
The calibration of the IMU, compass, gimbal, and remote controller is part of the maintenance tasks for any drone, it helps the components to operate correctly. In the case of the Mini 3 and Mini 3 Pro, calibrations are rarely required compared to previous models of the DJI Prosumer line
In this article, I will show how to perform all the different calibrations needed with the Mini 3 and 3 Pro and I will explain their purpose
If you are interested in the functionalities of the Mini 3 or the Mini 3 Pro, you might find these articles interesting:
- Beginner guide to the Mini 3 Pro
- Camera settings for video
- Camera settings for photography
- How to expose video and photos
- Obstacle avoidance system
- Return to Home tutorial
- How to use the Map, Radar, and Attitude mode
- How to transfer files to a computer, phone, or tablet
- Fly over water with the Mini 3 Pro
If you prefer to watch this as a video, you will find my YouTube version at the end of this article
IMU Calibration
What is the IMU?
IMU stands for Inertia Movement Unit
It utilizes several components of the aircraft, like the gyroscope, the barometer, the thermometer, and the accelerometer to keep the drone flying in a smooth, stable, balanced way
I perform the calibration of the IMU on two occasions:
- When I receive a prompt on the screen to calibrate it
- When the drone has an unexpected flight behavior
If the aircraft is unable to fly in a straight line, doesn’t maintain the altitude, drifts while hovering, or doesn’t respond appropriately to the sticks of the remote controller, the first thing to do is calibrate the IMU
Other occasions when the calibration is suggested is after traveling long distance, after big elevation changes, like for a trip to the mountains, or when the temperature is drastically different from the usual
Calibration
Choose an area far from metal and free from interference
We place the aircraft on a horizontal, level, and perfectly flat surface with the wings folded
Make sure to have a decent amount of battery time both in the drone and the remote control
After a flight, it is suggested to wait a few minutes to cool down
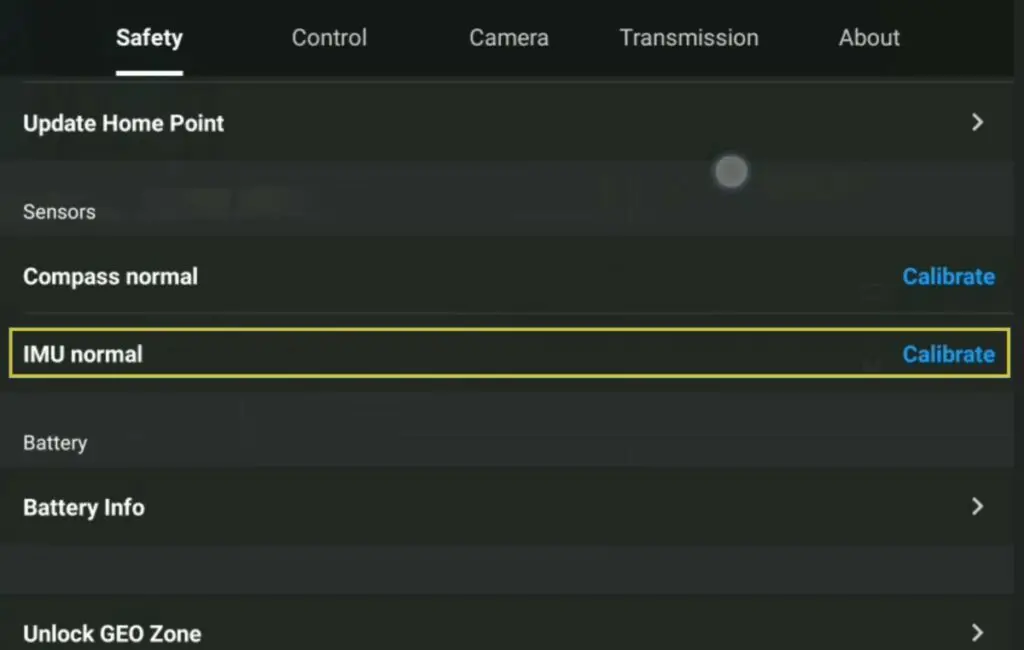
In DJI Fly app, we tap on the three dots at the top right of the screen to access the Settings. We select the Safety tab, the first one to the left
We scroll down until we find IMU Normal, and hit Calibrate
We are presented with a screen that guides us to the steps needed for the calibration
We are asked to place the drone in five different positions
- Position 1 – We start by positioning it laterally with the camera facing to the left, we can then hit the Start button at the bottom of the screen. The calibration starts in this position, the first of the five required. To the right of the screen, a circle shows the progress of the first step
- Position 2 – Sitting on the left side of the aircraft, with the power switch facing us and the camera to the left
- Position 3 – With the drone belly up with the camera facing to the right
- Position 4 – With the aircraft on its right side, and the camera facing to the right
- Position 5 – The drone standing on the back, showing us the right side
Finally, we place the Mini 3 in the first position and the aircraft will restart
It is a bit like the Mini 3 doing some yoga. The short video above shows the different positions
Compass Calibration
The compass keeps track of the drone’s position and the one of the Home Point
It is important in the case of a Return to Home
We calibrate it only when prompted by the app
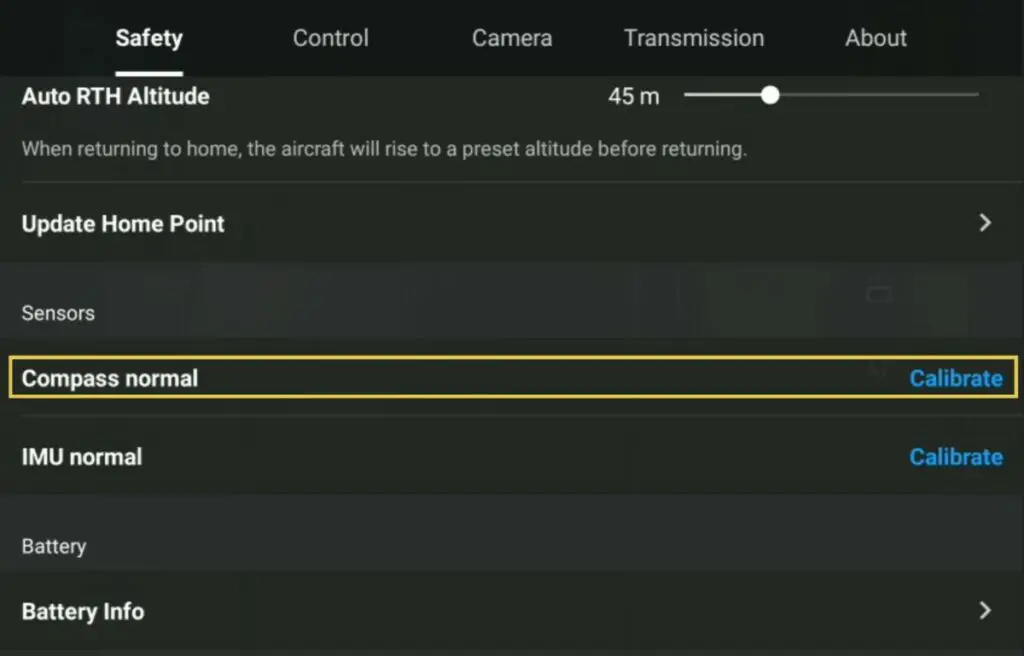
In the tab Safety of the Settings above the item for the calibration of the IMU, we find the one for the calibration of the Compass
Make sure to be far from metal and objects with an electrical charge
The aircraft must be kept at a height of about 1.5 meters from the ground, about 5 feet, which for most people is at shoulder height
After hitting the Start button, follow the instructions on the screen: first, rotate the drone 360 degrees in a horizontal position, then turn it to a vertical position and do the same
Gimbal Calibration
Unlike the IMU and the compass, the gimbal calibration doesn’t impact the flight behavior but acts upon the alignment of the camera
The reason why we want to proceed to a gimbal calibration is in most cases when the horizon is uneven, often after a small crash or a hard landing
When switched on the Mini 3 Pro operates a sort of basic calibration of the gimbal
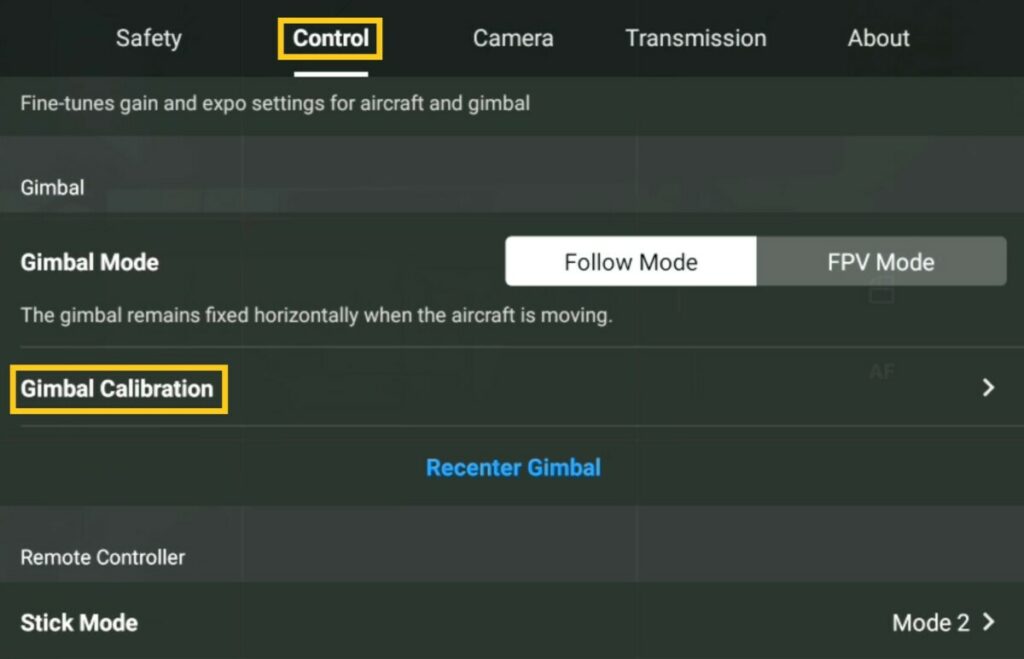
In Settings, we go to the Control tab and scroll down until we find Gimbal Calibration, there is a choice between Auto and Manual
Let’s start with the Auto Calibration
As for the IMU, we must place the drone on a level surface, this time with open wings
Immediately after hitting the Auto button, the calibration starts: the camera moves horizontally and then vertically for a few seconds and the trick is done
For the Manual Calibration, we hit the link below Auto. We are presented with two values we can modify. The first one is the rotation of the camera, the second is the horizontal alignment
Remote Controller Calibration
The remote controller contains a compass to detect its position, similar to the one of the drone
On some rare occasions, we may be prompted to calibrate the controller itself by a message on the upper left part of the screen of the RC controller
The procedure for calibration is explained on the screen
It is very similar to the calibration of the compass of the drone, by simply rotating the controller horizontally and then vertically
With the RC controller with the built-in screen, it is possible to summon the compass calibration of the controller
We scroll down twice on the screen with a finger to open the menu window
We then hit the gear icon at the top right and choose Compass Calibration
More details about the RC controller with a built-in screen are in my dedicated article