
Return to home is a crucial and often misunderstood safety operation for a drone. I will show how to set the Return to home in the safest way in the DJI Mini 3 and Mini 3 Pro to avoid possible accidents
I have done other articles dealing with safety issues with the Mini 3 and Mini 3 Pro that you might find interesting
- Beginner’s mistakes to avoid
- How to find your drone and how to avoid losing it
- Mini 3 Pro beginner tutorial
- How to calibrate the IMU, gimbal, compass, and remote controller
- How to use the Map, Radar, and Attitude mode
- How to transfer files to a computer, phone, or tablet
- Fly over water with the Mini 3 Pro
If you prefer to watch this as a video you will find my YouTube video at the end of this article
How to Set the Home Point
The first thing to know is how and where the position of the Home point is set. Many users believe that the Home Point is where the controller is, but this is not always the case
After switching on the aircraft, the software initiates the connection to the different satellites, as shown on the top right of the screen. To get a connection with the satellites the drone must be in an outdoor location
Once a certain number of satellites are connected, about 12, a voice message tells us that the home point has been set, and a message also appears on the screen
The operation takes less than a couple of minutes and I suggest waiting for it before taking off so that the Home Point will be exactly where the aircraft takes off
If we take off before the satellites are connected, the Home Point will be set at the aircraft’s position which can be quite far from the remote controller
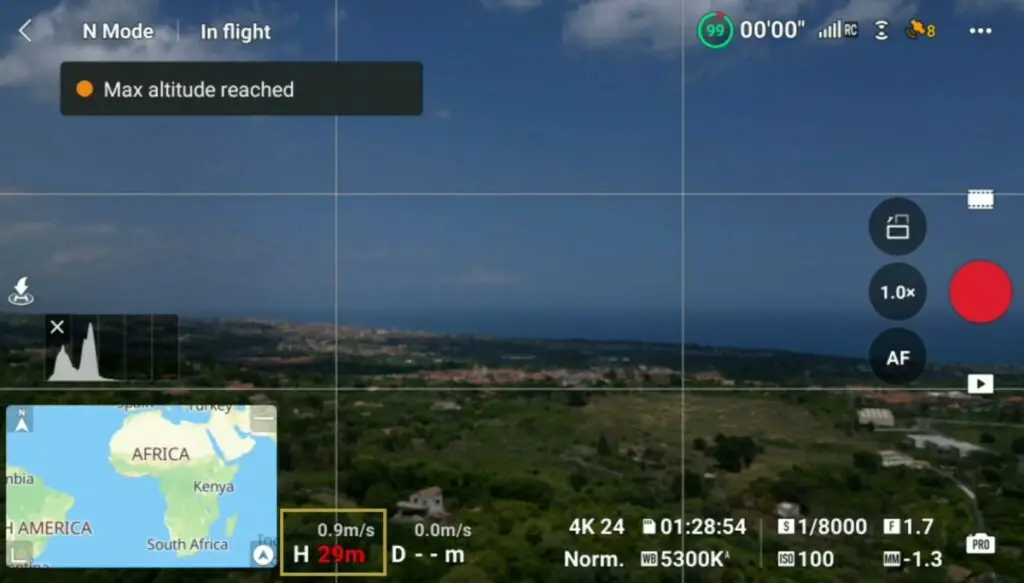
Notice that until the Home Point is updated, the maximum flight height is limited to 30 meters
Home Point
If the operator moves during the flight, for example on a car, on a boat, on a bicycle, or while hiking, the home point remains in the original position
If a return home is initiated, the drone might fly in an unexpected direction, maybe even further away from the operator. This can be dangerous because of obstacles or when running short of battery
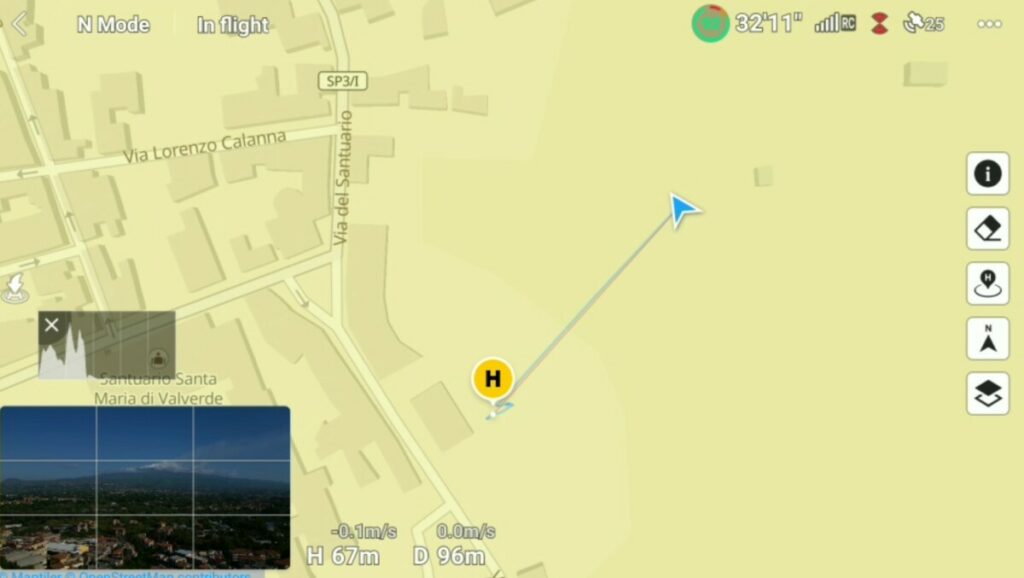
It is possible to check the position of the home point on the map, a yellow circle around an H will show it , while the remote controller is shown by a blue dot and the aircraft by a triangular shape
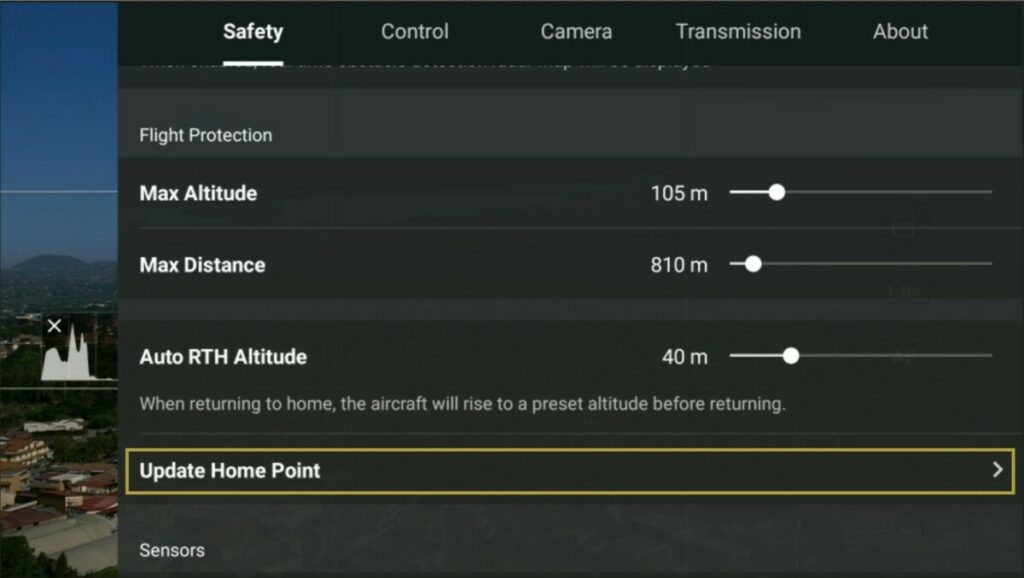
It is possible to modify the position of the home point at any time in the tab Safety of the Settings by selecting the option Update Home Point
A map appears on the screen with the position of the Home Point relative to the aircraft and to the controller
It is possible to drag the yellow circle on the map to move it manually, or it can be automatically updated to the position of the aircraft or the controller by tapping on one of the two icons on the right
Return To Home Altitude
In the Safety tab of Settings, above the Update Home Point, there is an option for setting the Auto Return to Home altitude
When a Return To Home is initiated, the aircraft will ascend to that altitude, then fly to the Home Point before lowering the altitude for landing
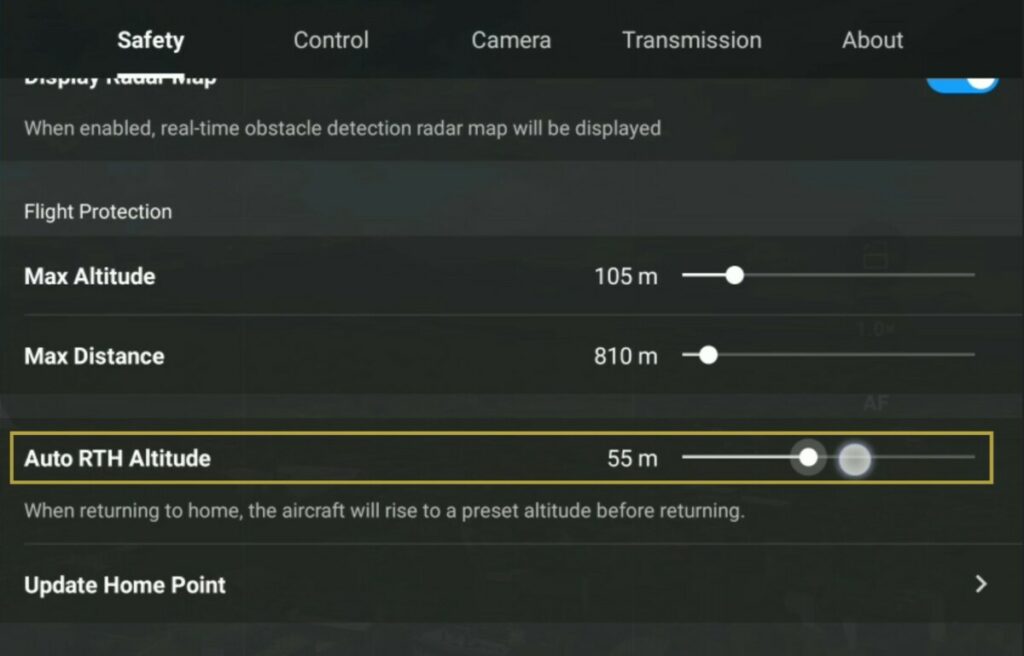
It must be set at a height above all surrounding obstacles, but not too high, as otherwise it will take longer to ascend and redescend for landing, which could be dangerous if we run out of battery
In most cases, in a flat environment, a height between 40 and 50 meters is suggested
A situation that requires extra attention is when flying in a hilly environment where the altitude varies considerably from the starting point
The Auto Return Home Altitude is computed based on the elevation of the home point, if the aircraft starts the return home on much higher ground, it will not raise in altitude at all before initiating the return
Under this scenario, it is suggested to plan for the difference in elevation and set a much higher RTH Altitude
Flying Under Obstacles
Extra care is needed when flying under a canopy of trees or with other obstacles above. If a Return To Home should be initiated for any reason, the aircraft will immediately rise to the selected RTH altitude
Since the Mini 3 and Mini 3 Pro don’t have upwards obstacle detection, the drone might crash against the obstacles
Here is my in-depth analysis of the obstacle avoidance system of the Mini 3 Pro
In these situations, a lot of attention is needed. I recommend landing immediately after having done the filming
Signal Loss

In the Advance Safety Settings, it is possible to specify how the drone behaves in case of signal loss with the following choices:
- Return to Home
- Descend
- Hover
I never use the option Descend, as the drone might land on water, on bushes, or on someone’s property
When planning to film or take photos in woods, under bridges, or other restricted areas, I suggest selecting Hover to take manual control and avoid accidents
In most other situations I choose the option ReturnTo Home
How a Return To Home is Initiated
Manual Return To Home
A Return To Home can be started manually at any time by the same button used to take off on the left of the screen
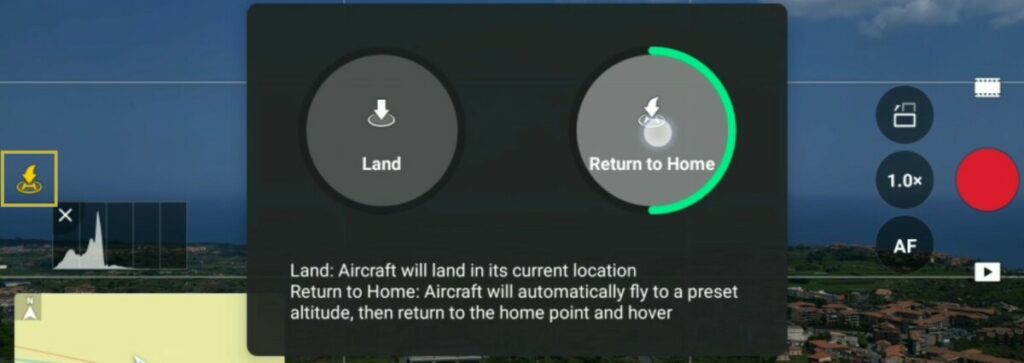
After taking off the icon change to an H for Home. After tapping on it we are presented with a choice between landing or starting a return to home
Another possibility is to press and hold the RTH button on the left part of the remote controller. In this case, the return will start immediately, without the option of landing
It is possible to cancel a Return To Home and retake manual control of the drone by tapping on the same icon on the left of the screen or by pressing the RTH button on the remote control
Signal Loss
A Return to Home is also initiated in case of prolonged signal loss if this option is selected. On the top of the screen, next to the battery time indicator, there is an icon showing the strength of the signal
The bars are white with a good signal, they turn to orange when the transmission starts to deteriorate and finally to red in case of a weak signal, close to disconnection
When the signal is lost, the aircraft waits for a few seconds and then initiates a forced RTH. The same happens when the remote controller is turned off
More details about the signal transmission in the Mini 3 and 3 Pro are in my specific article
Return To Home Due to Depleted Battery
The last cause of a Return To Home is when the aircraft’s battery runs below a specific level. A warning prompt will appear in DJI Fly when the battery level is low
Low Battery RTH is triggered when the Intelligent Flight Battery is depleted to the point where the aircraft may not be able to return safely

Running out of battery is probably the main cause for the loss a drone, so I suggest paying close attention to the battery indicator at the top of the screen
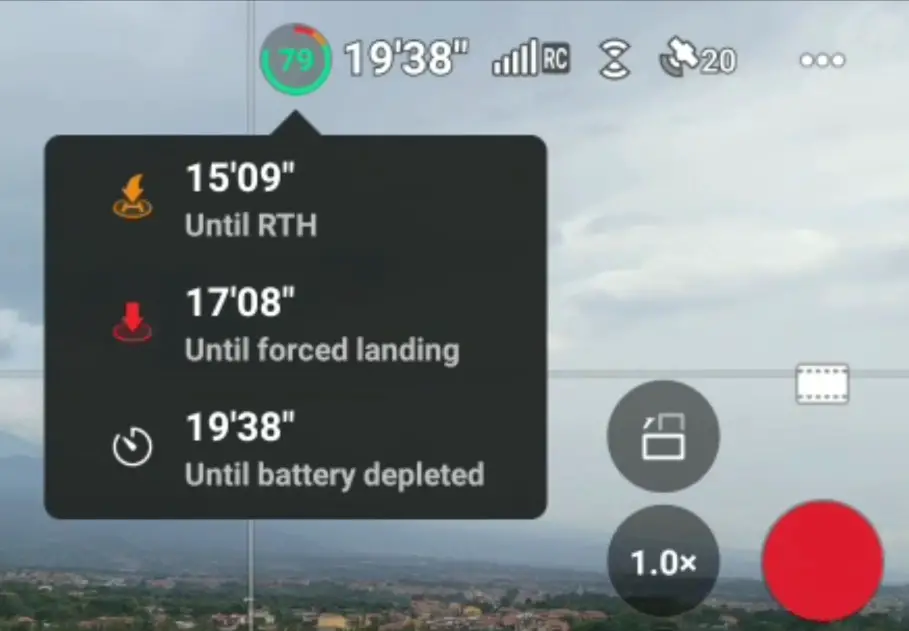
The icon with a green, orange, and red circle around shows the percentage of the battery time remaining, by tapping on it we access the remaining time to a forced return home, to a forced landing, and to complete depletion of the battery
Differences Between the Mini 3 Pro and the Mini 3
A significant difference between the two models is the presence of tridirectional obstacle sensors in the Mini 3 Pro
The obstacle avoidance system is activated in case of a return to home. If the aircraft encounters an obstacle, it will stop in front of it, and after a couple of seconds, it will find its way above the obstruction
But the Mini 3 Pro cannot detect obstacles above and to the sides, therefore the same attention as for the Mini 3 is suggested when planning a flight