The Mini 4 Pro has plenty of new functionalities compared to the Mini 3 Pro. Most of them are useful for filming. I will concentrate on the photography side with a walk through all the settings and features, including several interesting new ones compared to the Mini 3 Pro
I will keep things easy for beginners, but experienced users will find several useful tips and tricks
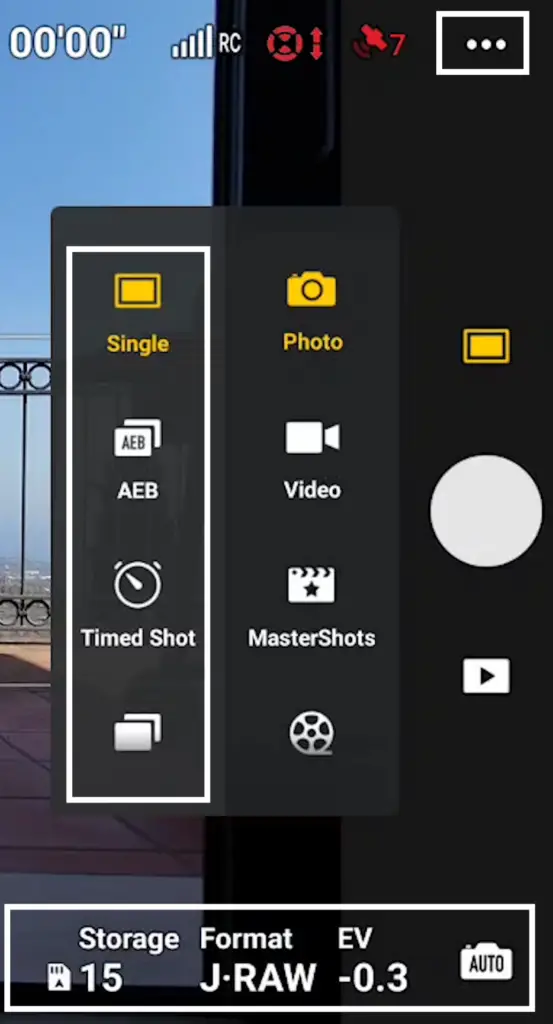
There are three main locations where we can control the behavior of the Mini 4 Pro for still images:
- In the Settings
- In the Exposure Window
- In the main Photo/Video menu next to the shutter
I have already done a review of the photo quality and functionalities of the Mini 4 Pro, the Mini 3 Pro, the Air 3, and the Mavic 3
You can also watch my other articles about photography with the Mini 4 Pro
- Mini 4 Pro photography review
- Camera settings for video and photos
- Mini 4 Pro Panorama mode
- Mini 4 Pro Automatic Exposure Bracketing for HDR photos
- 48MP Photo Mode with the Mini 4 Pro
- Mini 4 Pro night photography
- RC 2 remote controller
- Mini 4 Pro Signal Transmission vs Mini 3 Pro
- Mini 4 Pro and Air 3 Return To Home
- Mini 4 Pro Hyperlapse tutorial
If you prefer to watch this as a video, you will find my YouTube version at the end
You can check the prices for the different configurations of the Mini 4 Pro through the button below (commission earned)
Settings for Photography
The menu is context-sensitive, in other words, the settings are not the same in video or photo mode
So, before tapping on the three dots on the top right of the screen, we choose Photo in the Photo/Video menu. Now the menu relates to Photo
Safety Tab
The first tab, Safety does not directly relate to photos, but there are a couple of options to choose from for peace of mind during your photo-shooting sessions
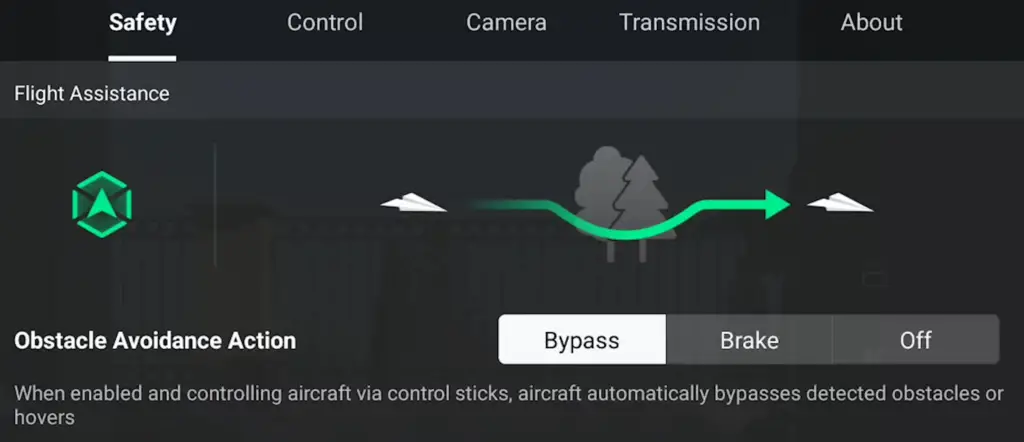
I always set Obstacle Avoidance Action to bypass or break, as it is easy to get distracted when searching for the best target to frame and the obstacle detection system has saved my drones on many occasions
Scrolling down to the bottom, open the Advance Safety Settings to choose the behavior in case of signal loss

Descend has to be always avoided, as you don’t want your drone to land on someone’s property, into bushes, or on a lake. In most cases, I set it to Return to Home, but when flying indoors, under trees, or in other tight spaces, it is better to choose Hover
Control Tab
In Gimbal Mode we have a choice between Follow and FPV modes
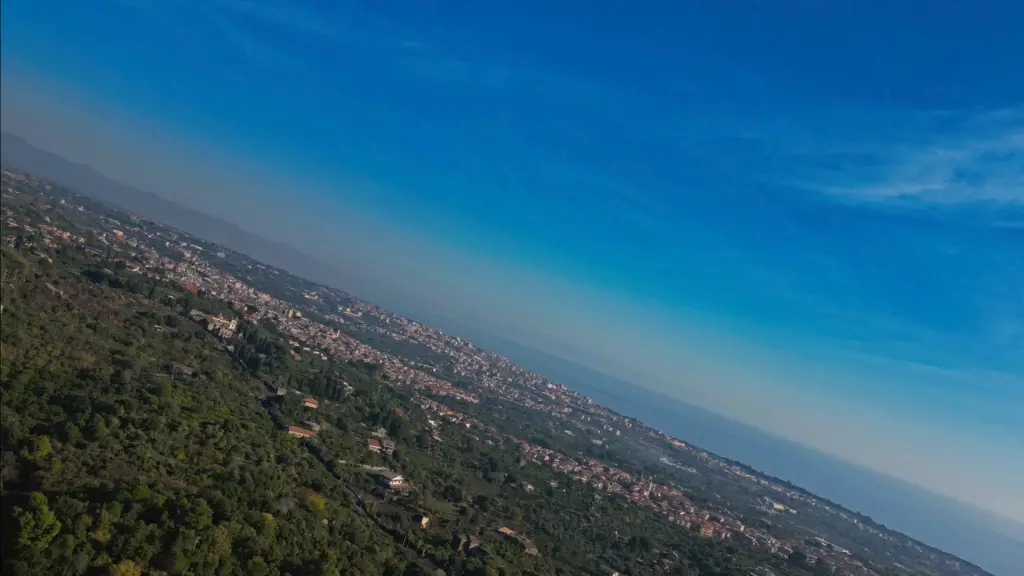
It is meant for video, and most of the time keep it on Follow, but if we switch to FPV, the aircraft will lean sideways while turning, like a real plane. This gives us the chance to take some unusual creative photos
Further down we have Gimbal Calibration

Here we can automatically calibrate it if we are prompted by the app, but we can also access Manual if we have the horizon slightly slanted, as here we can fine-tune it
Camera Tab
This is where most of the functionalities for photography can be found
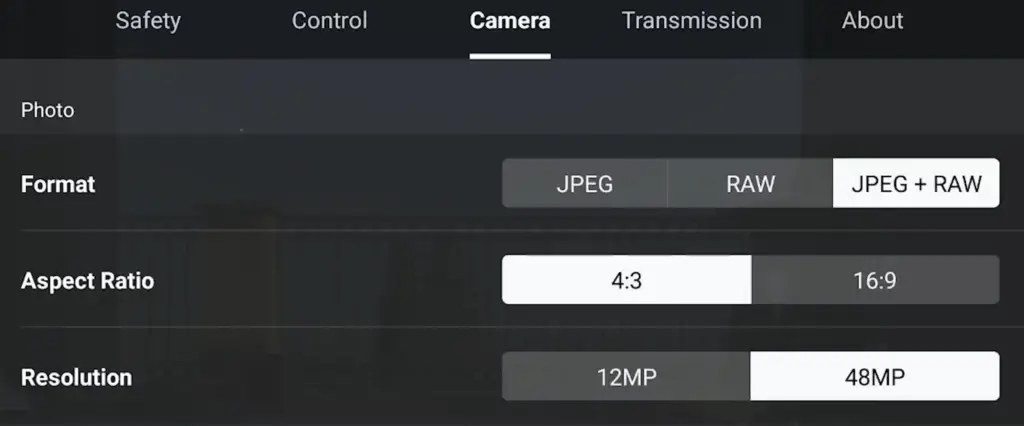
The first option is the File Format. We can choose to save the photos in JPEG, RAW, or both formats.
Then we can select the Aspect Ratio of the images, if we select 4:3 we get the full resolution of the sensor, 4032×3024, slightly more than 12MP, if we choose 16:9 we get a version cropped to fit the traditional 4k landscape video format
I always choose 4:3 as it gives more options for reframing or cropping
Further down we can select the Resolution between the real one of 12 MP, or the famous 48 MP mode
In the Mini 3 Pro, this mode was available only in the photo menu near the shutter
It is now possible to directly apply the 48 MP modes to AEB images and Panorama
The next one turns the Histogram on and off
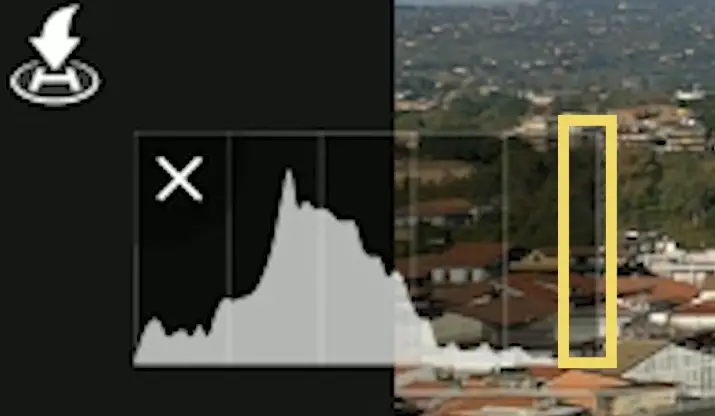
I keep it always on, as the histogram is the main tool I use for exposing. I leave some room between the last bar to the right and the right edge to avoid overexposure
Peaking level is a tool for focusing
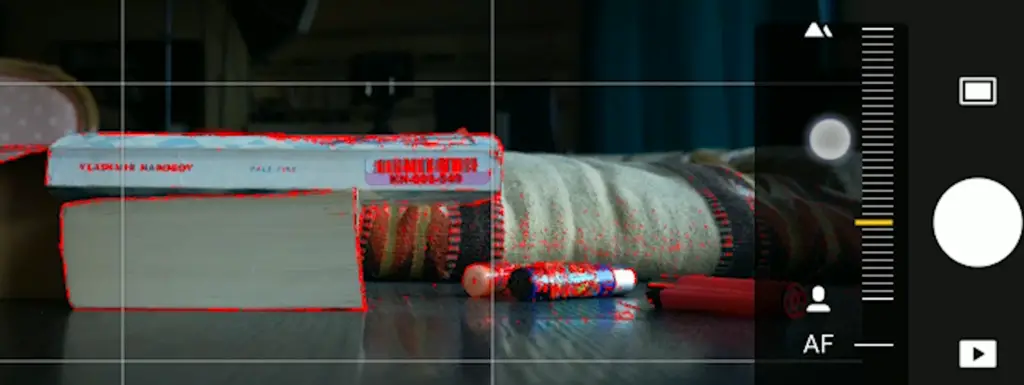
It outlines in red the elements in focus, but only when using manual focus
I only use it when focusing manually on a subject close to the camera. With drones on most occasions, we leave it off, as it distracting and not needed
The next option, Overexposure warning, is another tool for exposure
It overlays white stripes on the overexposed areas. I never use it, as I find it distracting
Then it is possible to overlay Gridlines
I generally use the one in the middle to apply the rule of thirds
With drones, we often have the horizon line in the frame. Rather than having it in the middle, it is more interesting to divide the scene into thirds and have it either on the higher or on the lower third
On other occasions, especially for top-down shots, we might want a symmetric framing, in which case the same overlay helps position the subject
In the Mini 4 Pro, the function Style to adjust Sharpness and Noise Reduction is available only for video, while in the Mini 3 Pro, it was also in the Photo menu

Maybe DJI will add it in the Camera Settings for photos with firmware updates, but I don’t really miss it, as the new model produces sharper images with very little noise
The program I use for editing and organizing photos, Luminar Neo, has an excellent Noise Reduction tool based on AI that does an astonishing job.
Here is my article about Luminar Neo
You will find info about Luminar Neo together with a coupon for a 10% discount by entering the code “vicvideopic” using the button below
Exposure Settings
They can be accessed in the lower part of the screen to the right
Automatic Exposure
In auto mode the exposure is set by the software, we can only adjust the Exposure value (EV) for the overall luminosity

I find that the app tends slightly to overexpose, therefore I prefer to set the value at -0.3 or -0.7
When the camera moves, the exposure values are modified to maintain a constant luminosity, but the individual values for ISO and SS are not shown. This is one of the reasons why I always suggest using manual exposure, as we want to be able to control these values
Manual Exposure
By tapping on the icon to the right, we access manual mode, labeled as Pro. Then tapping on the area of the values slightly to the left, we access the Exposure Window
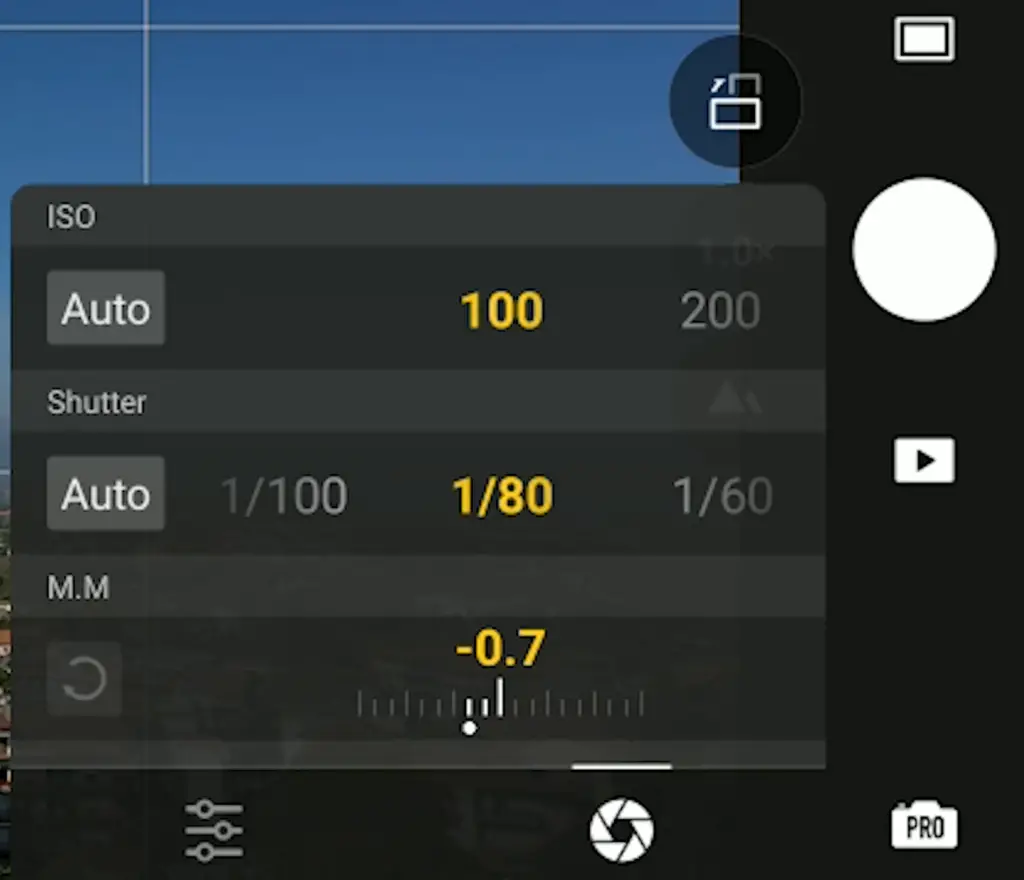
In photography, there are three parameters for exposure
- ISO
- Aperture
- Shutter Speed
With the Mini 4 Pro, like with many other prosumer drones, the aperture is fixed, therefore we have only two values to deal with. We can set the values for ISO and shutter speed independently
The MM value at the bottom cannot be modified, it displays the luminosity resulting from the values chosen above compared to the optimal exposure computed by the software
Semi Auto Exposure
In this window, there is a feature that was added in the Mini 3 Pro: there are two Auto buttons for ISO and Shutter Speed. We can now set one of the two values, either ISO or Shutter Speed, as Auto
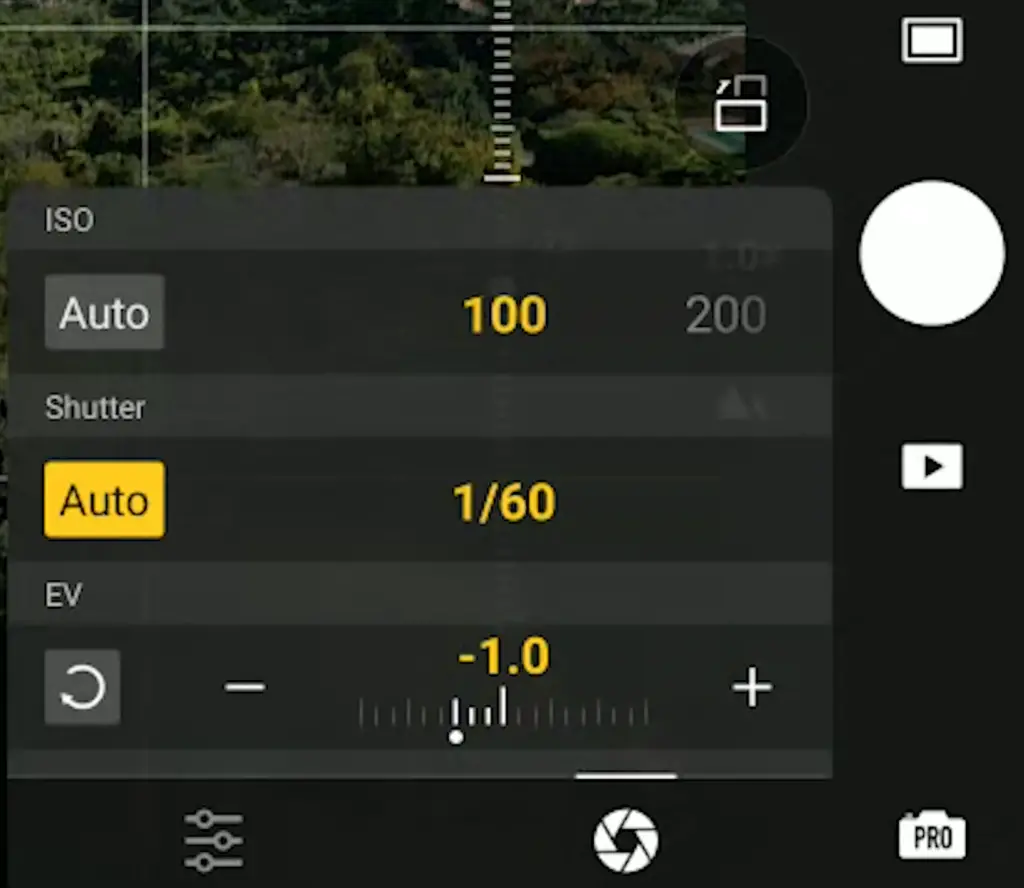
Let’s say we want a fixed value for ISO, 100, to get the best possible image quality. We set ISO to 100 and Shutter Speed to Auto
When the luminosity varies, only the value for Shutter Speed changes to maintain the correct luminosity, leaving the ISO at 100
Notice that the value MM has now turned into EV, for Exposure Value and it can be modified
On other occasions, we might want a constant value for Shutter Speed
We select the desired value for SS and set the ISO to Auto and this time as the luminosity increases or decreases, only the ISO varies
We can choose to put both values to Auto
It is very much like using Auto exposure, but there are some advantages compared to using the traditional Auto mode
In Auto mode, we the individual values for ISO and SS are not shown, while using this method we can see both values
White Balance Window
By tapping on the icon at the lower left, we access another window with other options
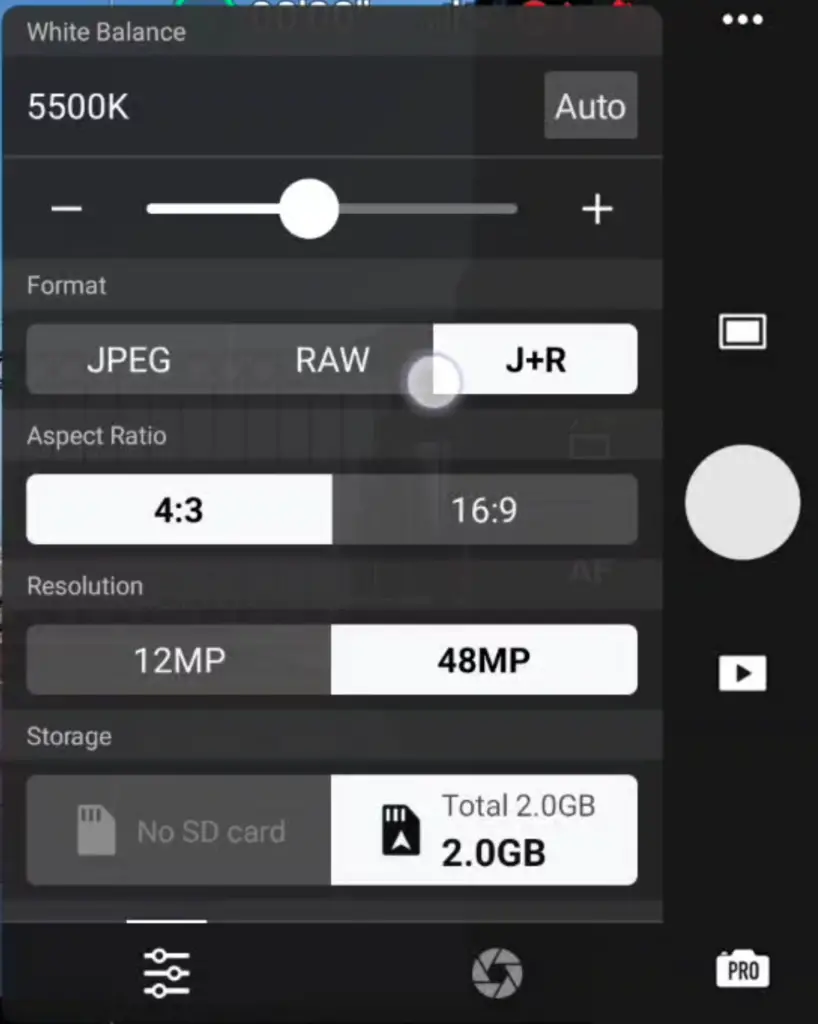
The White Balance can be set to auto, in which case the value will adjust automatically as the luminosity changes
I prefer to keep it on manual and I generally set it to about 5500 kelvins, which is the average value for sunny conditions
This window contains other options like File Format, Aspect Ratio, and Resolution that we have already analyzed
At the bottom, it is possible to select the Storage location between the SD card and the internal memory
An Issue with Exposure Settings
I like DJI Fly app interface with most of the settings available from the same window, but there is something that I find annoying
The exposure settings are sticky for each photo or video mode
Let’s say that I am shooting single photos, I set the exposure and I take the shot, then I decide to take five bracketed photos of the same scene
The exposure values will be the ones used the last time a bracketed image was taken, so I need to expose again, the same applies to 48 MP mode or if I switch to auto mode
It would make much more sense to memorize the latest exposure value for all modes, to match the current light conditions
Photo Menu Modes
After the Single shot, there is an icon for Automatic Exposure Bracketing with a choice of 3, 5 or 7 images, while with previous modes only 3 or 5 were available
The extra option for 7 photos is useful in high dynamic range situations.
Then Timed Shot, to take several images at a specific interval in seconds, useful for stop motions or for selfies after hiding the remote controller
Finally Burst, with a choice of up to 7 shots in rapid succession, useful for sports and action
To the left of the shutter, there are 3 buttons
The one at the top is to rotate the camera from landscape to portrait orientation
The button below toggles between normal size and 2x zoom. If we drag we can zoom progressively from 100 to 200%. It is also possible to control the digital zoom with the right wheel of the controller, for smoother results
Further down, there is a button to toggle between Auto and Manual focus
