
The DJI Mini 4 Pro performs very well in low-light conditions, due to the very wide aperture, a new image signal processor, and an updated algorithm. The images have more detail compared to the Mini 3 Pro. The 48 MP mode has been improved. The only issue is an area of higher luminosity in the center of the image
Further down you will find plenty of photo examples that can be downloaded to better appreciate the quality
You can check the prices for the different configurations of the Mini 4 Pro through the button below (commission earned)
Some other articles about photography with the Mini 4 Pro you might find interesting:
- Mini 4 Pro Photography Review
- Mini 4 Pro Camera Settings for Photography
- Exposure settings for video and photography
- Mini 4 Pro Panorama mode
- Automatic Exposure Bracketing
- 48 MP Photo Mode
- Mini 4 Pro vs Mini 3 Pro Photography
- Mini 4 Pro vs Air 3 Photography
If you prefer to watch this as a video, you will find my YouTube version at the end
5 Tips for Low-Light Photography
1 – Be Aware of Obstacles
The Mini 4 Pro is equipped with an omnidirectional obstacle detection system but it cannot operate in low-light conditions
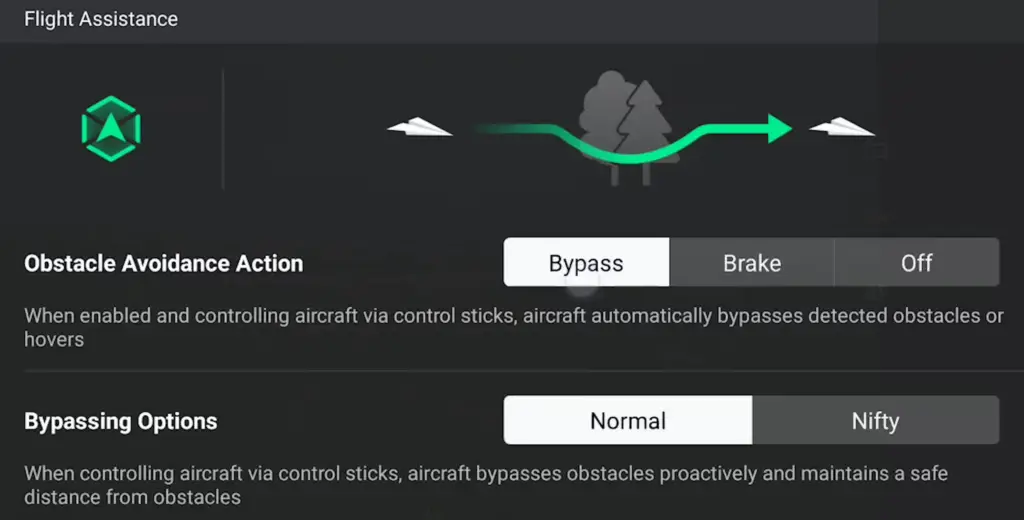
Due to the reduced visibility, it is not easy to spot obstacles on the screen, so for safety reasons, it is suggested to be familiar with the environment
In an unknown location, it is better to get there earlier for some recognition flights in brighter light conditions
2 – Home Point
When taking off make sure that the home point is set very close to your location, it makes it easier to bring the aircraft back at the end of the shooting
3 – Use Manual Exposure
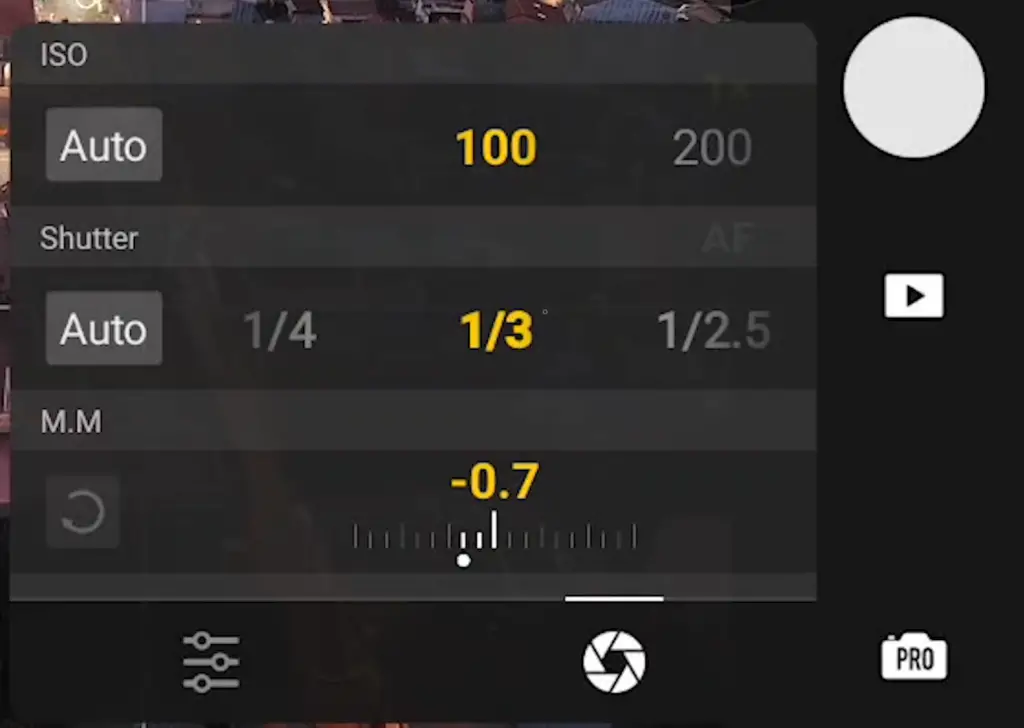
Always use Manual Exposure, as in low light it is critical to control the exposure values, ISO, and Shutter Speed.
4 – RAW Files vs JPEG
For best results, low-light images require intensive editing, so it is better to use RAW files, as they contain more information in the shadows and are not pre-processed, so they respond better to color grading
However, the JPEG files in the Mini 4 Pro are excellent and can be used with good results by inexperienced users or when processing is not an option
5 – Automatic Exposure Bracketing
Using Automatic Exposure Bracketing, the Mini 4 Pro can take seven photos in rapid succession with different exposure values, with a difference of ⅔ of a stop between each image
I suggest always using this option to make sure that one of them is perfectly exposed
On certain occasions, it can be beneficial to merge the images to HDR to reduce the dynamic range, as we will see later on
To edit all the images and merge them to HDR I have used Luminar Neo.
Here you find my article about this excellent program
You will find info about Luminar Neo together with a coupon for a 10% discount by entering the code “vicvideopic” using the button below
Mini 4 Pro Photo Specs
The Mini 4 Pro has a 1/1.3” sensor with a very wide aperture of f1.7 and a photo resolution of 12 MP with a 48 MP mode available
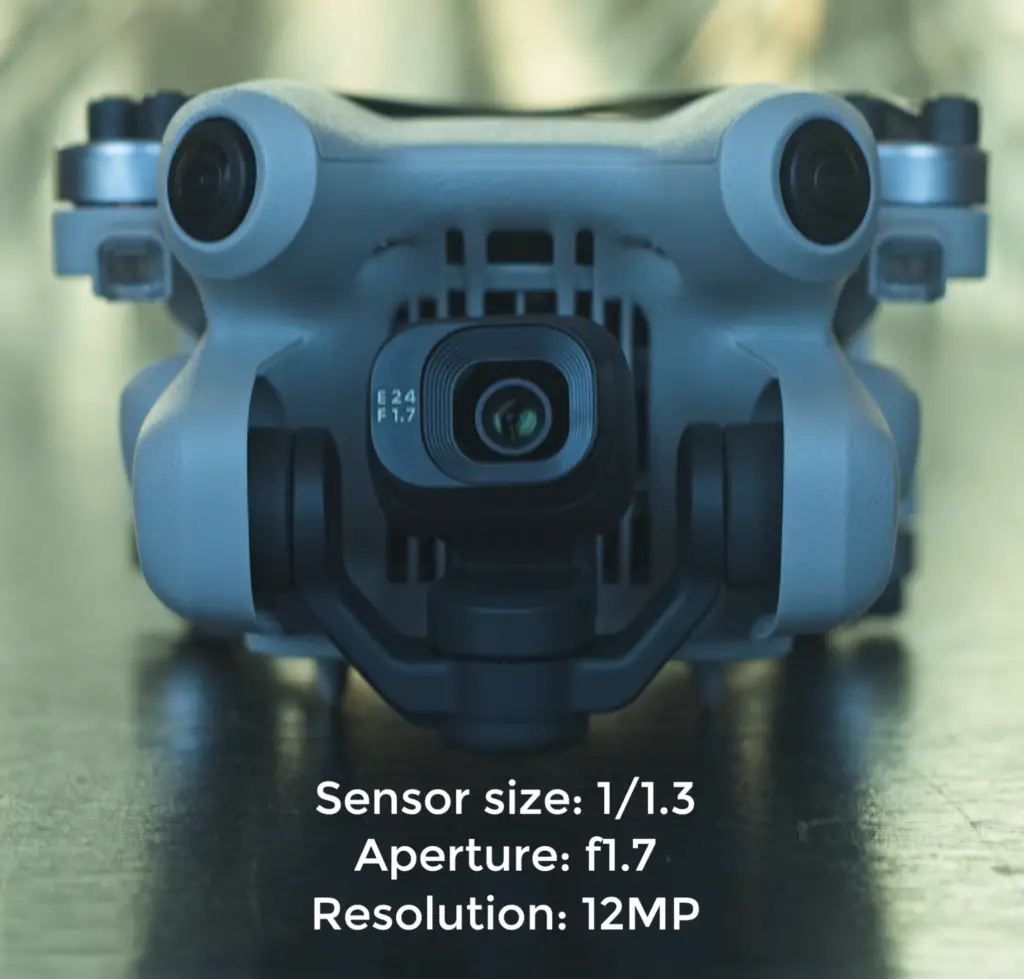
The specs are the same as the Mini 3 Pro and the wide-angle lens of the Air 3
But is it the same sensor? DSJI’s website has never revealed the specs of the sensor of the three models
According to several online discussions the two new models have a stacked sensor, the same is likely true for the Mini 3 Pro. Let’s assume that three models share the same sensor
Photo Quality
The images taken with the Mini 4 Pro are very similar to the ones of the wide-angle lens of the Air 3
They show noticeable improvements compared to the Mini 3 Pro, especially in sharpness and detail. The 48 MP mode has also been improved
The improvements are due to a new image signal processor and an updated algorithm
12 MP images
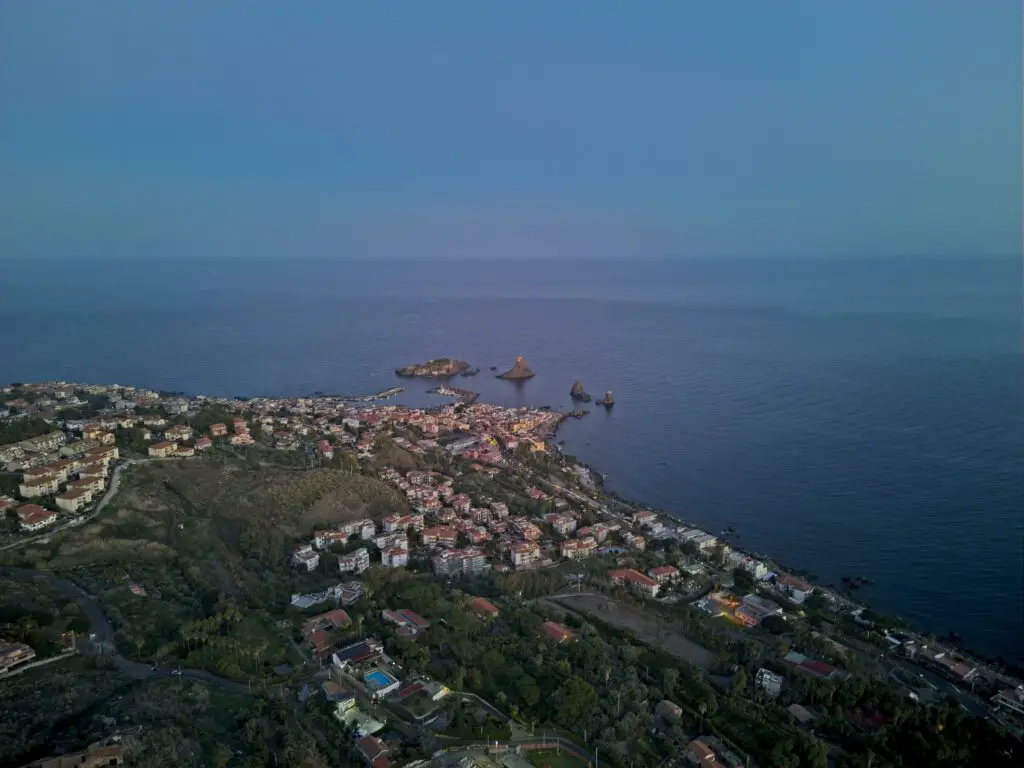
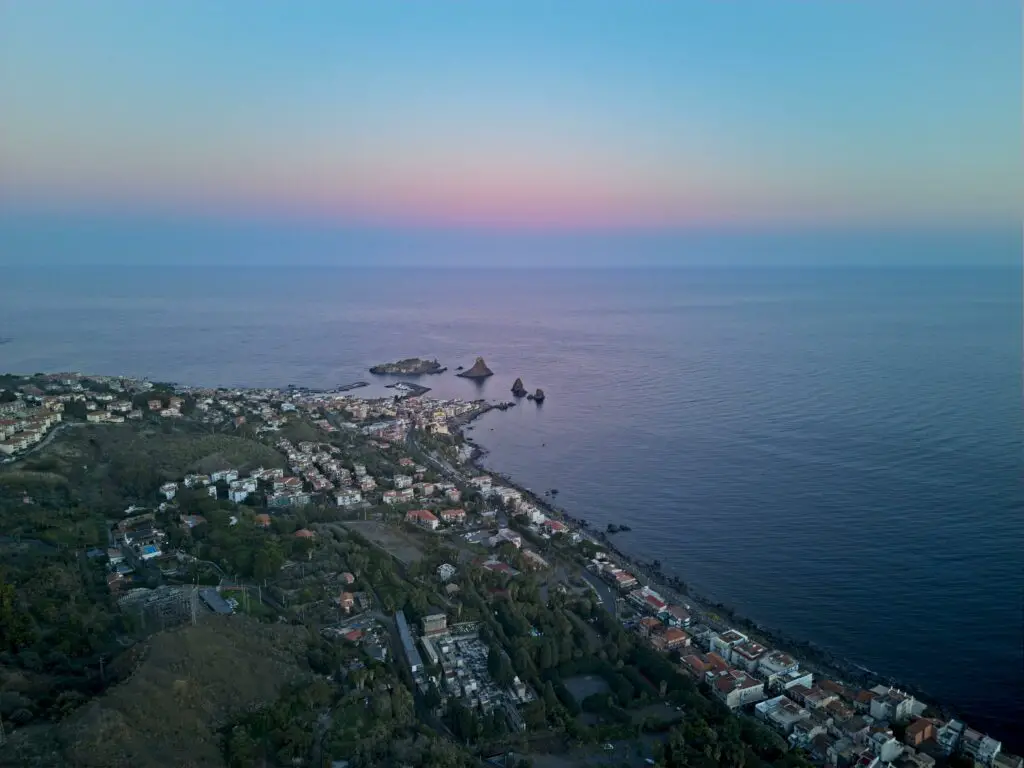
Let’s start with some single 12 MP images, taken in conditions that I consider optimal for testing the low-light capabilities of a camera
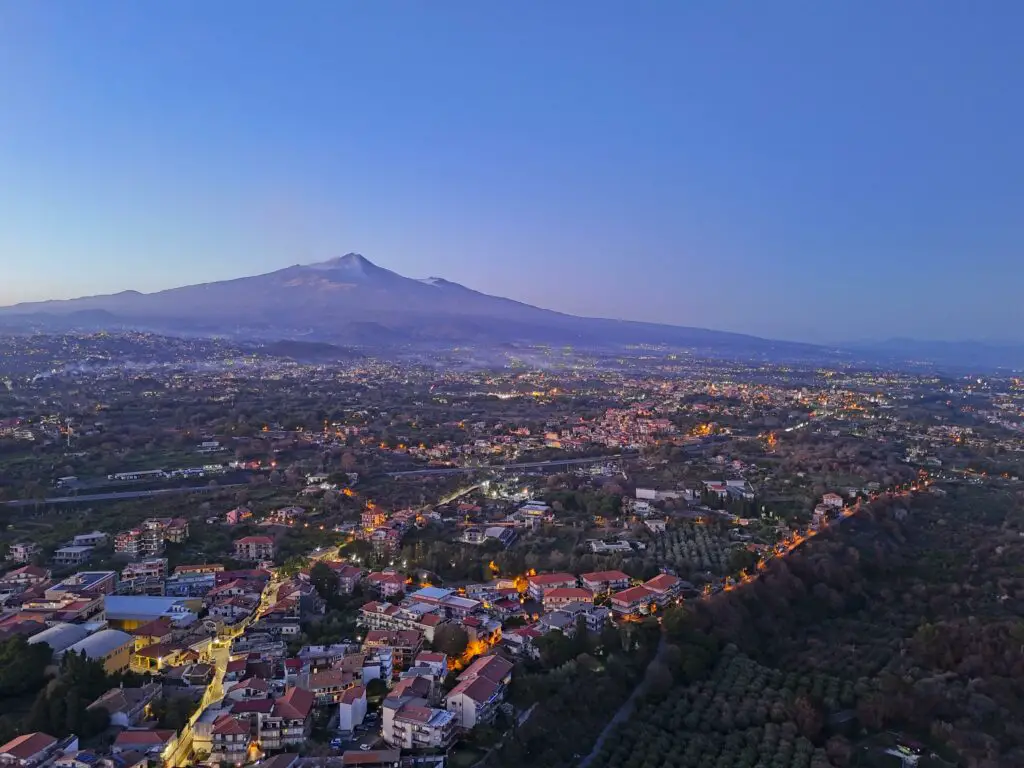
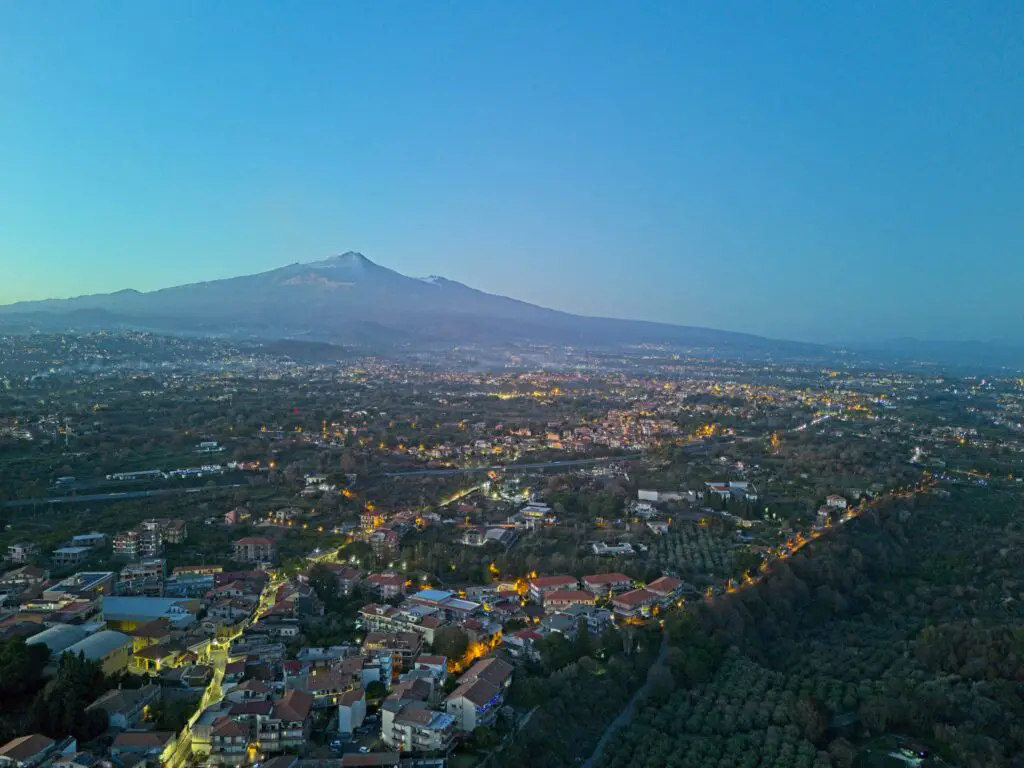
It is half an hour after sunset, there is still the last bit of twilight, and the first artificial lights
I prefer to have plenty of natural features like vegetation, the sky, and the sea to check how the shadows are rendered
Many will think that this is not low light, but believe me, it was very dark. The Mini 4 Pro with its very wide aperture of f1.7 can gather an extraordinary amount of light
Under these conditions, the results are excellent with the same luminosity as the Mini 3 Pro but with a good dose of extra sharpness and detail
An Issue with RAW Files
The only issue I notice with the 12MP images is that the area in the middle is slightly brighter with a magenta cast compared to the rest of the photo
This issue has been discussed at length in specialized forums. It appears that the 4 Pro has a built-in lens profile which should automatically be applied to any editing software
Let’s compare 12 MP images of the same scene taken in RAW, in JPEG, and in 48MP mode
With RAW files the luminosity in the central area is very noticeable and quite annoying
With JPEG images, the issue is a bit less pronounced
The best rendition is with the 48 MP mode, as in this mode the issue is hardly noticeable
JPEG File Quality
The JPEG files have improved a lot in the last generation of DJI prosumer line
I did not take them seriously in the past, but now they perform well right out of the box and this is excellent news for users who don’t rely on computer editing.
48 MP Photos
The 48 MP has come a long way from the first version of the Mini 3 Pro firmware
They used to have plenty of chromatic noise and other artifacts, especially in the shadows
This mode works by splitting the 12MP of the sensor into 4 smaller ones, but the resulting pixels are so small that can only gather a smaller amount of light
So night photography is not supposed to be a strong point
The results in low light are often very good, to the point that at times I prefer using this mode compared to 12MP images
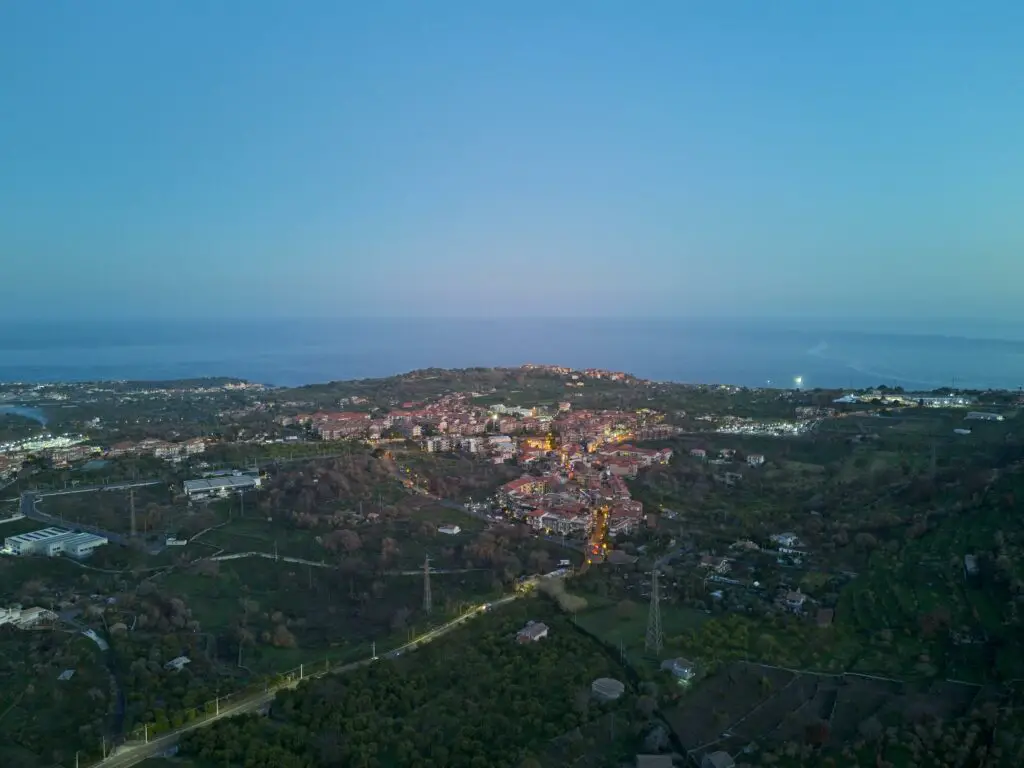
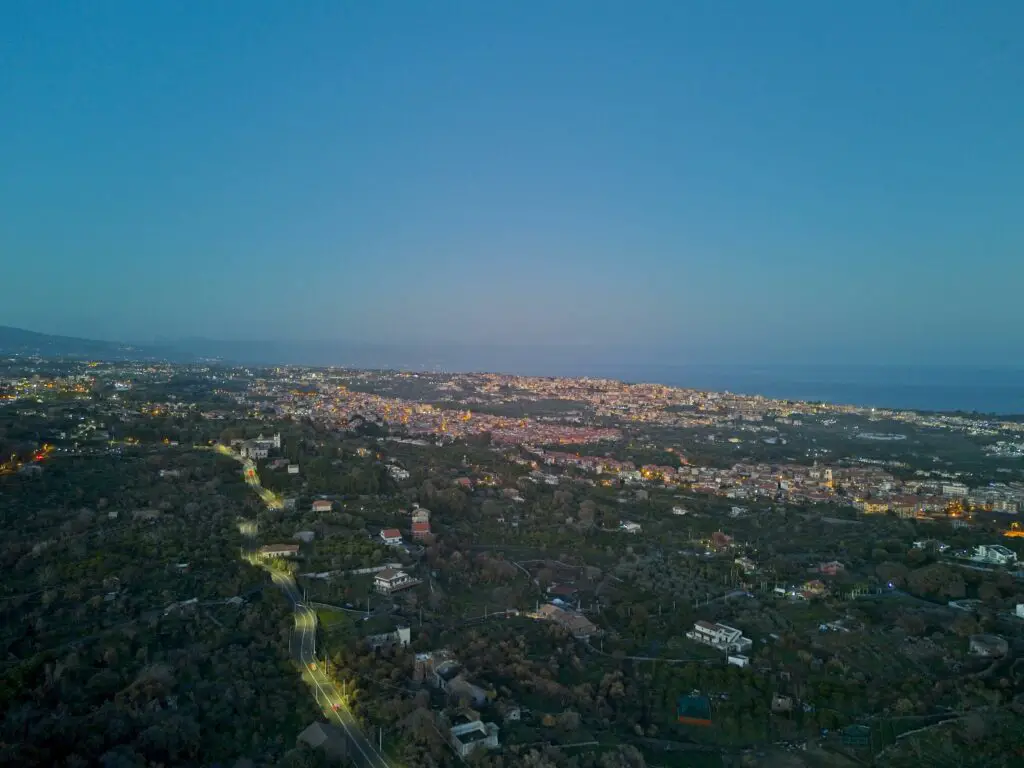
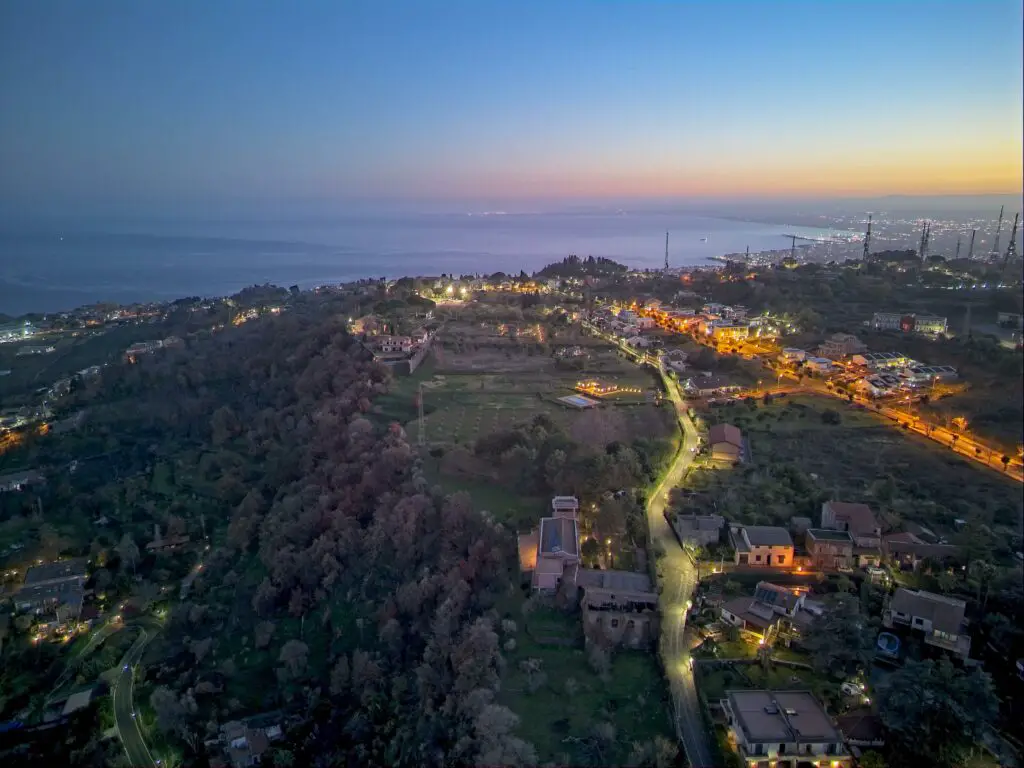
Night Photos in High Dynamic Range
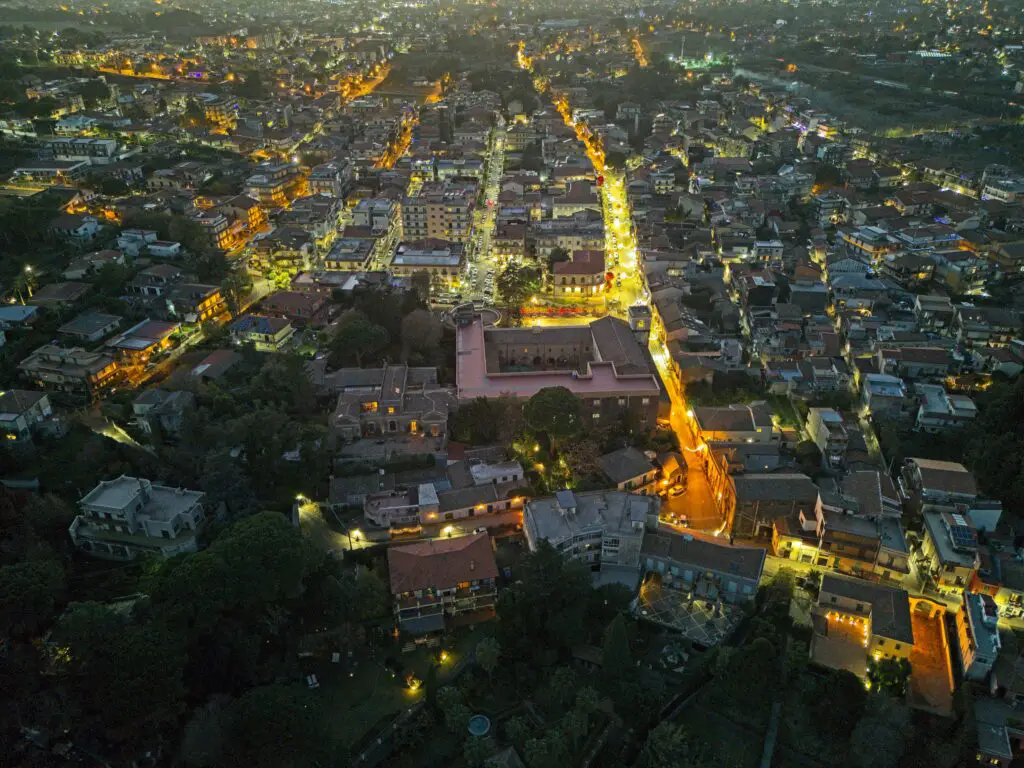
I often see tests of low-light photography in cityscapes taken late at night
In my opinion, these situations are not meaningful tests for the low-light capabilities of a camera, as the challenge is rather to avoid overexposing the very bright lights while the shadow will be extremely dark, regardless of the capability of the camera
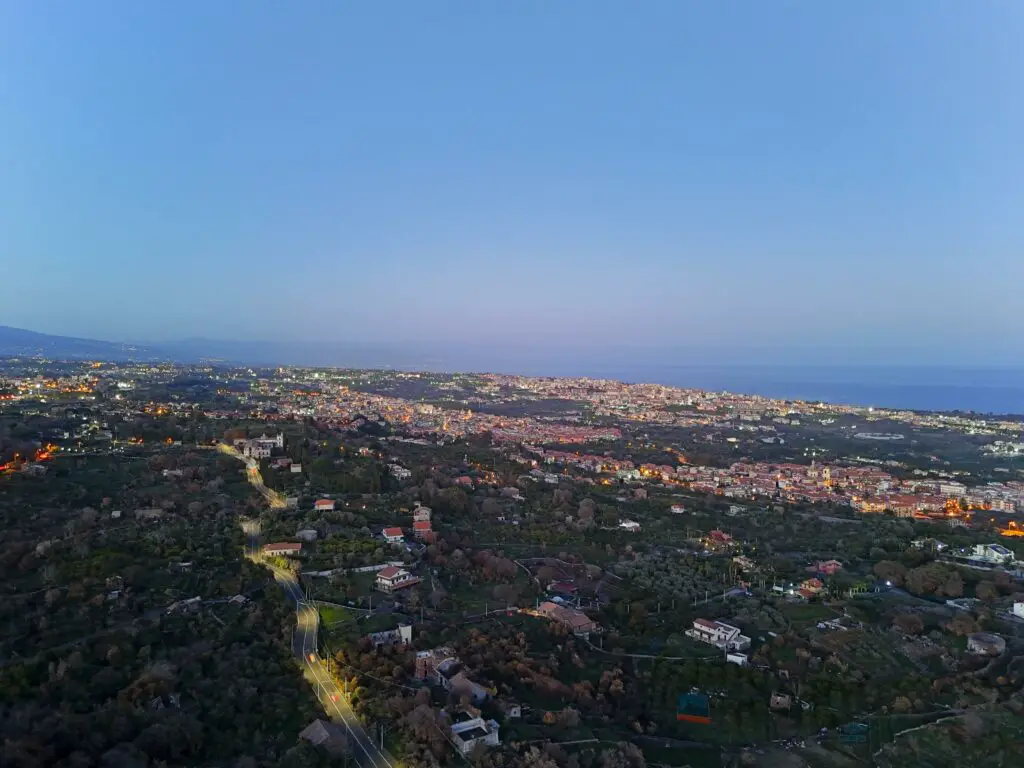
In this top-down image of a village in Sicily, the Christmas lights are very bright
The Mini 4 Pro managed to maintain some detail in the shadows while keeping the highlights in a decent shape, although, in my opinion, they are borderline overexposed
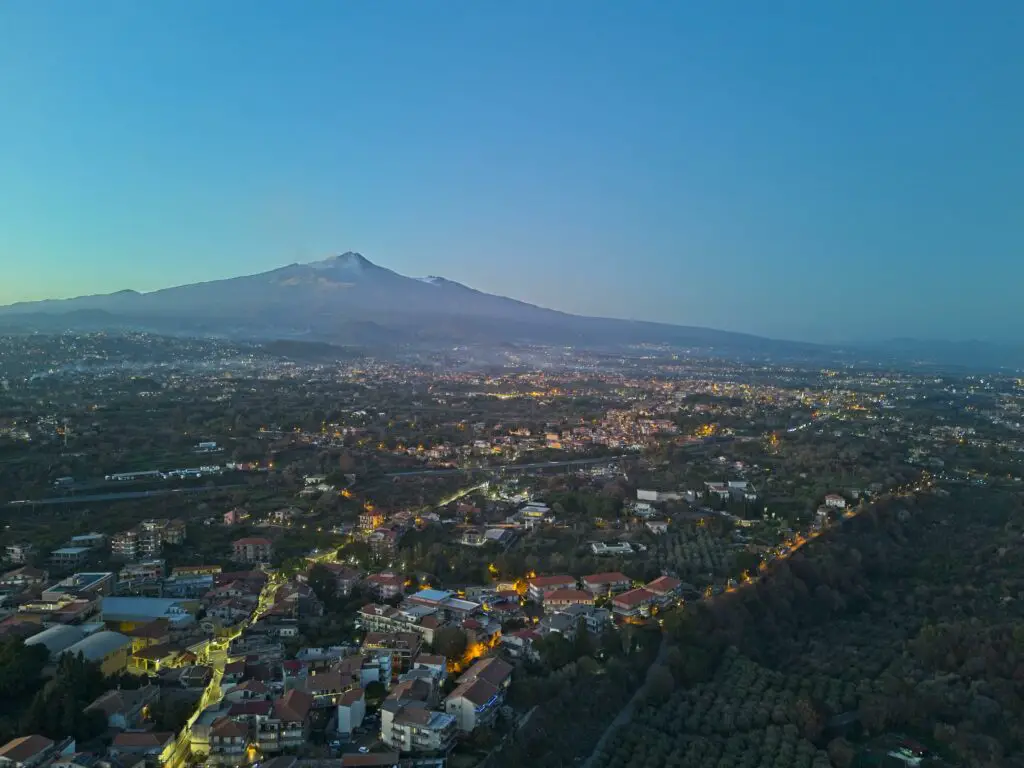
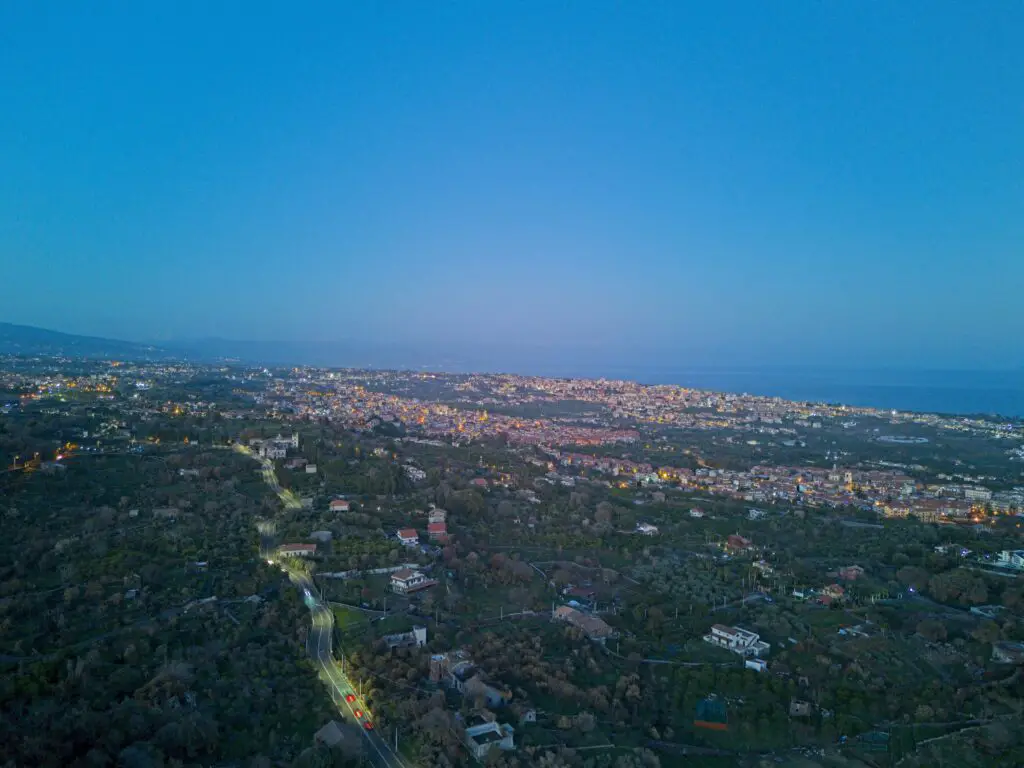
Bracketed Photos Merged to HDR
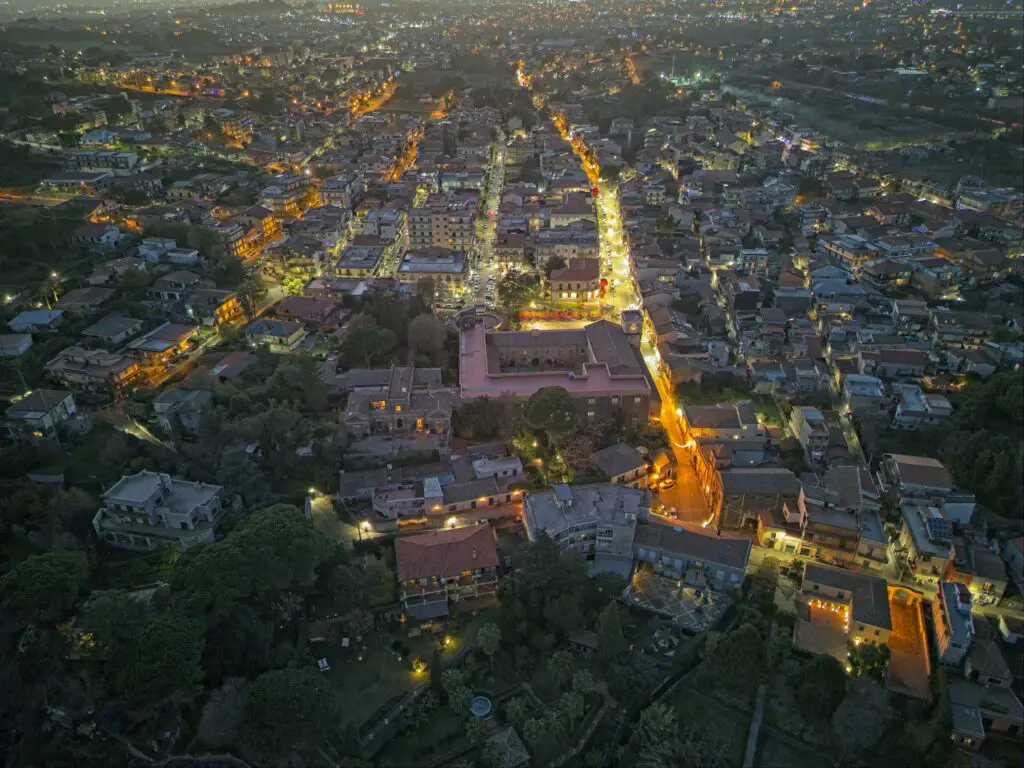
In these high dynamic range situations, it is often beneficial to merge to HDR seven images taken with Automatic Exposure Bracketing
With the merged image we have better control of the highlights and slightly more detail in the shadows
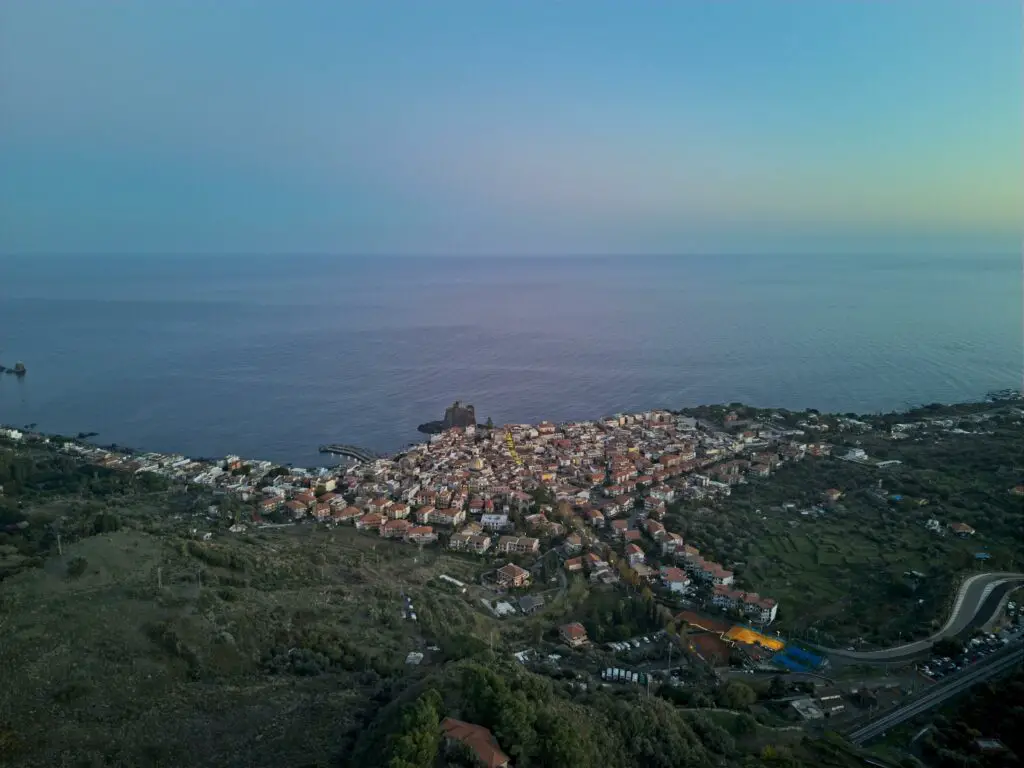
A similar example of the use of merge to HDR compared to single 12MP photos is this view of a hill overlooking the Mediterranean Sea
The resulting image has more detail in the shadow and good control of the highlights