
Automatic Exposure Bracketing is a tool that I use constantly for photos with any drone, for two reasons:
- To have several photos taken almost simultaneously with different exposure values so that at least one image is perfectly exposed
- To extend the dynamic range and get better-quality images in certain light conditions, as we will see later in this article
Automatic Exposure Bracketing with the Mini 4 Pro to merge the images to HDR yields excellent results, with plenty of detail in the shadows and control of the highlights even against the sun. In cases of moderate dynamic range, it is often possible to obtain richer colors and extra contrast
You can check the prices for the different configurations of the Mini 4 Pro through the button below (commission earned)
Further down in this article, you will find plenty of examples of photos that can be downloaded as JPEG files to appreciate the difference between single photos and images merged to HDR with the Mini 4 Pro
I have written several other articles about different aspects of photography with the Mini 4 Pro:
- Photography review of the Mini 4 Pro
- Camera settings for photography
- Panorama mode
- 48MP Photo Mode with the Mini 4 Pro
- Night Photography with the Mini 4 Pro
- Mini 4 Pro vs Air 3 photo comparison
- Mini 4 Pro vs Mini 3 Pro photo comparison
If you prefer to watch it as a video, you will find my YouTube version at the end of this article
Settings for AEB Photography with the Mini 4 Pro
Automatic Exposure Bracketing Menu
With the Mini 4 Pro, we access AEB in the Photo/Video menu

We have a choice between 3, 5, or 7 photos, while with previous models the choice was limited to 3 or 5 shots. This extra option is helpful in scenes with a big difference in luminosity.
It is possible to take AEB photos in vertical format by turning the camera to portrait mode before shooting
Another new feature introduced with the Mini 4 Pro is the possibility to take bracketed 48 MP photos by selecting this mode in the Camera tab of the settings, or the White Balance window before choosing the AEB mode in the Photo/Video menu
When using the 48 MP only three bracketed images will be taken
How AEB Works
The camera takes the shots in rapid succession, within a second. Each image has an exposure interval of ⅔ of a stop, the ISO value remains constant, while the shutter speed is modified at each shot
An Issue with the Exposure Settings of the Mini 3 Pro
I like the exposure interface of DJI Fly app, with all the settings available from the two tabs of a single window, but there is something poorly planned that could be very easily fixed by DJI.
The exposure values are stored in memory for each single photo mode
If we expose for the current light conditions, take a photo, and then choose AEB, the exposure values are set to the last time AEB was used, so we have to set the exposure again. The same happens if we choose the 48MP mode
Merge to HDR
How to Merge the Images
Most photo editing programs can merge to HDR photos taken in AEB
I do it with Luminar Neo, the program I use for RAW photos post-processing. You can read my article about Luminar Neo through this link
You will find info about Luminar Neo together with a coupon for a 10% discount by entering the code “vicvideopic” using the button below
Benefits of Merge to HDR
The benefit of merging to HDR is an increase in the dynamic range of an image. The dynamic range is the difference between the brightest and the darkest part of the scene
A camera has a much lower dynamic range compared to the human eyes
The idea behind merging to HDR is to take the shadows from the overexposed images and the highlights from the underexposed ones. By merging several photos we obtain an image with highlights and shadows within a range that can be better reproduced
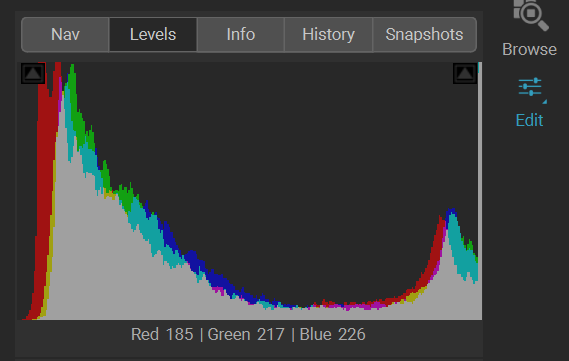
How to Read the Histogram
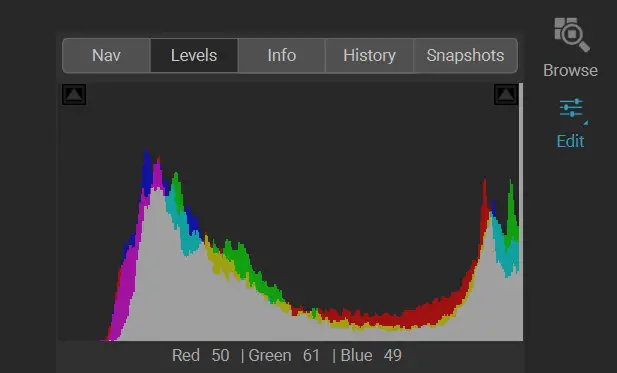
The sensor can reproduce highlights only up to a certain luminosity, after that the highlights will be burned and impossible to recover. This is indicated on the histogram by the bars touching the right edge
The same goes for the shadows, below a certain point the sensor will interpret all dark shadows as black, as we can see from the bars bunched up on the left edge
With the shadows, there is more tolerance and they can be recovered up to a certain degree

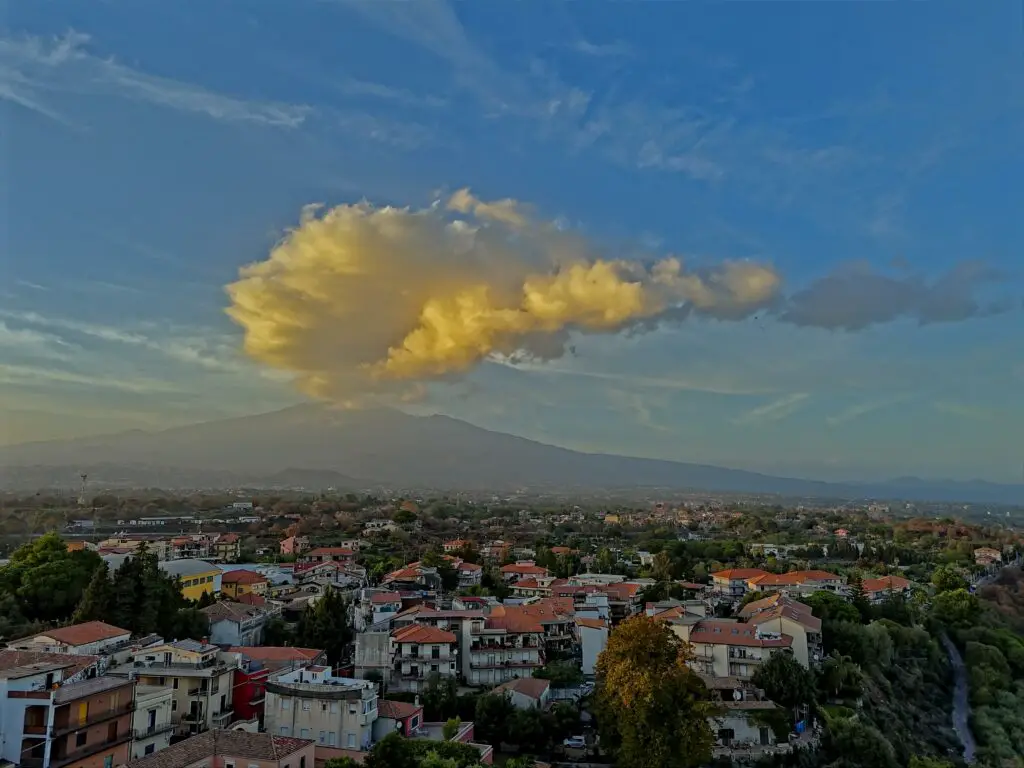
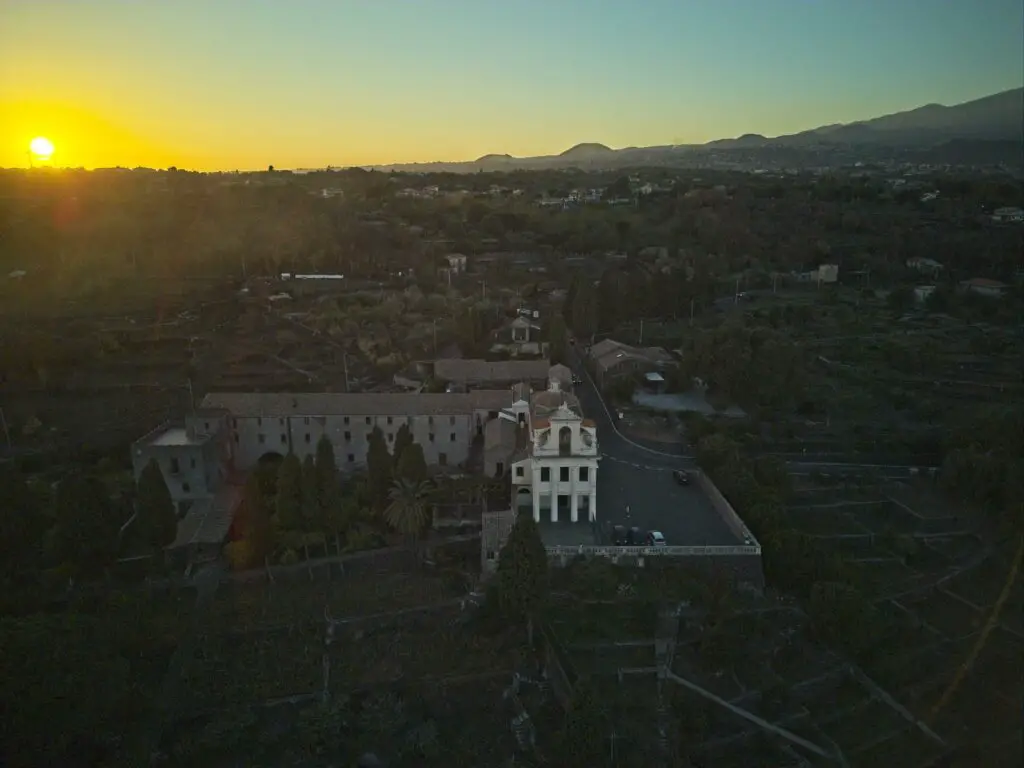
This image was taken before sunset with the full sun in the middle of the frame, partially covered by some very interesting clouds
In the histogram we notice that there are bars bunched up against both the left and the right edges, this shows that we are in an extreme dynamic range situation
If we set the exposure to optimize the sun and avoid burning the highlight, the shadows will be way too dark. If we optimize the shadows we lose the structure of the sky, as the highlights will be burnt beyond repair
File Format: RAW or JPEG?
It is preferable to use RAW files, as they contain more information, especially in the shadows
But the JPEG files have improved a lot in the latest generation of DJI drones and the ones of the Mini 4 pro are excellent
I prefer to save both RAW and JPEG files, as occasionally the RAW files happen to have some issues and cannot be used. On these occasions, the JPEG files can be used instead
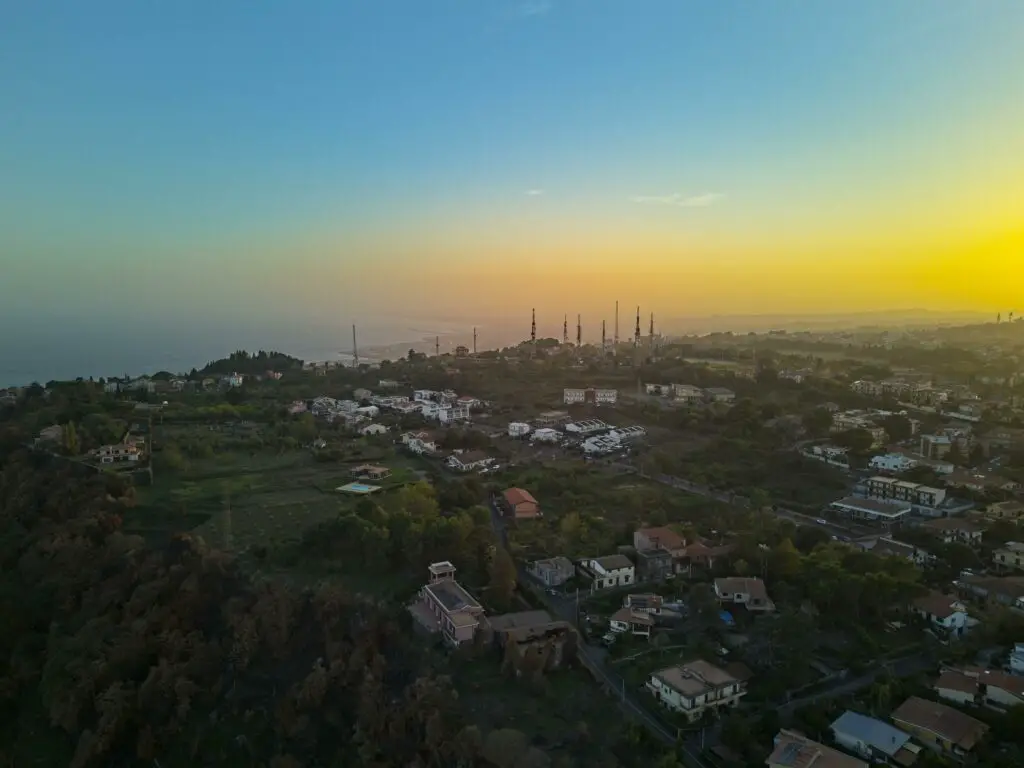
It is also possible to merge the JPEG files to HDR with good results, even though the final image feels a bit more processed
We can further enhance the merged image by color-grading
The result is excellent, and much closer to what we see in real life. The sun is perfectly exposed the structure of the sky is outstanding
There is plenty of definition in the elements on the ground, while a good amount of contrast is retained
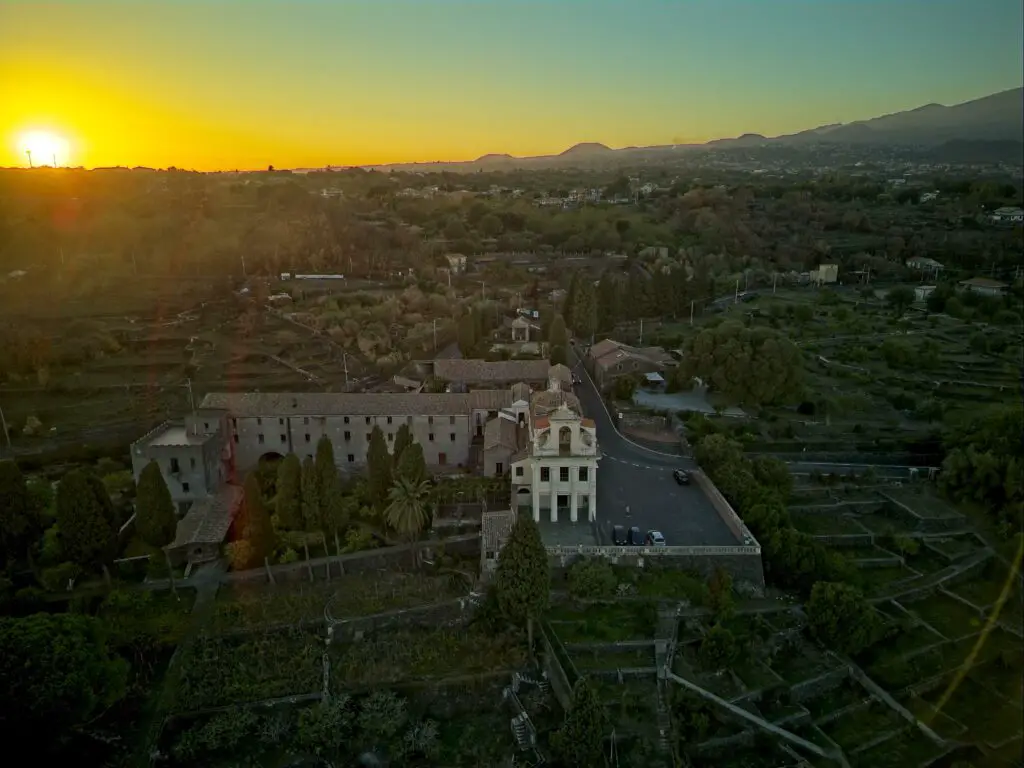
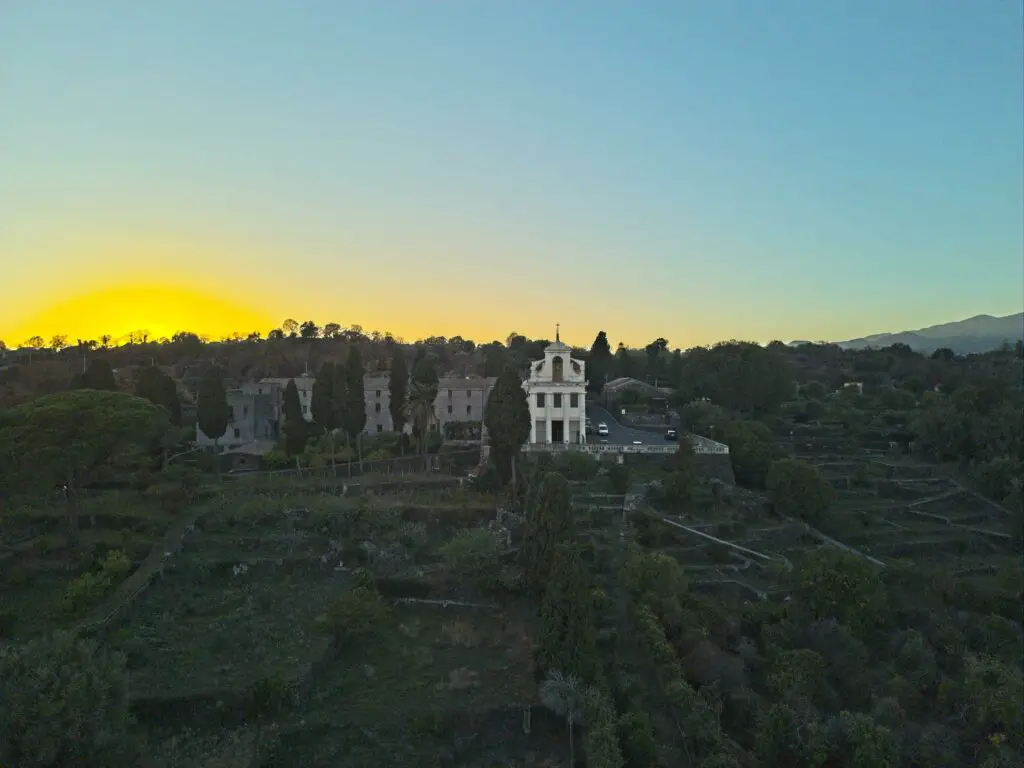
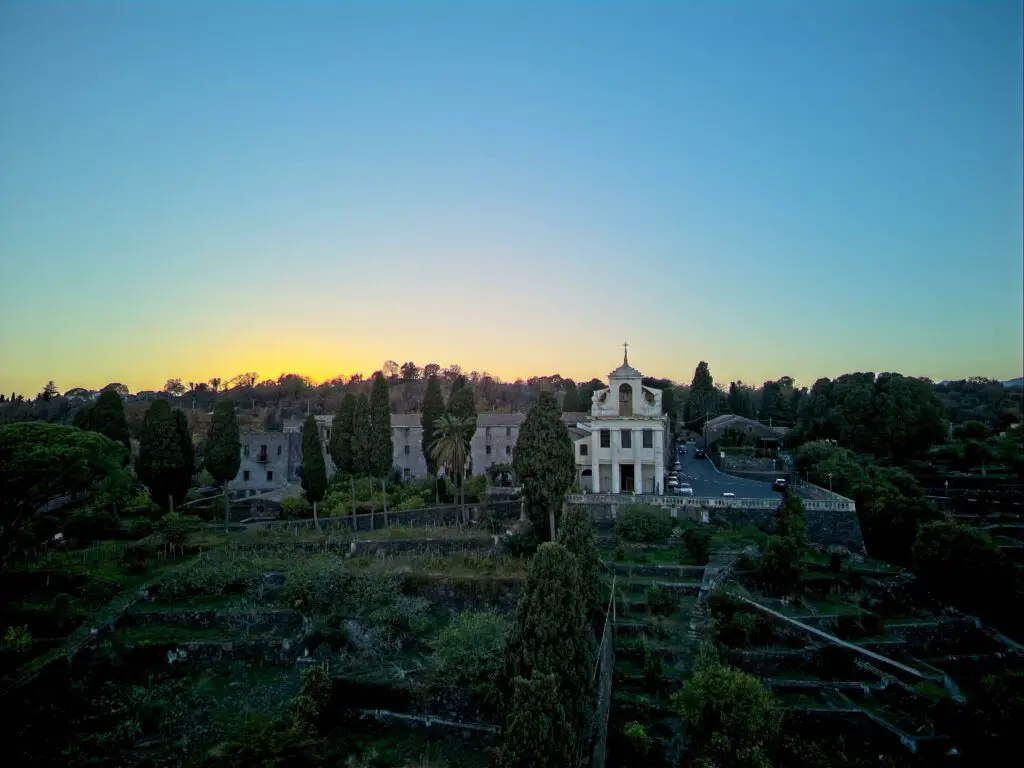
Examples of Single Images vs Photos Merged to HDR
In all the photos shown in this article, I have not used any local adjustments like gradients or masks that are very useful to further reduce the dynamic range
When using merged images local adjustments are not needed
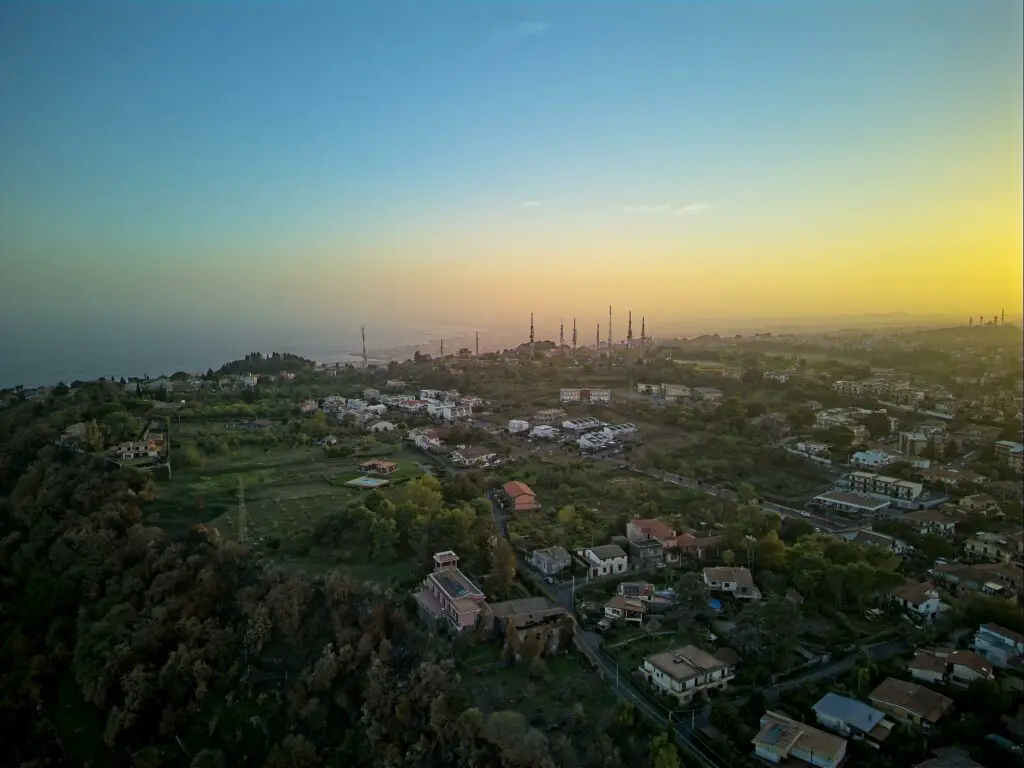
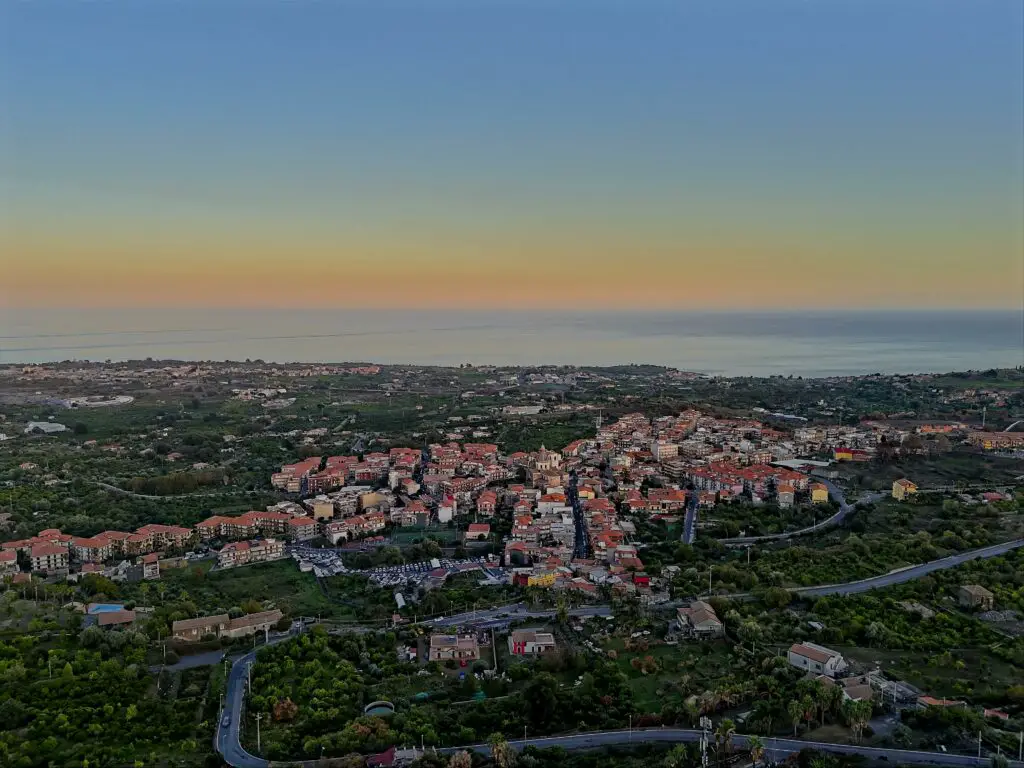
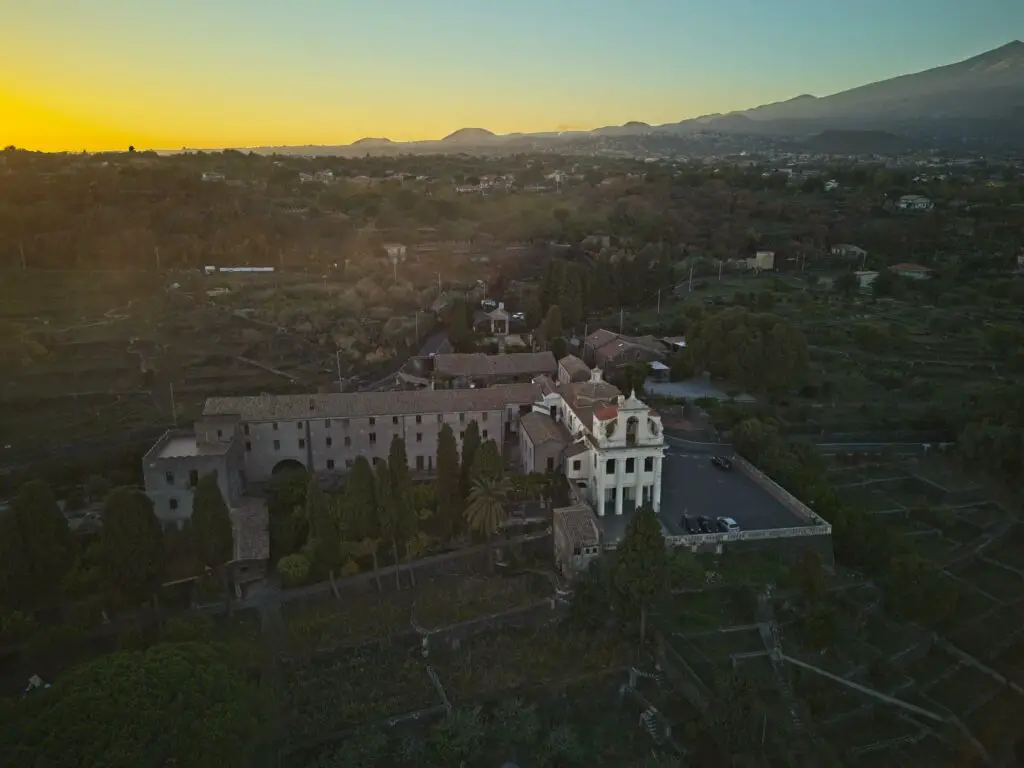
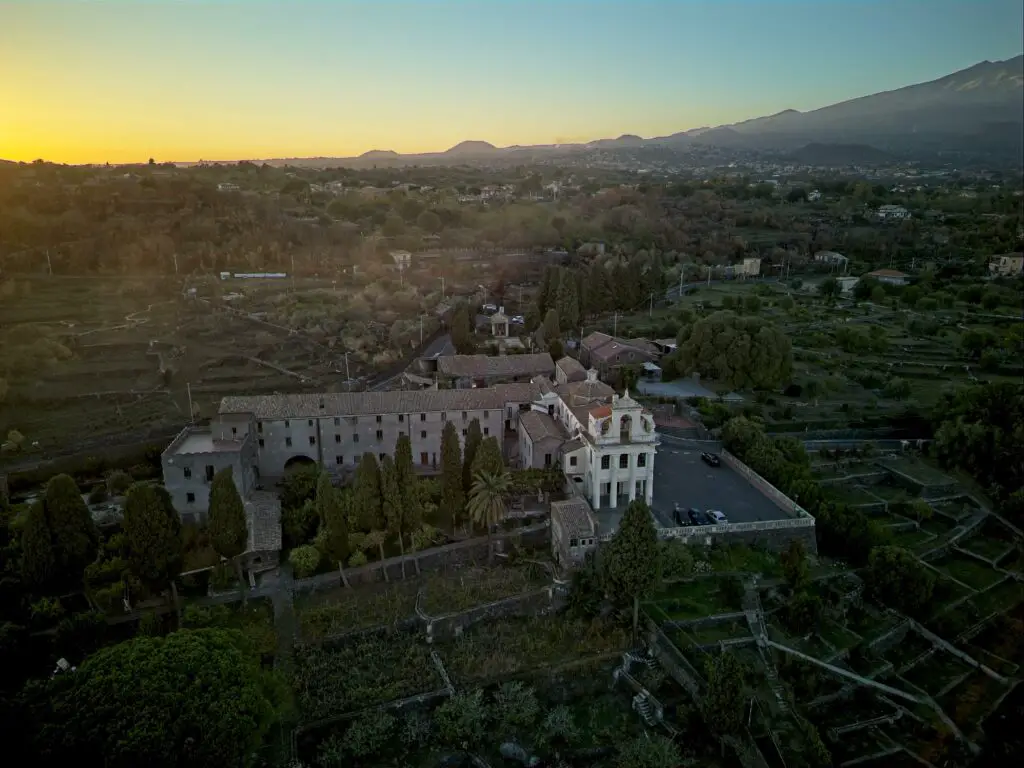
Further down we can see the same subject with different degrees of dynamic range to compare the results obtained with a single image vs photos merged to HDR
On all these images the merged photos retain a much larger amount of information in the shadows and there is more room to play with while editing, the colors are also much richer
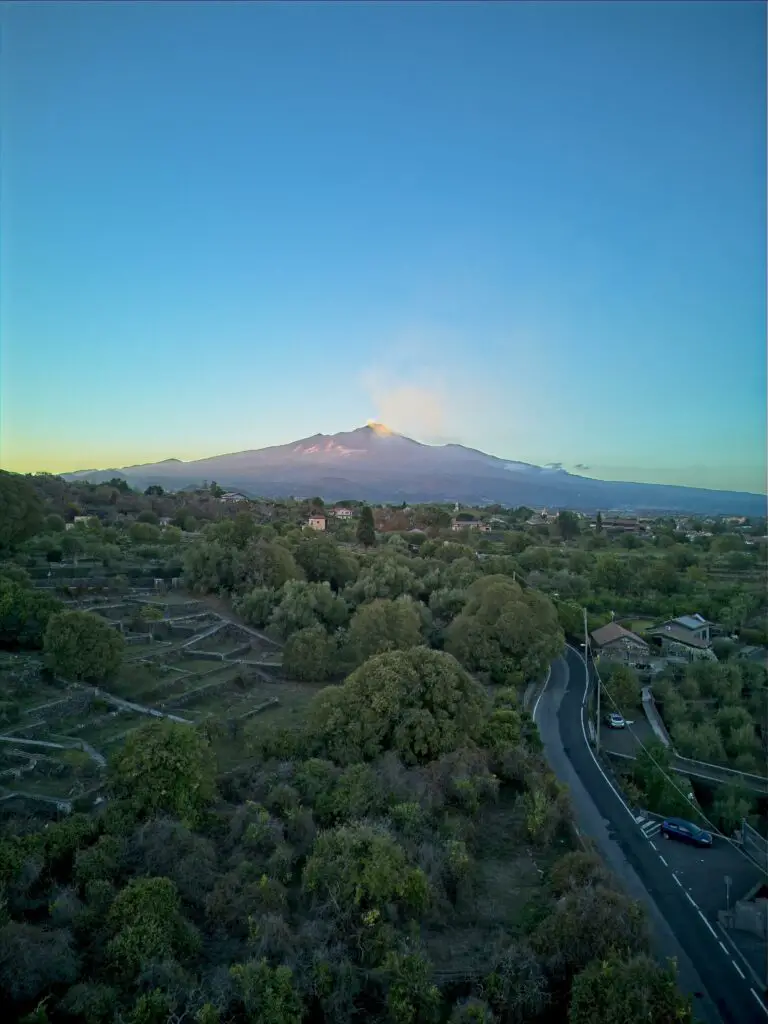
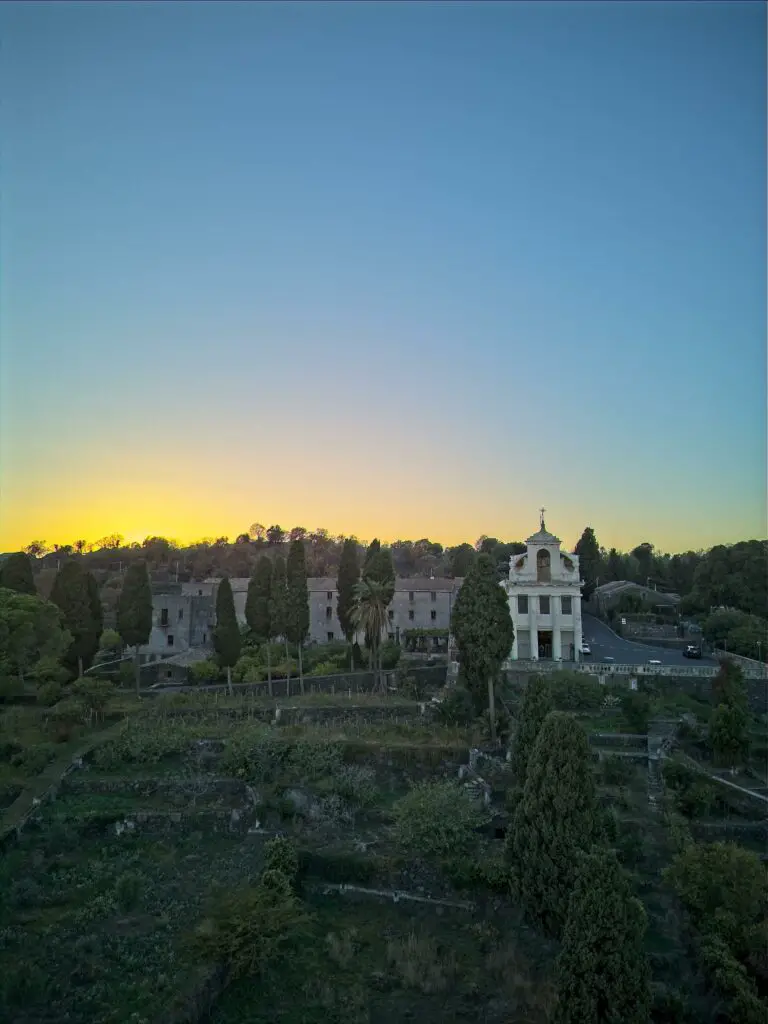
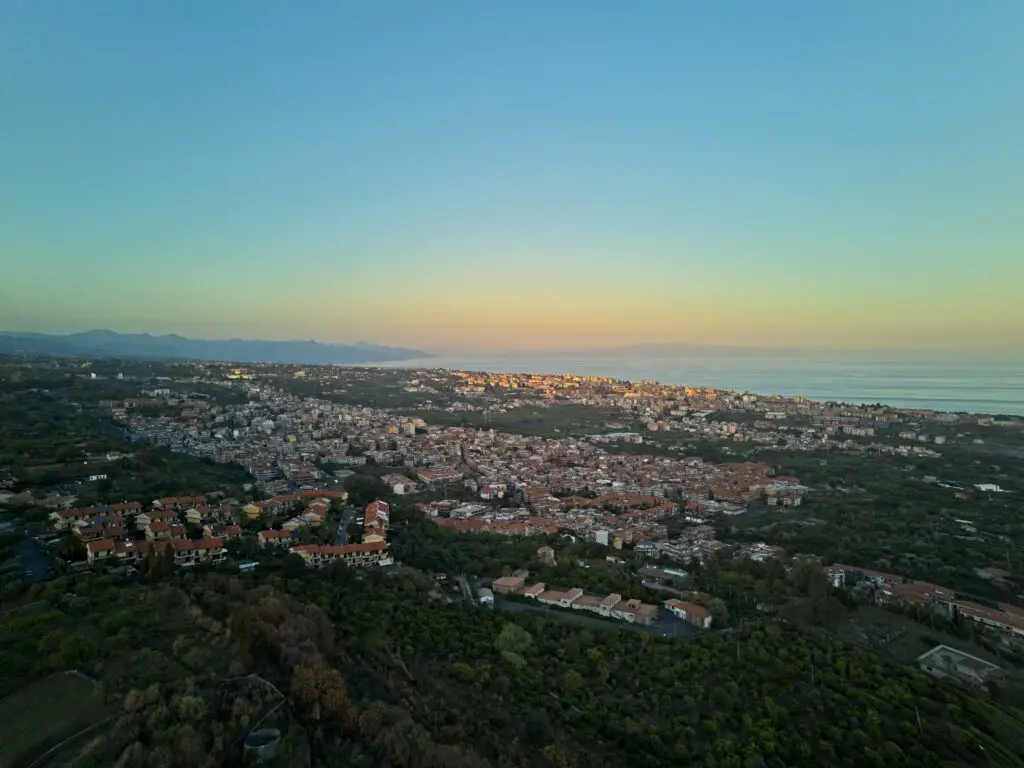
AEB also works on vertical photos and the result with merged images is just as good as with regular landscape images
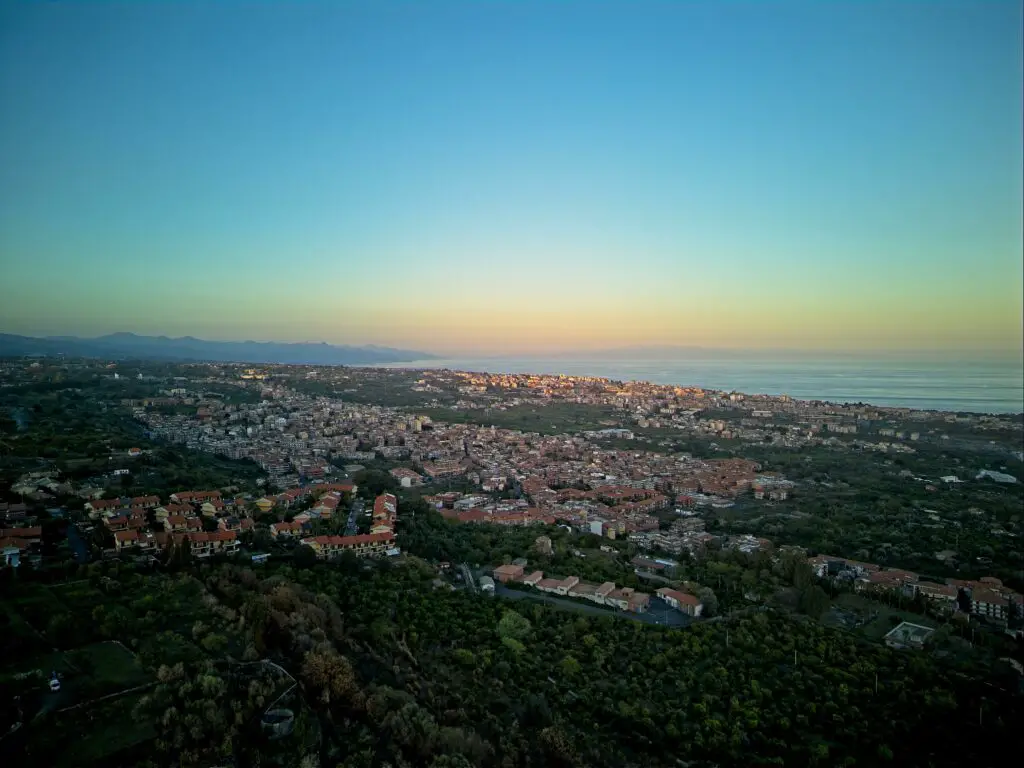
In drone photography, the sky is very often in the frame with some degree of high dynamic range