
JPEG photos taken with the DJI Mini 4 Pro are excellent, with rich and well-balanced colors and a remarkable amount of detail, which was a weak point of the Mini 3 Pro. Night photos are extremely good. With the RAW files, the amount of information contained in the shadows is beyond my expectations
Scrolling down you will find plenty of images that can be downloaded to better appreciate the quality
If you want to compare the photo quality of the Mini 4 Pro to other current DJI models:
You can also watch my other articles about photography with the Mini4Pro
- Camera settings for photography of the Mini 4 Pro
- Exposure settings for video and photos
- Panorama mode with the Mini 4 Pro
- Night Photography with the Mini 4 Pro
- 48 MP photo mode with the Mini 4 Pro
- Mini 4 Pro Automatic Exposure Bracketing
- Mini 4 Pro Hyperlapse tutorial
You can check the prices for the different configurations of the Mini 4 Pro through the button below (commission earned)
If You Prefer To Watch This As a Video
Mini 4 Pro Photo Specs and Features
Specs
| Sensor Size | 1/1.3″ |
| Field of View | 24 mm |
| Aperture | f1.7 |
| Photo Resolution | 12 MP |
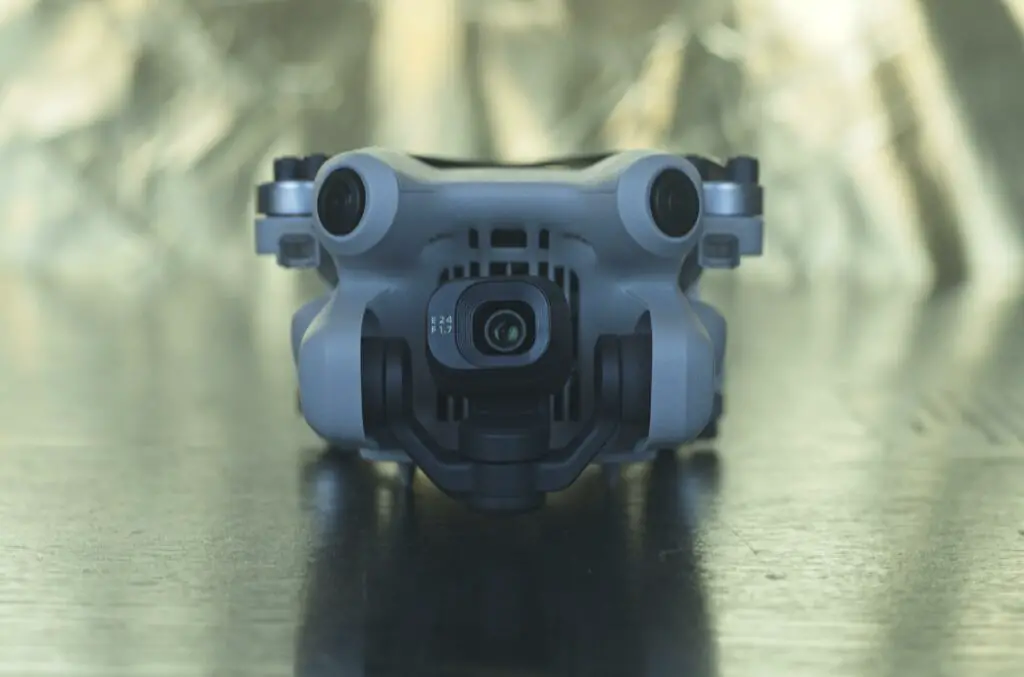
It has the same camera as the Mini 3, Mini 3 Pro, and the wide-angle one of the Air 3
Photo Modes
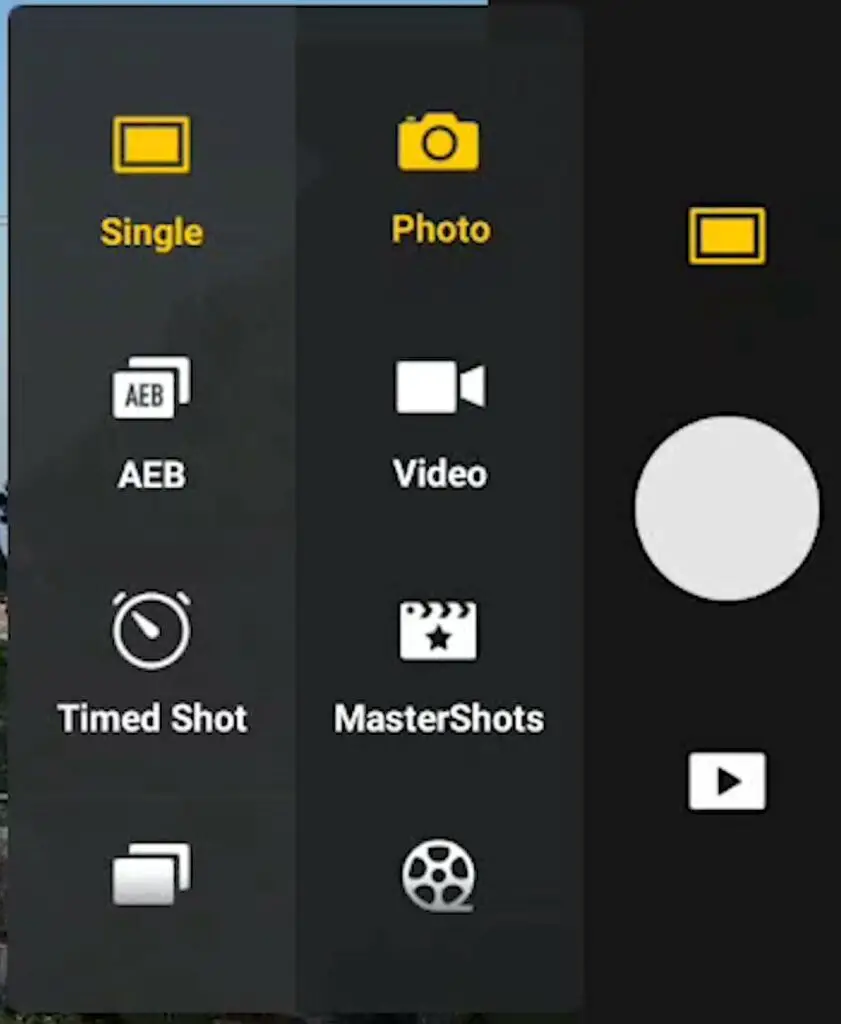
In the Photo/Video menu above the shutter, we choose Photo and tap on it to access the different Photo modes:
- Single Photo
- Automatic Exposure Bracketing with a choice of 3, 5, or 7 photos, instead of 3 or 5 in previous models. This can be useful in the case of extreme dynamic range
- Timed Shots for stop motions or for taking selfies after putting away the remote controller
- Burst shots for sports and action shots
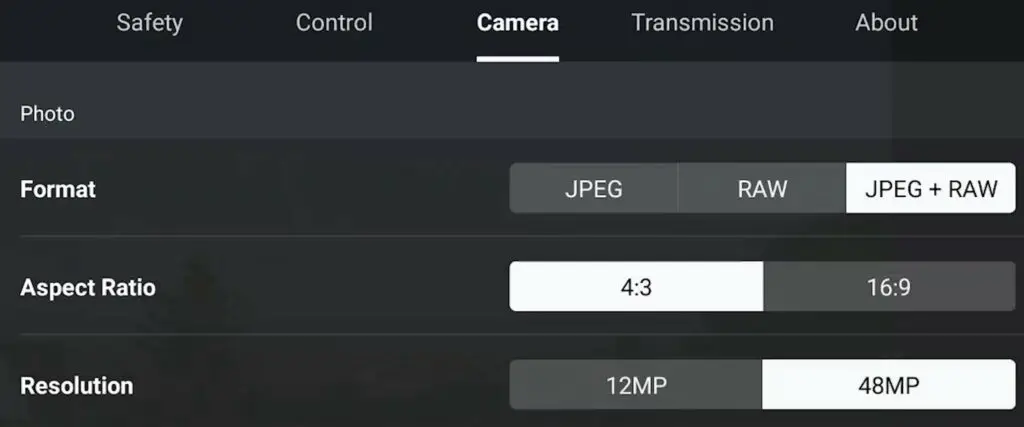
The 48 MP mode is not in this menu anymore, but it can be selected in the Camera tab of the settings or in the exposure window at the bottom right of the screen. This is handy, as now the 48 MP mode can be applied to AEB shots or panorama
Vertical Photos
The Mini 4 Pro can rotate the camera by 90 degrees to take vertical photos or video by clicking on the icon to the left of the shutter

This feature was introduced with the Mini 3 Pro and it is a major selling point for users active on social media platforms
It is meant mostly for video, but I find it also useful for photography for creative and unusual shots
An Issue with the Exposure Settings
I like DJI Fly app, but there is still something annoying in the exposure that DJI should fix
When exposing in manual mode, which is what I do all the time, the exposure values are set to the last time a specific mode was used
As an example, the last time I used the Mini 4 was last night, obviously in very dark conditions. This morning I start my shooting session by taking a single photo and I have to modify the exposure, as the light conditions are much brighter
If I then select AEB mode, I am presented again with the settings of the night before, as it is the last time I used AEB, so I have to expose again. The same goes for 48 MP mode, Panorama, or hyperlapses
It is a waste of time and quite annoying, as it would make much more sense to update these values to all the different modes at once since these are the current light conditions
Two Features Useful for Photos
The Mini 4 Pro has an array of functionalities, but they are mostly useful when shooting video. I will therefore analyze them in specific videos
But two features come in very handy for photography
Even though the omnidirectional obstacle avoidance system is mostly meant for footage, it gives peace of mind when taking photos too
The transmission system is the main weak point of the Mini 3 Pro, which has the worst signal of any DJI prosumer drones of the last few years
DJI has acknowledged it and several changes have been made to the new model to fix this issue
The Mini 3 Pro has no small feet at the end of the wing, so the antennas are positioned horizontally inside the wings
The new model has got the feet back with the antennas repositioned inside them
Also, the Mini 4 Pro has a new pair of controllers with external antennas and an improved version of Ocusync
The signal transmission in the Mini 4 Pro is excellent
JPEG Files
With DJI models of previous generations, I used to analyze only RAW files and never took JPEG ones seriously
But in this video, I will start with JPEG files for two reasons:
- Many users of prosumer drones are interested in posting on social media with little or no editing and want to know about JPEG files
- The quality of JPEG files in the Air 3 has massively improved and they should now be taken seriously
The wide-angle camera of the Air 3 is the same as the one of the Mini 3 Pro, so the improvement is due to better software processing
I am very curious to see how the JPEGs of the Mini 4 Pro compare to the ones of the Air 3
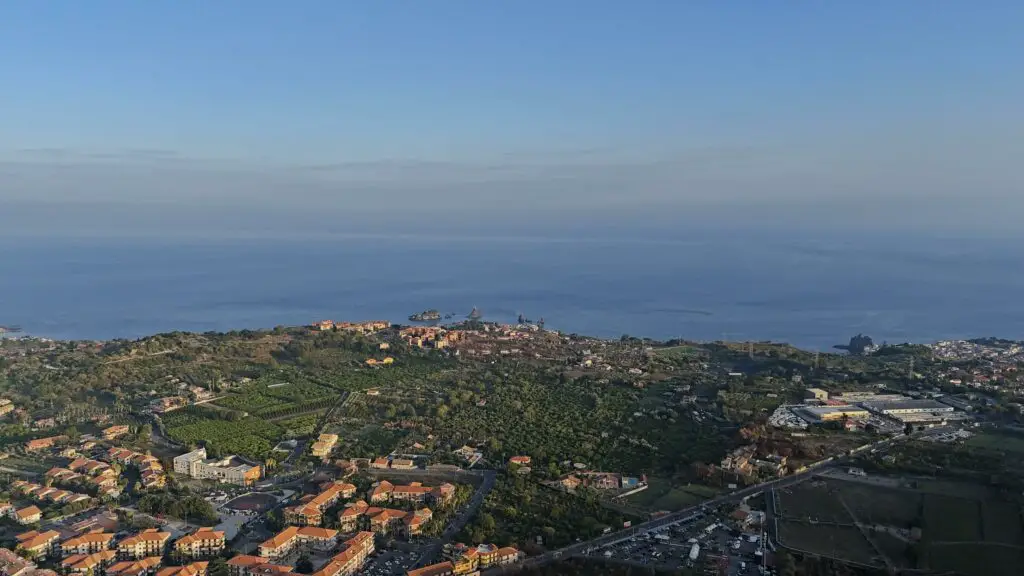
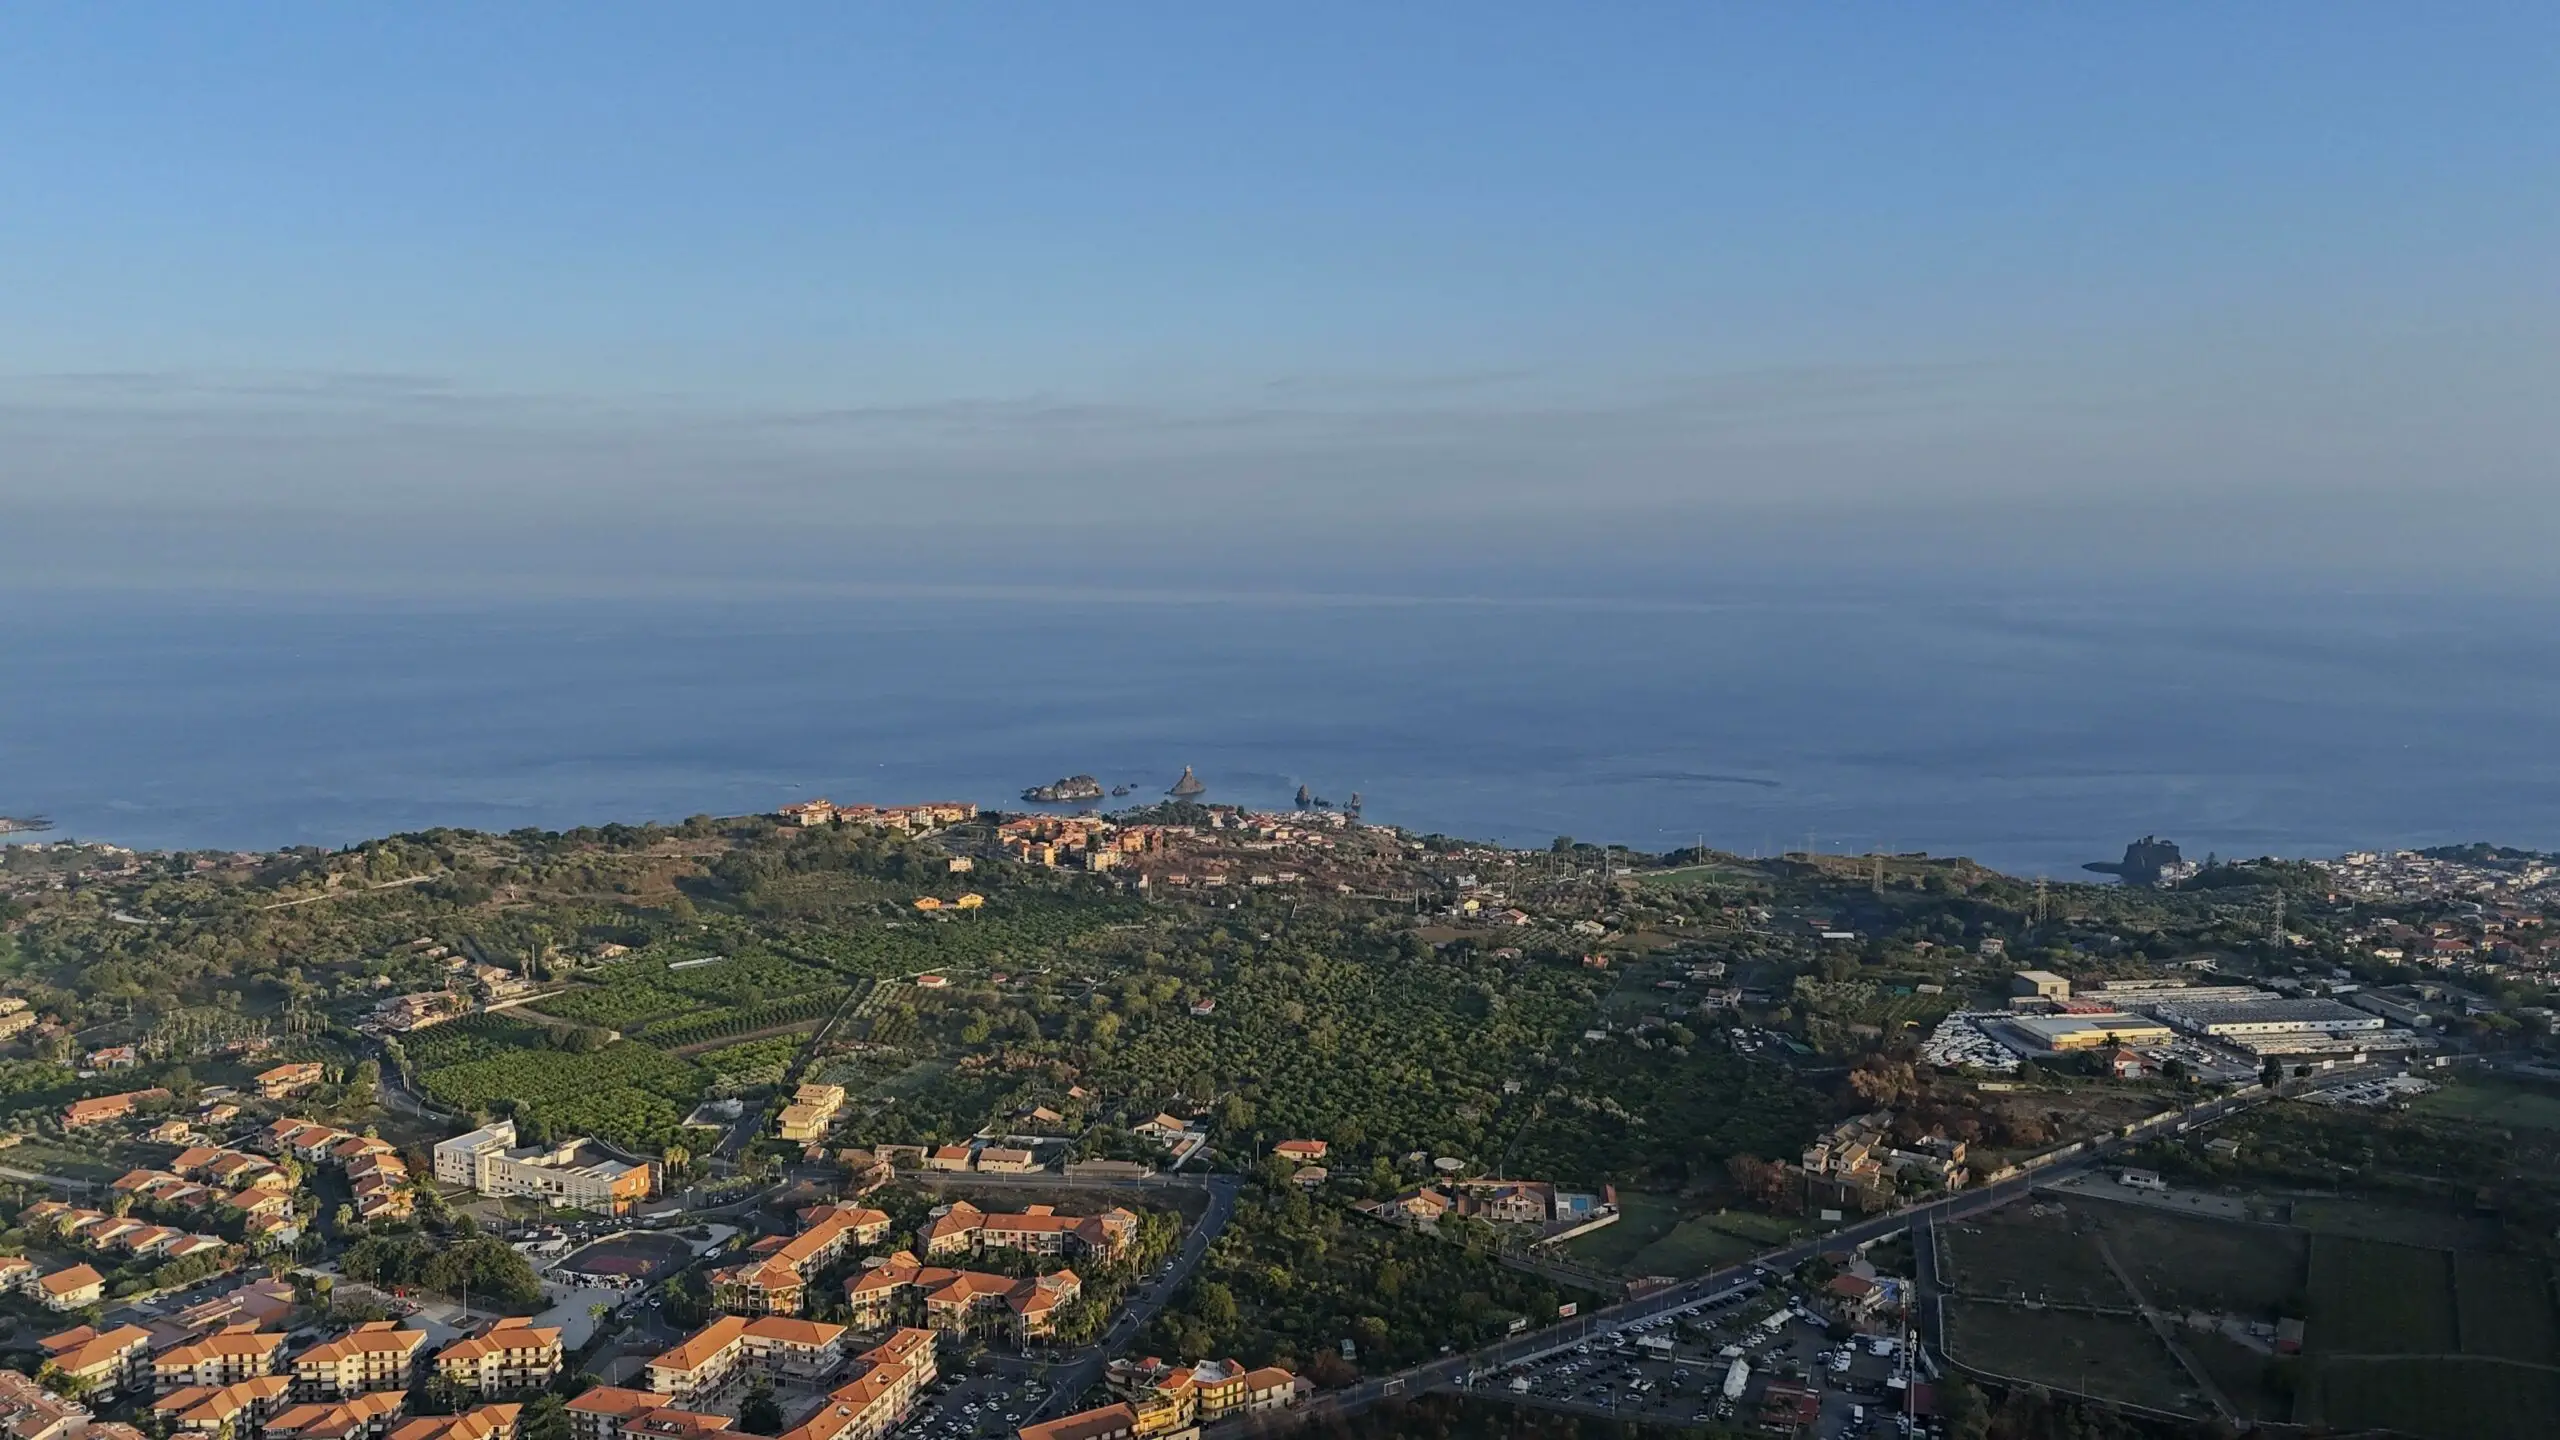
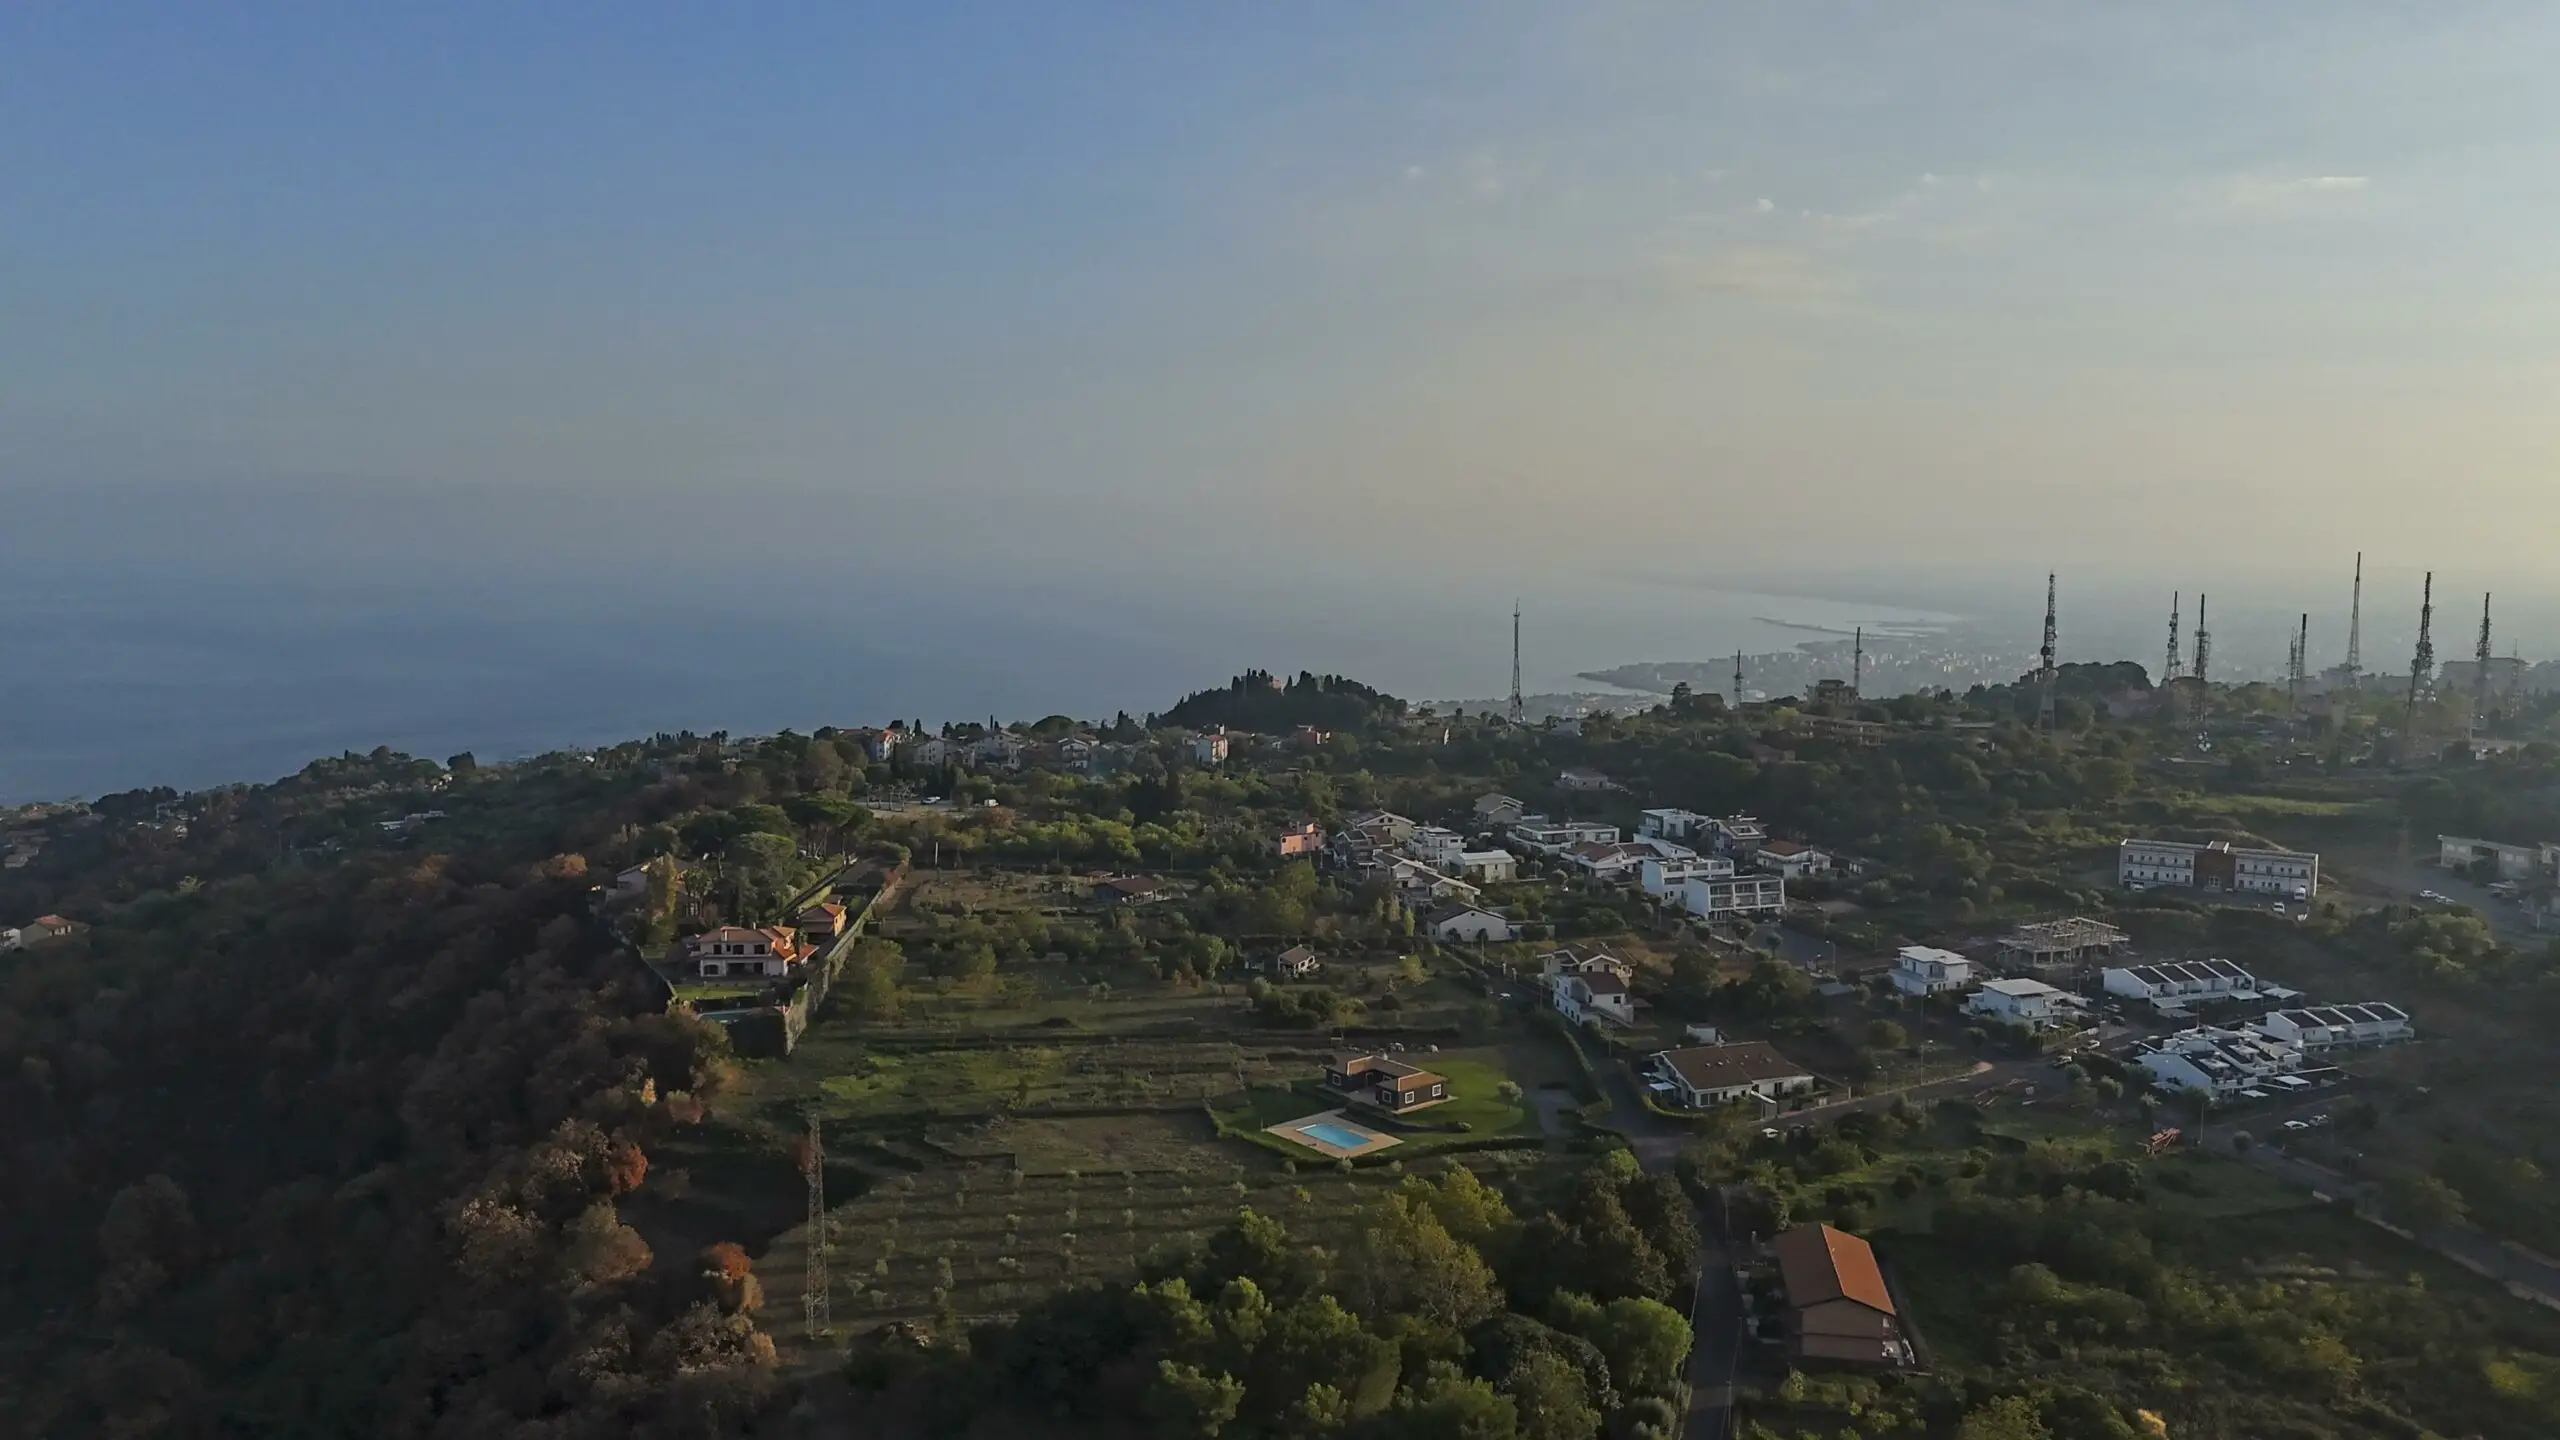
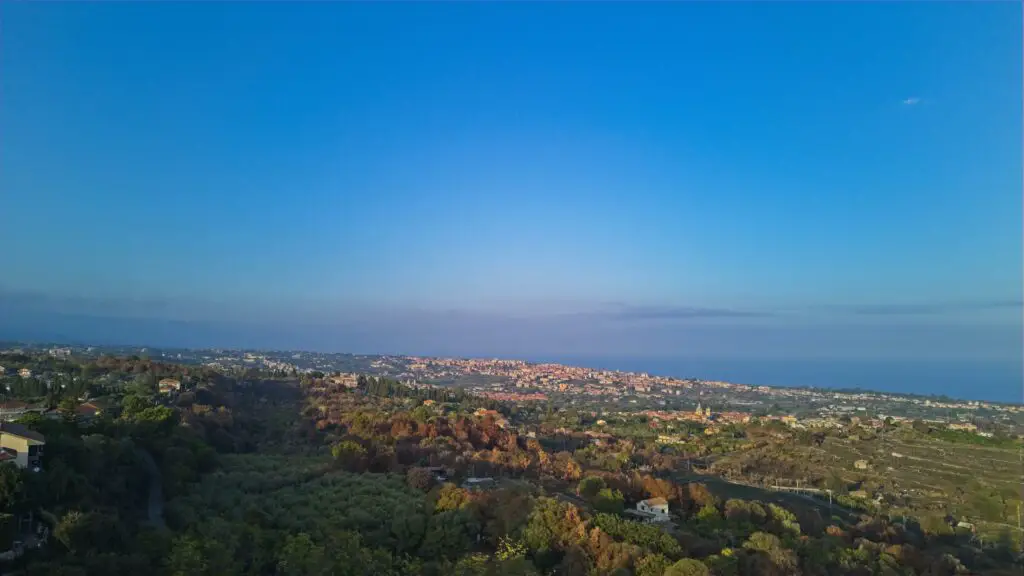
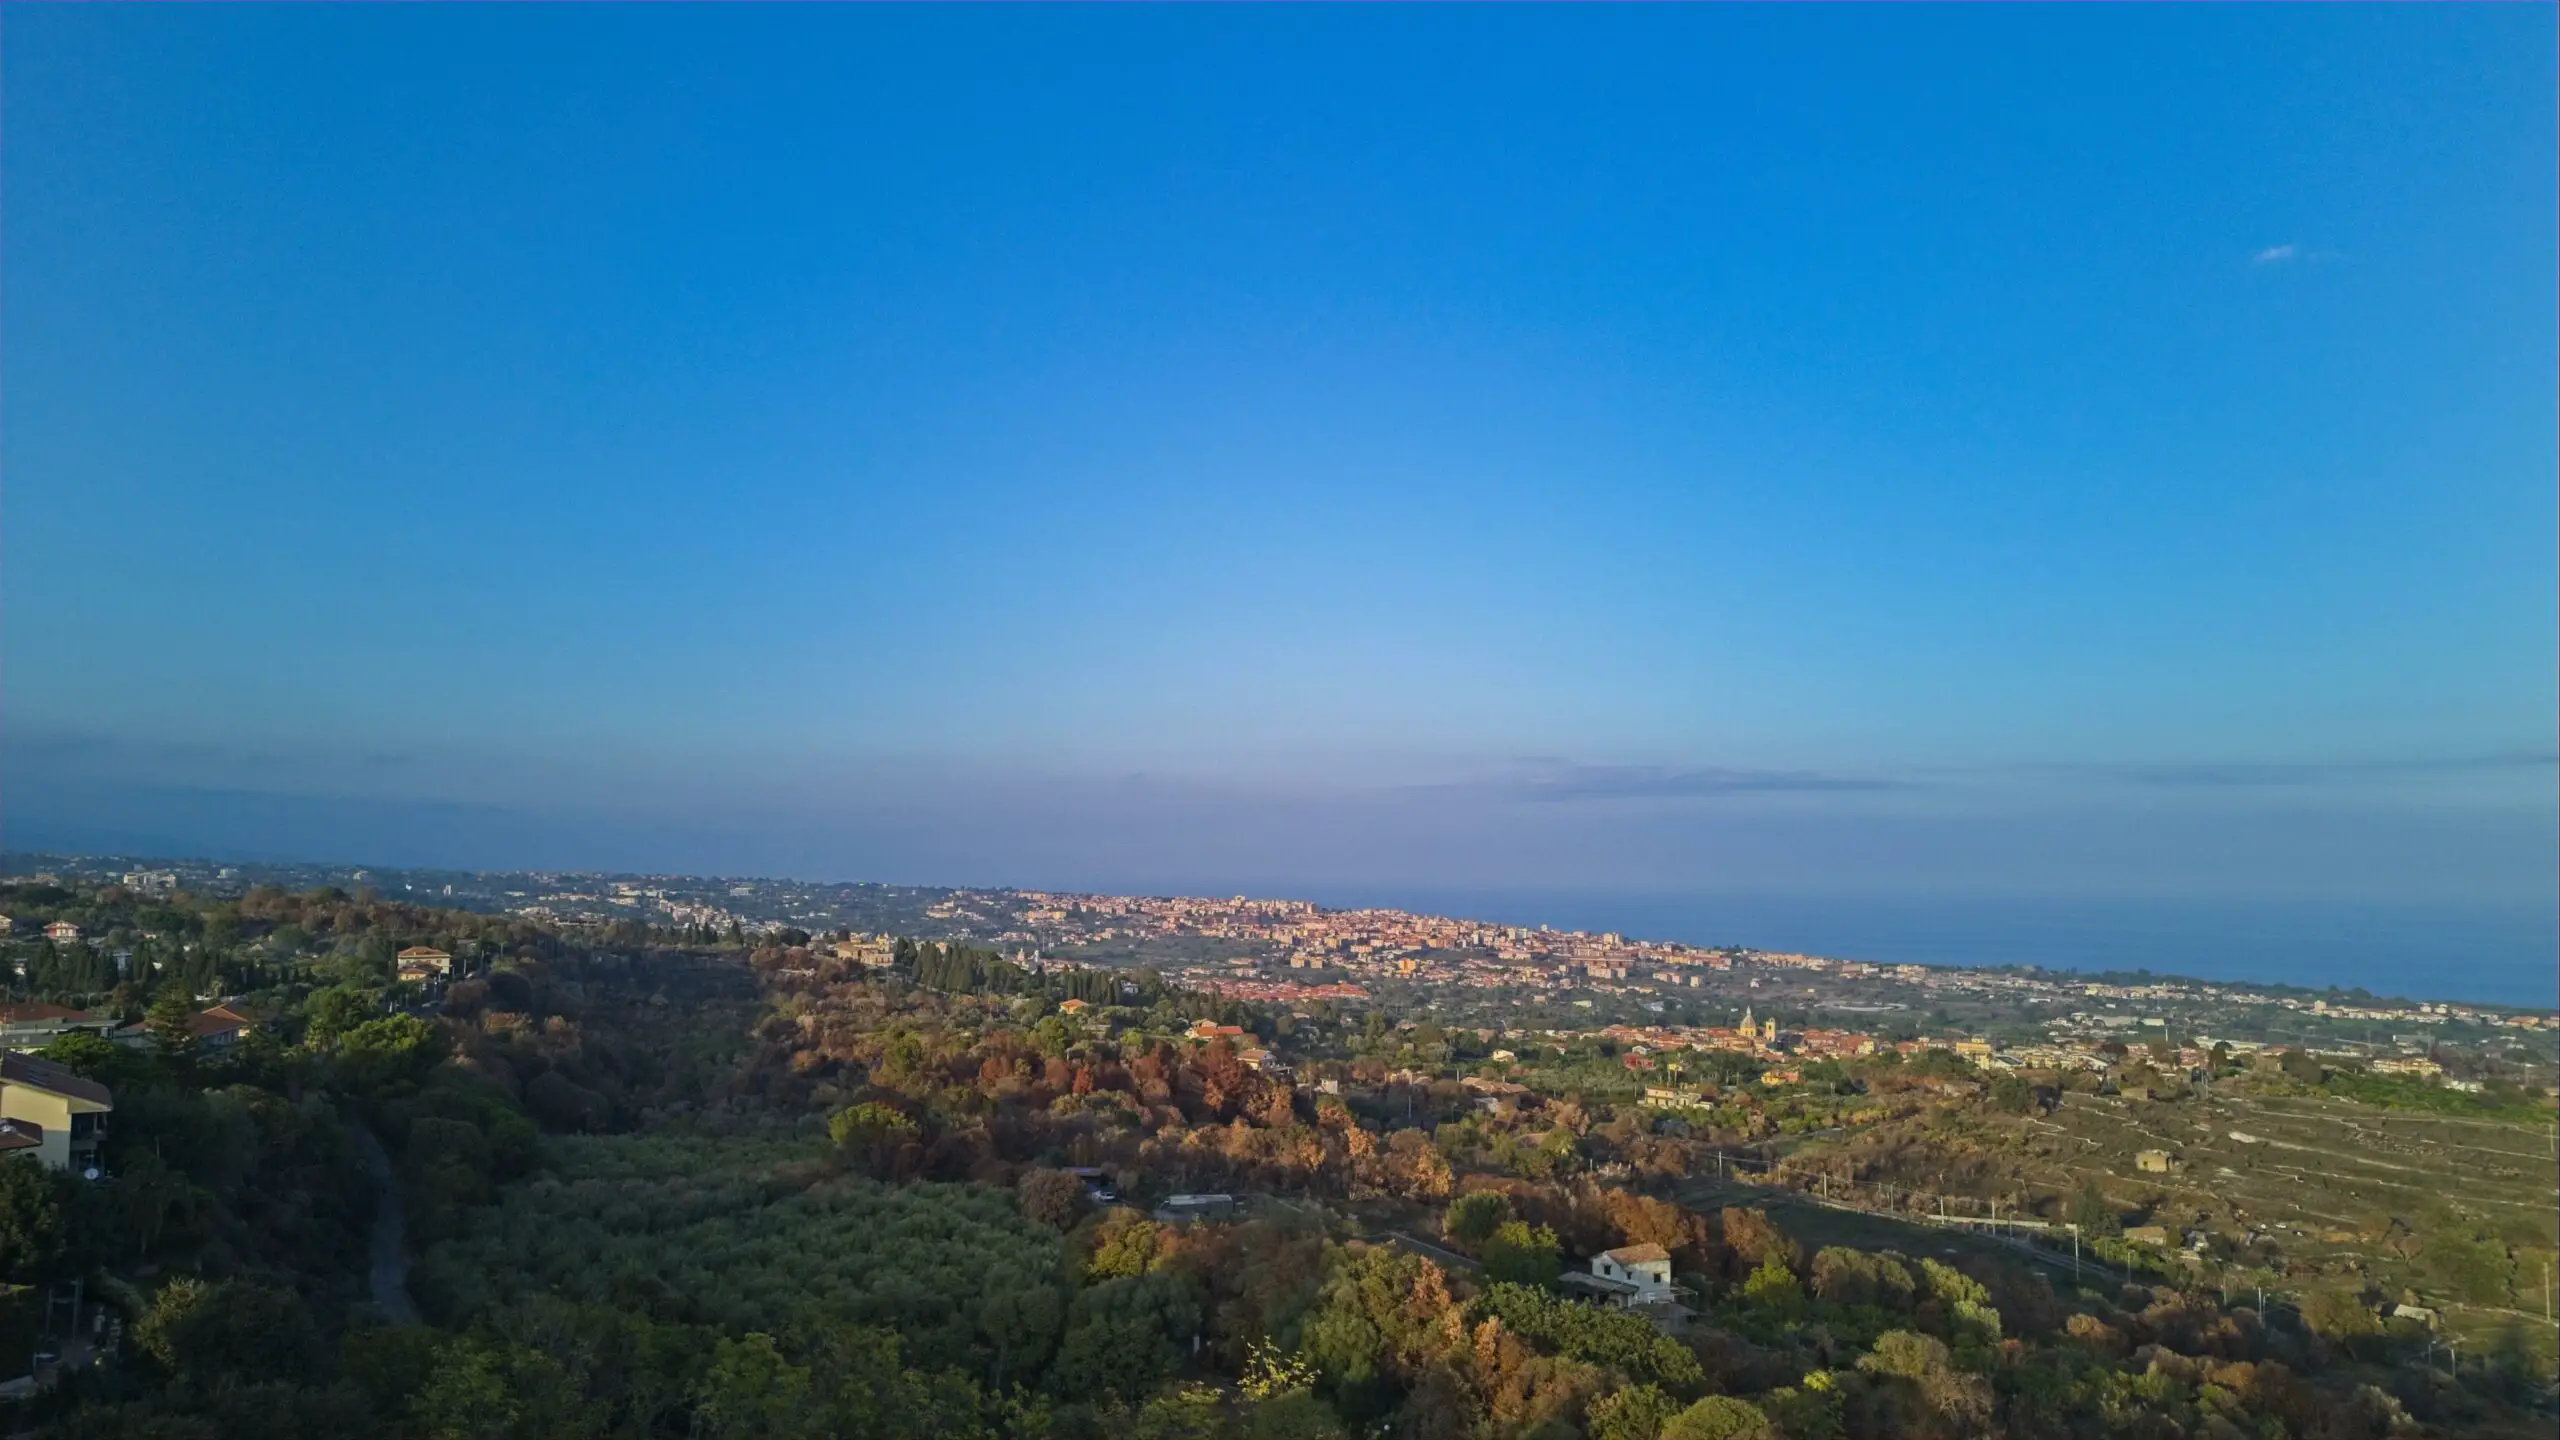
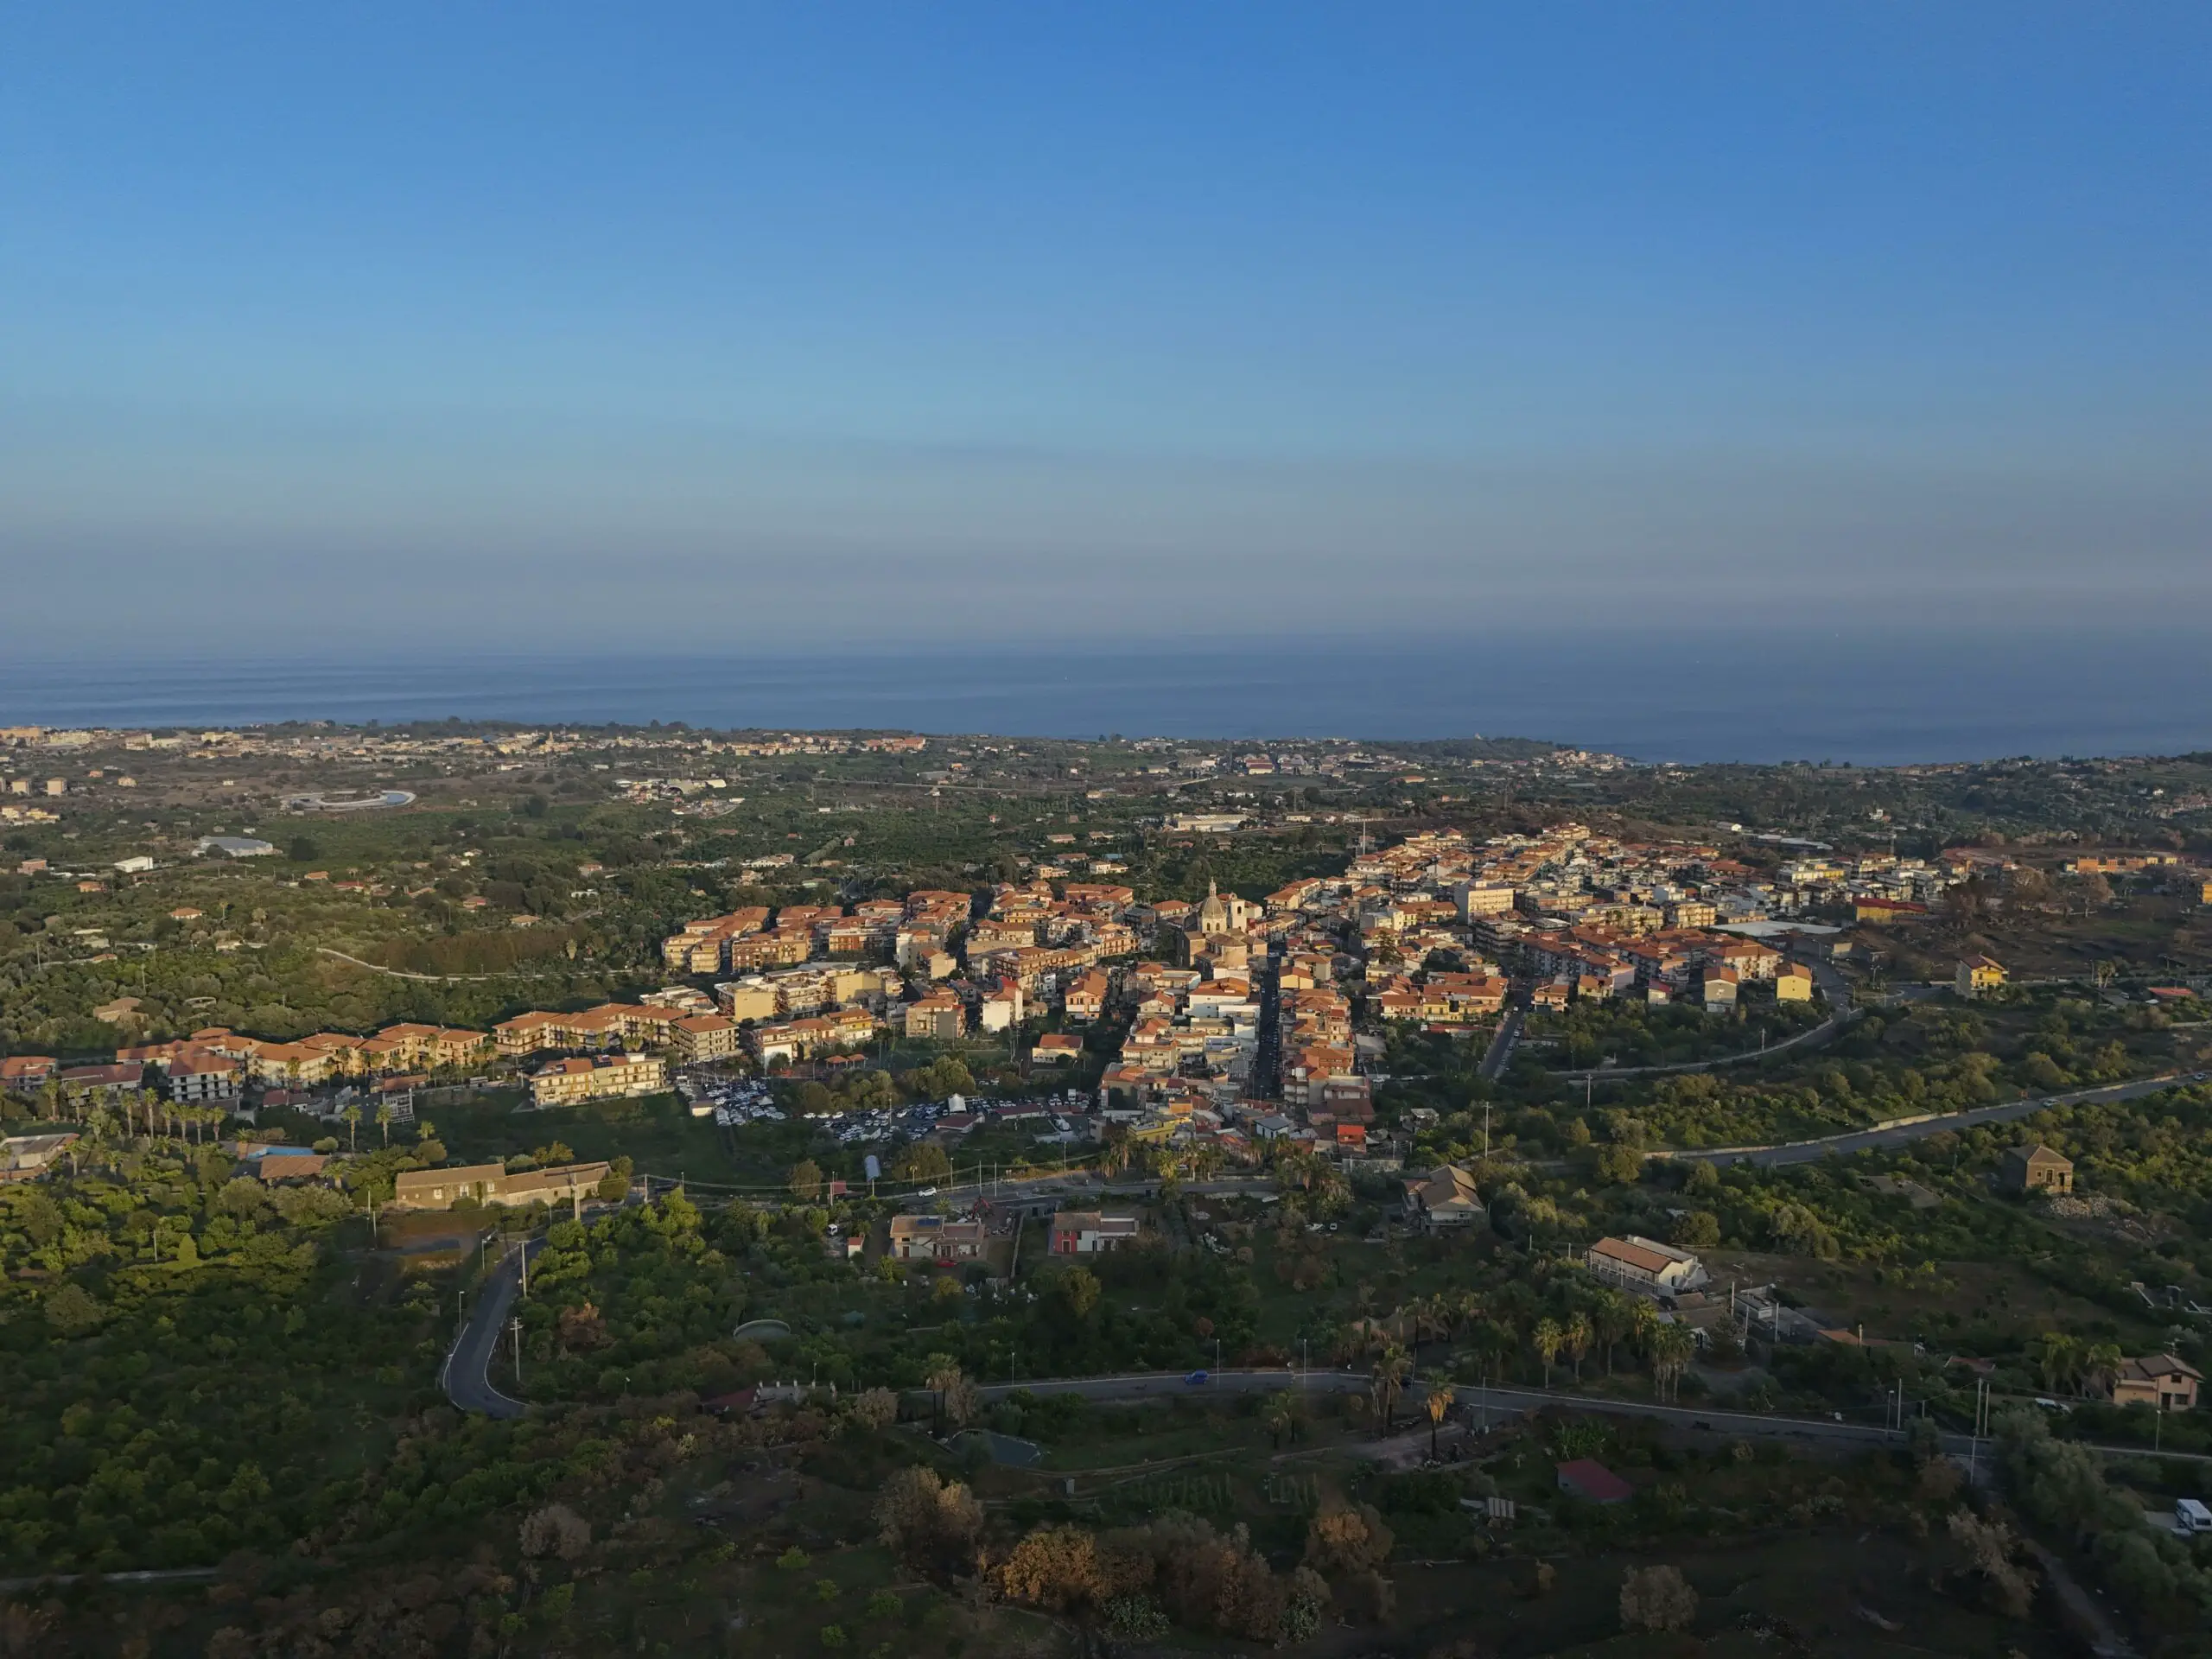
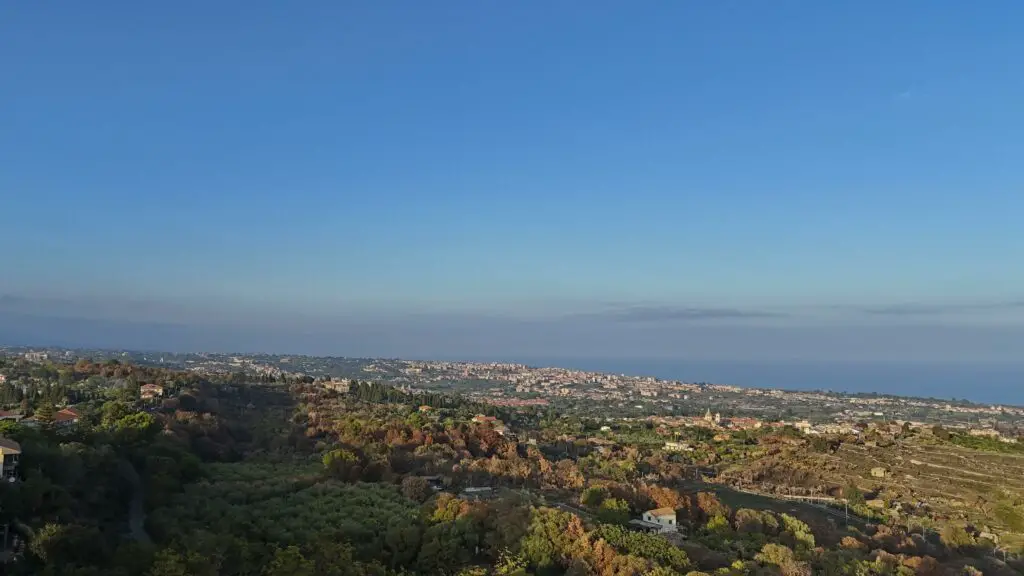
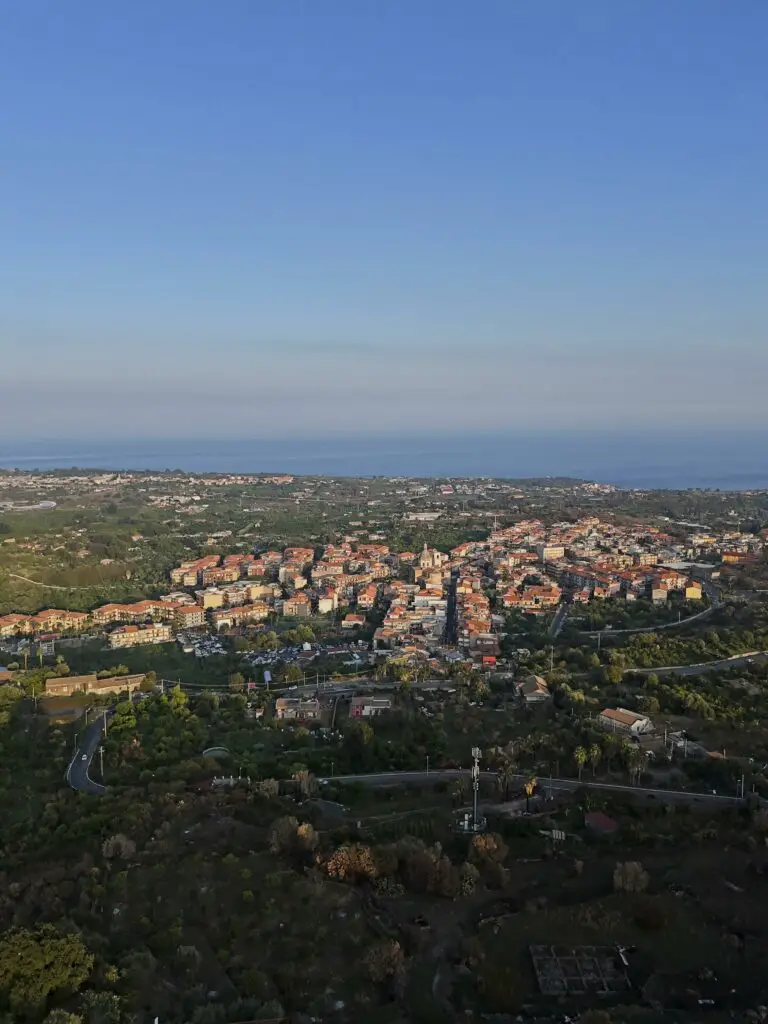
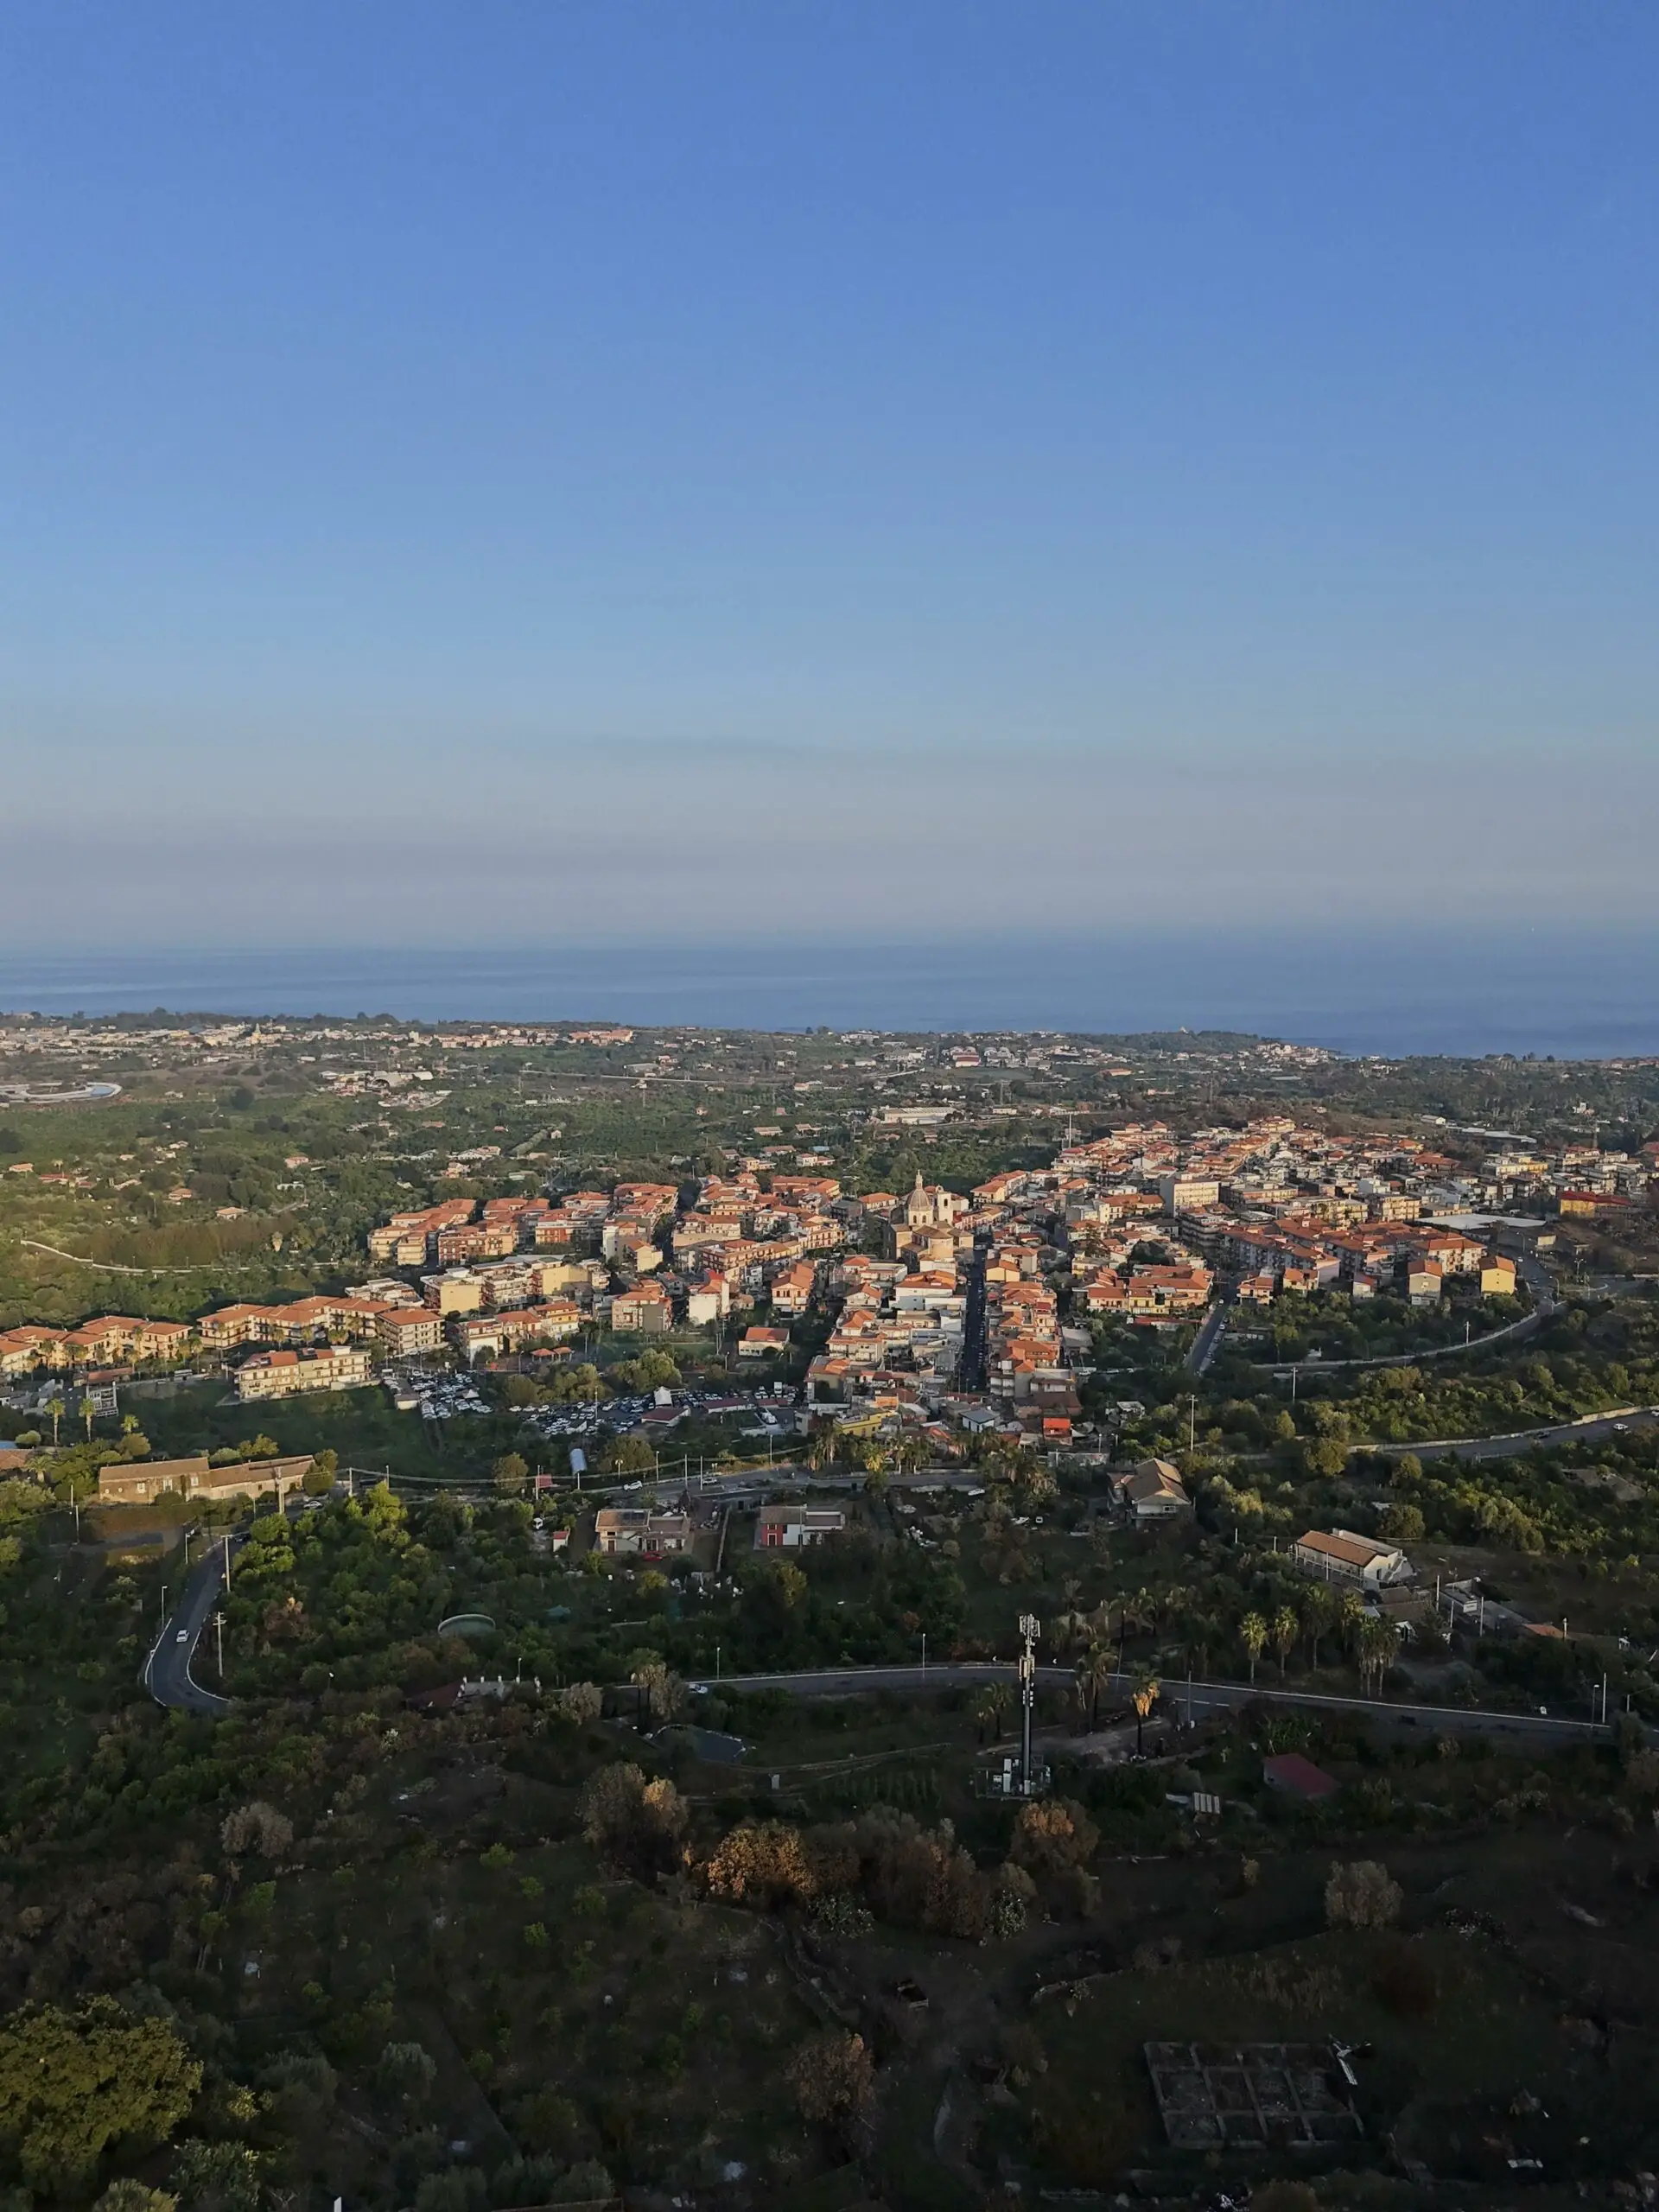
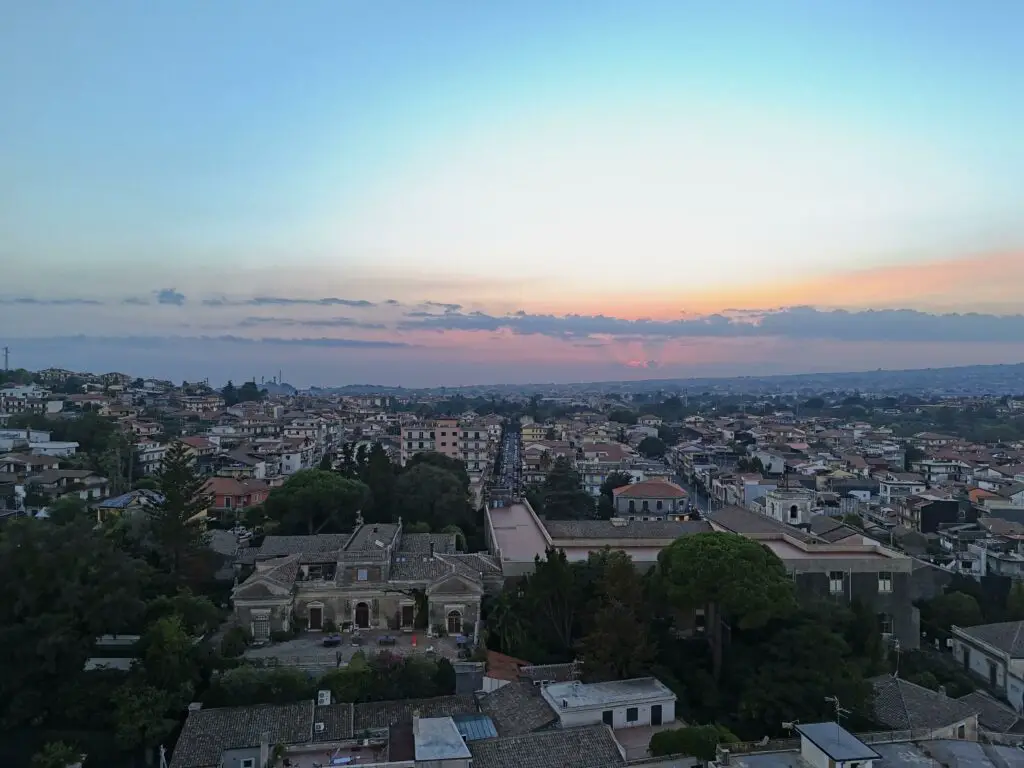
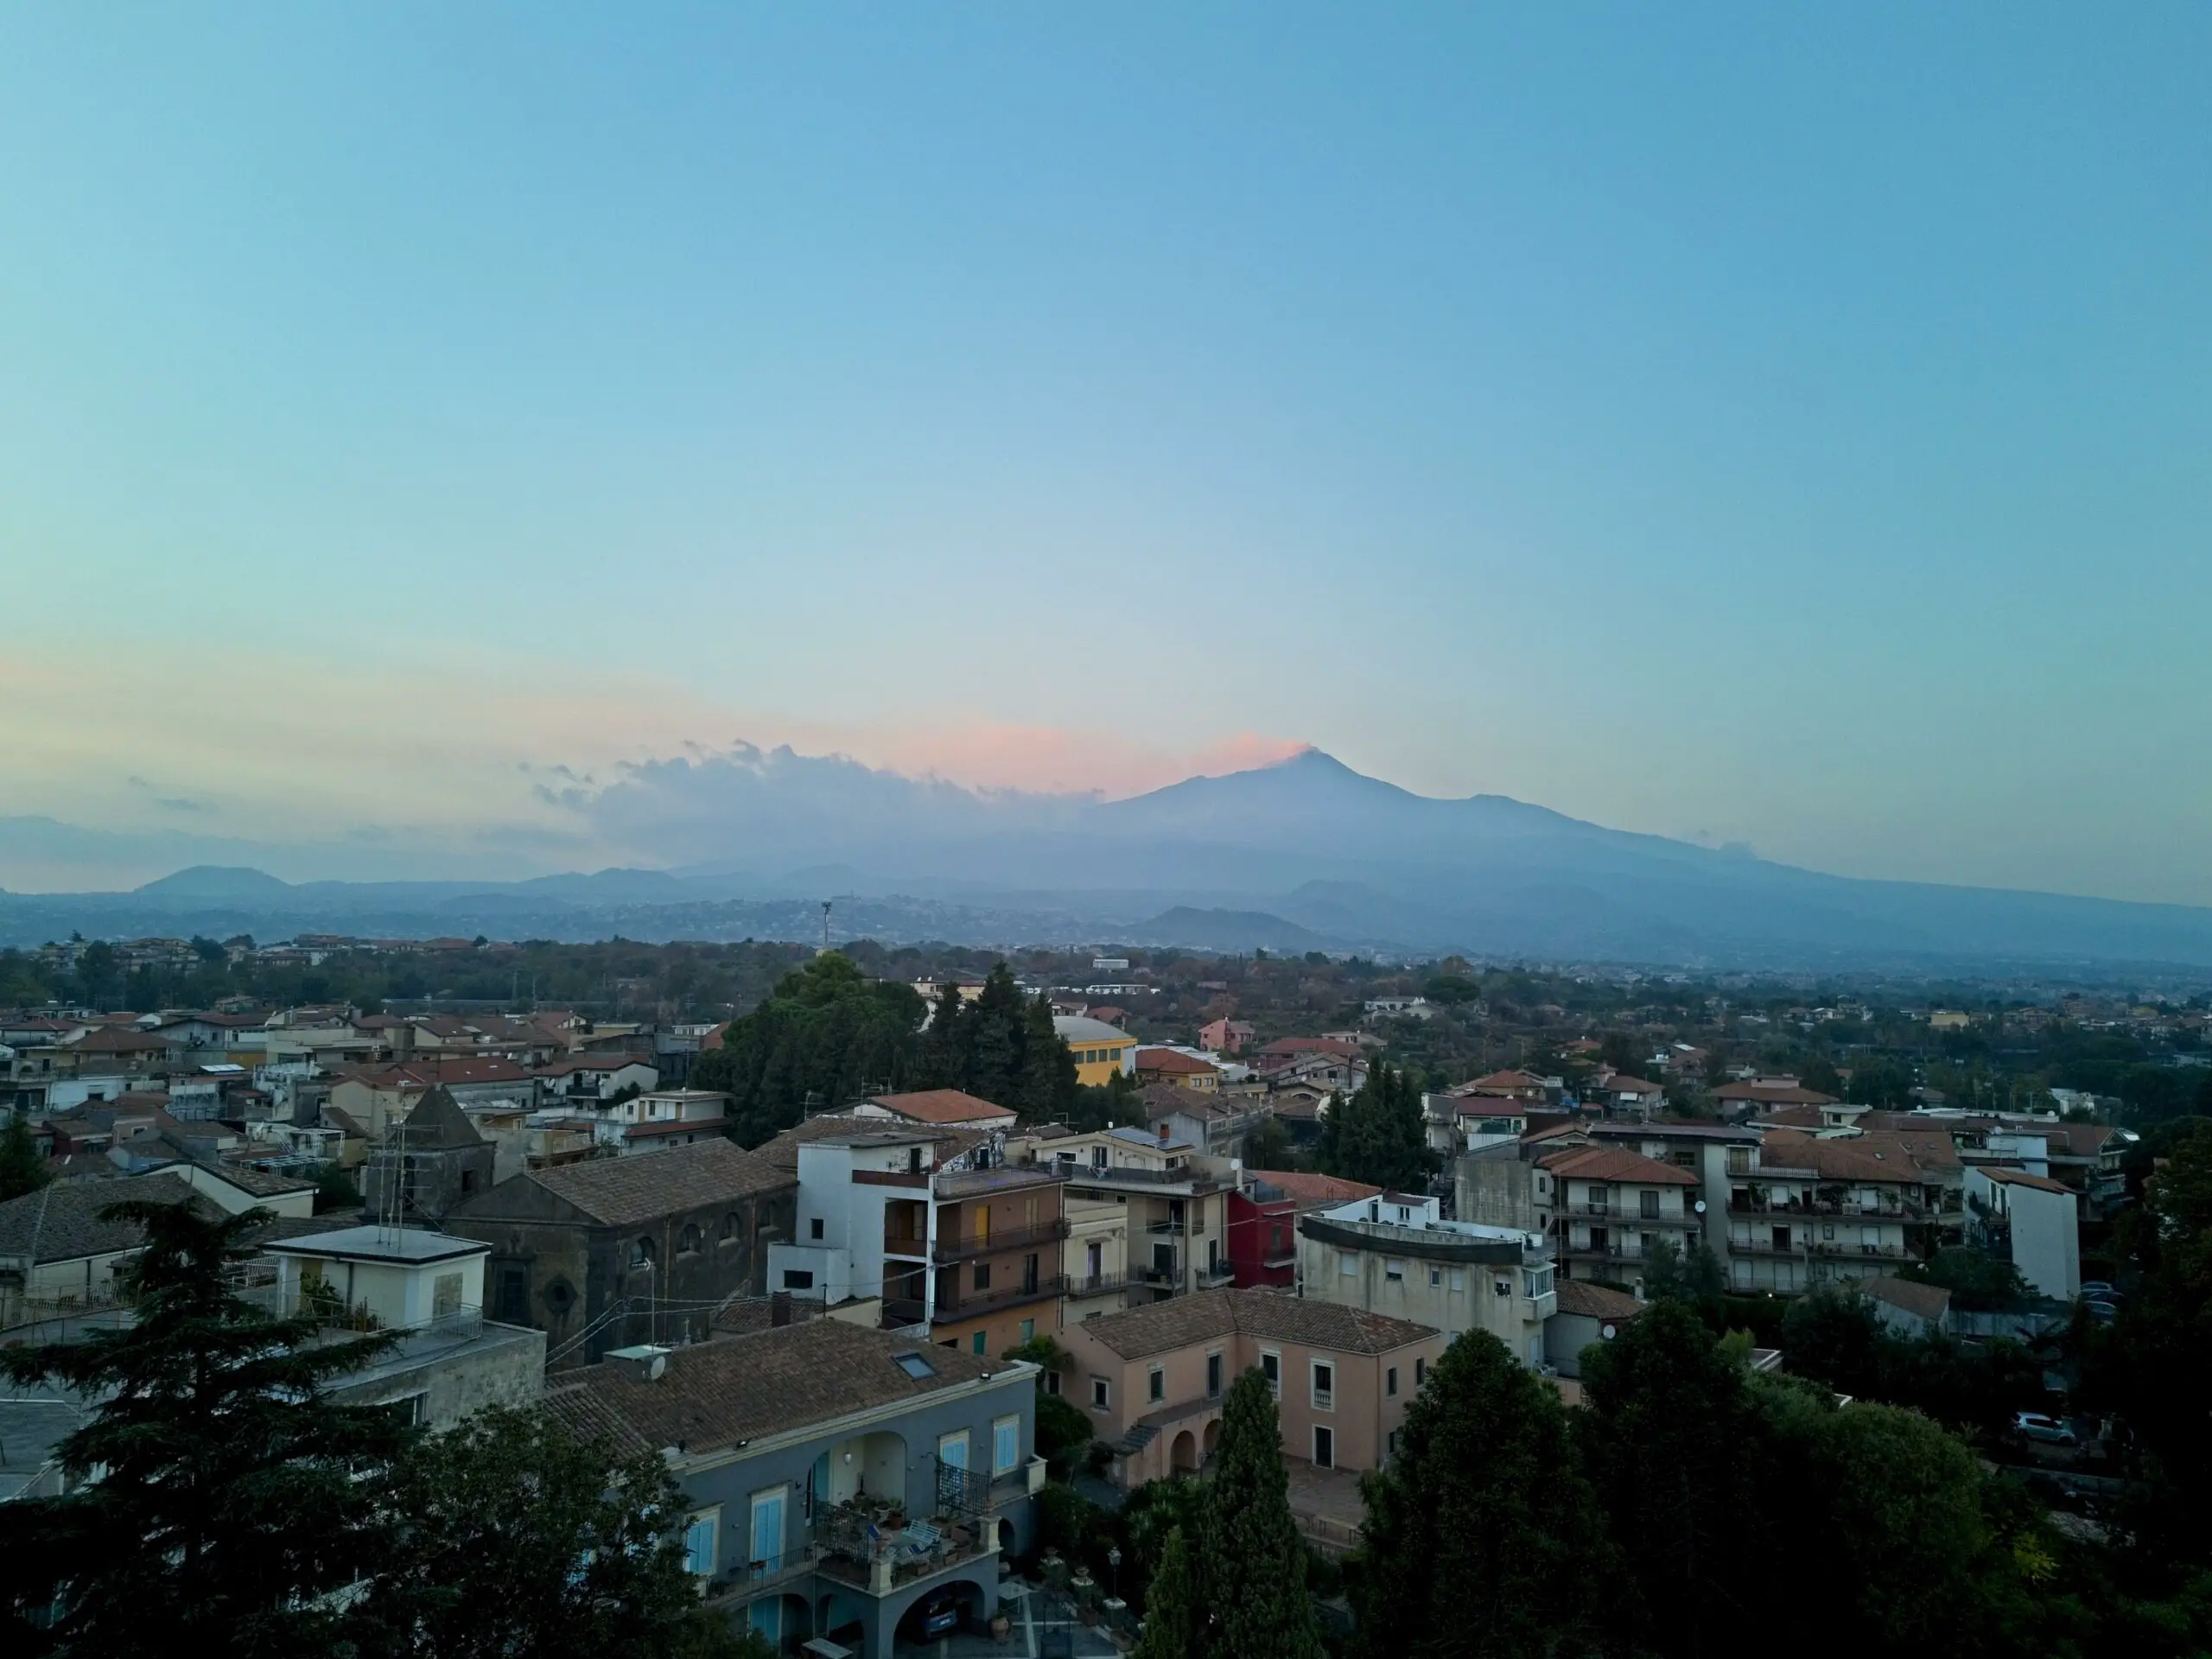
Daylight Conditions
In easy light conditions, the JPEG photos are a thing of beauty, with rich and well-balanced colors and a remarkable amount of detail, which was a weak point of the Mini 3 Pro

The still images can be used without any editing with excellent results. Users mostly interested in social media photos will be very, very happy
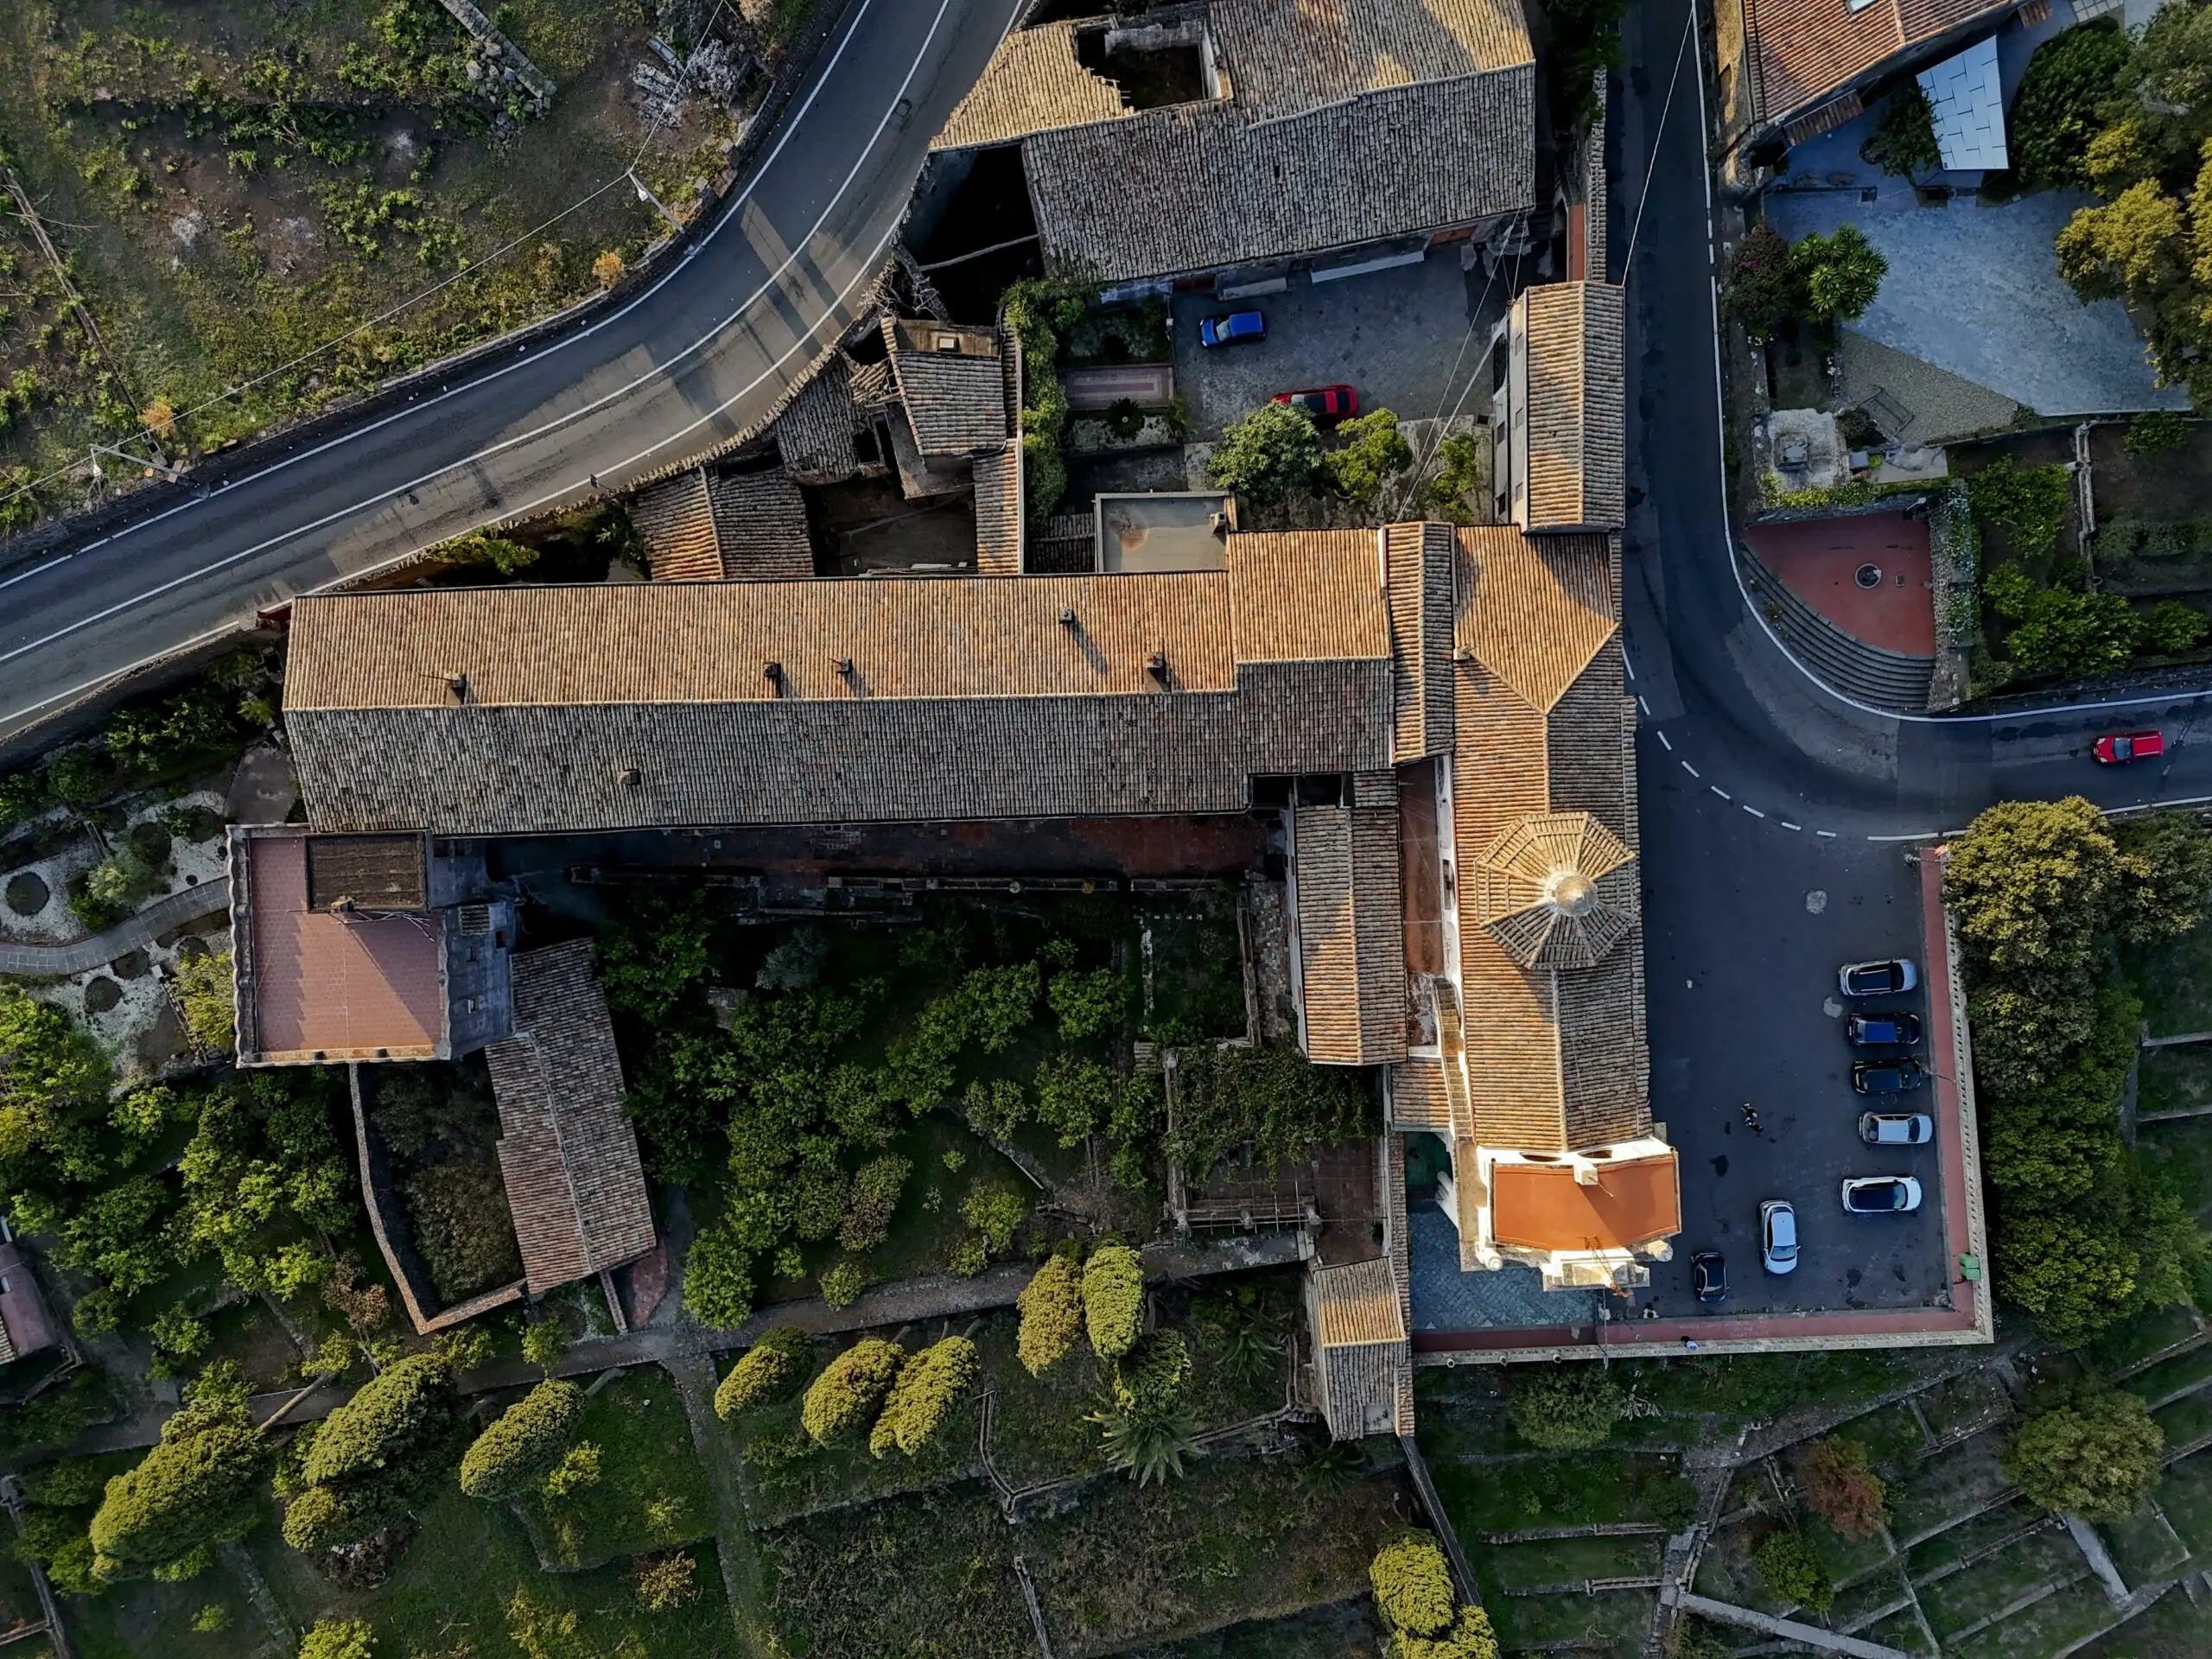
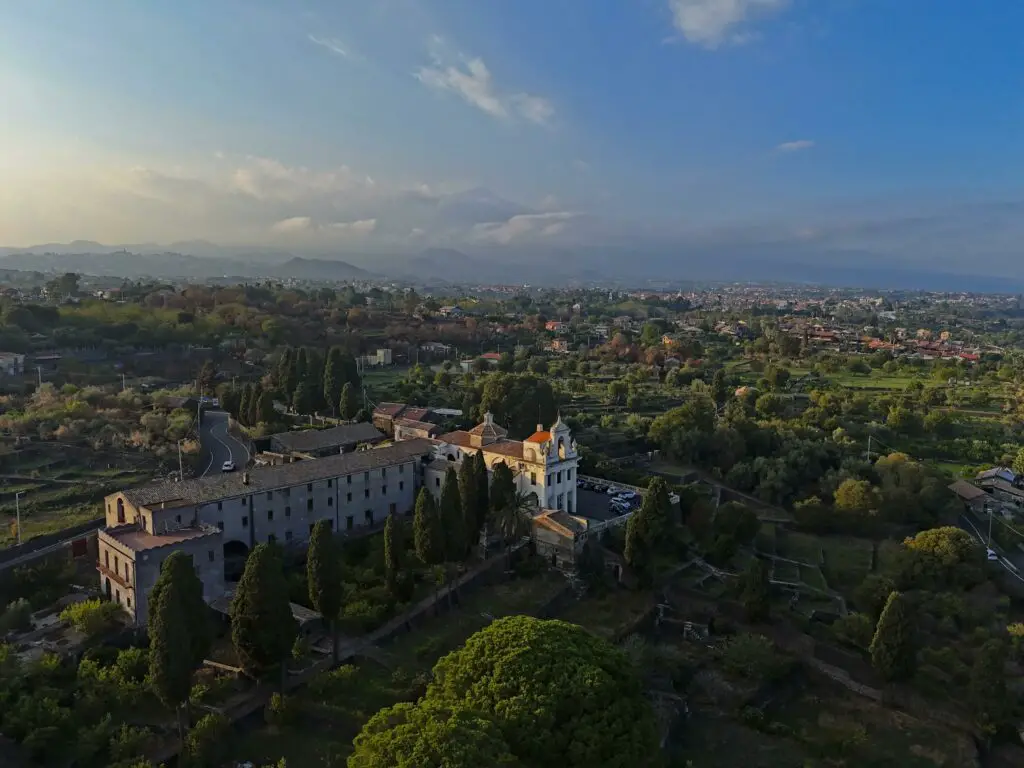
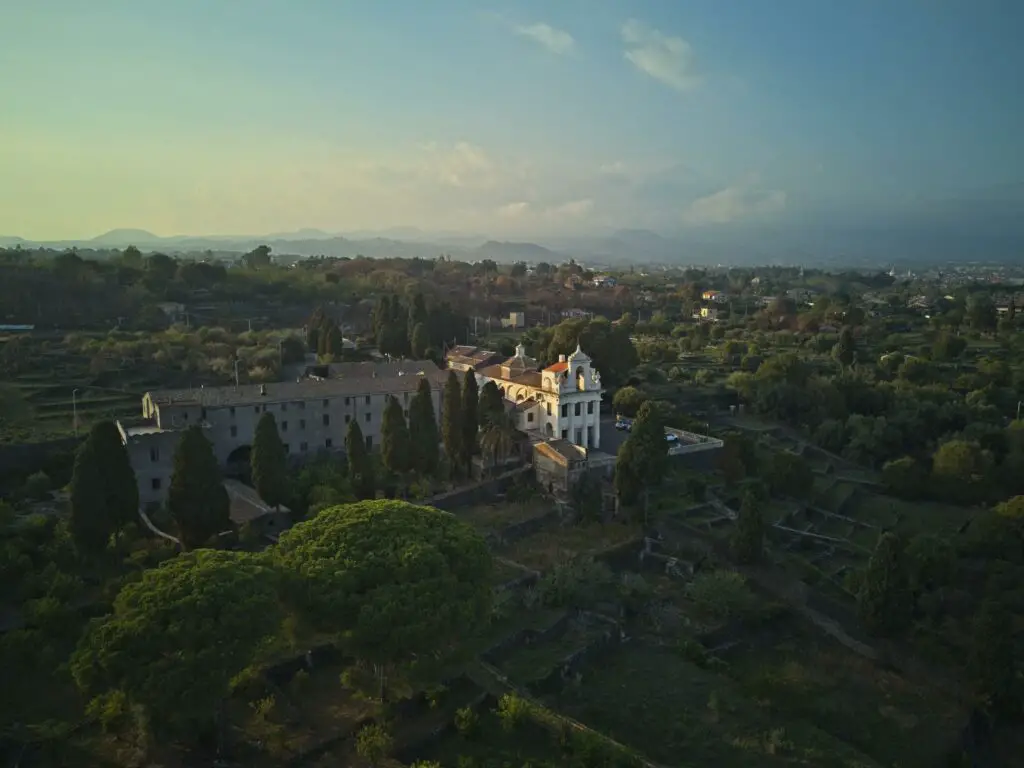
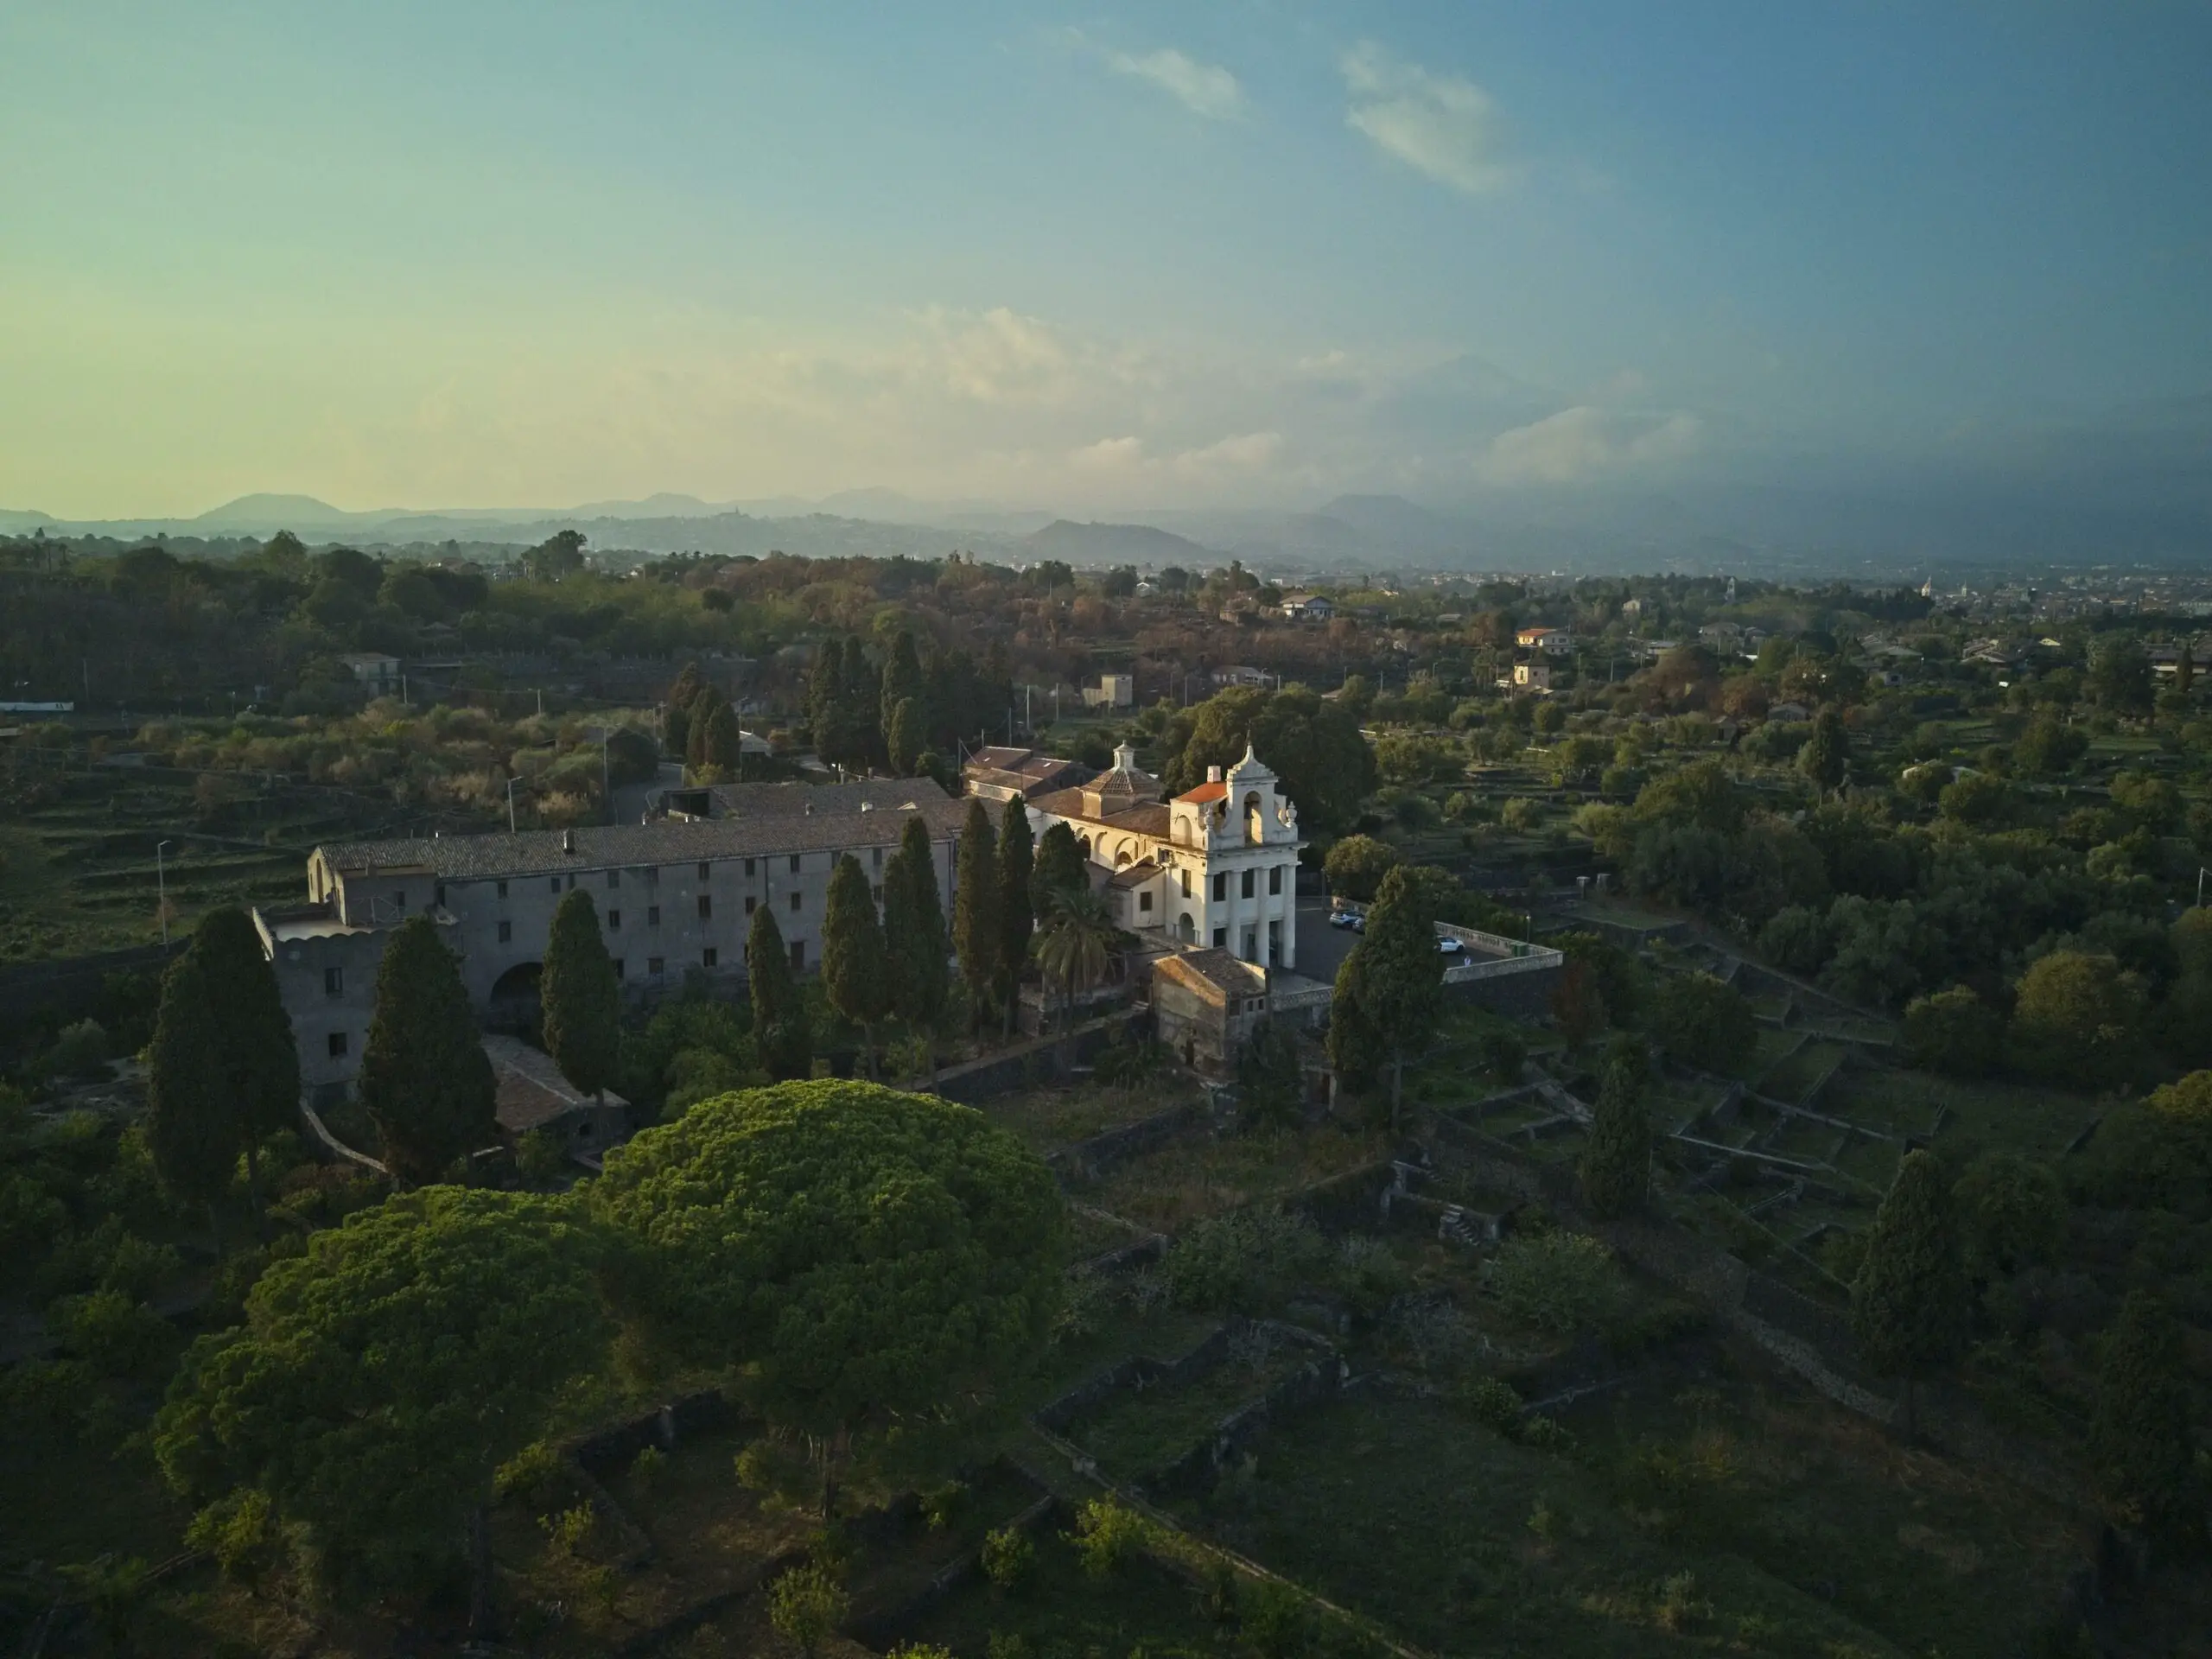
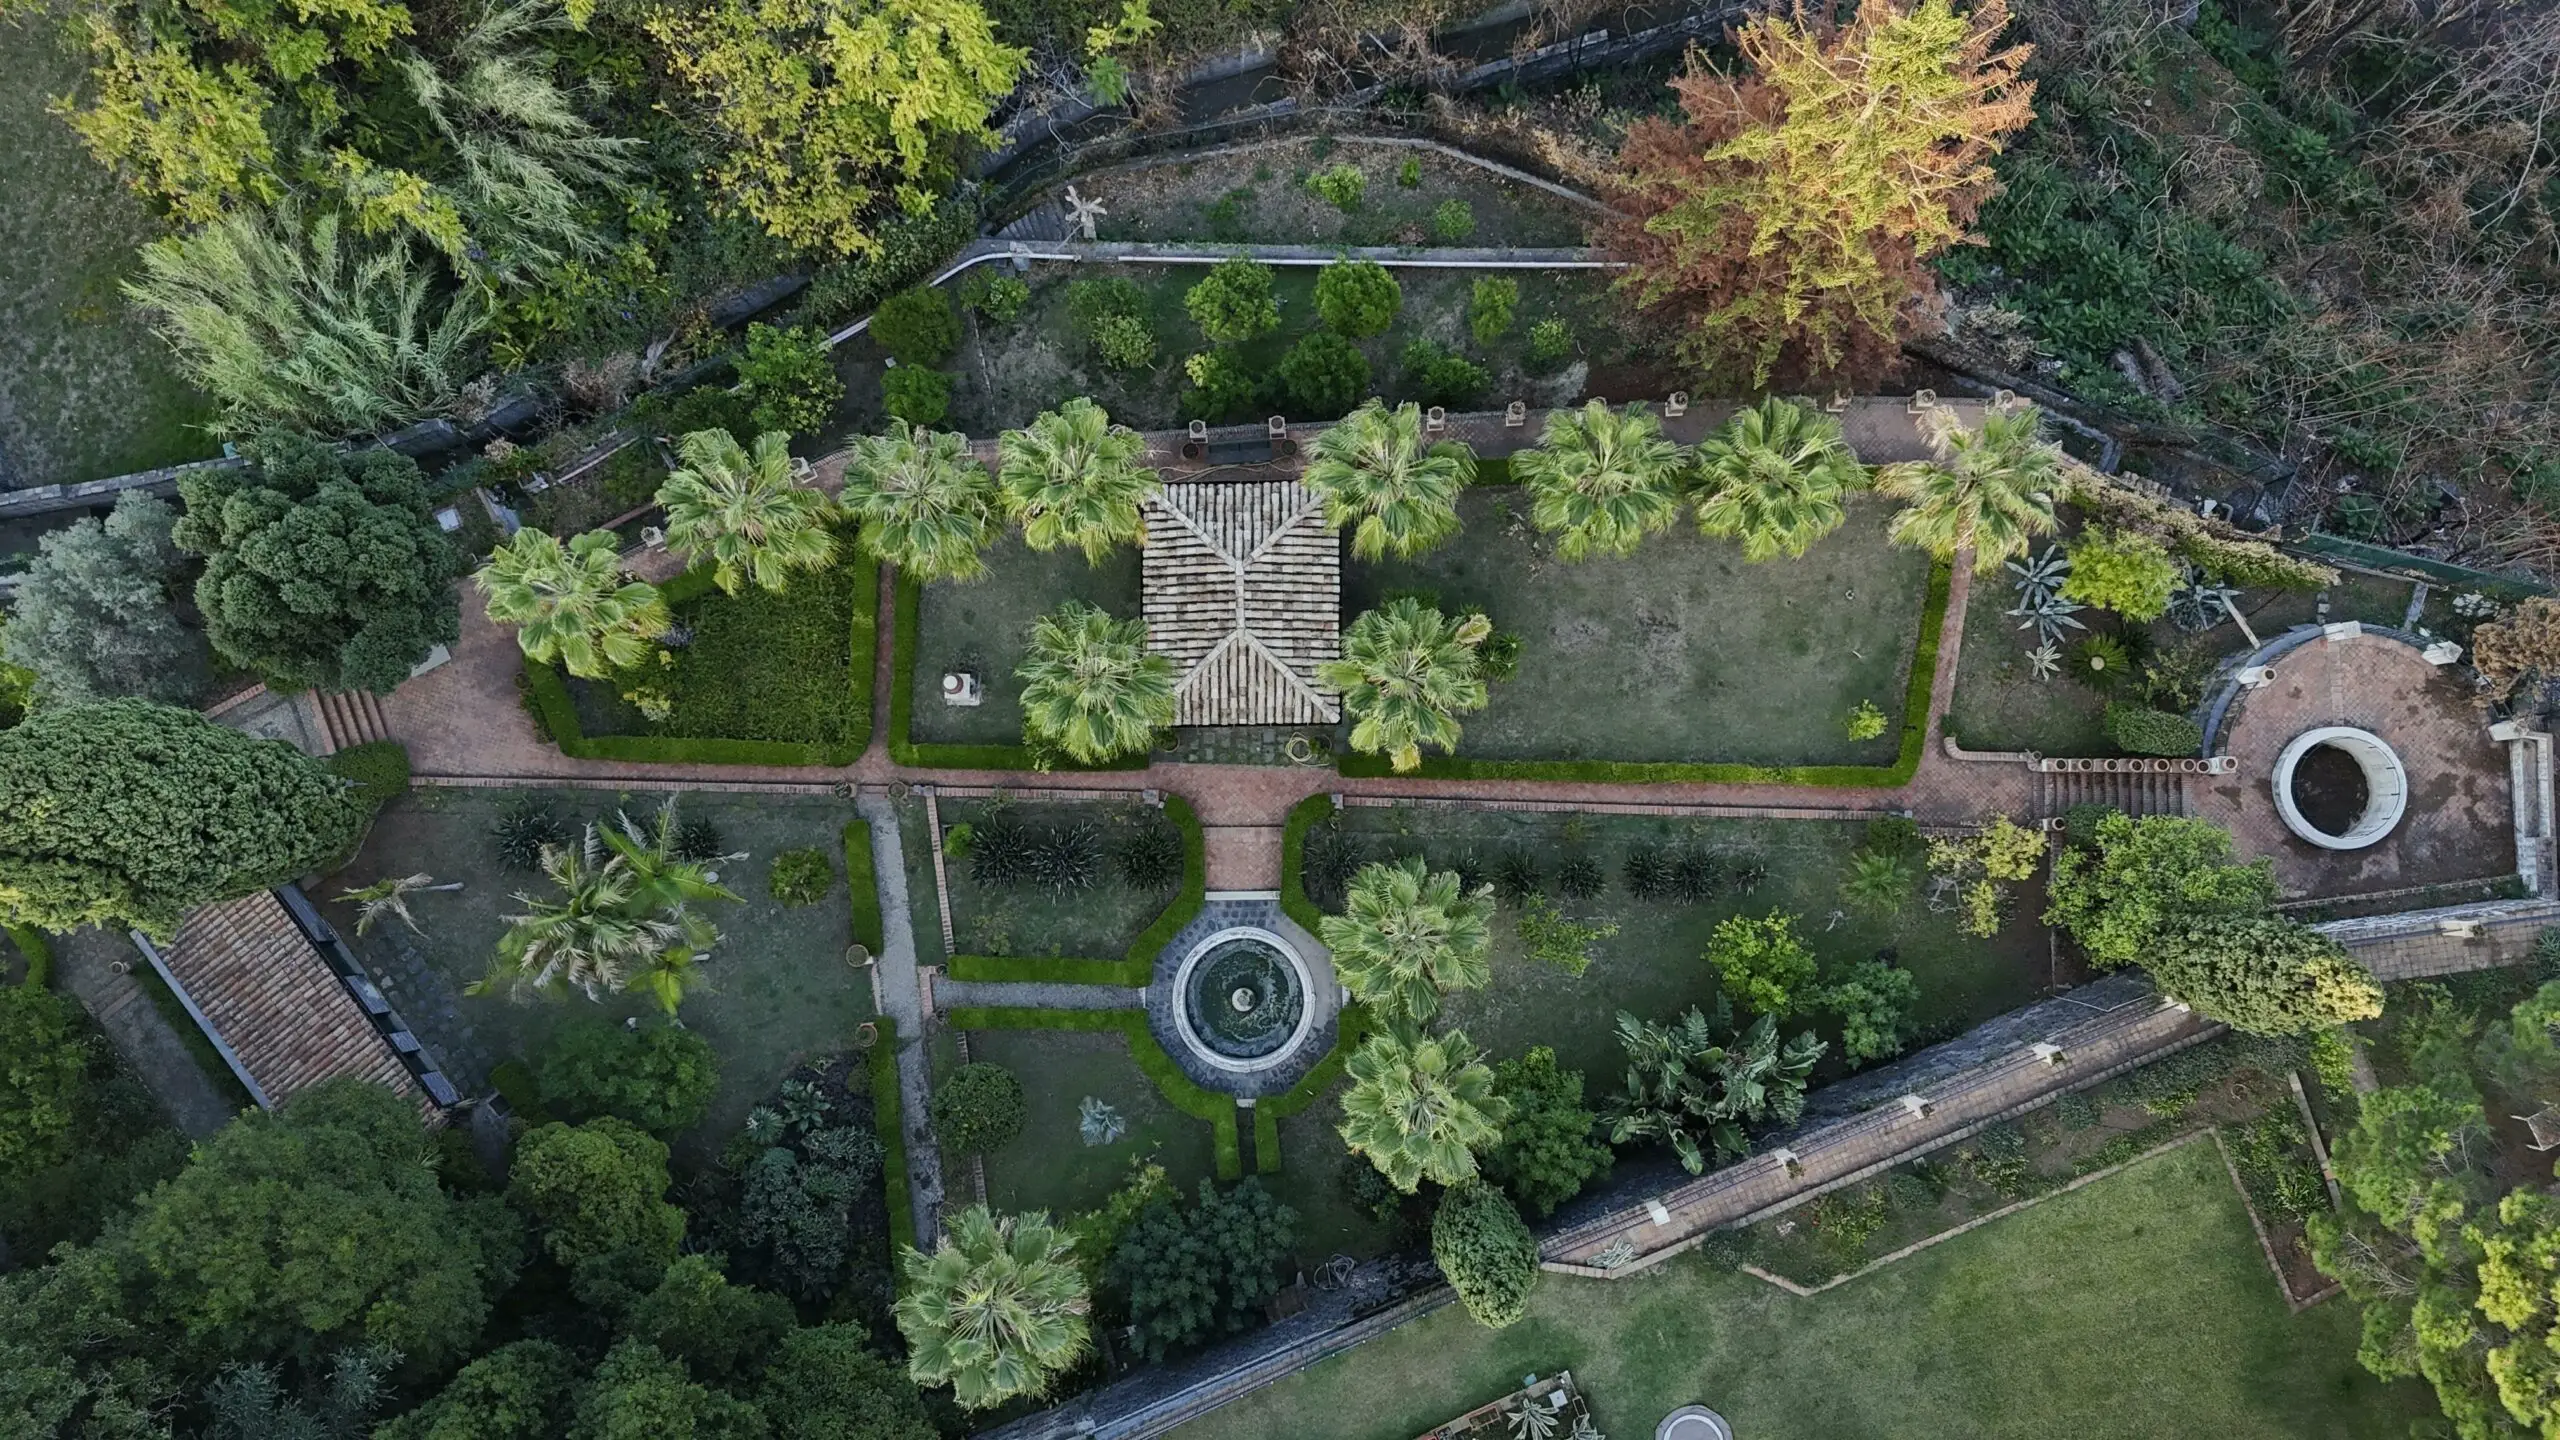
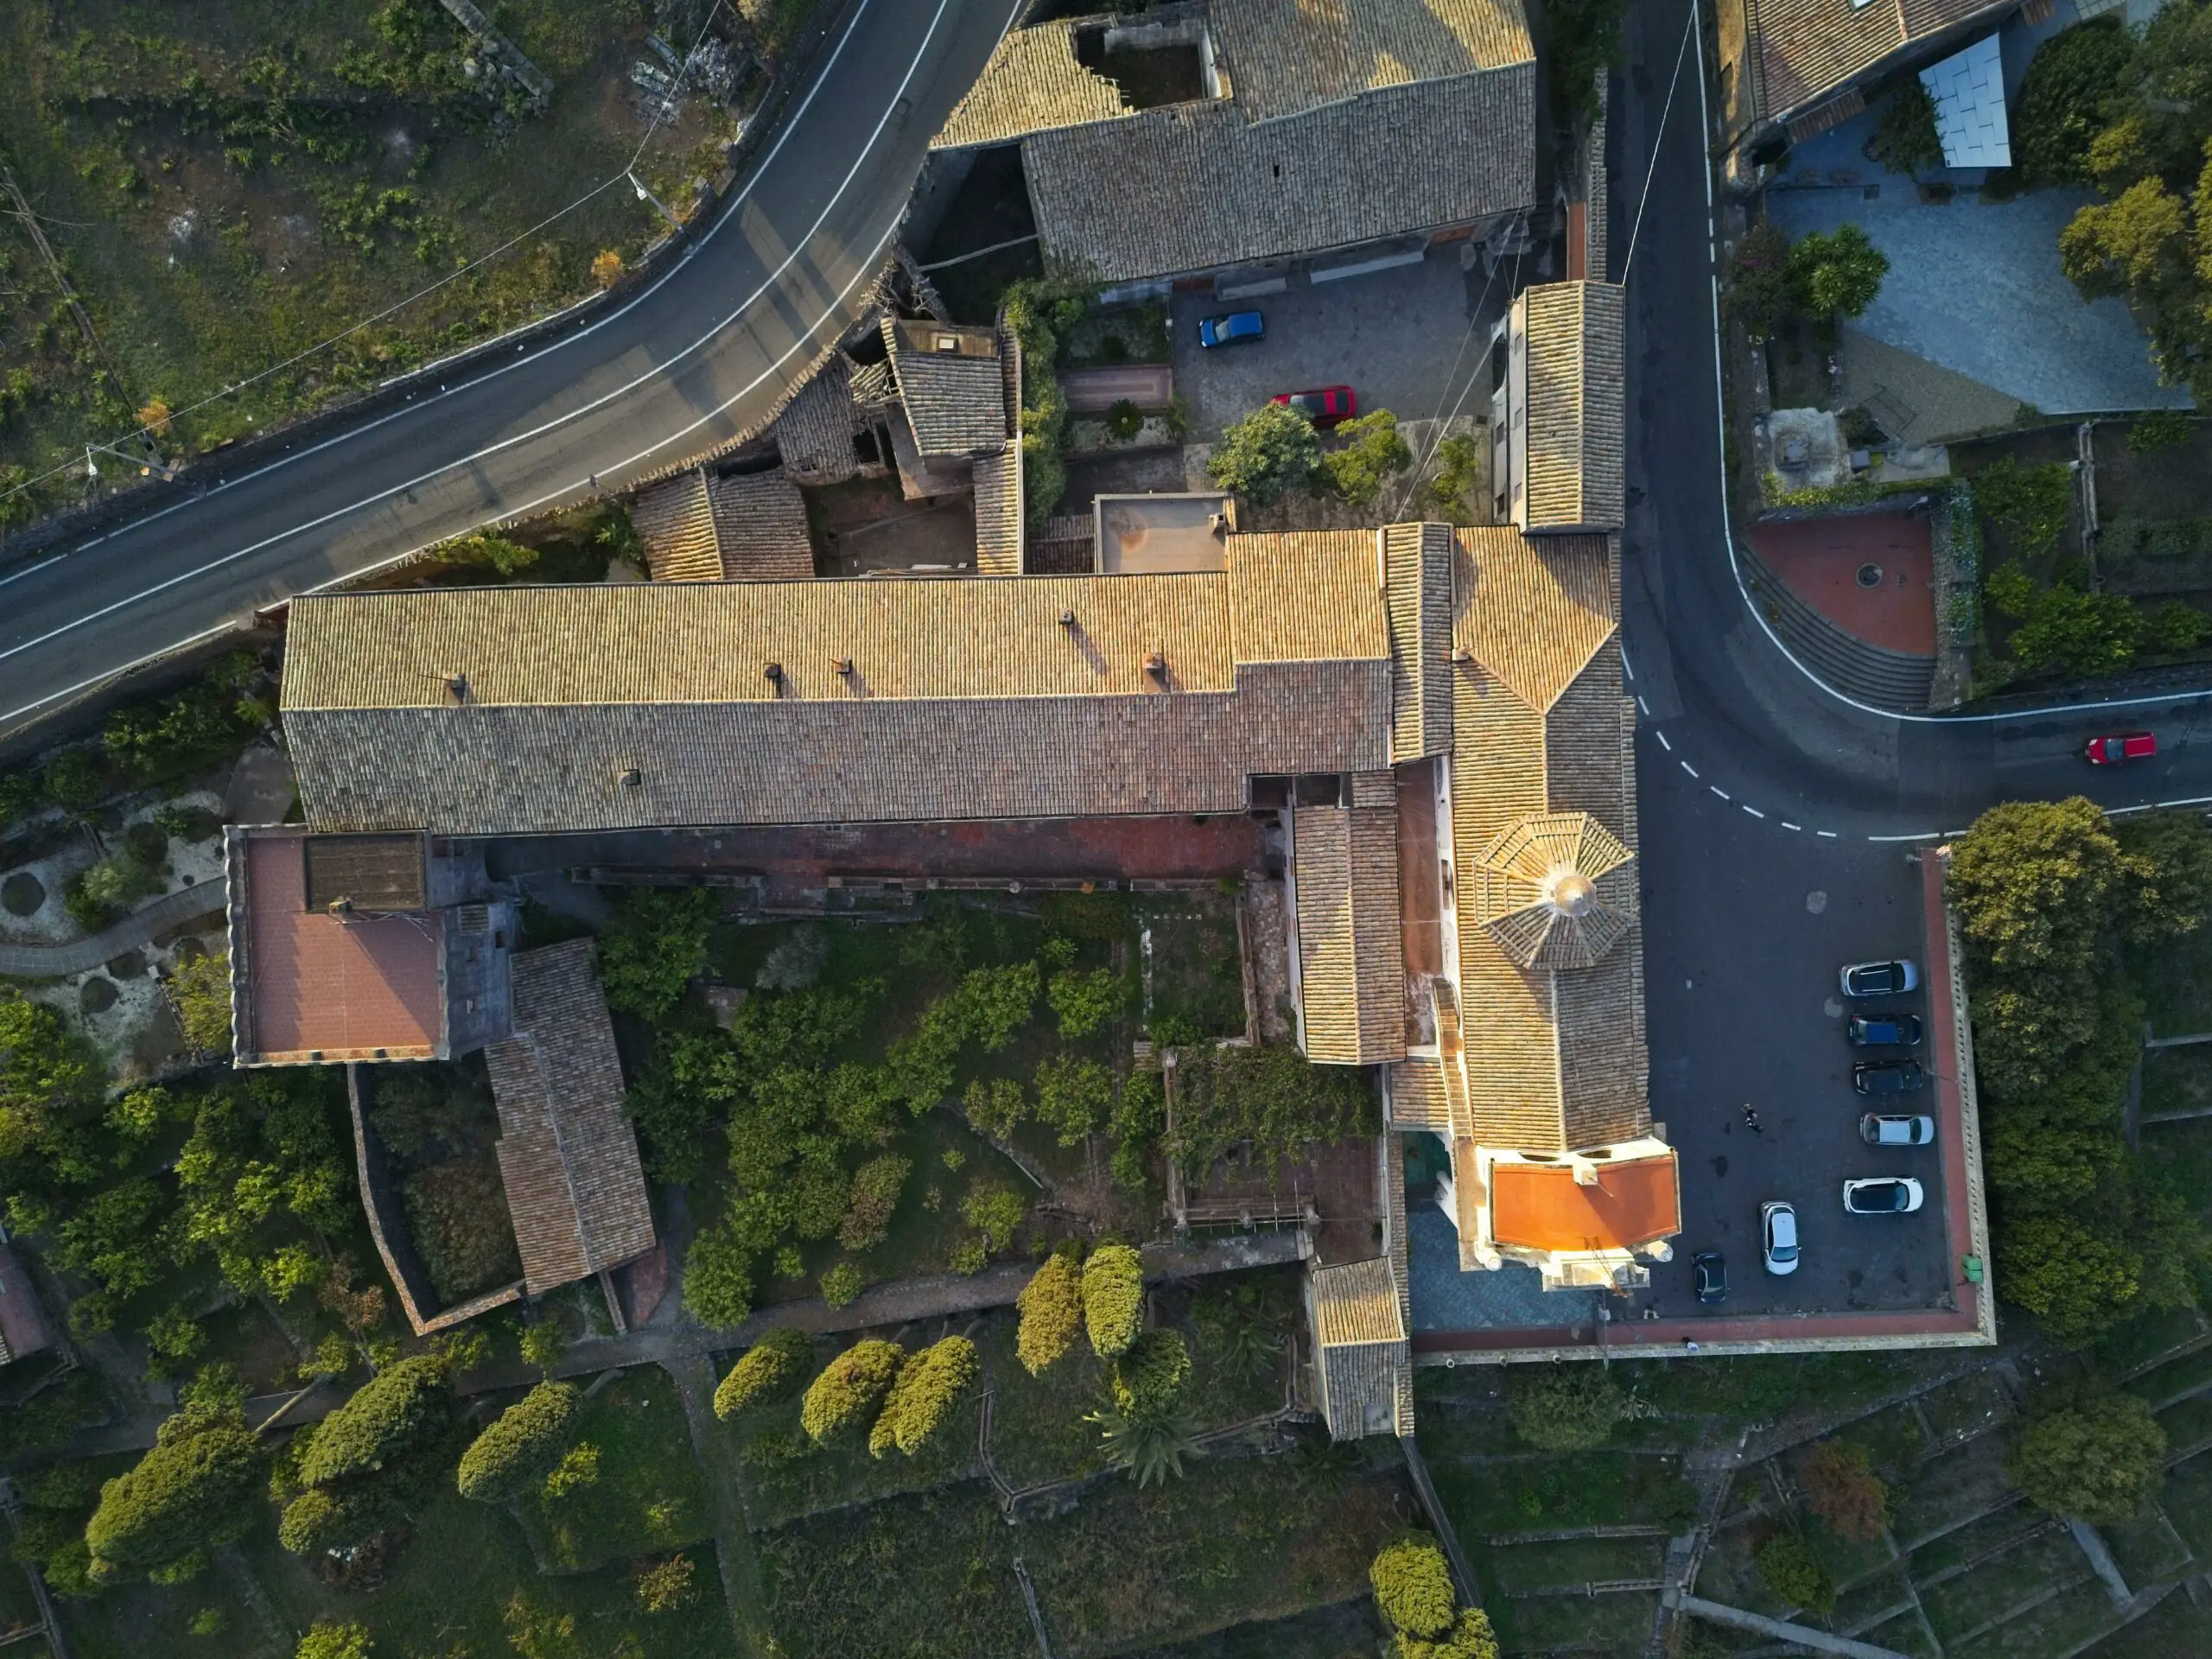
Top-Down Photos
By turning the camera towards the ground for top-down photos, we take the sky out of the equation to focus on detail and colors

The fine vegetation and the architectural details are rendered very well, a big improvement compared to the Mini 3 Pro
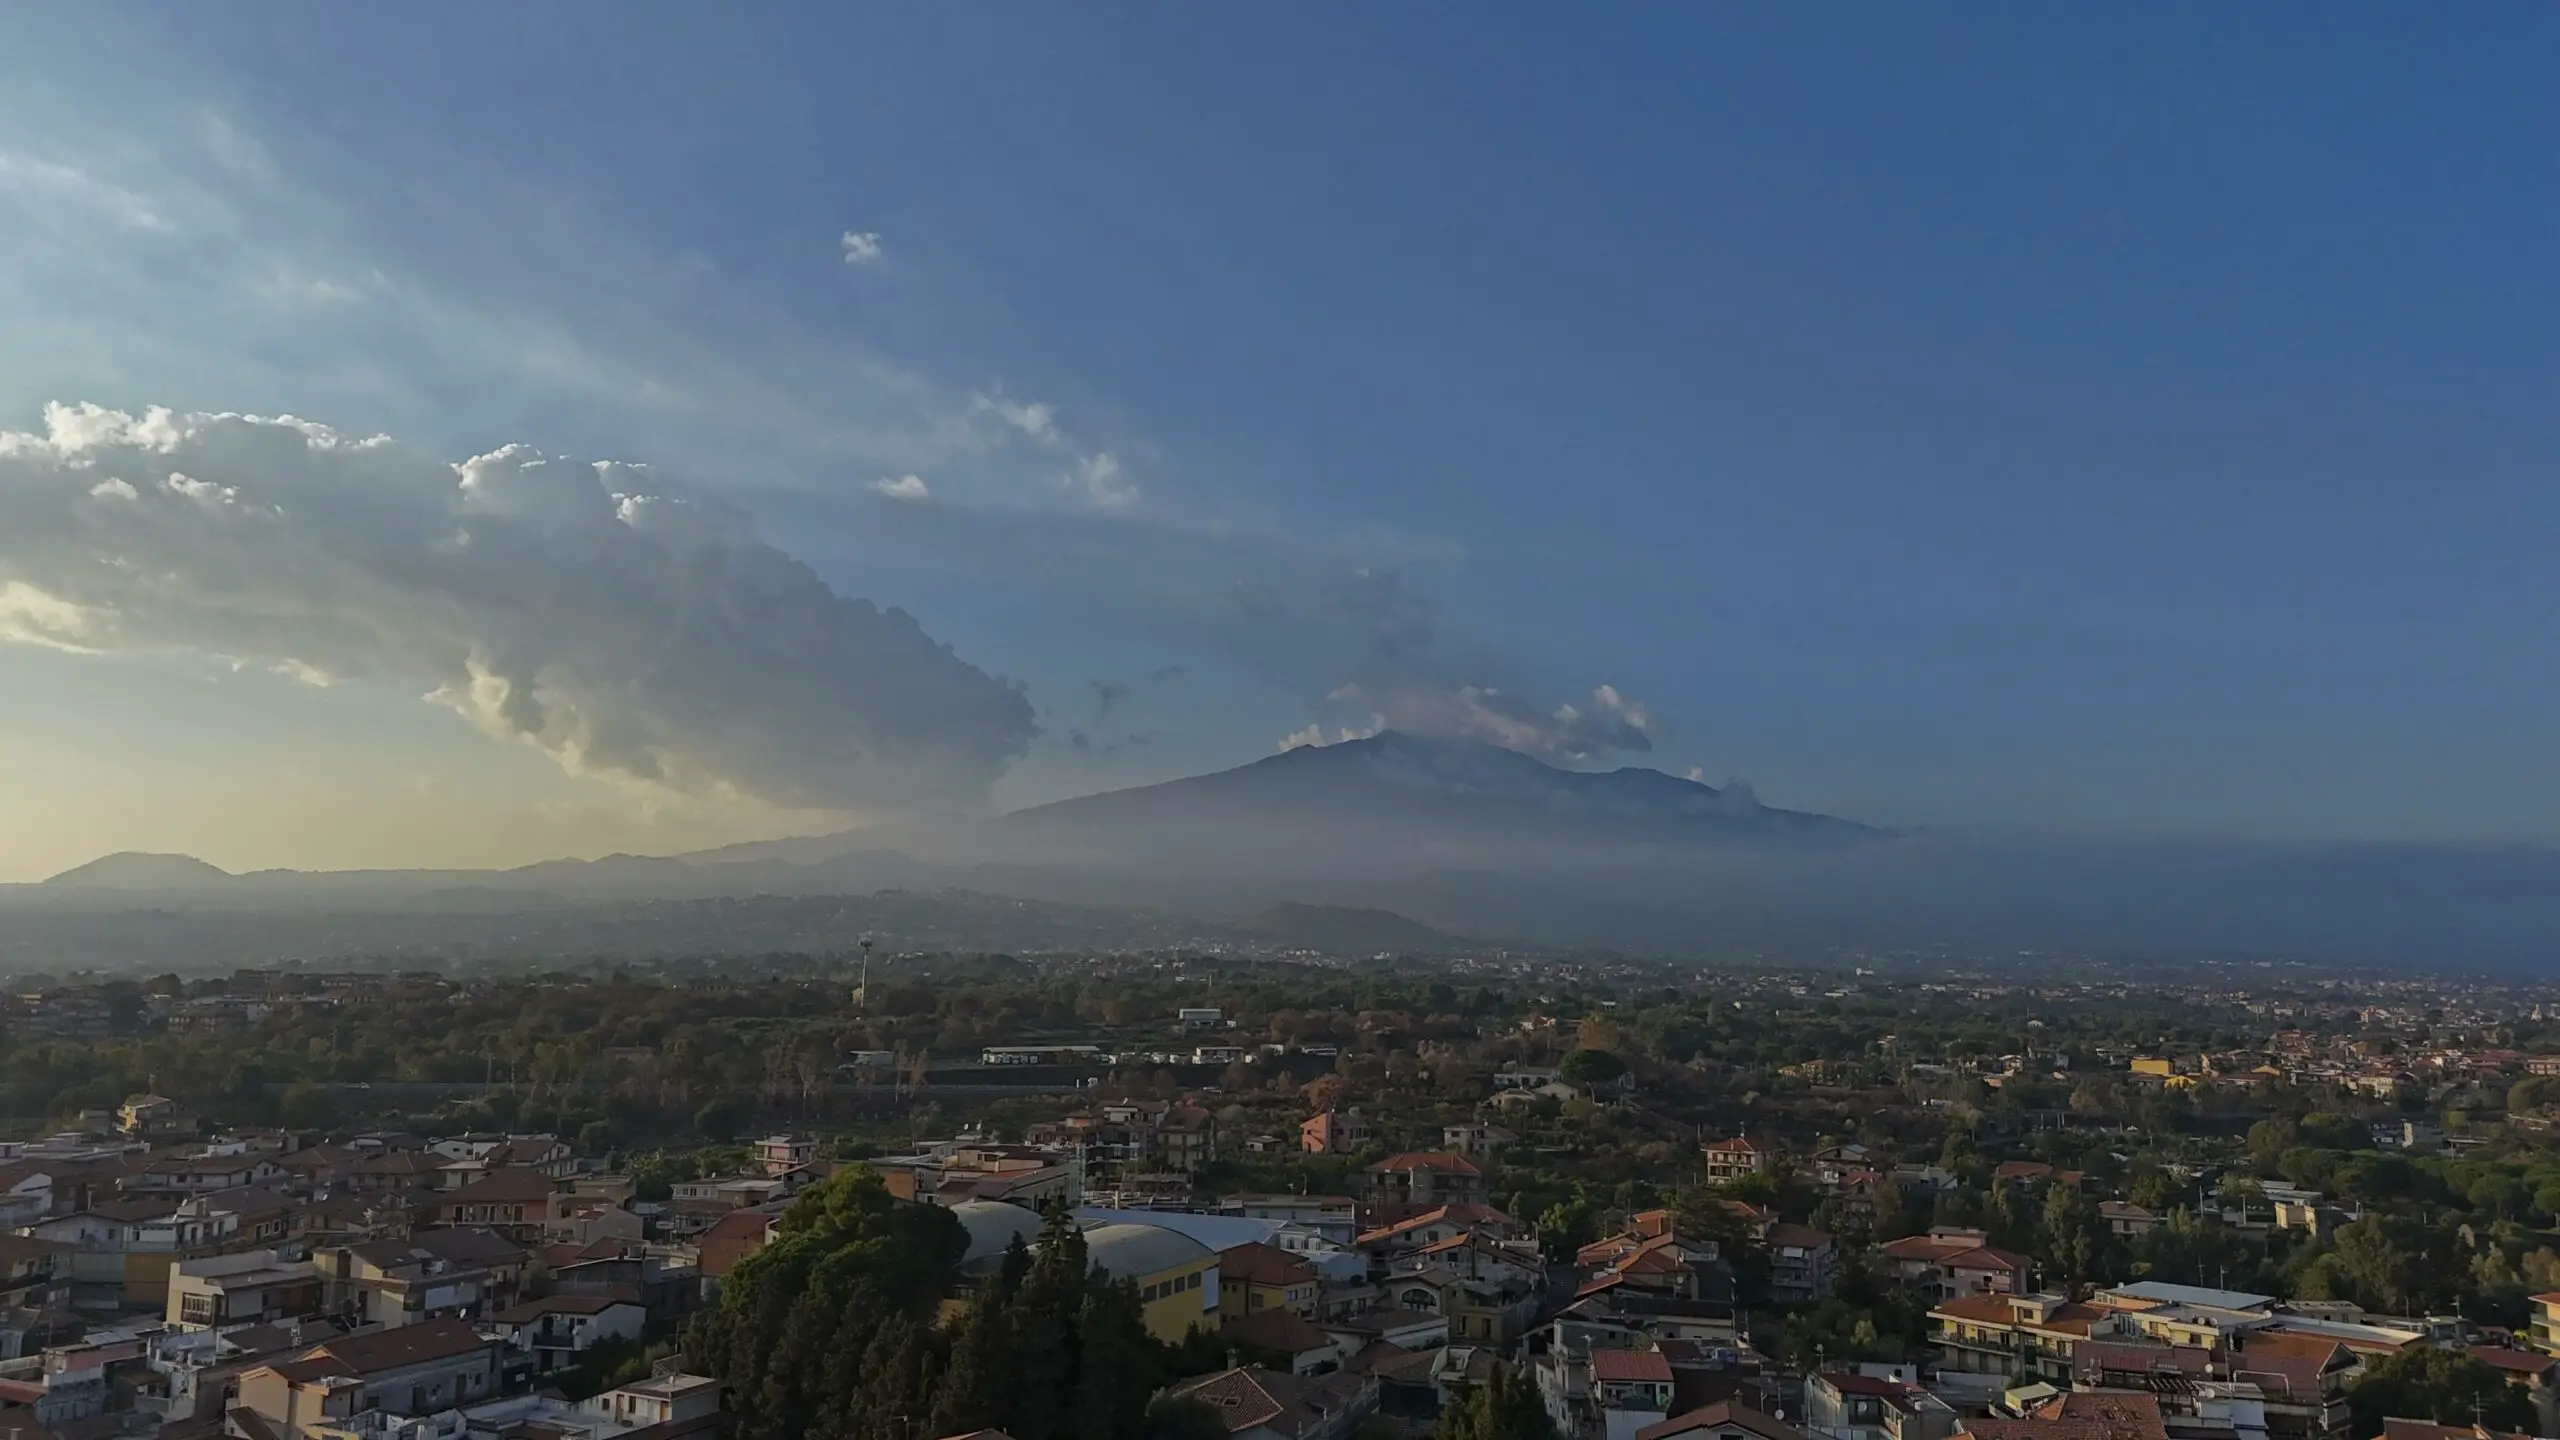
Against the Sun
The most difficult situation in drone photography is the shots in the direction of the sun, due to the extreme dynamic range
Until a few years ago with drones, I would never take photos or video with the camera facing South, to avoid disasters

The technology has improved incredibly fast. The quality of the lens in the whole DJI prosumer line is excellent: even in images with the sun in the frame, there are no nasty flares, loss of detail and saturation, or chromatic aberrations
With the sun just outside the frame, the relatively small sensor of the Mini 4 manages to maintain a decent amount of info in the shadows while keeping the highlights under control
The performance is good, but this is an area where the Mini 4 and the Air 3 cannot compete with the much bigger sensor of the flagship model, the Mavic 3
A few of the features that were reserved for the top model, like omnidirectional obstacle avoidance and Waypoints mode, have now trickled down to the more affordable models, but professional photo and video quality remains the domain of the Mavic 3, as it is for the variable aperture
In this department, with the Mini 4 Pro, I expect better results using the RAW files
I have color-graded all the photos shown here with Luminar Neo, the software I use for post-processing photos
This is my article about it
You will find info about Luminar Neo together with a coupon for a 10% discount by entering the code “vicvideopic” using the button below
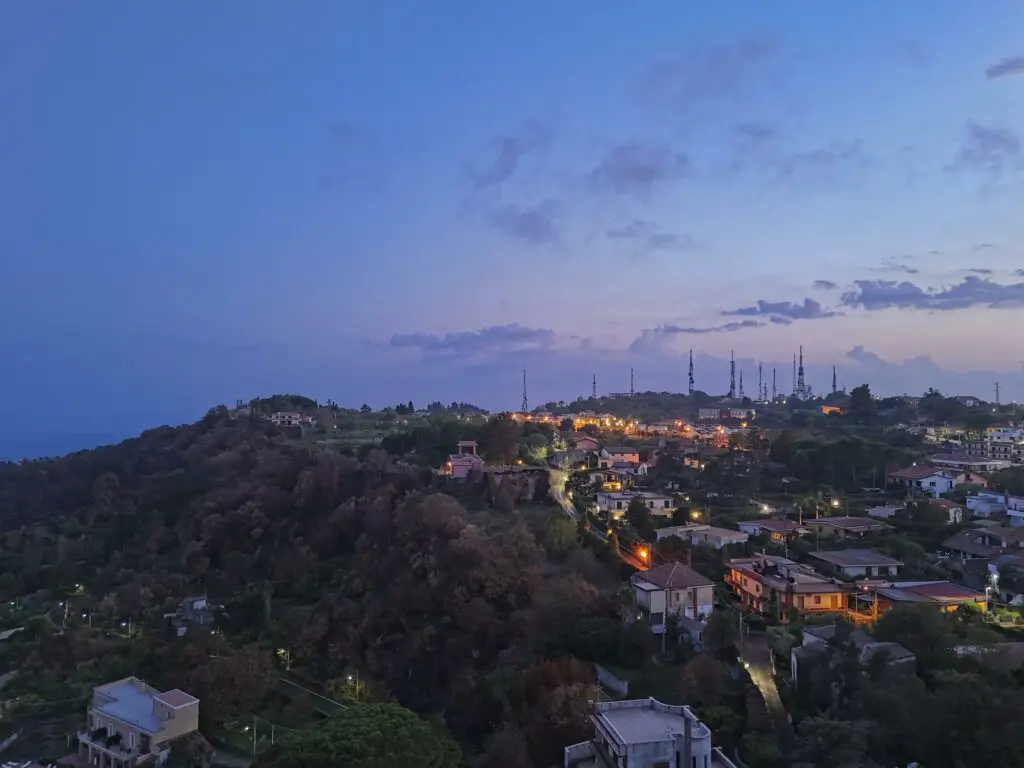
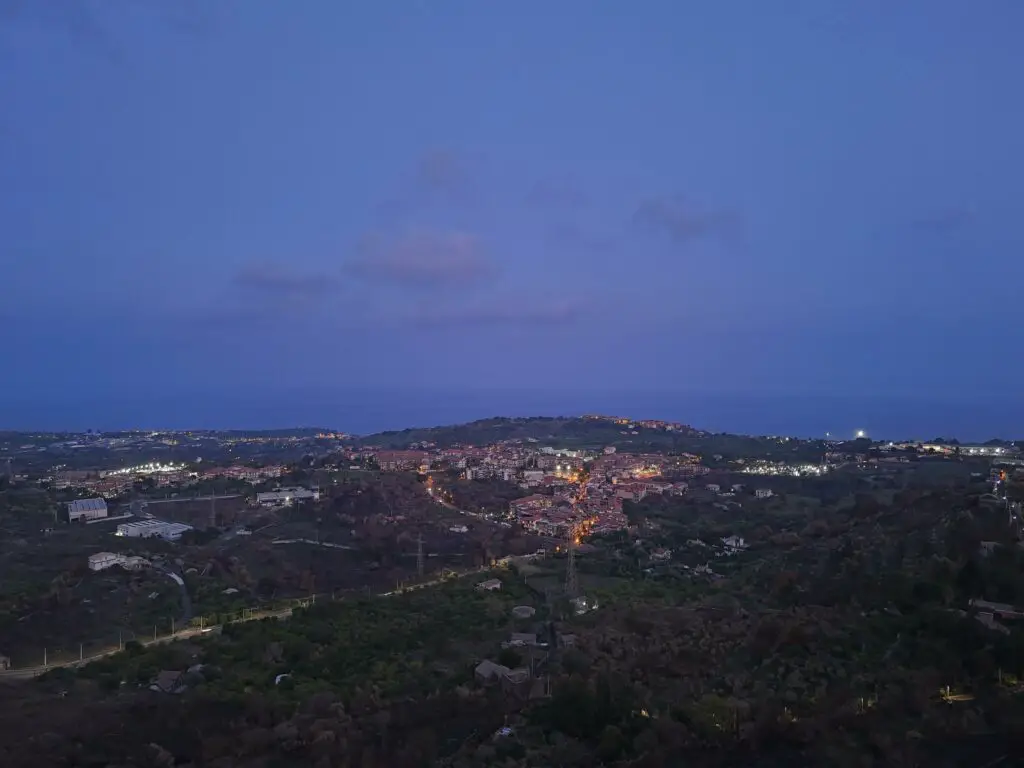
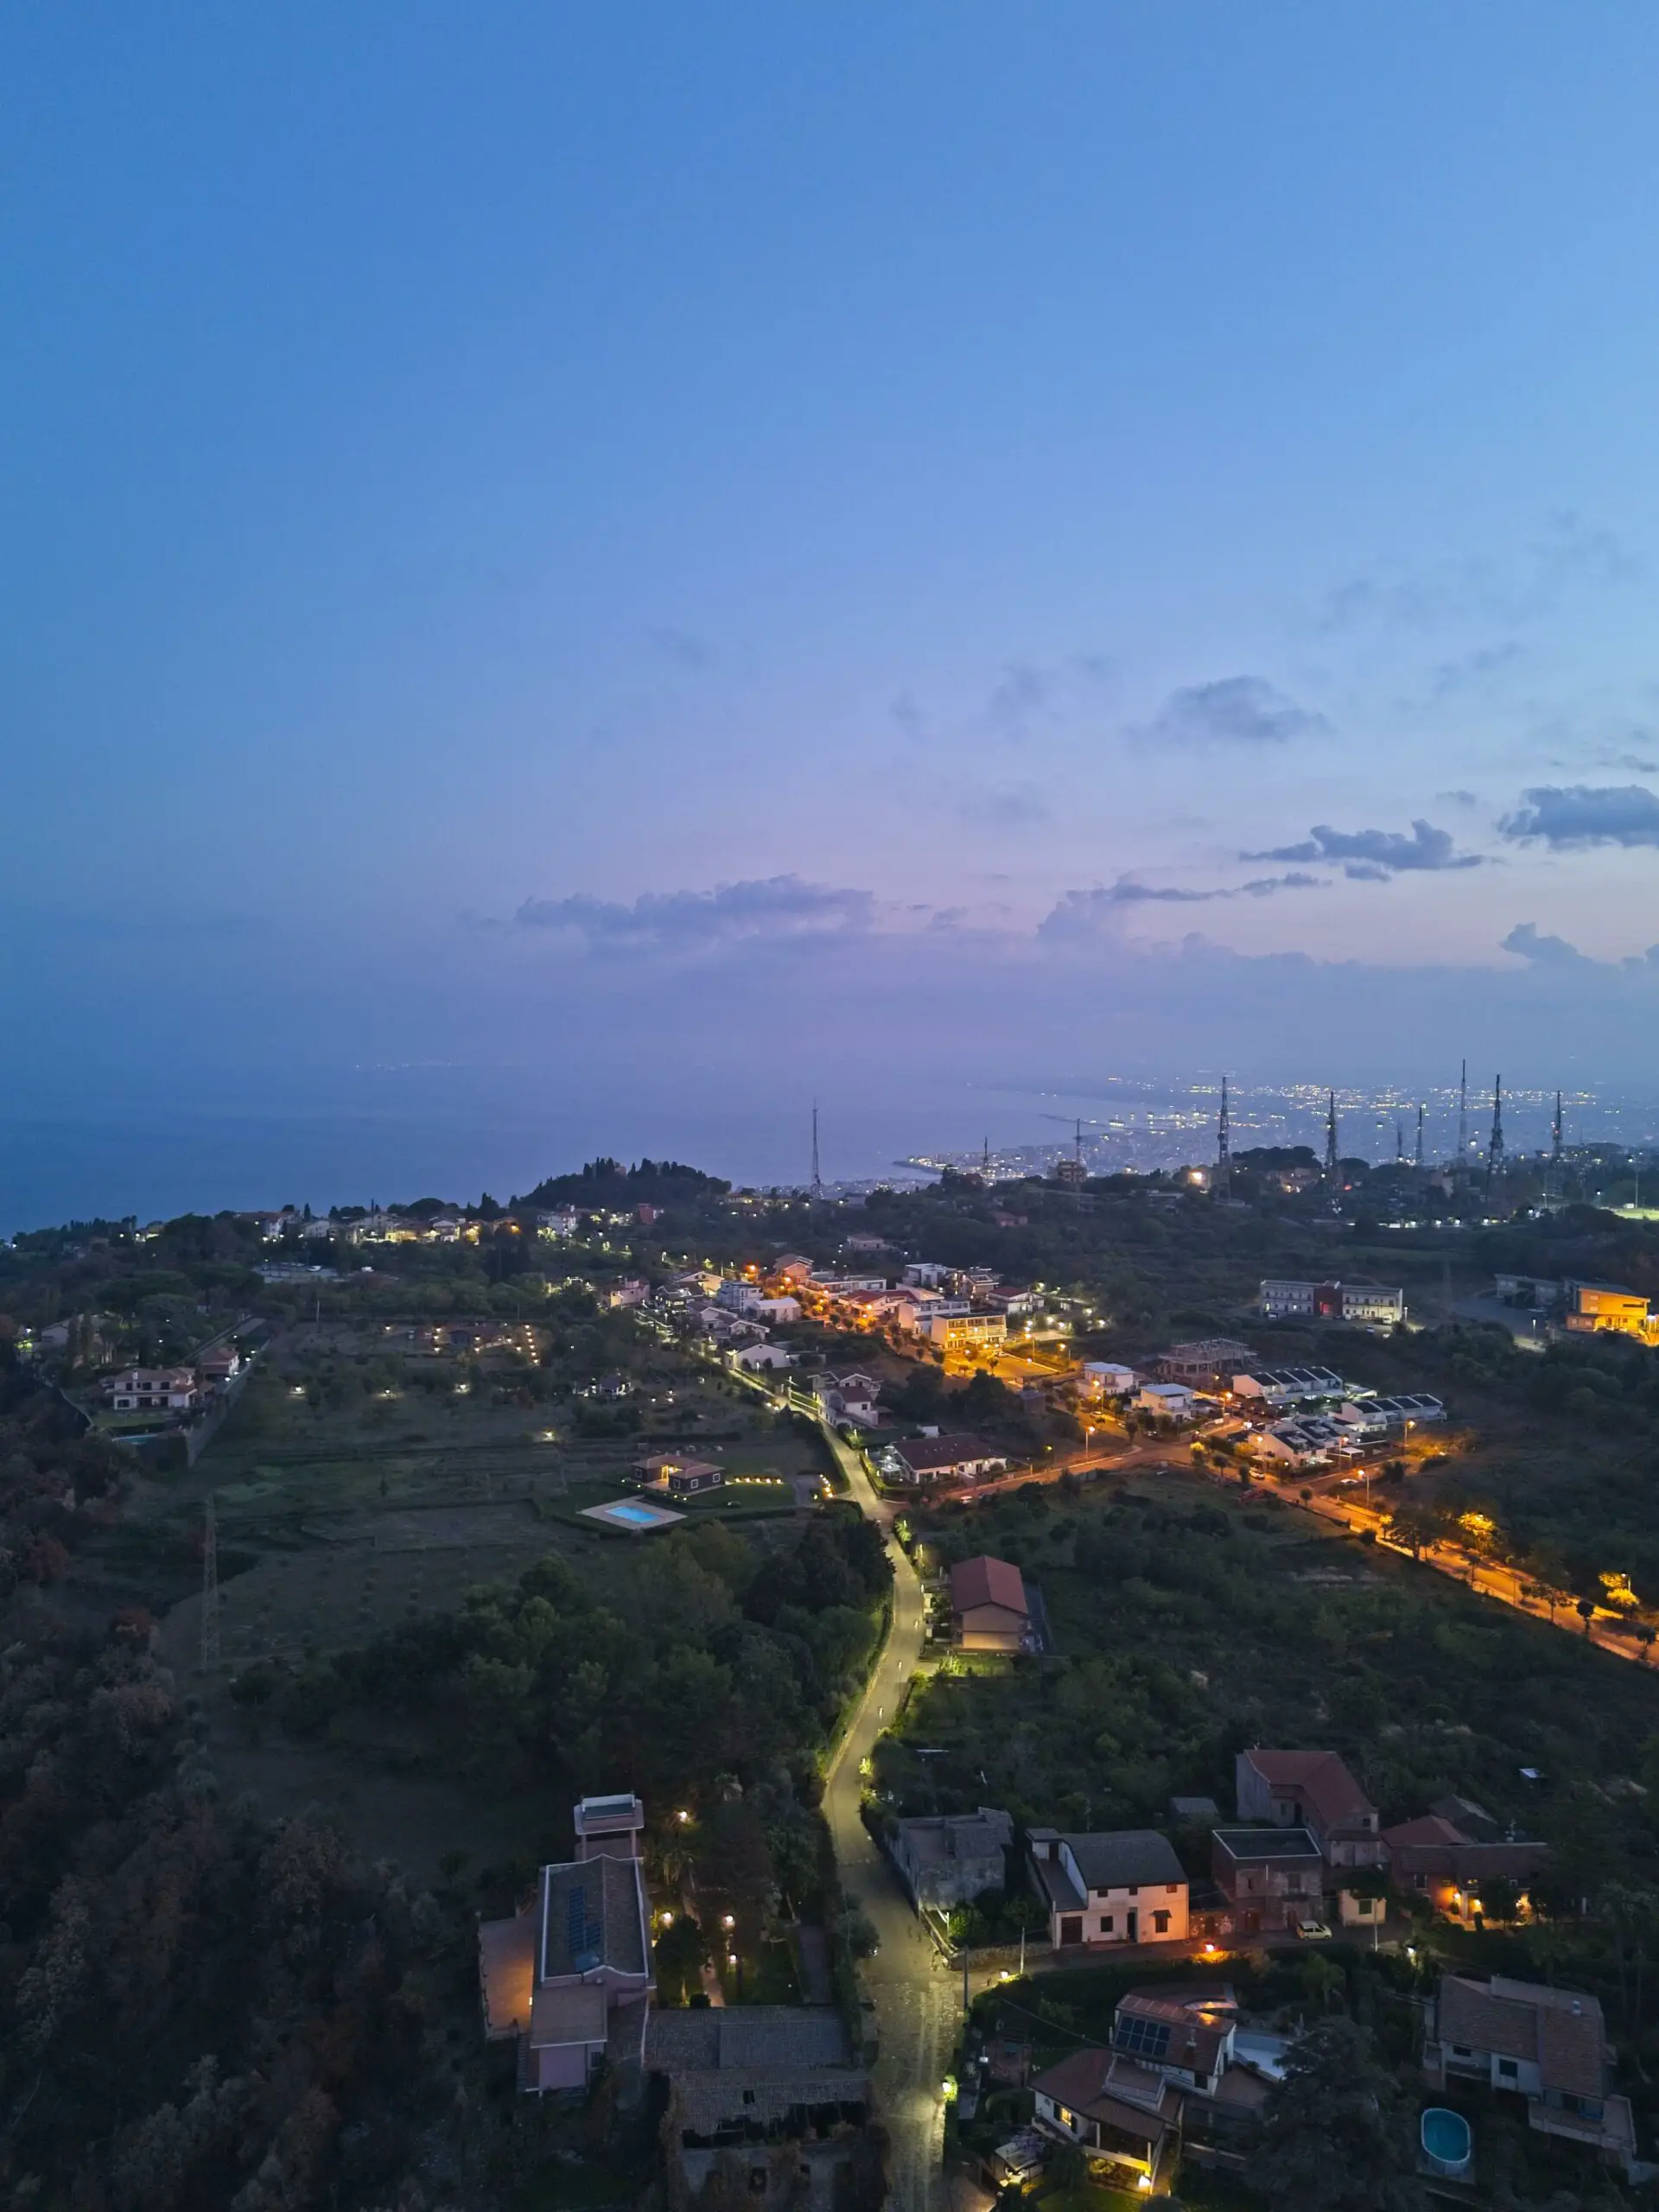
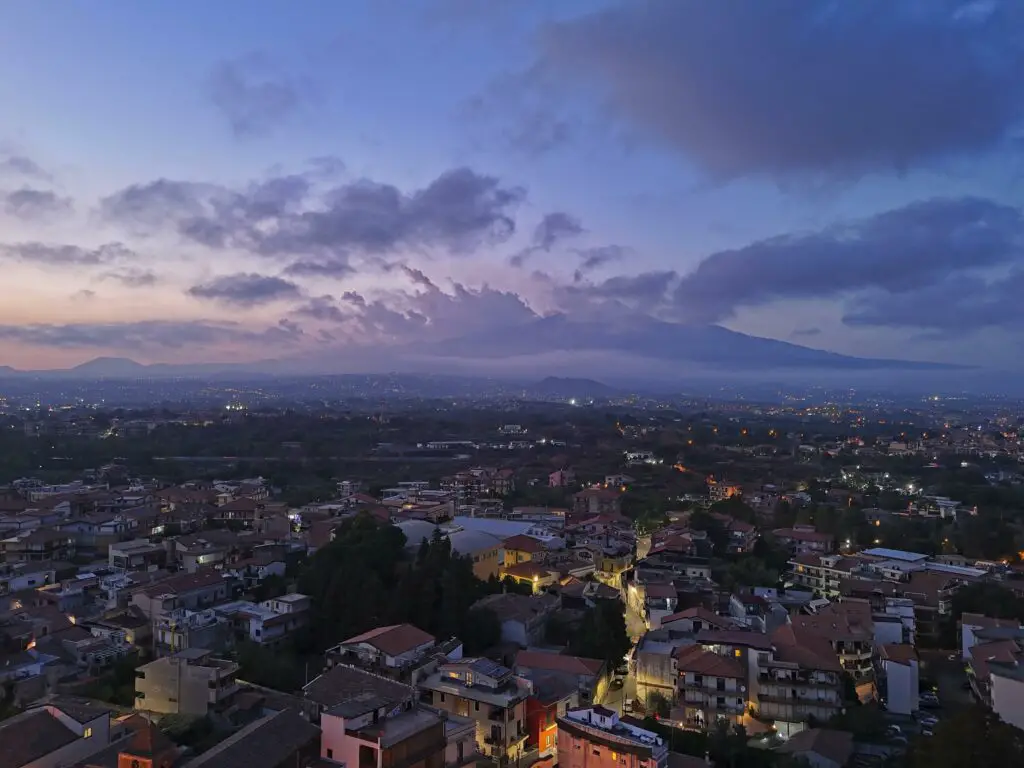
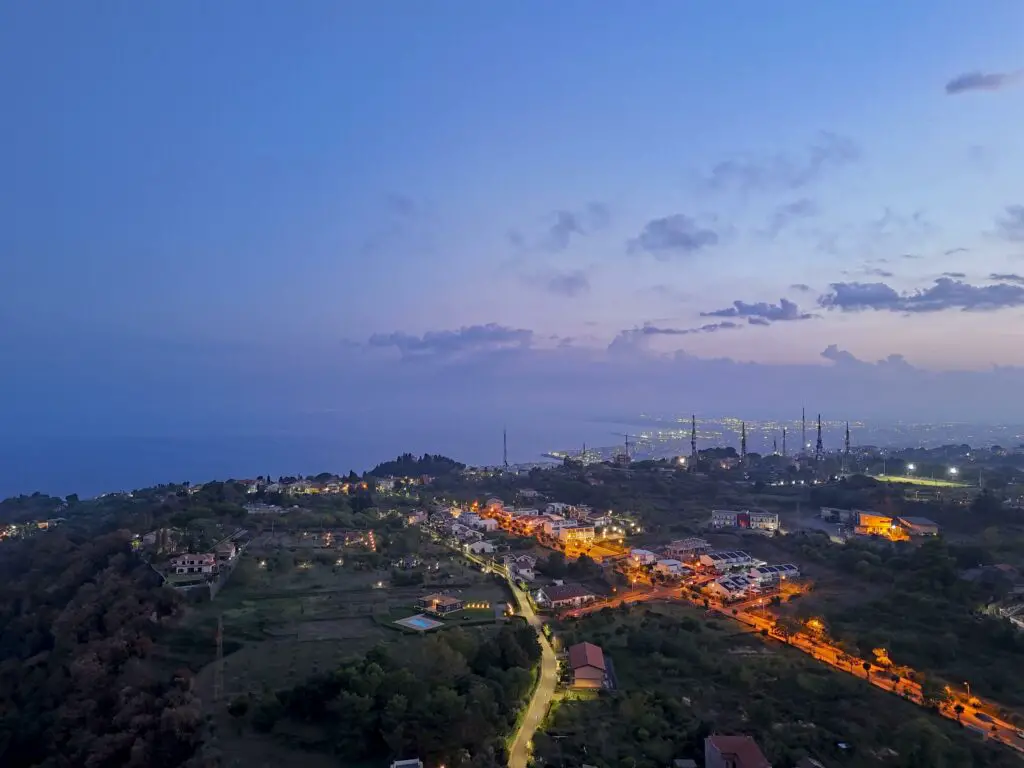
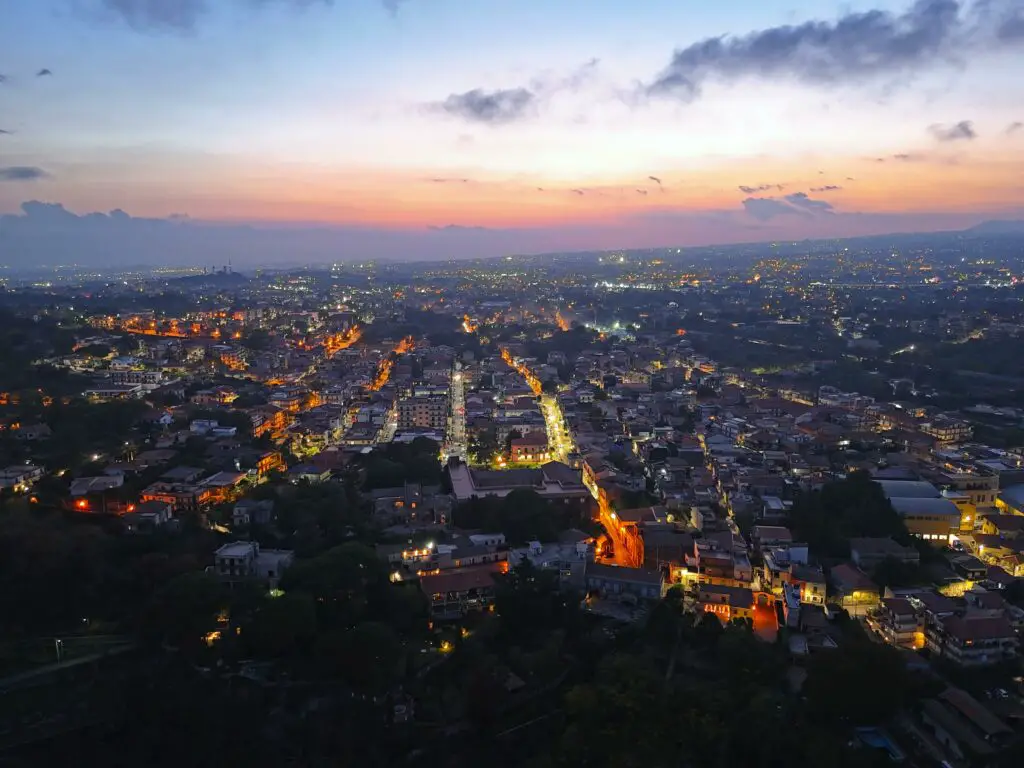
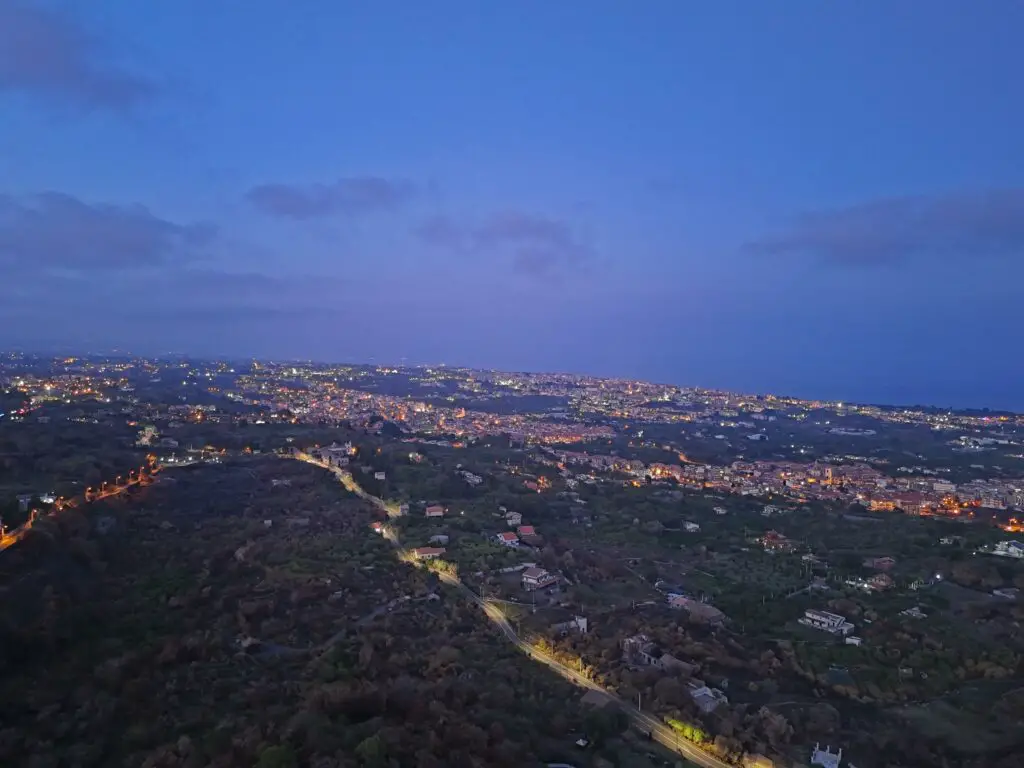
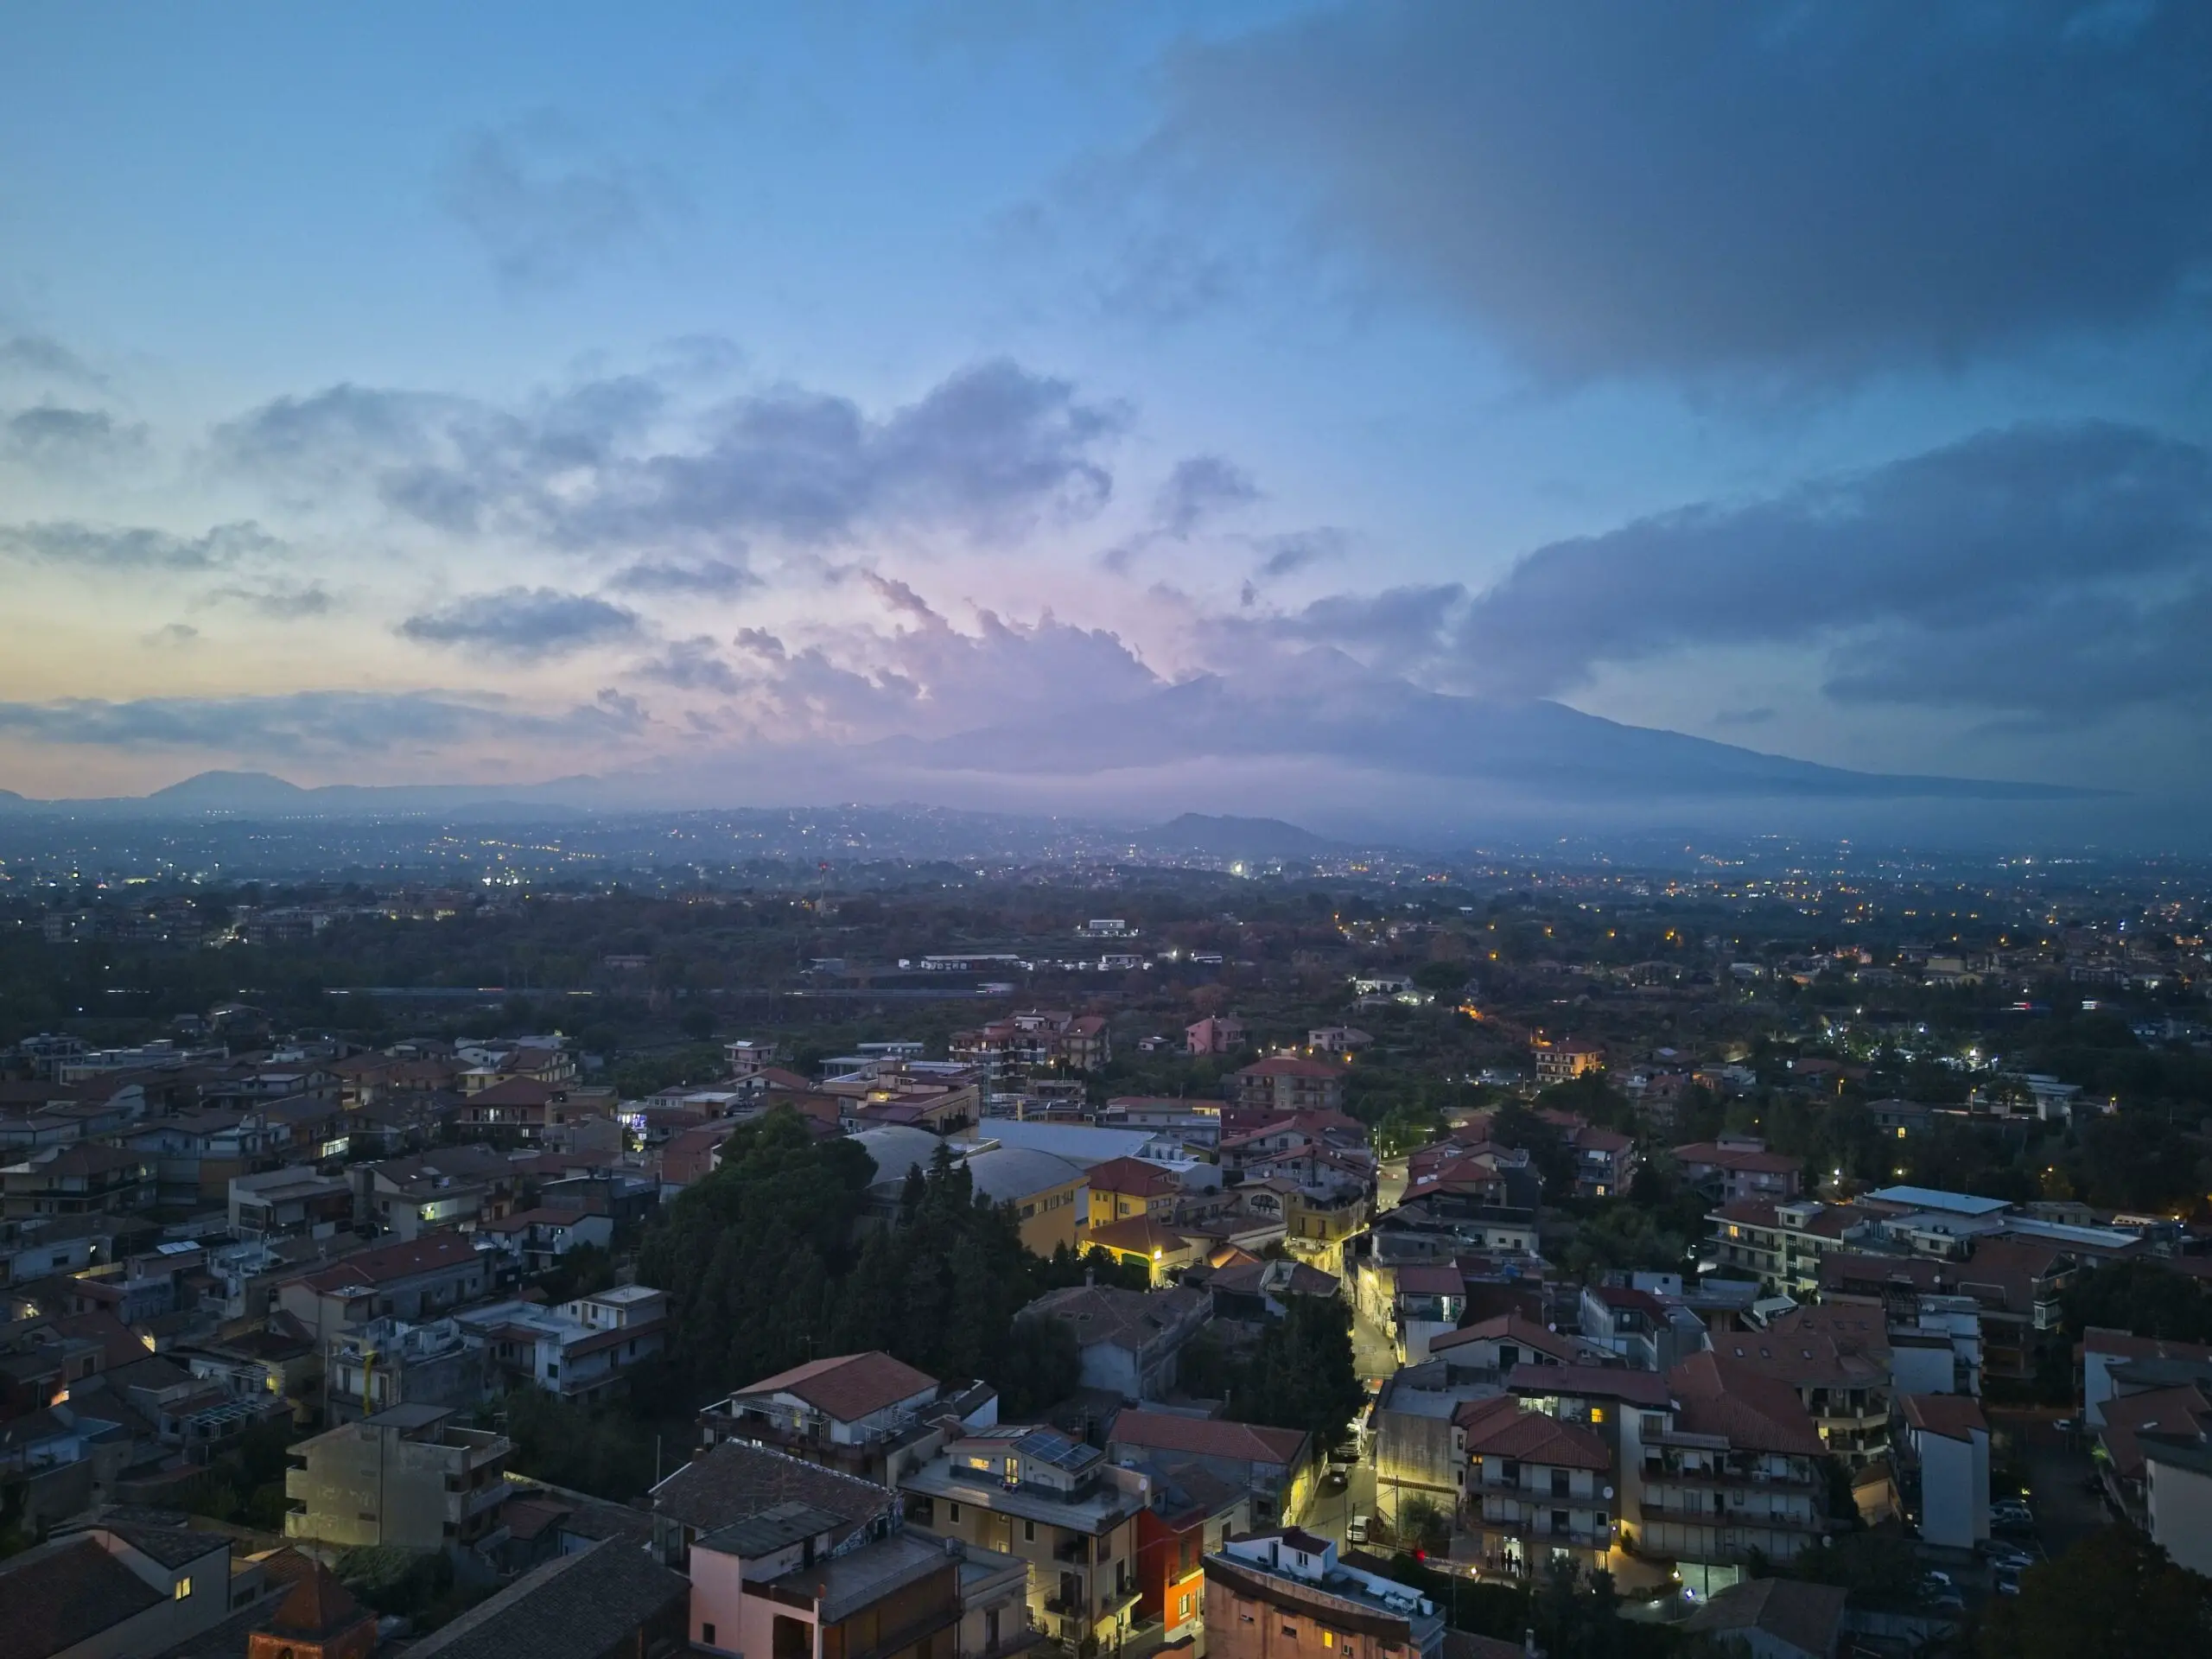
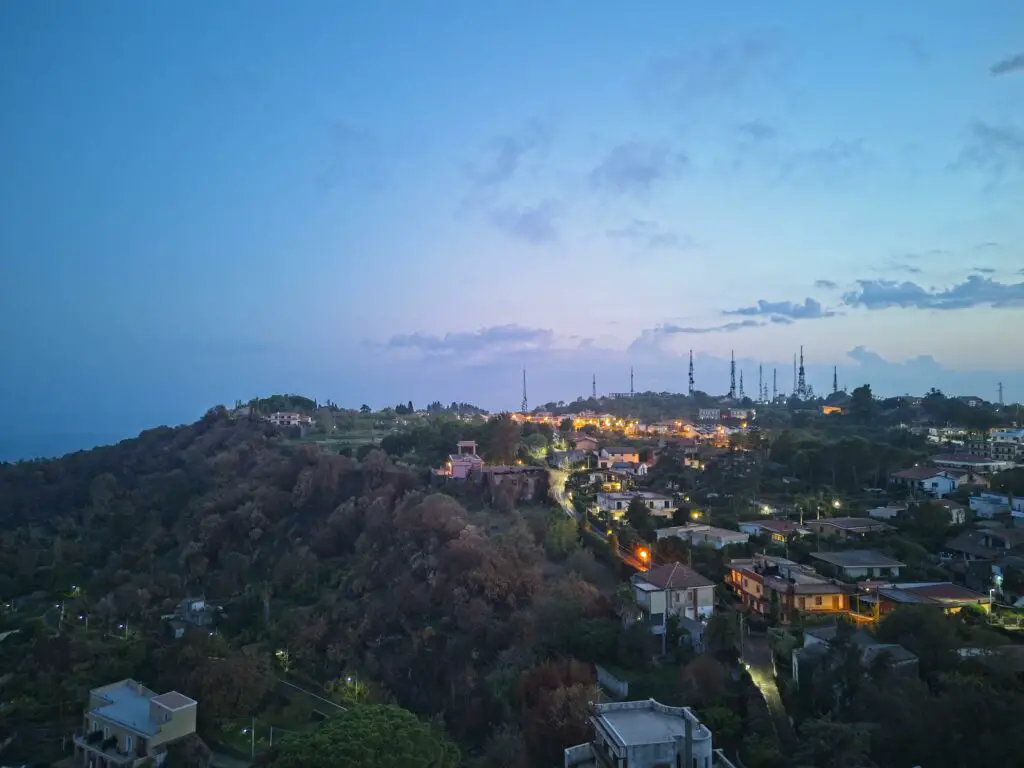
Low-Light Photography
An area where the Mini 4 Pro really shines, if you excuse the pun, is low-light photography, in part due to the very wide aperture
These images were taken half an hour after sunset, with electric lights acting as the main source and the last bit of twilight as a fade light
The ISO value is the base one, 100, for all of them, who needs higher ISO values?
I know that some people might think that these are not low-light conditions, but believe me, it was pitch dark. Here in Sicily, they try to save money on electricity, so whenever the street lights are on it must be very, very dark
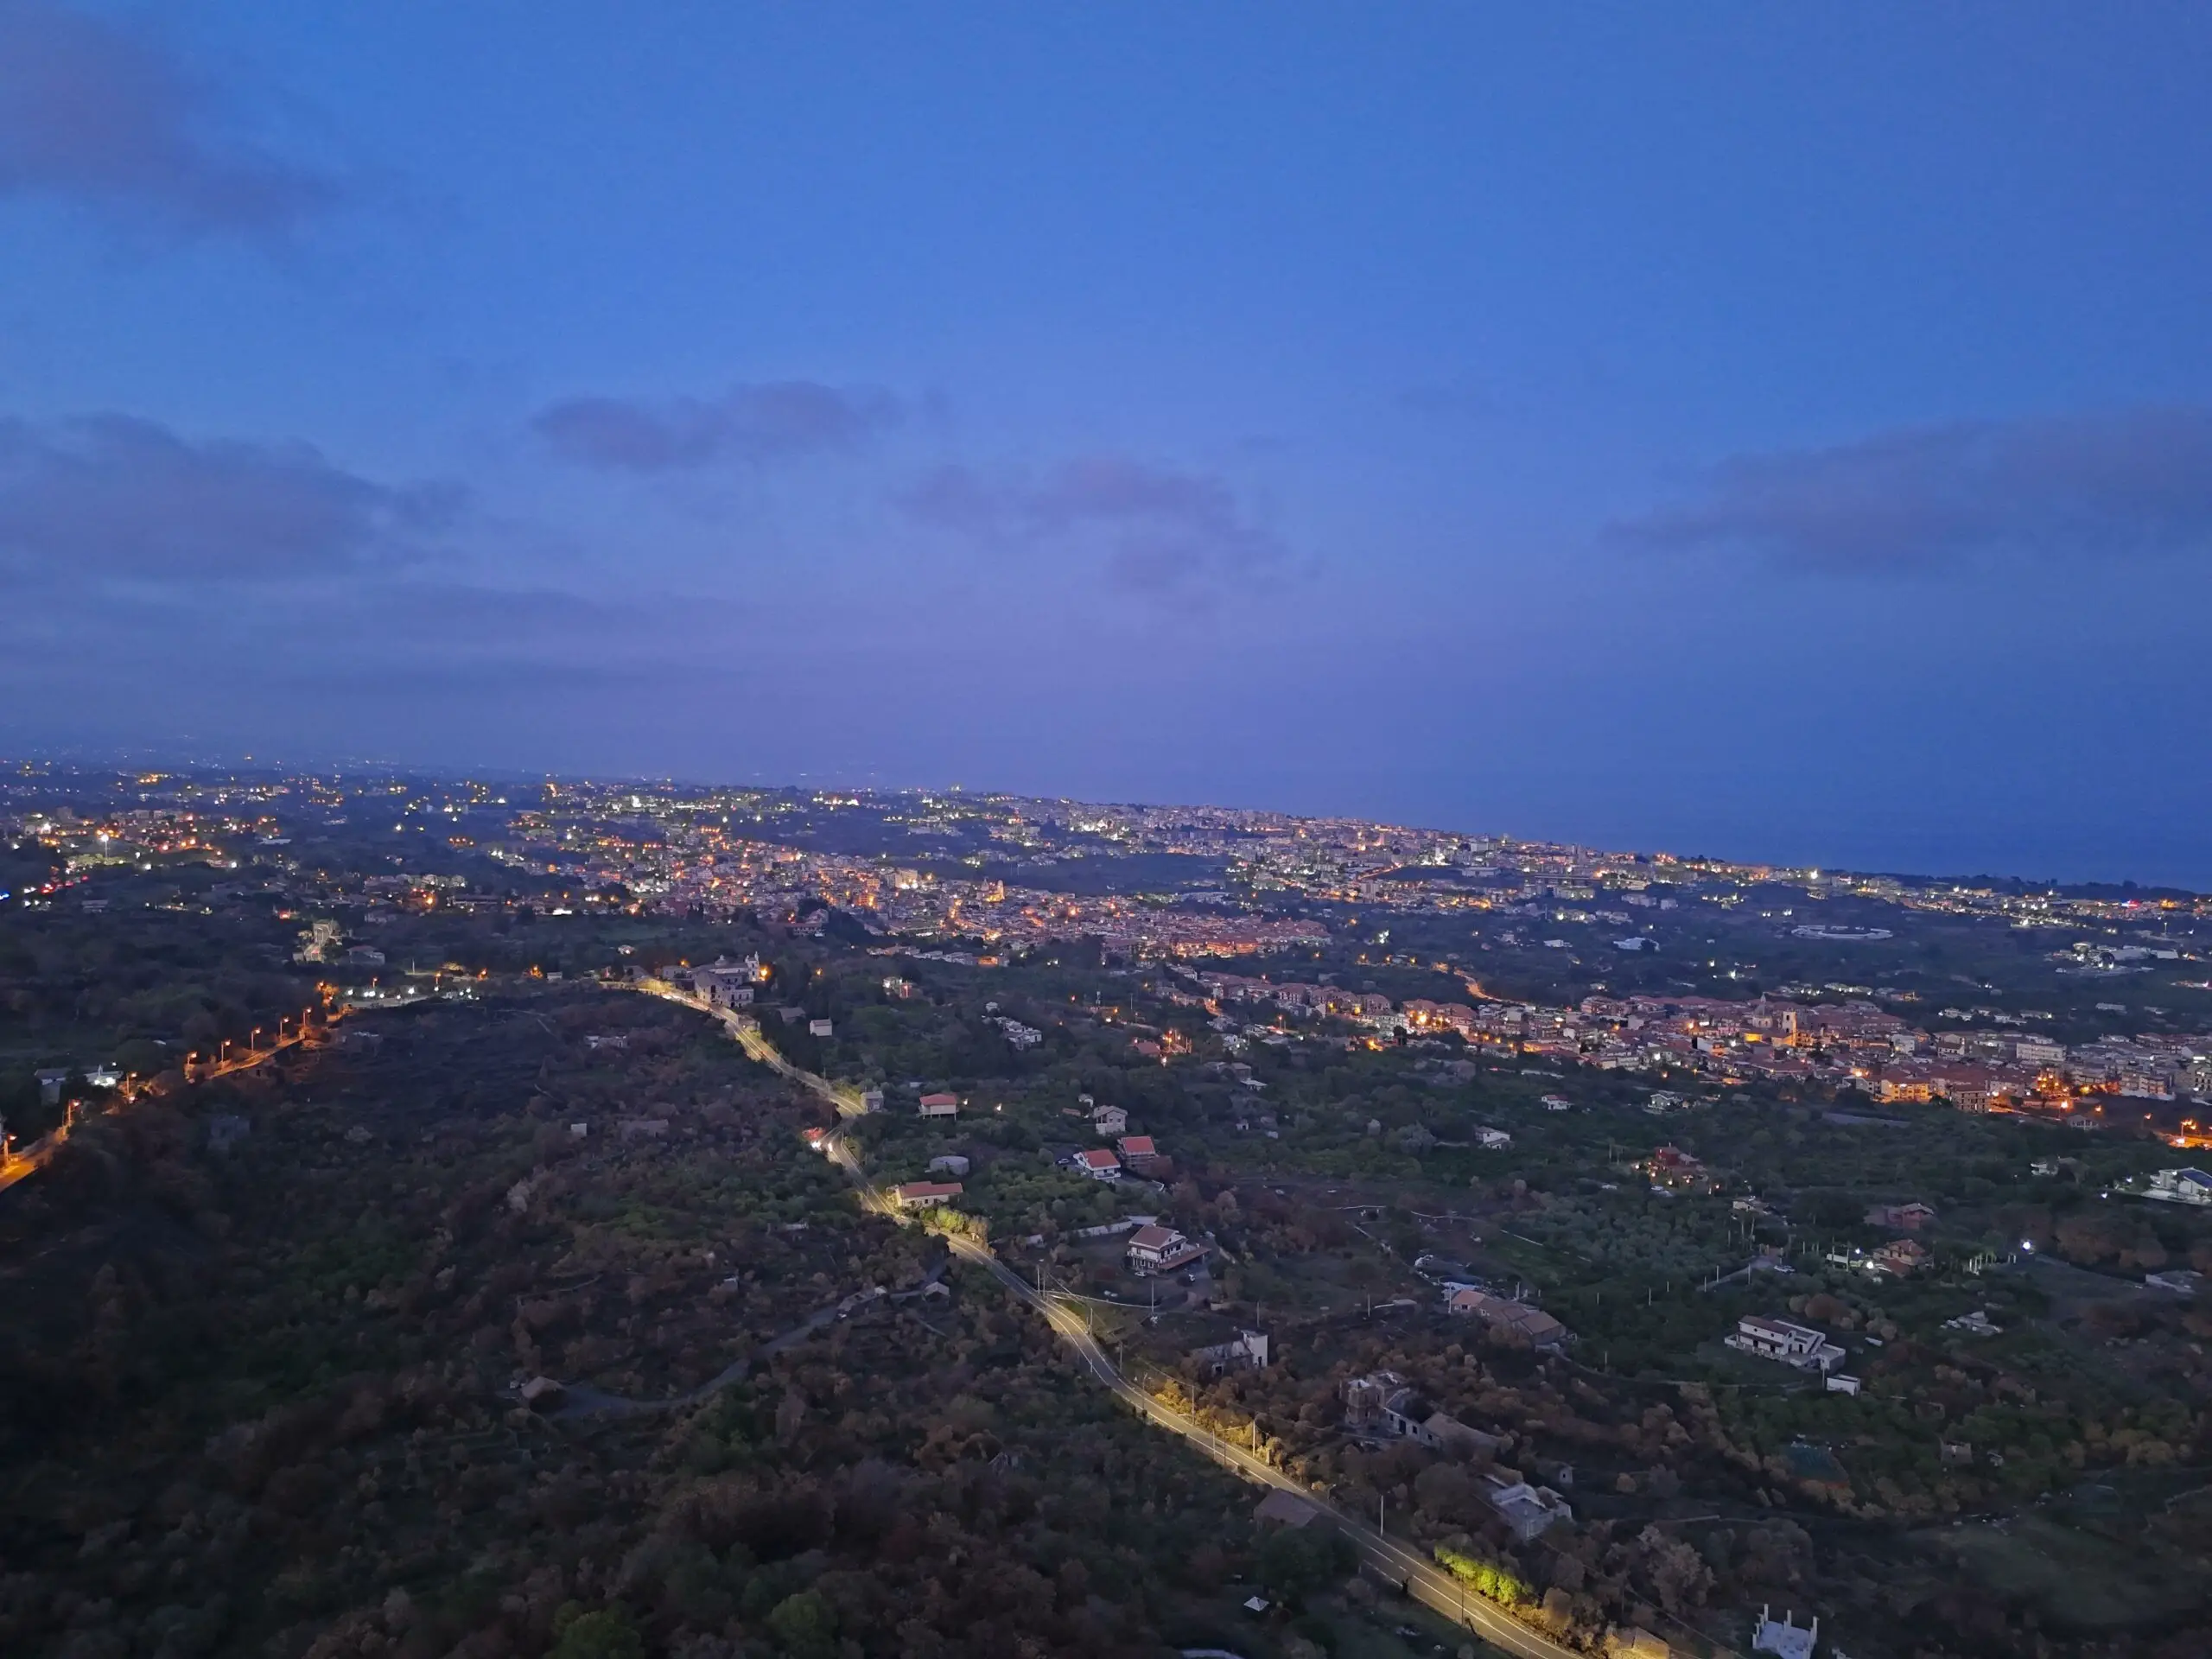
The results in night footage with the RAW files are sensational, here the Mini 4 Pro can almost compete with the mighty Mavic 3
And once again the JPEG files are very solid and respond very well to color grading
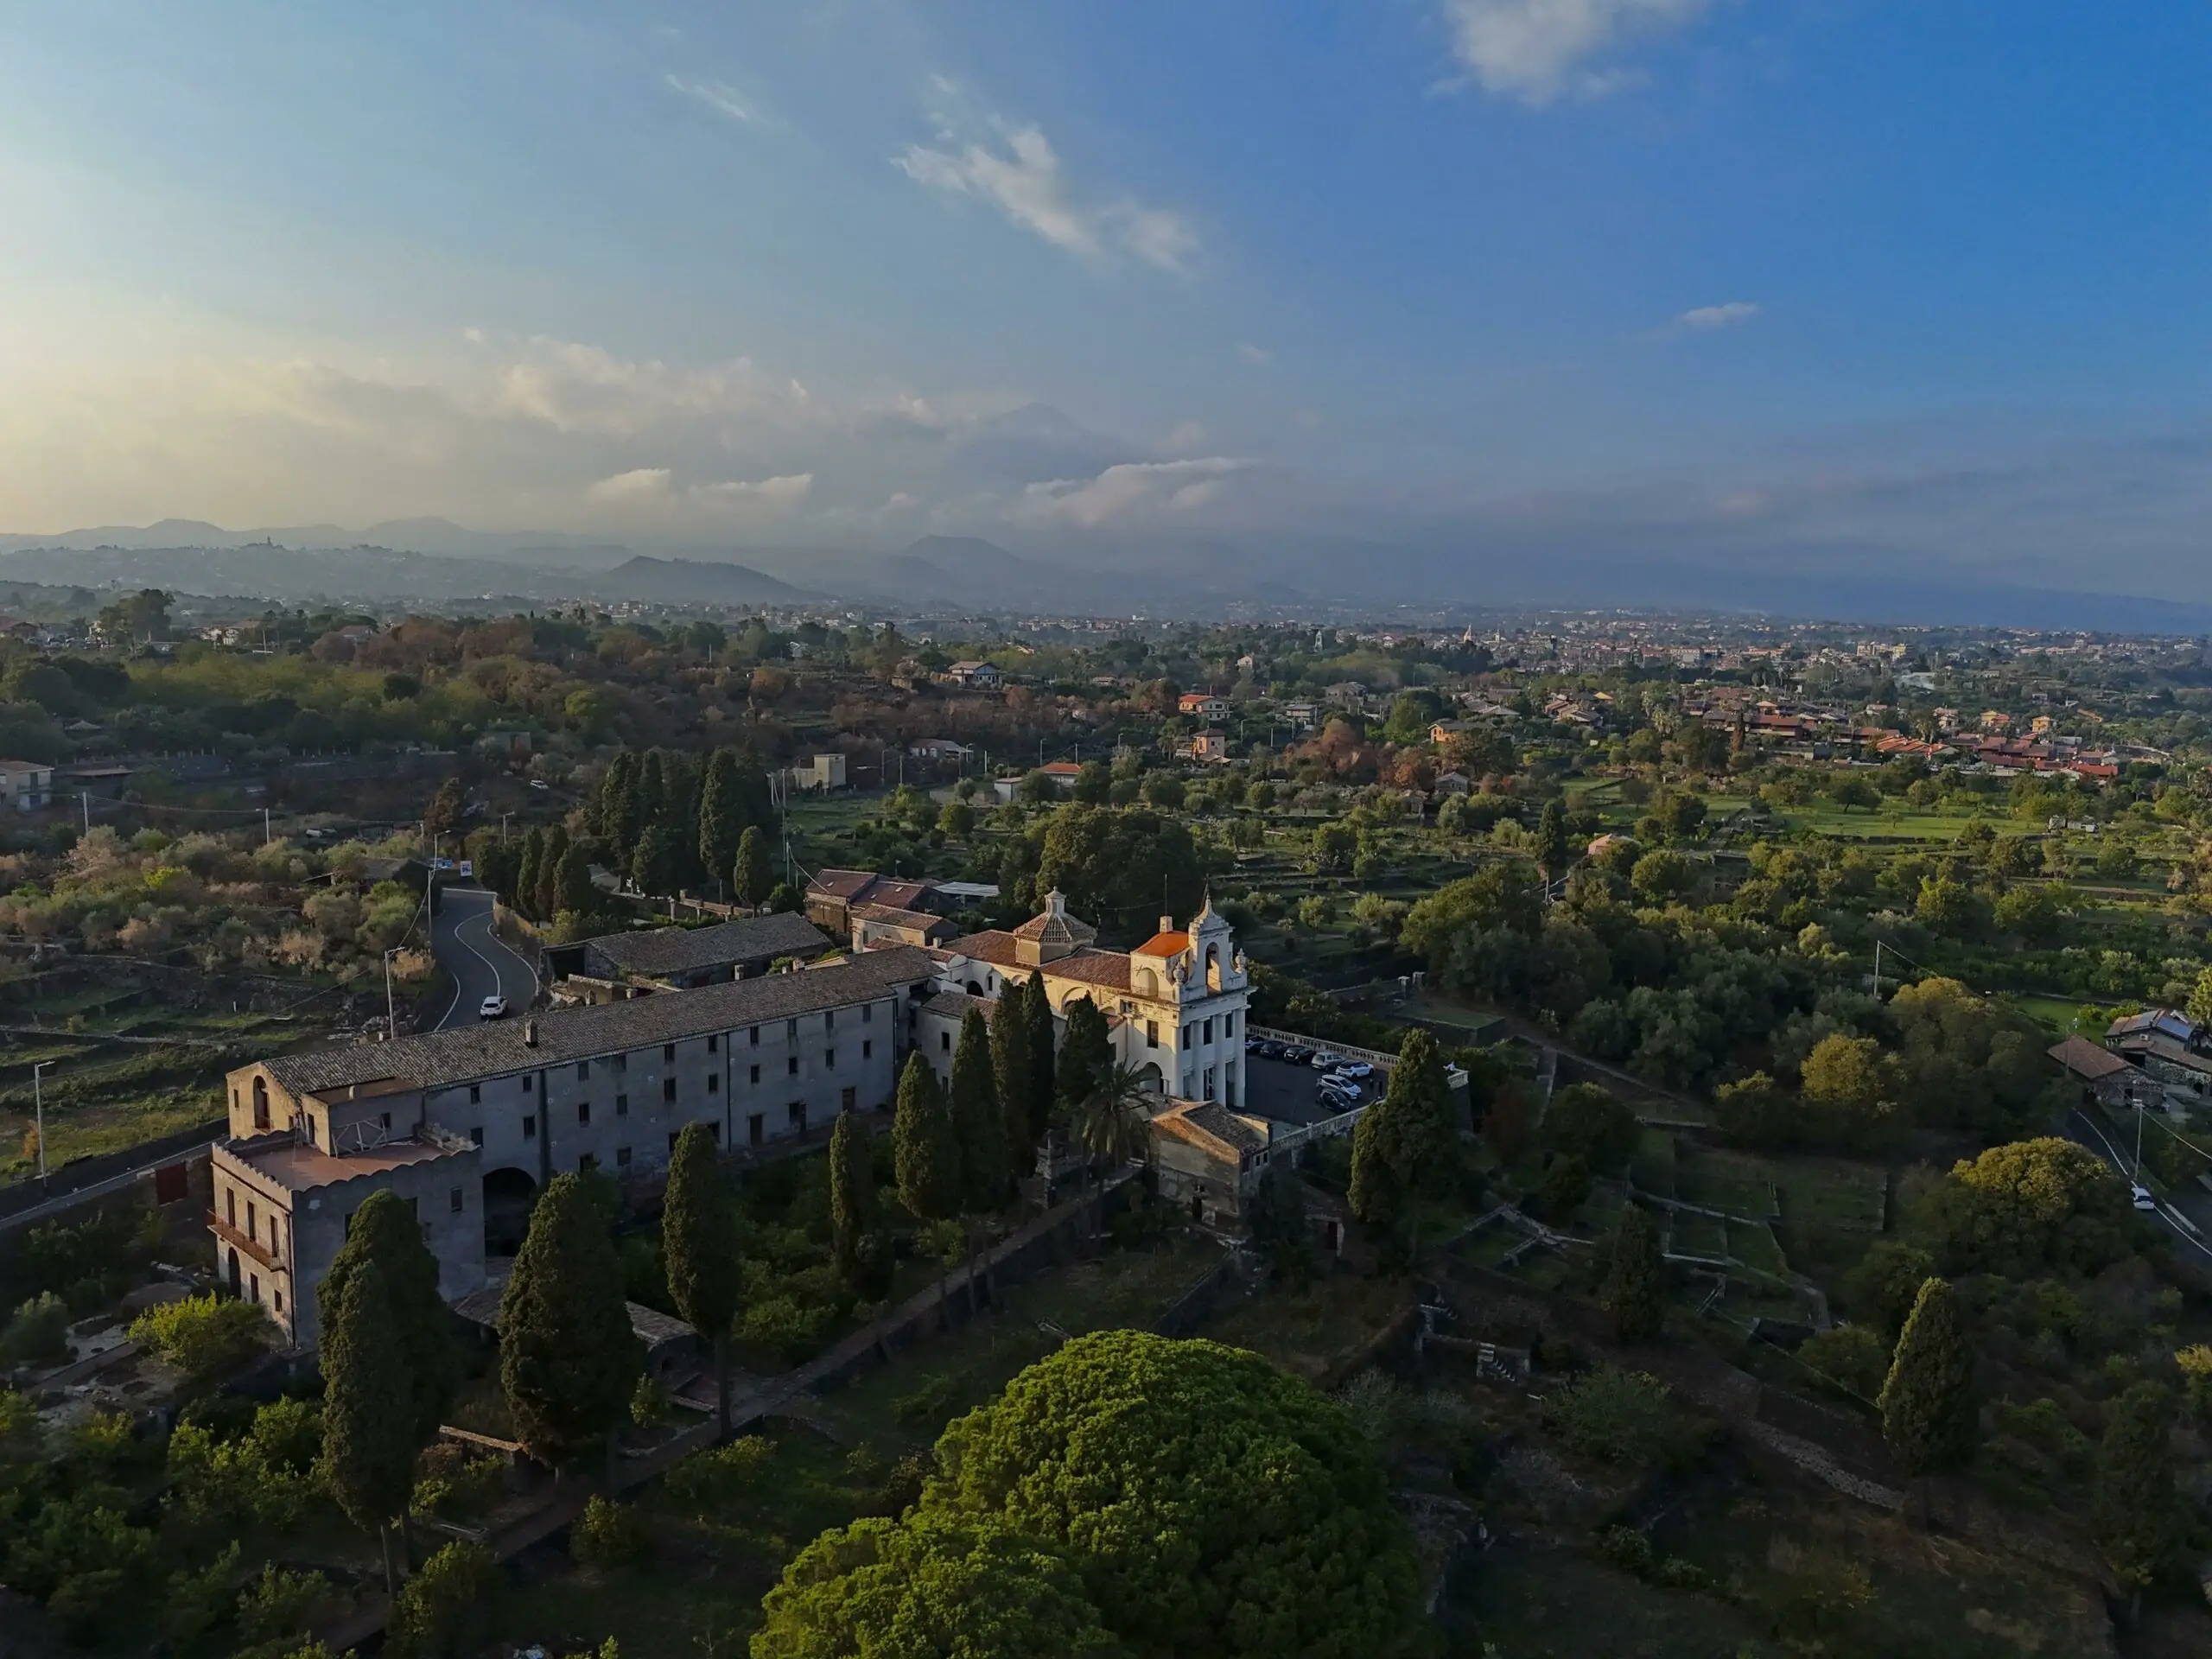
RAW Files
Moving to the RAW files I am immediately surprised by the amount of detail. This is a weak point of the Mini 3 Pro and I was expecting the same with the new model since the camera is the same
With the Mini 4 Pro the images look sharper. Even in deep crops and in elements in the background, the vegetation and the architectural details are very well reproduced.
I will soon do a comparison with the MIni 3 and the Air 3 for photography, but my first impression is that DJI has improved the algorithm of the smart photo to improve the fine details
The RAW files respond to post-processing better than the JPEG, and this is not a surprise. The amount of information contained in the shadows is beyond my expectations
The performance in high dynamic range situations is excellent and even in very low light the shadows have plenty of detail
More JPEG Files You Can Download
Photos taken in JPEG


Photos Taken In RAW


