
Correct exposure is crucial for high-quality results with the Mini 4 Pro. The main factor is choosing the best light conditions. The only tool I suggest using is the histogram. Exposing is more challenging for video, as there is a reduced choice for shutter speed value compared to photos
In this article, I will show all you need to know to expose correctly footage and photos
Other related articles about the Mini 4 Pro you may find interesting:
- Camera setting for photography
- Camera settings for video
- Video quality review
- Low-light and night video
- Photo quality review
- Night Photography
- Signal Transmission
- Mini 4 Pro Obstacle Avoidance System
- Mini 4 Pro and Air 3 Return To Home
If you prefer to watch this as a video, you will find my YouTube version at the end of this video
Footage vs Photos
The techniques and the tools for exposure are fundamentally the same for footage and photos
But in the case of photos, things are easier for several reasons. With still images, we have more choices for Shutter Speed value, while for video we cannot use a value slower than the frame rate used
As an example, when shooting video at a frame rate of 24 frames per second, we cannot use a value slower than 1/25″
With footage, in certain conditions, we should try to respect the 180° rule by maintaining a certain ratio between the Shutter Speed value and the frame rate, as I will explain later on
When shooting video, we should also consider the possible variations of luminosity during the clip, while this is not an issue for photos
Choosing the Best Light Conditions
To get the best results, the most important factor is the choice of light conditions
The central hours of a sunny day are to be avoided at all costs, as the shadows are extremely harsh and the contrast too strong
There are good reasons why it is said that these are the hours when photographers and videographers are supposed to sleep
For centuries painters and photographers have tried to control the quality of the light in their studios, by carefully choosing the position of the windows and the distance from walls acting like light reflectors
In more recent times reflectors and diffusers have been widely used for two purposes: avoiding strong highlights and achieving shadows as soft as possible
Excellent light conditions for video and photos are in the two hours around sunrise or sunset, more or less the ones known as golden hour and blue hour
Another possibility is when the sun is covered by clouds acting like a big softbox. The aim is to reduce the dynamic range and have a small difference in luminosity between the highlights and the shadows
My favorite time is about half an hour after sunset with the last twilight acting as the fade light and the artificial lights as the main source
How to Use the Histogram
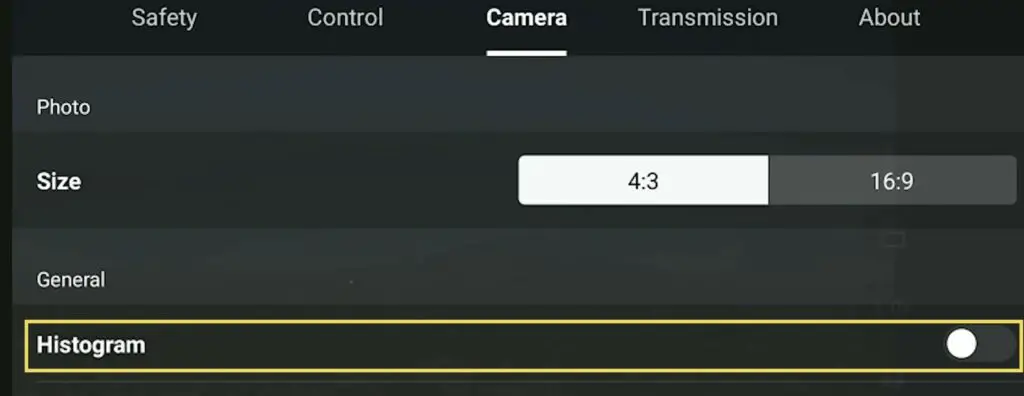
The histogram is the only tool I use for exposing. It tells us a lot about the light condition of a scene
Overexposure
When the bars touch the right edge the image will be overexposed. This is something to be avoided at all times, as burnt highlights cannot be recovered while editing
For this reason, I always make sure to leave a gap between the last bar to the right and the right edge of the histogram, so that the highlights are preserved
Underexposure
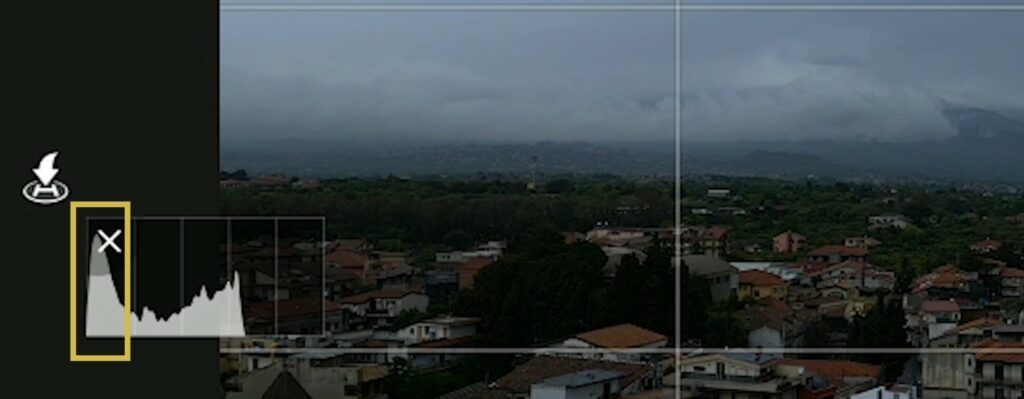
When a few bars touch the left edge of the histogram, the shadows will be too dark, however, it will be possible to recover them during post-processing, up to a certain extent
But when many bars are bunched against the left edge, the image is under-exposed and the shadows are too dark, containing less information. It will be difficult or impossible to recover them
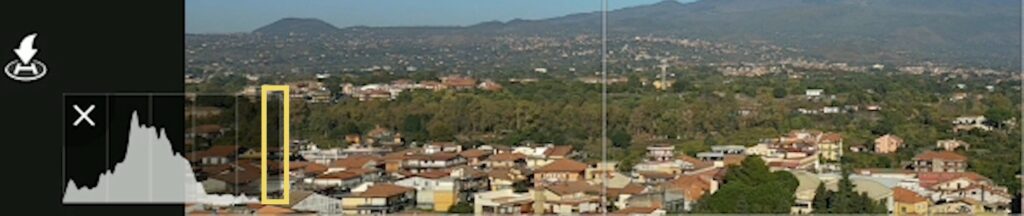
Low Contrast
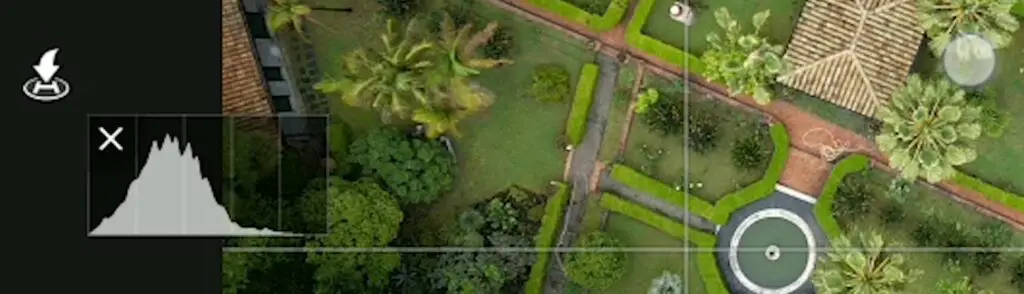
When the histogram has most of the bars in the middle with gaps to the right and the left sides, the image has low contrast
These are the easiest conditions for correct exposure and correspond to the best hours of the day mentioned earlier. It will be simple to add a bit of contrast while editing for excellent results
High Dynamic Range
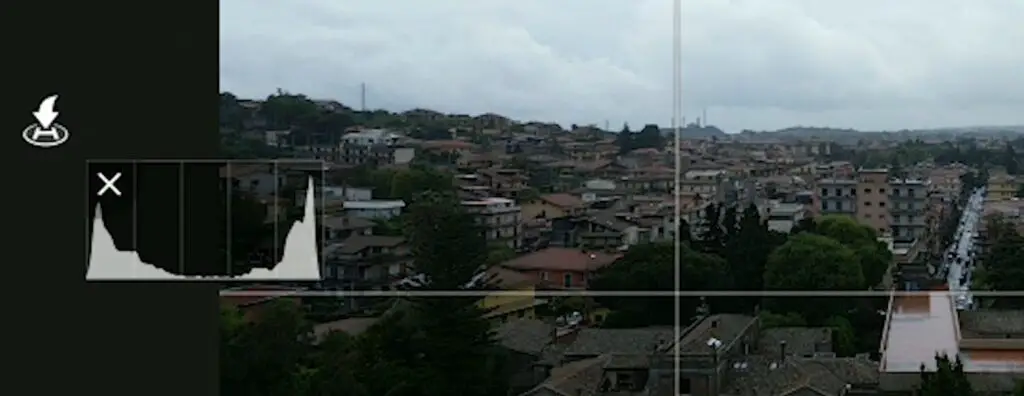
When the bars touch both the right and left edges of the histogram, it is a high dynamic range scene, in most cases containing the sky and with the camera pointing in the direction of the sun
These are the most difficult situations, it is again suggested to leave a small gap to the right of the histogram to preserve the highlight
The shadows will be very dark, but on many occasions, it will be possible to recover them, at least partially, although some advanced post-processing will be involved
This is why it is suggested that beginners avoid shooting footage or photos in the direction of the sun
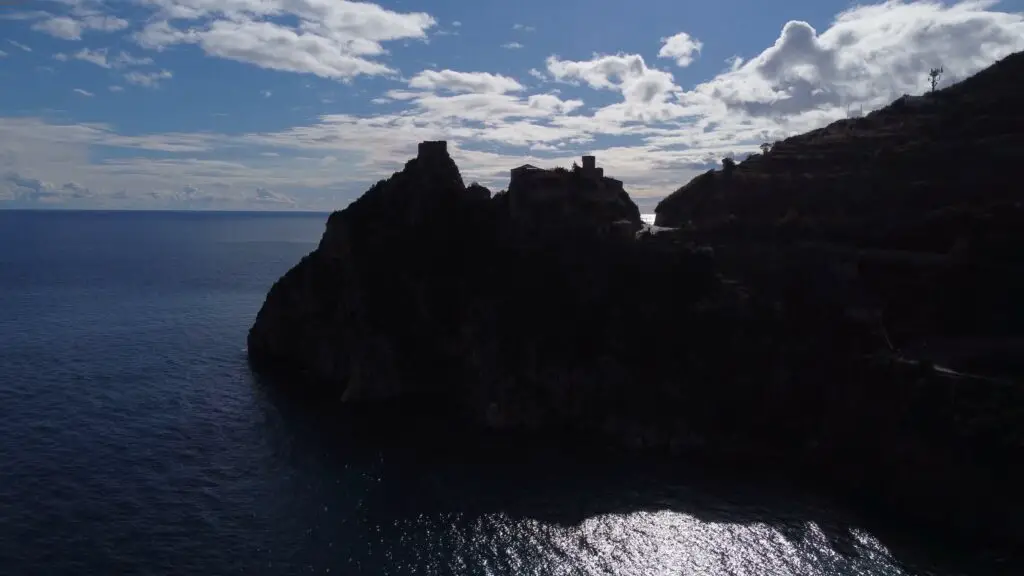
An alternative possibility is to avoid burning the highlight and leave the elements on the ground as a silhouette, which can create an interesting effect on certain occasions
An Alternative Tool
In the Camera tab of Settings, there is another tool to aid exposing: Overexposure Warning
It works by overlaying black and white diagonal stripes to the overexposed parts of a scene. I never use it, as I find it very distracting
Exposure settings in the Mini 3 Pro
Auto Exposure
This small icon at the bottom right of the screen toggles between Auto and Manual exposure
In Auto mode the exposure is set by the software, we can only access the EV value to adjust the overall luminosity. I find that the software tends to overexpose slightly, hence I prefer to set the value at -0.3 or -0.5
When the camera moves the exposure values are automatically modified to maintain a constant luminosity, but the individual values for ISO and shutter speed are not shown
Beginners generally start by using Auto Exposure, however, there are two main reasons why it is better to get used to always shooting in manual exposure
When using auto exposure for video, if the overall luminosity of the scene changes, the software will detect it and modify the exposure value. This will lead to a noticeable progressive shift of luminosity in the clip, an evident sign of amateur footage
For similar reasons, I suggest always using Manual White Balance for video, as in Auto mode the differences of luminosity within a clip cause shifts in color
Manual exposure
Another reason to use manual exposure is to control the individual exposure parameters
Professional videographers prefer to use a specific shutter speed based on the frame rate of the project: 1/50” when using a frame rate of 24 or 25 frames per second or 1/60” with 30 frames per second
This is known as the 180-degree rule and it is more important when filming close to the ground or when the scene contains elements in motion, to optimize motion blur
When shooting landscape videos with a drone from a high altitude and without elements in motion, the 180-degree rule can be disregarded
By tapping on the icon to the right, we access manual mode, labeled as Pro, then, tapping on the area of the values, slightly to the left, we access the window for exposure
The Mini 4 Pro has a fixed aperture, so the only values we can select are ISO and Shutter Speed. We can set these values independently
The MM value at the bottom cannot be modified, it displays the luminosity resulting from the values chosen above compared to the optimal exposure computed by the software. I prefer to see a value slightly negative to avoid overexposure
Setting the ISO at its base value, 100, is preferable for best quality whenever possible. But the Mini 4 Pro can handle ISO values up to 400 without any noticeable loss of quality, so we have some room to play with
To maintain a specific shutter speed value with different light conditions ND filters are needed, you will find details on why and when to use them in my specific article
Semi-Auto Exposure
In the exposure window, there are two Auto buttons for ISO and shutter speed, to set one of the two values as Auto
If we want a fixed value for ISO, 100, to get the best possible quality, we set ISO to 100 and shutter speed to Auto
As the luminosity varies, only the value for SS changes to maintain the correct luminosity, leaving the ISO value to 100
Notice that the value MM has now turned into EV for Exposure Value, and can be modified
If we want control over the shutter speed, we select the desired value and set the ISO to Auto and this time, as the luminosity increases or decreases, only the ISO value will change
We can also choose to put both values to Auto. It is very similar to using auto exposure, but there are some advantages compared to the traditional Auto mode
In Auto we have no indications for the values of ISO and Shutter Speed while using this method we can visualize both
Automatic Exposure Bracketing for Photos
When taking photos, there is an extra option to help expose
We can use Automatic Exposure Bracketing to ta ke seven shots in rapid succession with different exposure values
It is a sort of insurance, as one of the seven images will always be perfectly exposed
In the case of images shot in the direction of the sun, it is possible to merge the images to HDR using an editing program
With this technique the highlights will be taken from the darkest image and the shadows from the brightest one, thus reducing the dynamic range of the resulting merged photo
The program I use for processing still images and merging photos to HDR is Luminar Neo
If You Prefer to Watch This as Video