
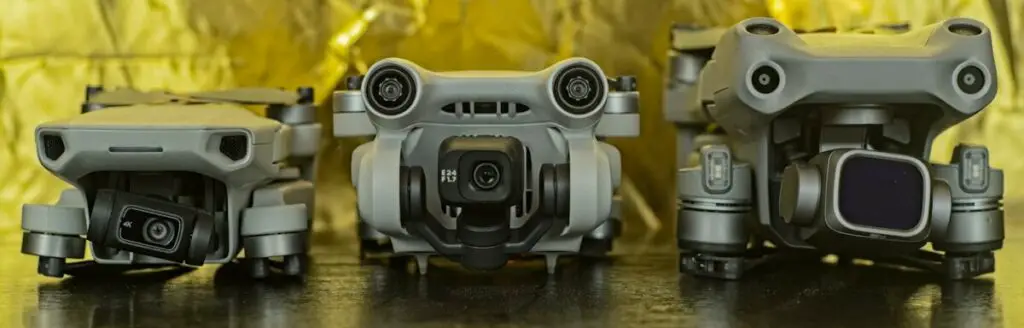
The Mini 3 Pro in terms of photography is a big step forward compared to the previous lightweight models. The performance in low light conditions is astonishing, thanks to the wide aperture of F 1.7 and the larger 1/1.3″ sensor. It offers a 48 MP photo mode, useful for large prints and extra detail in easy light conditions
Through this article, you will find downloadable JPEG files of the different photos to better appreciate the quality
If you are interested in photography, I have done several related articles:
- Camera settings for photography
- Panorama photography with the Mini 3
- Hyperlapses with the Mini 3 Pro
- Long-exposure photos with the Mini 3 and 3 Pro
- How to expose video and photos with the Mini 3 and 3 Pro
- 9 tips for amazing photos with the Mini 3 and Mini 3 Pro
If you prefer to watch this as a video, you will find my YouTube version at the end
Mini 3 Pro Camera Settings for Photo
Mini 3 Pro Photo Modes
The Mini 3 Pro offers several different shooting modes for photos
- Single, at 12MP
- 48MP mode
- Automatic Exposure Bracketing (AEB), with a choice of 3 or 5 photos
- Burst, with a choice of 3, 5, or 7 photos
- Timed Shots, with intervals ranging from one photo every 2 seconds up to 60 seconds
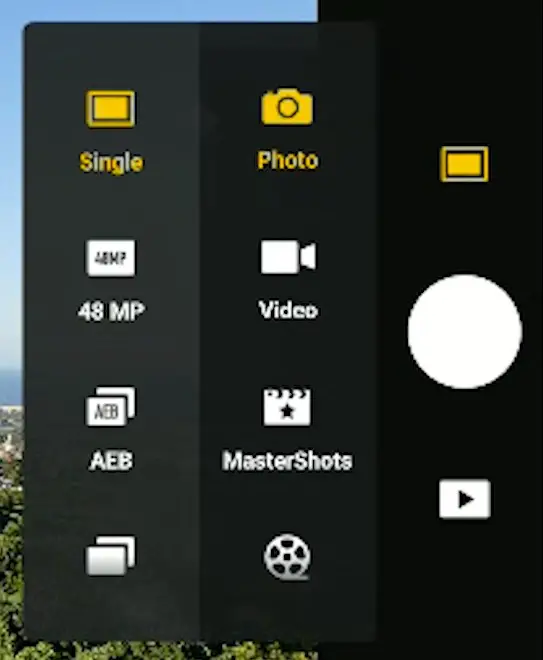
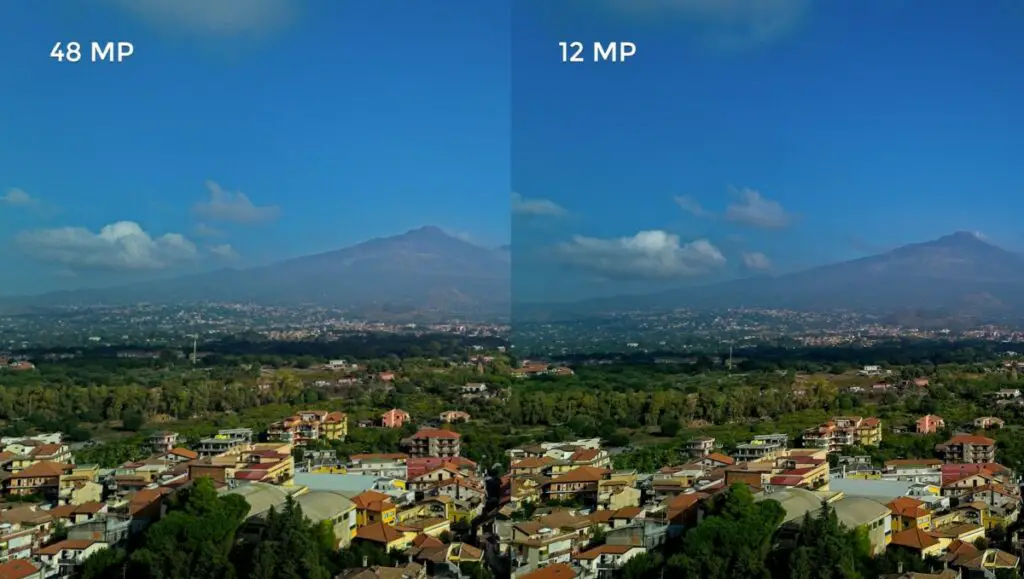
The Mini 3 Pro can shoot photos at a real resolution of 12 megapixels, but it is equipped with a Beyer Quad sensor able to split each pixel into 4 smaller ones, therefore achieving a sort of 48 megapixels
In the Photo menu, we have a choice of single photo at 12MP or the 48MP mode
Here you will find an in-depth analysis of the 48MP mode of the Mini 3 Pro

Automatic Exposure Bracketing (AEB) is a handy feature that can be used any time a photo is taken for two reasons:
- To make sure that at least one photo is perfectly exposed
- To merge the images to HDR for better results compared to single photos under certain conditions
Here you find an in-depth analysis of AEB with the Mini 3 Pro
Burst Mode takes several photos in rapid succession and helps catch the perfect moment with elements in motion, for example when shooting sports or wildlife
Timed Shots are handy for selfies, as several photos are taken at a specified interval. It is possible to hide the remote controller and take several shots
Exposure Settings
DJI Fly interface for the Mini 3 Pro is well-designed and easy to use

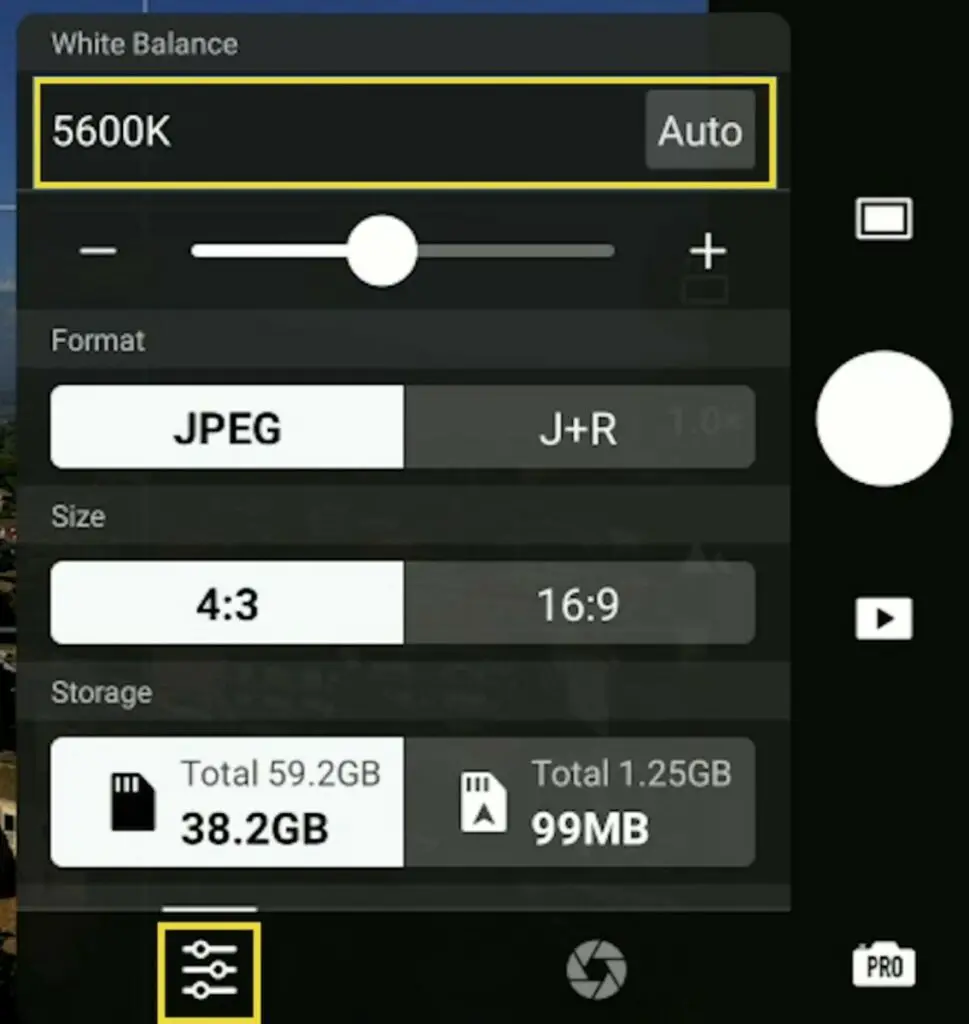
All settings for photos or video are available in a single window with two different tabs, one for the Exposure Values and the other one for White Balance and File Format with a choice between JPEG or RAW+JPEG
Here is an in-depth analysis of the settings for photography of the Mini 3 Pro
A Small Issue with Exposure
There is something that needs to be reorganized. The exposure settings are sticky for each photo mode and this is not practical at all
Let’s suppose taking an ABE shot in very bright conditions. After exposing and taking the shot a single photo is needed
The exposure settings are not updated from the previous AEB shot, but from the last time a single photo was taken, so the exposure values must be set once again
The same applies to a 48 MP photo, a Panorama, and so on
This is annoying. The exposure settings of the last photo taken should apply to all different modes, as it makes sense to assume that the next shot will be in the same light conditions
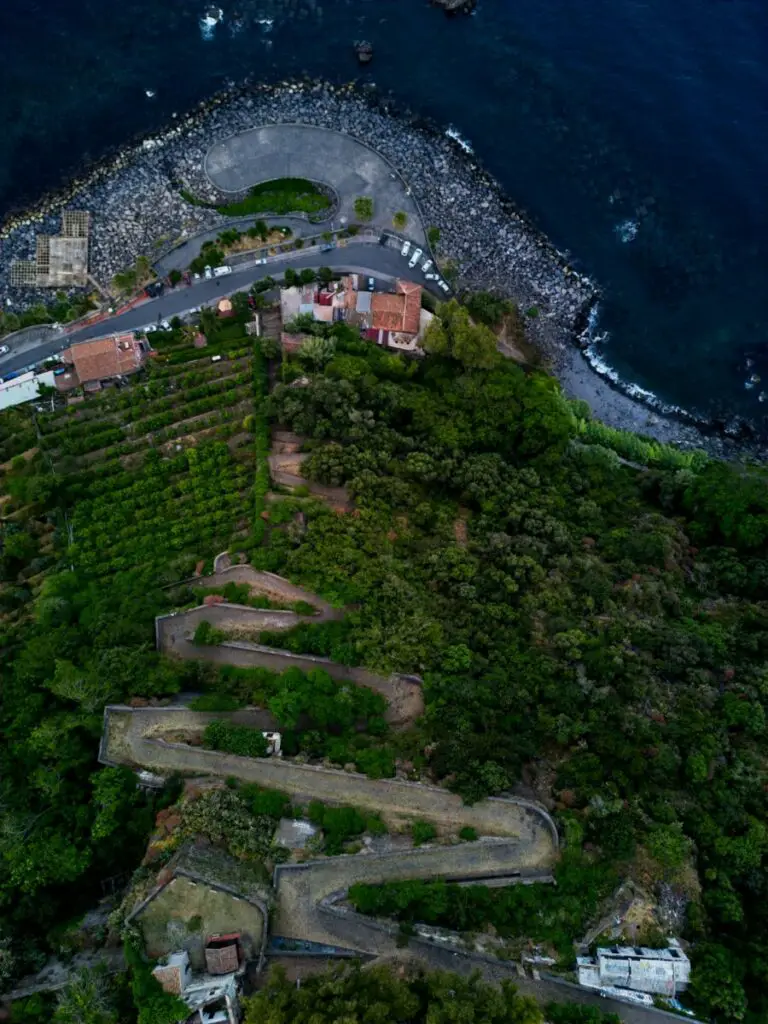
Mini 3 Pro Photo Quality in Easy Light Conditions
Let’s see some images taken in easy light conditions

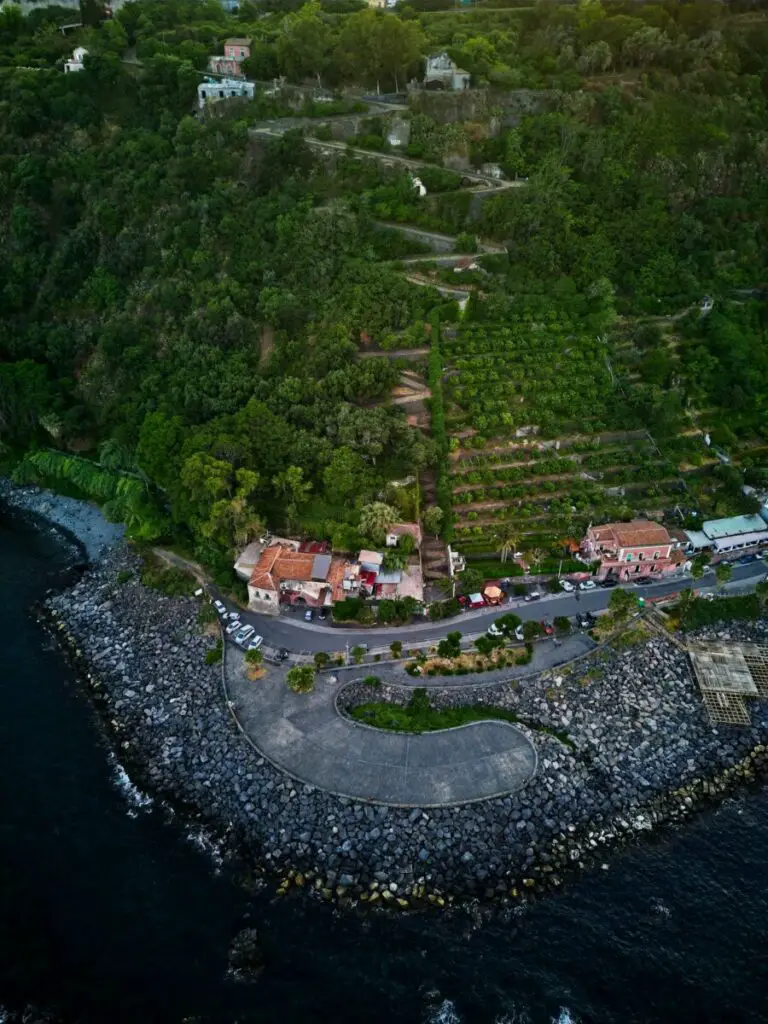
In photos taken with the Mini 3 Pro, the shadows have plenty of detail, and it is possible to recover more in post-processing
The colors look nice and organic, without any major cast; they respond very well to color grading
When the Mini 3 was released, In photos containing the sky, there was an area with higher luminosity and a slight magenta cast in the middle of the image
But things have improved after several firmware updates
The performance in good light is good, a big improvement compared to the Mini 2

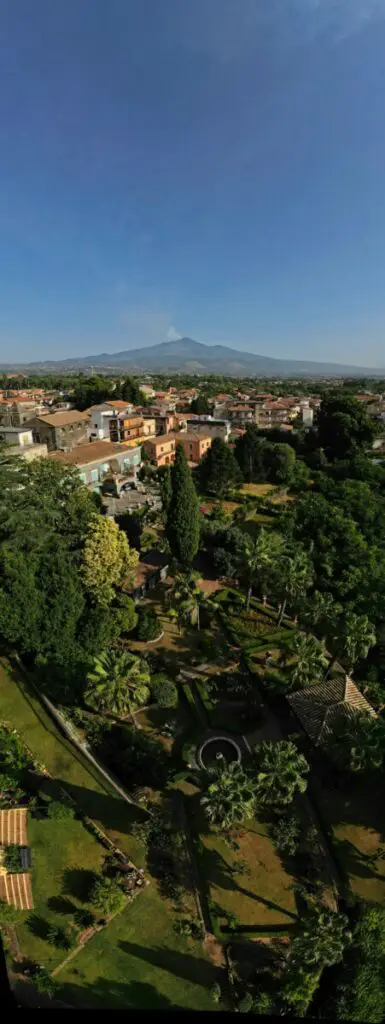
By tilting the camera down we take the sky out of the equation to focus on detail and color rendition
Detail is not the strong point of the Mini 3 Pro, but this is not necessarily a bad thing. The image is well-balanced and does not jump to the eyes because of oversharpening. The colors are very natural and engaging
The only weakness is the amount of detail in the elements in the background
In good light conditions, the 48MP mode performs better adding a touch of extra detail
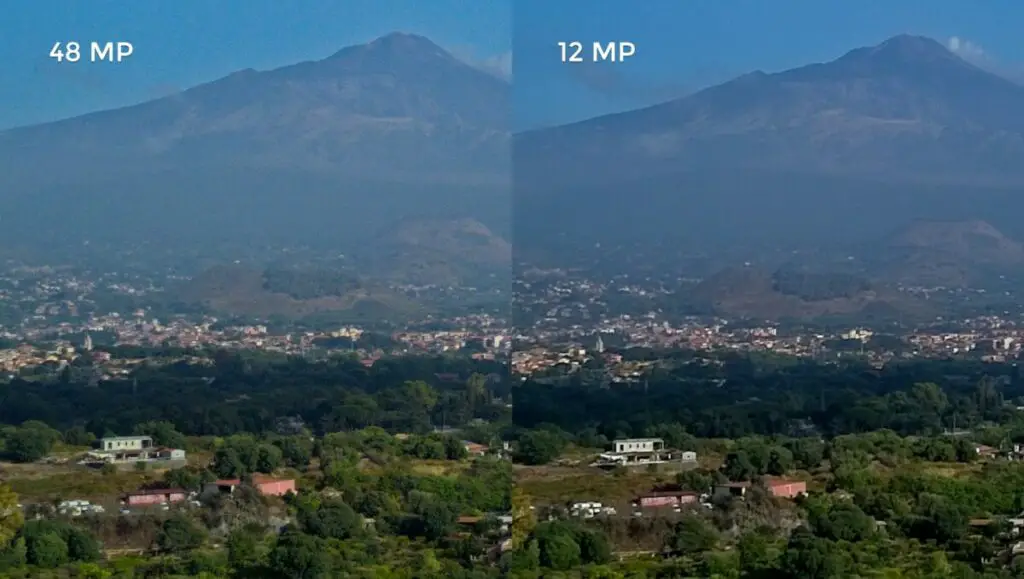
Here we have the single photo compared with the 48MP one. When zooming in we notice a tiny bit of extra detail on the 48MP one
For editing and color grading all the images I have used the excellent Luminar Neo, the tool I use for editing and managing all my photos
You will find info about Luminar Neo together with a coupon for a 10% discount by entering the code “vicvideopic” using the button below
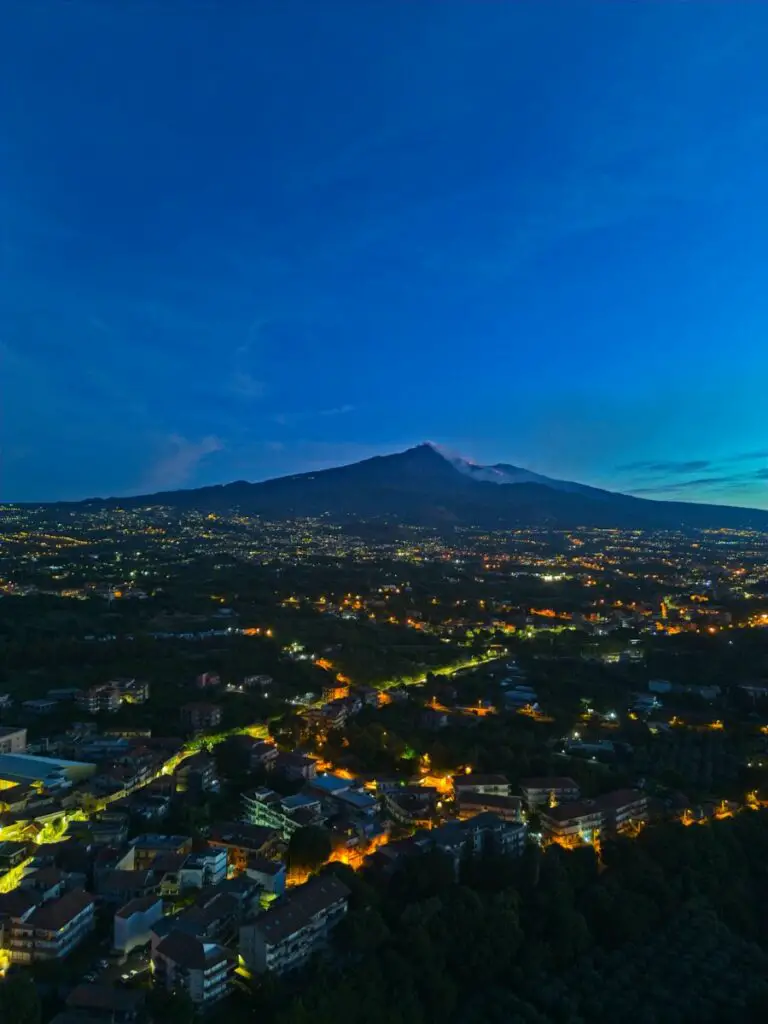
Vertical Photos with the Mini 3 Pro
The ability to shoot video in vertical format is a big selling point of the Mini 3 Pro for users active on social media platforms. I like the possibility of shooting photos in portrait mode, as it opens up creative opportunities
(Photo by Vicvideopic)
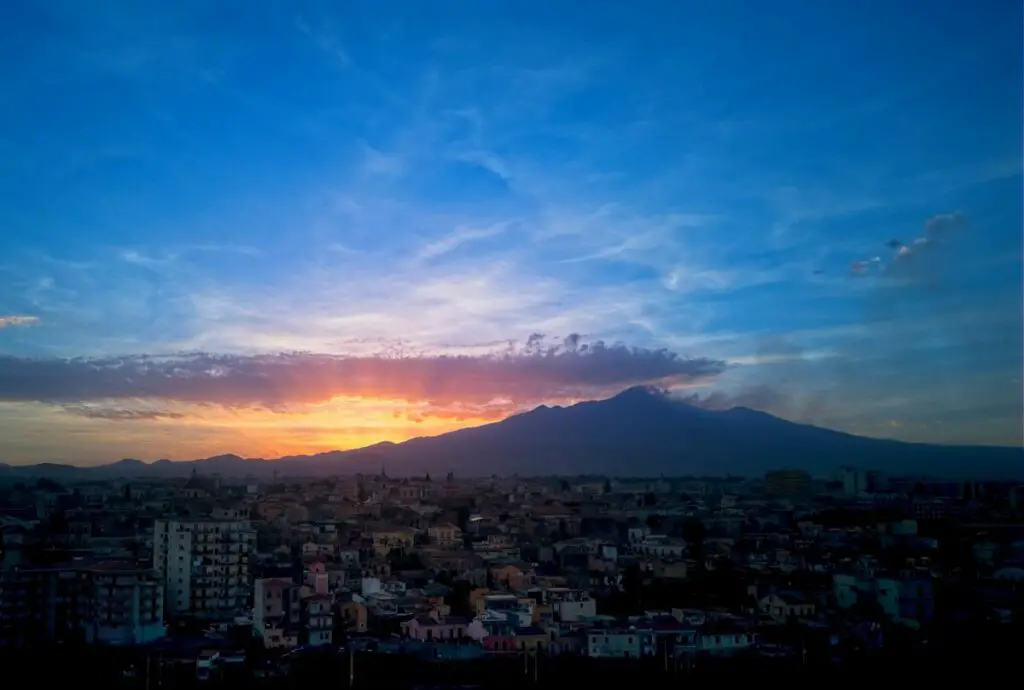
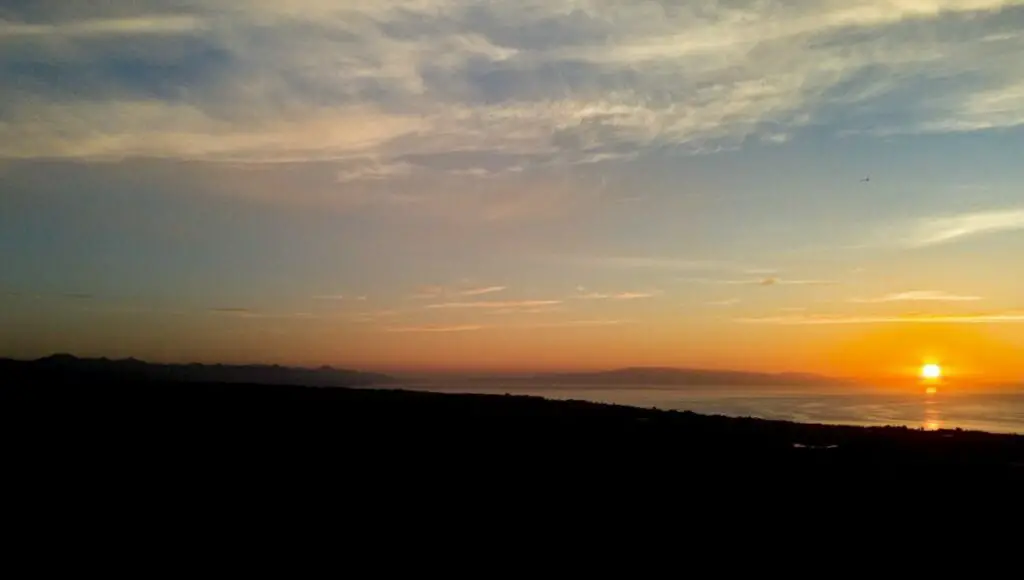
Photos Against the Sun
Images shot in the direction of the sun are the most difficult to reproduce correctly, due to the extreme dynamic range
It is a traditionally weak area for drones, due to the small lenses and the reduced size of sensors
Here the full sun is in the image at sunrise. Let’s start by exposing to optimize the sun and the sky, leaving the ground as a silhouette
The result is excellent, with no flare around the sun and an excellent structure of the sky

The lenses of the cameras have improved a lot in the last DJI generation
If we try to raise the shadows and recover some details in the elements on the ground, the result is decent, but there is some chromatic noise and aberrations, and the town by the sea has little detail. But these are extreme light conditions
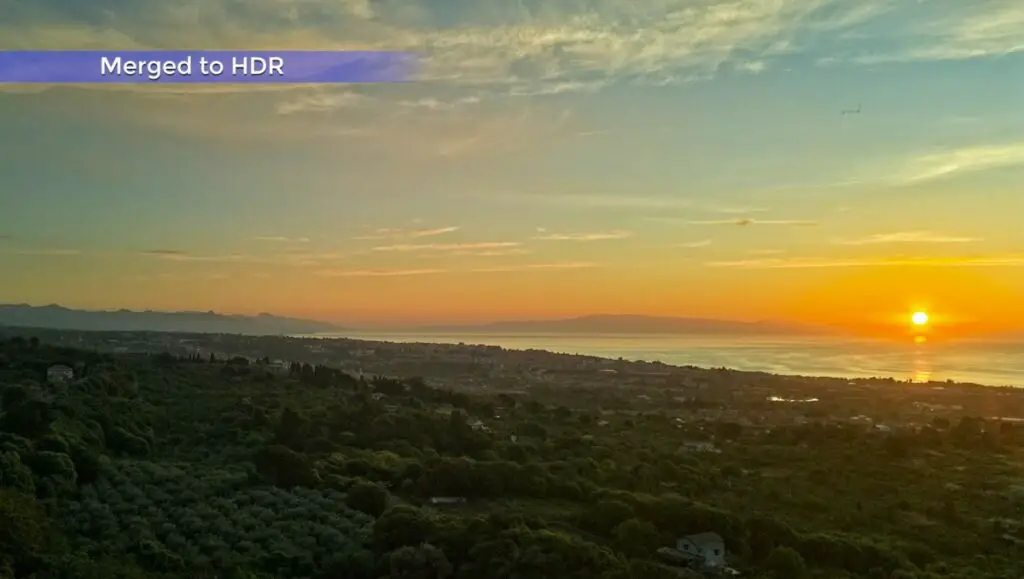
The same scene in bracketed photos merged to HDR gives better results, in this case with only 3 shots
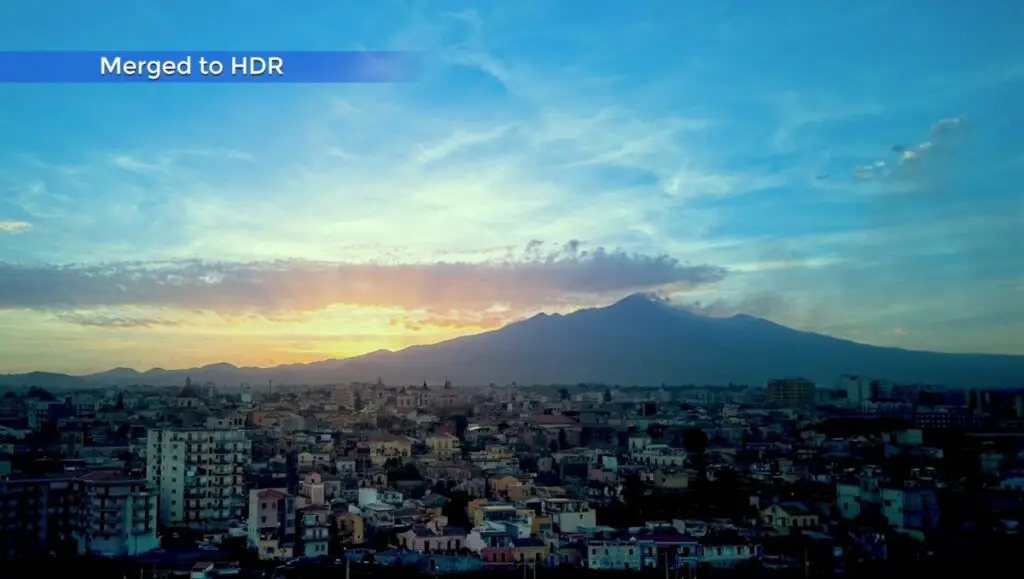
Let’s see another example made with five photos. Much better!
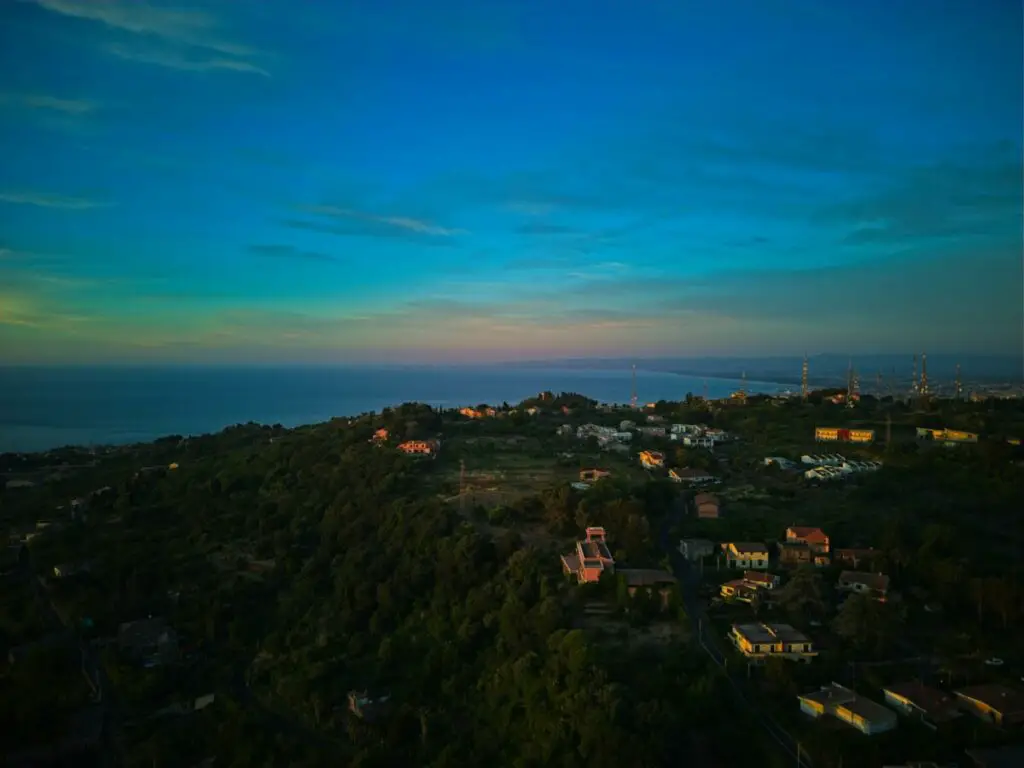
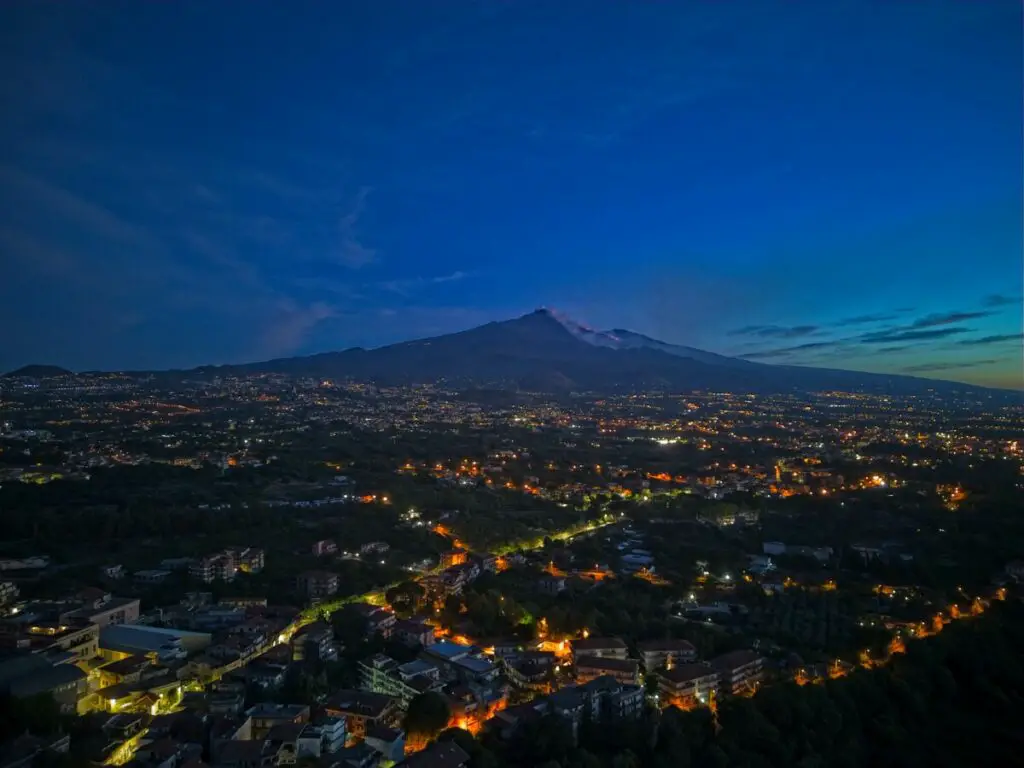
Photos at Night and in Low Light Conditions with the Mini 3 Pro
In low light conditions, the Mini 3 puts up an excellent performance, due in part to the very wide aperture of F 1.7
It is amazing to see how much the last generation of the Mavic line has improved in the last couple of years. Noise is a thing of the past
Here is an in-depth analysis of night photography with the Mini 3 Pro