
Automatic Exposure Bracketing (AEB) is a tool that I use all the time for photos with any drone, for two reasons
Using AEB mode with the DJI Mini 3 Pro, five photos are taken in rapid succession with different exposure values, therefore one image is always perfectly exposed. Another advantage is to extend the dynamic range by merging the images to HDR
It is a bit like a free insurance policy: when shooting a lot of photos, maybe during a trip abroad, it may happen to have a few shots wrongly exposed, especially against the sun or in low light and this can be extremely frustrating
After the release of the basic, more affordable Mini 3, I have made a specific comparison of the Mini 3 and 3 Pro for photography
Other relevant articles:
- 9 tips and tricks for epic drone photography
- Photography tips for the Mini 3 and 3 Pro
- How to make long-exposure photos with the Mini 3 and Mini 3 Pro for unusual creative effects
- Photography with the Mini 3 Pro
- Panorama photography with the Mini 3 Pro
If you prefer to watch It as a video, You will find my YouTube version at the end of this article
How to Shoot in Auto Bracketing Mode
All DJI prosumer drones have an AEB function with 3 photos, or with a choice between 3 or 5
In the Mini 3 Pro, there is an option for AEB mode in the Photo video menu with a choice of three or five photos. The shots are taken in rapid succession, with an exposure interval of ⅔ of a stop
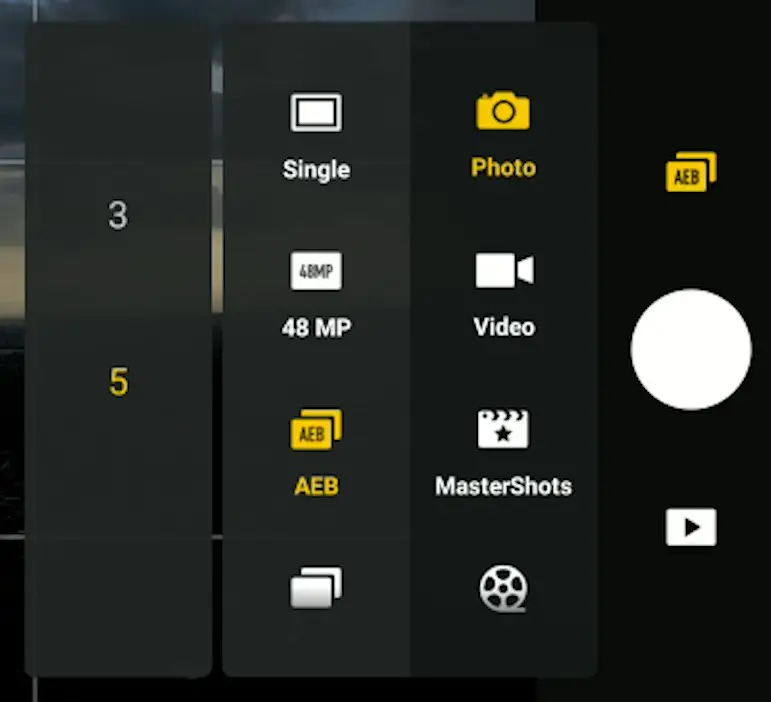
A wider interval of exposure between each shot would be preferable, possibly 1 or 1.5 stops
Benefits of Merging to HDR
The 5 photos taken in AEB can be merged to HDR using RAW processing software like Lightroom or Luminar Neo or specific programs like Photomatix
The major benefit of merging bracketed photos to HDR is to increase the dynamic range by taking the darkest parts from the overexposed photos and the brightest parts from the underexposed ones
By merging the photos, highlights and shadows will be within a range that can be correctly reproduced
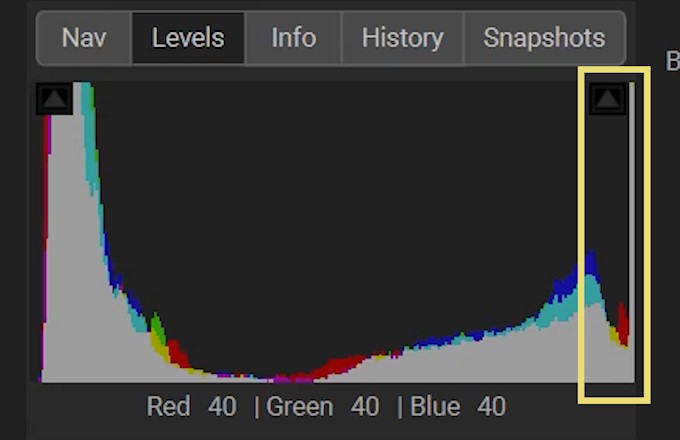
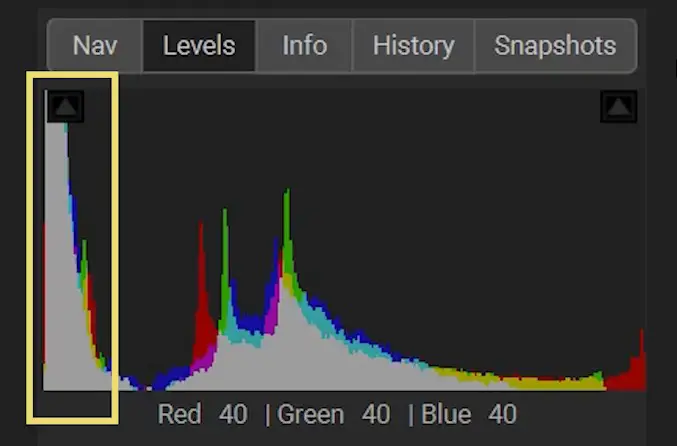
The sensor can reproduce highlights only up to a certain luminosity, after that the whites will be burned and it will be impossible to recover them
This is shown on the histogram by the bars touching the right edge
The same goes for the shadows, below a certain point the sensor will interpret all dark shadows as black, as we can see from the bars bunched up on the left edge
How to Edit AEB Photos
Even though the quality of JPEG files with the Mini 3 Pro has improved a lot compared to previous models, it is strongly suggested to use RAW files, as they contain more information
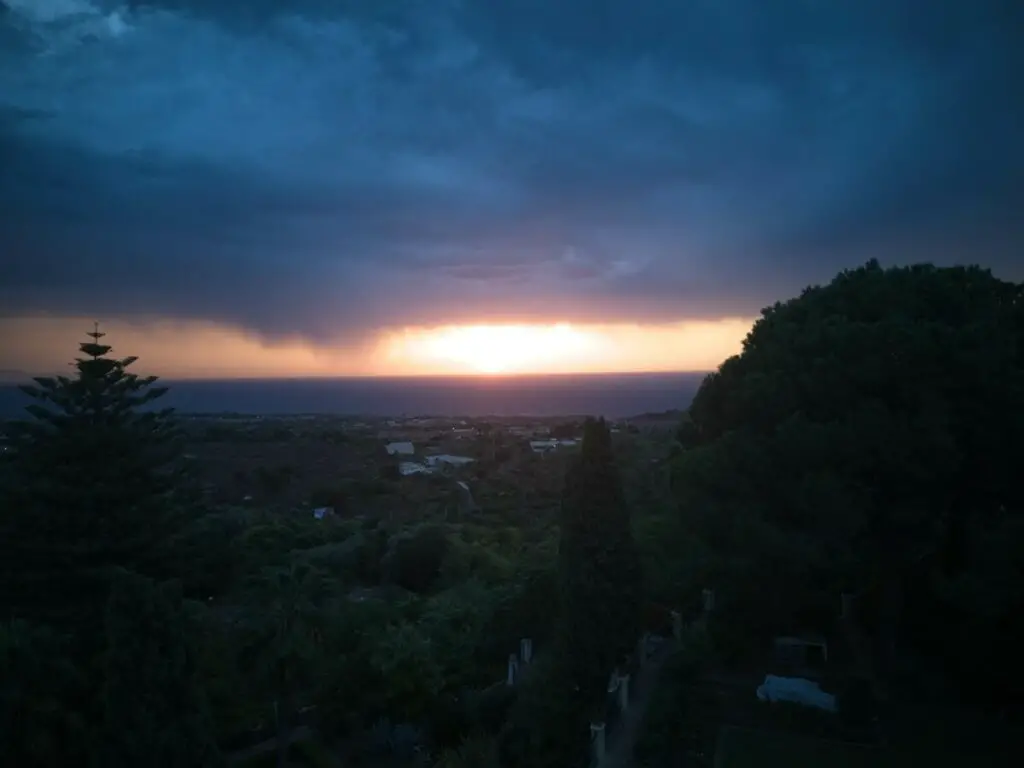
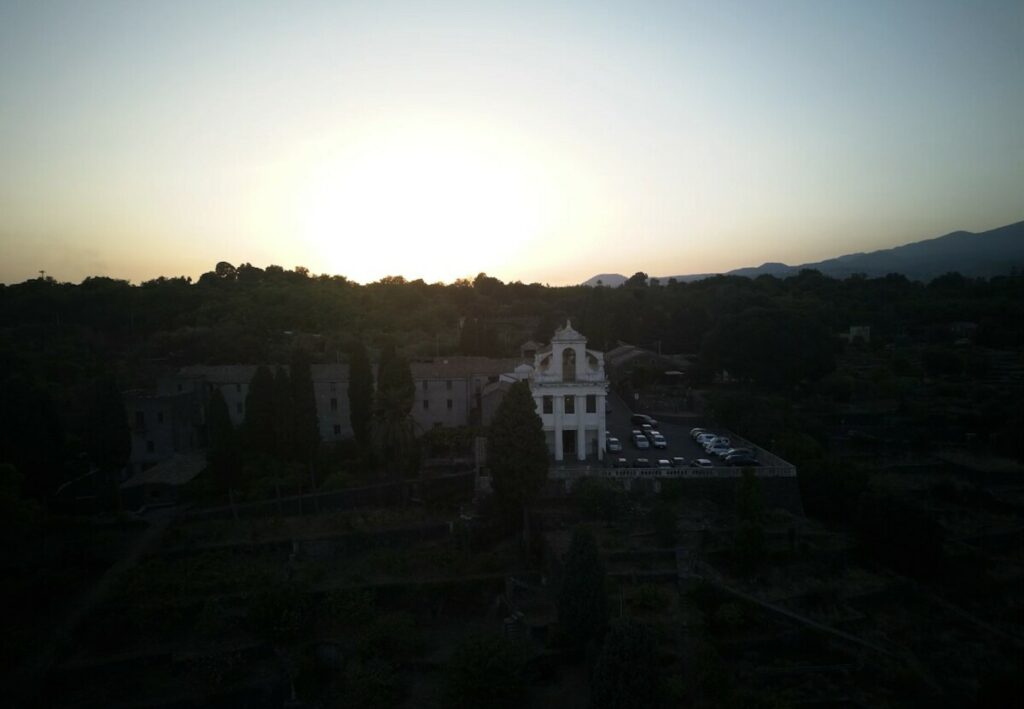
This image was taken right after sunrise on an overcast day. The full sun is in the image uncovered by clouds
In the histogram we notice that there are bars bunched up against both the left and the right edges, this shows that we are in an extreme dynamic range situation
When exposed to optimize the sun and avoid burning the highlight, the shadows will be too dark. While by exposing to optimize the shadows, the highlights are burnt beyond repair
More details about How to expose video and photos with the Mini 3 and 3 Pro in my specific article
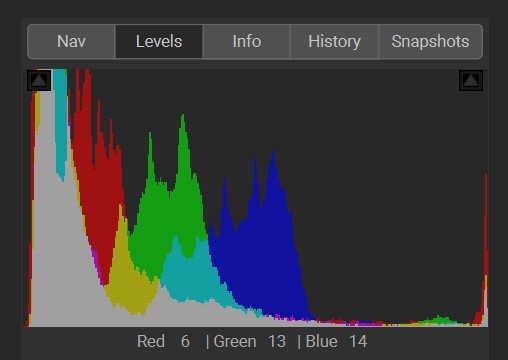
After merging the 5 photos to HDR, the resulting image maintains an excellent structure of the sky, the area around the sun is under control without any flare or chromatic aberrations and there is plenty of detail in the shadows
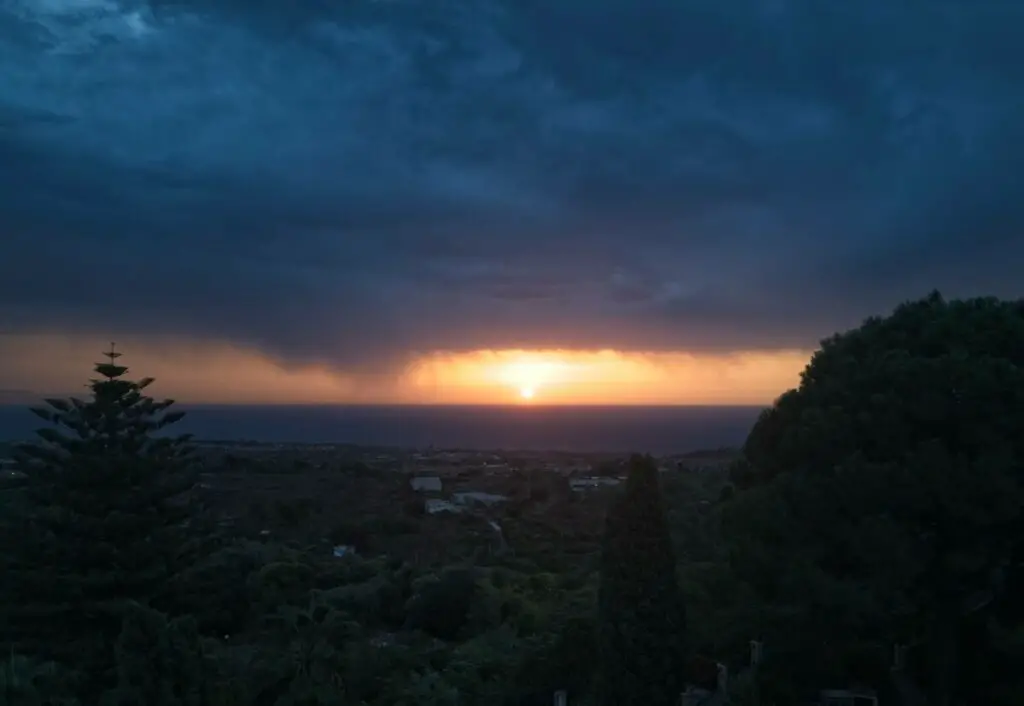
The merged image can be enhanced by color grading, increasing mid-tones and shadows while decreasing the overall exposure, adding a bit of Dehaze, increasing the saturation, and adjusting the white balance
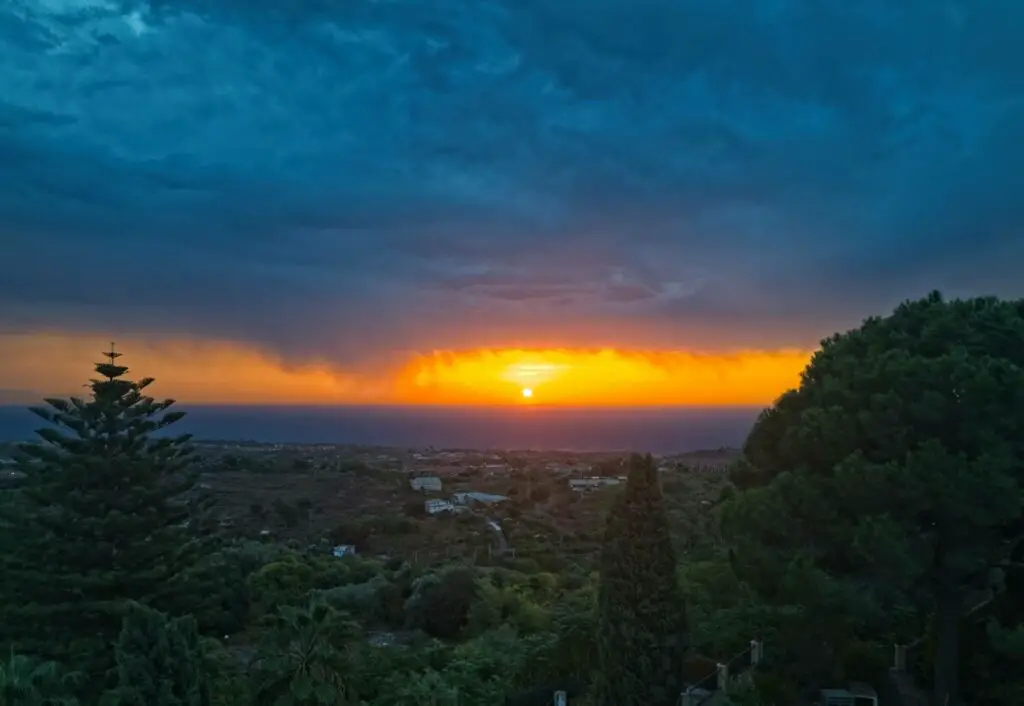
The result is excellent, and much closer to what we see in real life. The sun is perfectly exposed, and the structure of the sky is outstanding
There is plenty of definition in the elements on the ground, while a good amount of contrast is retained. The very wide aperture of the lens of the Mini 3 helps to render the shadows
In all the photos shown in this article, I have not used any local adjustments that are very useful to further reduce the dynamic range. When using merged images they are not needed
For editing and color grading all the images I have used the excellent Luminar Neo, the tool I use for editing and managing all my photos
You can purchase Luminar Neo with a 10% discount coupon by entering the code “vicvideopic” through the button below
More detail about exposure in my article about Camera Settings for photography with the Mini 3 Pro
AEB vs 48MP photos
Here is the same scene, taken a few seconds later, with a single 48MP photo. The result is good considering the challenging light conditions, but nowhere near the merged image
There is an area of overblown highlights just above the sun, some chromatic noise in the shadows, and the structure of the sky cannot match the merged image
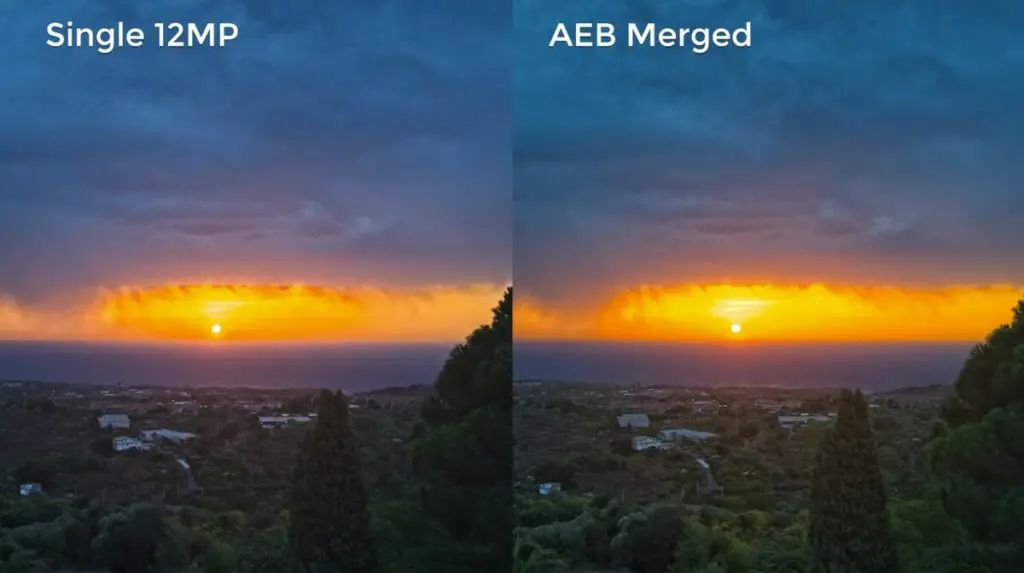
Here is one of the 12MP photos used for merging. In my opinion, the edited image is better than the 48MP one, but it cannot achieve the richness of the colors, the structure of the sky, and the details of the merged image
When using 48MP photos it is not possible to use AEB. I have tried to do it manually, by taking 5 photos and modifying `the shutter speed value in each of them, but there is a lapse of a few seconds between each shot and the drifting of the drone causes severe ghosting that ruins the resulting image
More details in my article about the 48MP photo mode of the Mini 3 Pro
AEB also works on vertical photos and the result with merged images is just as good as with regular landscape images
Examples of AEB Photos with the Mini 3 Pro Merged to HDR
The image we saw before was an extreme HDR situation. In these cases merging is without any doubt the way to go
In drone photography, the sky is very often in the frame with some degree of high dynamic range. I generally merge the bracketed photos and in most cases, I get better results compared to the single images
From time to time the merged image can have some artifacts, especially with subjects in motion or with very strong artificial lights
But since we have the 5 individual shots, if something goes wrong, we can always use one of the single images instead
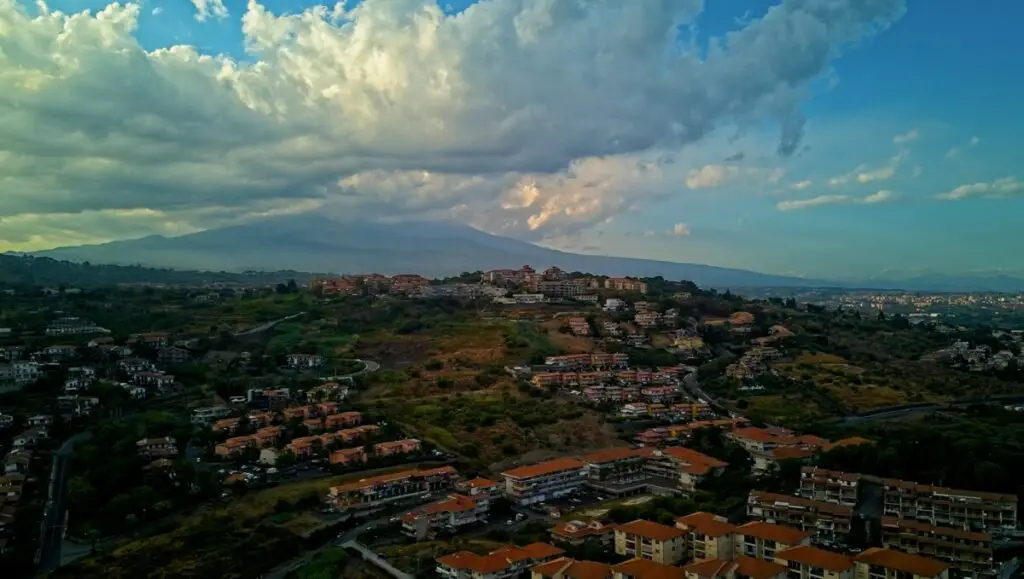
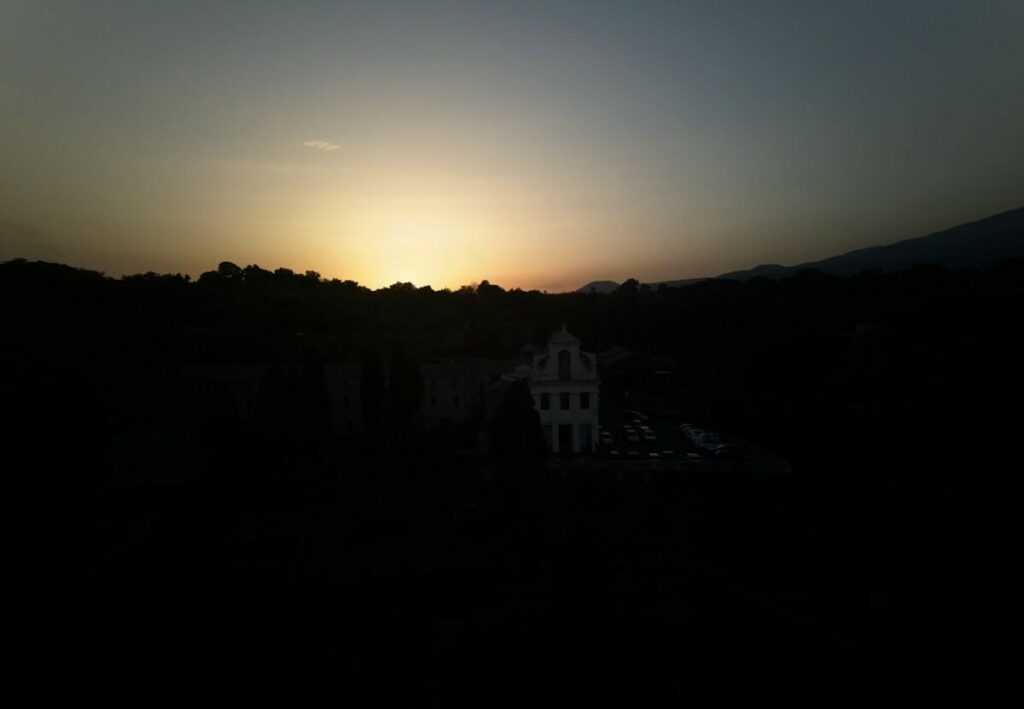
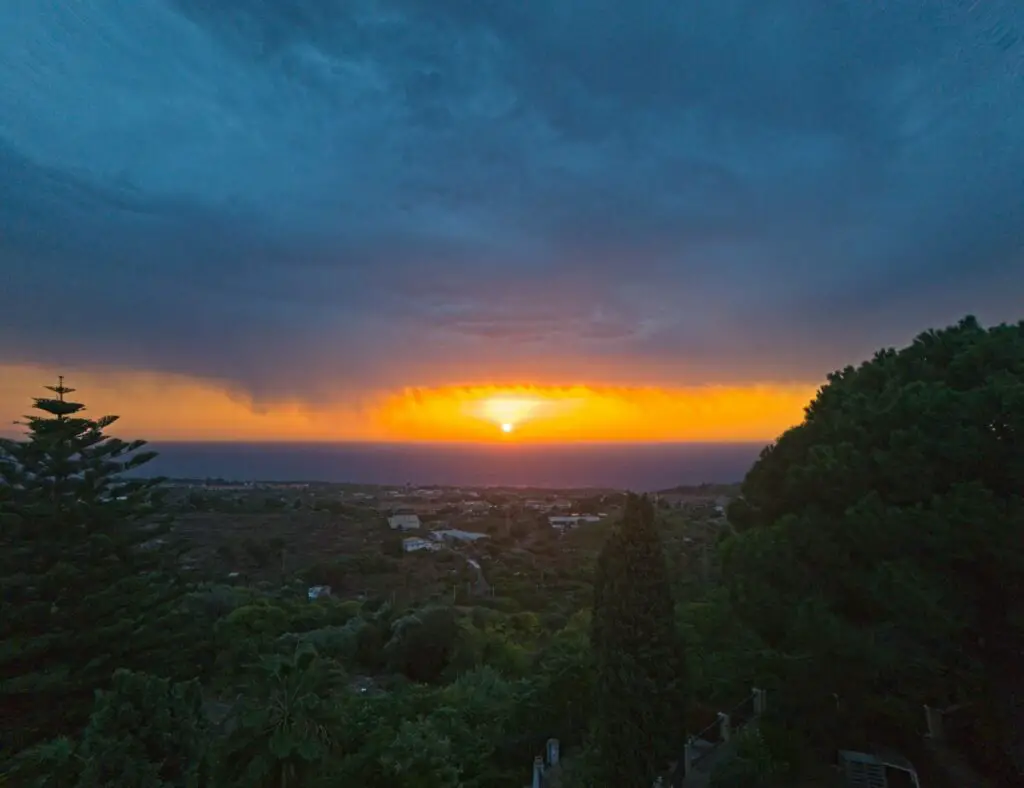
This is again a high dynamic range situation, although not as extreme. The sun is outside the frame to the left, but the sunlight is reflected by the clouds over the mountain
There is a huge difference in luminosity compared to the little village in the foreground, which normally would appear extremely dark
By merging five images the result is very well balanced
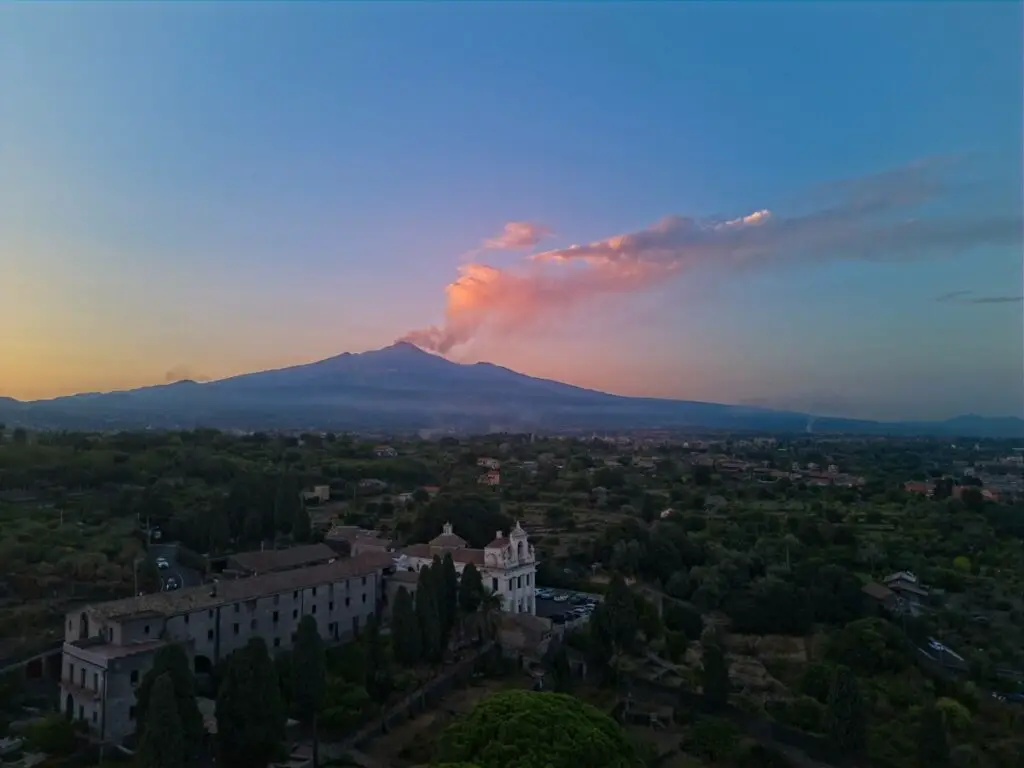
Another high dynamic range image. The sun at sunset is just outside the frame, Mount Etna is having a quiet smoke reflecting the light from the sun
The lens of the Mini 3 does an excellent job of avoiding any flare or chromatic aberration around the sun
The detail in the shadow is excellent
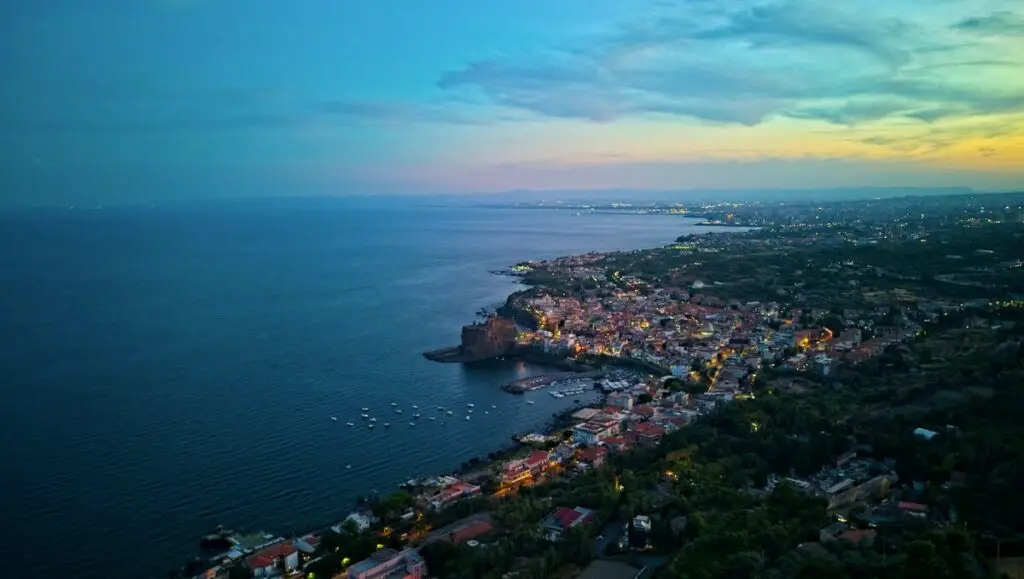
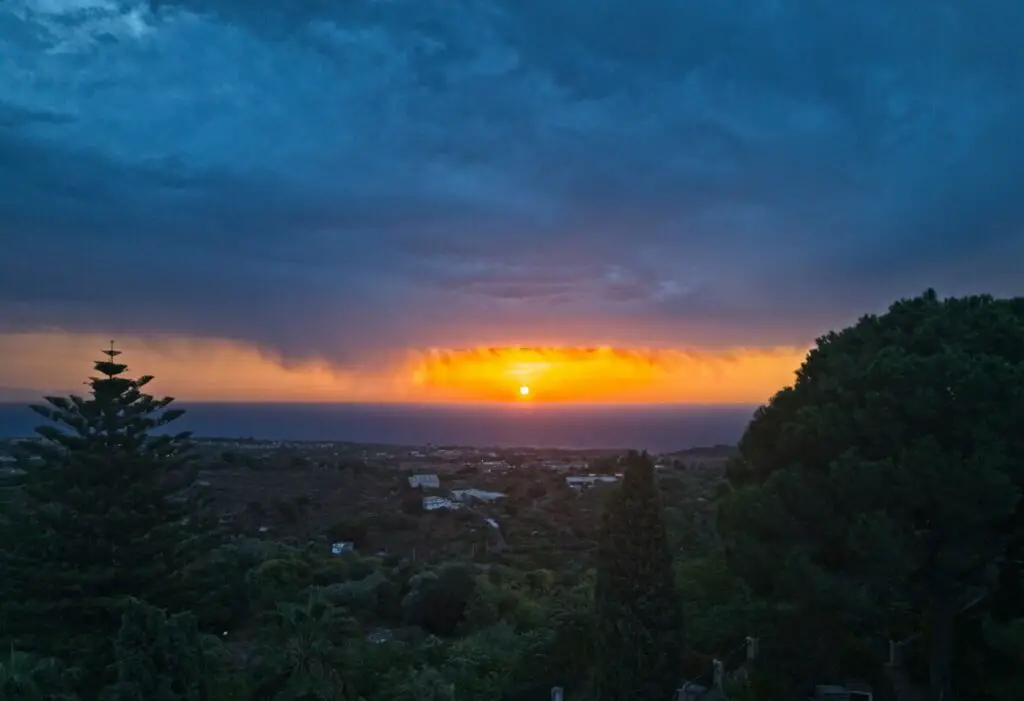
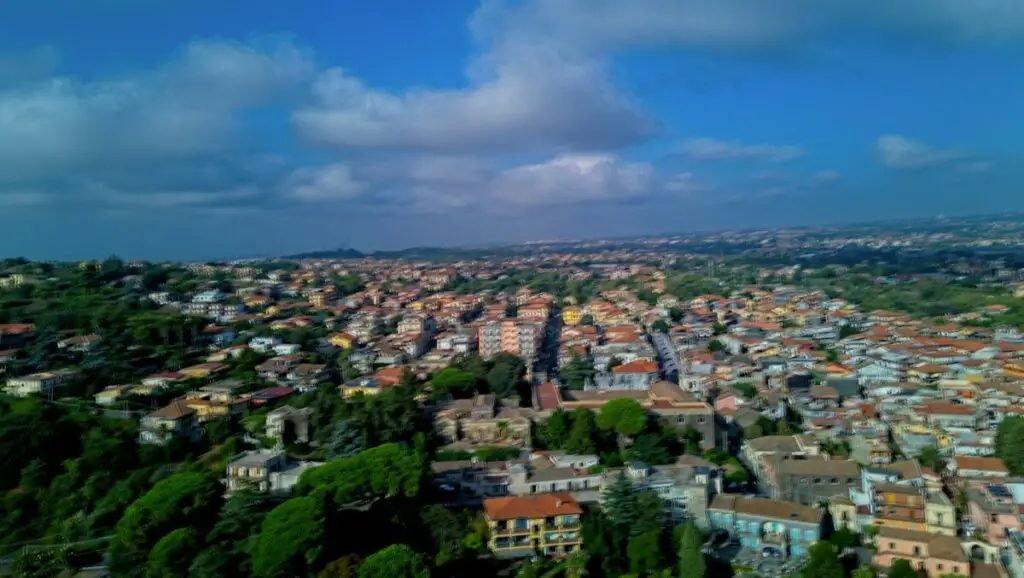
Here we have an interesting structure of the sky after sunset, with the sun at about 2 o’clock
The street light in this village by the sea and further away along the coast add interest and depth to the image
There are also some very dark areas in the vegetation and the sea, but by merging the images everything is very well balanced
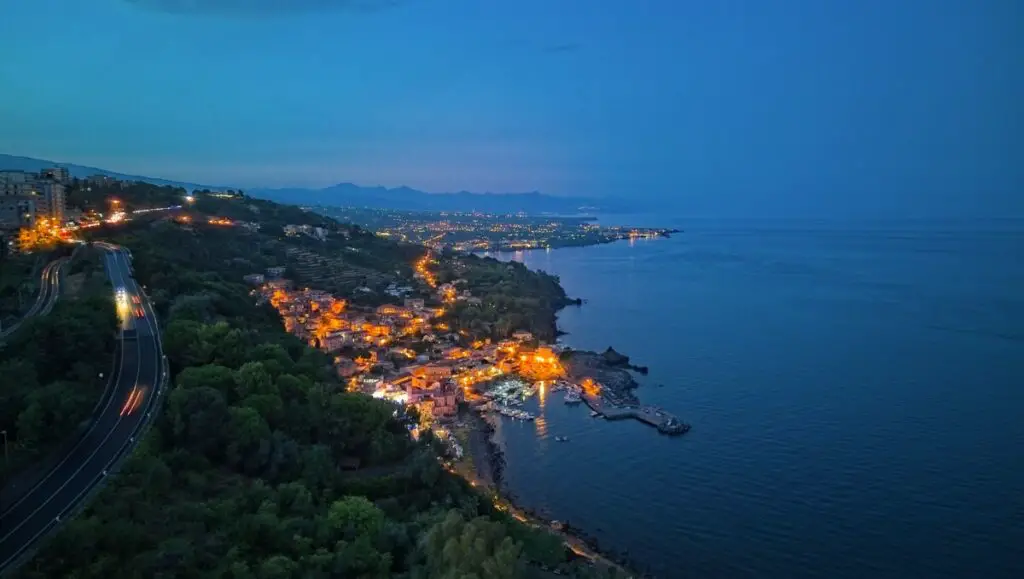
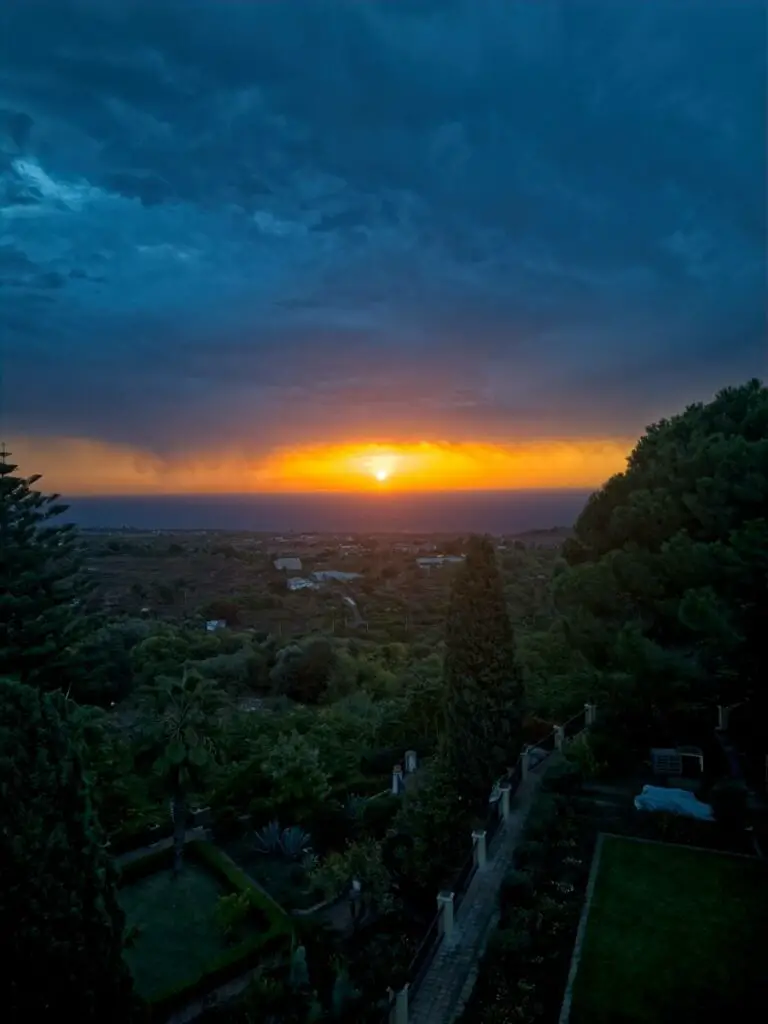
In this one there is a huge difference in luminosity between the electric light in the little village by the sea, the cars on the road above, and the very dark vegetation, with the very last twilight acting as a fade light
It would be impossible to render the highlight and the shadows properly without merging the photos to HDR
More details in my article about Night photography with the Mini 3 Pro