Master Shots can be used for two different purposes:
- To quickly gather interesting footage of an unknown location
- To produce automated short movies with music and text
Users often confuse MasterShots with Quickshots, but they work in different ways
You can check the prices for the different configurations of the Mini 4 Pro through the button below (commission earned)
Other related videos you might find interesting:
- Quickshots with the Mini 4 Pro
- Point of Interest with the Mini 4 Pro
- Spotlight with the Mini 4 Pro
- Active Track 360 new version
- Mini 4 Pro Video Quality
- Mini 4 Pro Camera Settings for Video
- Mini 4 Pro Color Profiles
- Mini 4 Pro Waypoints
- Low-light footage and Night Mode
If you prefer to watch this instead of reading it, you will find my YouTube video at the end
Settings

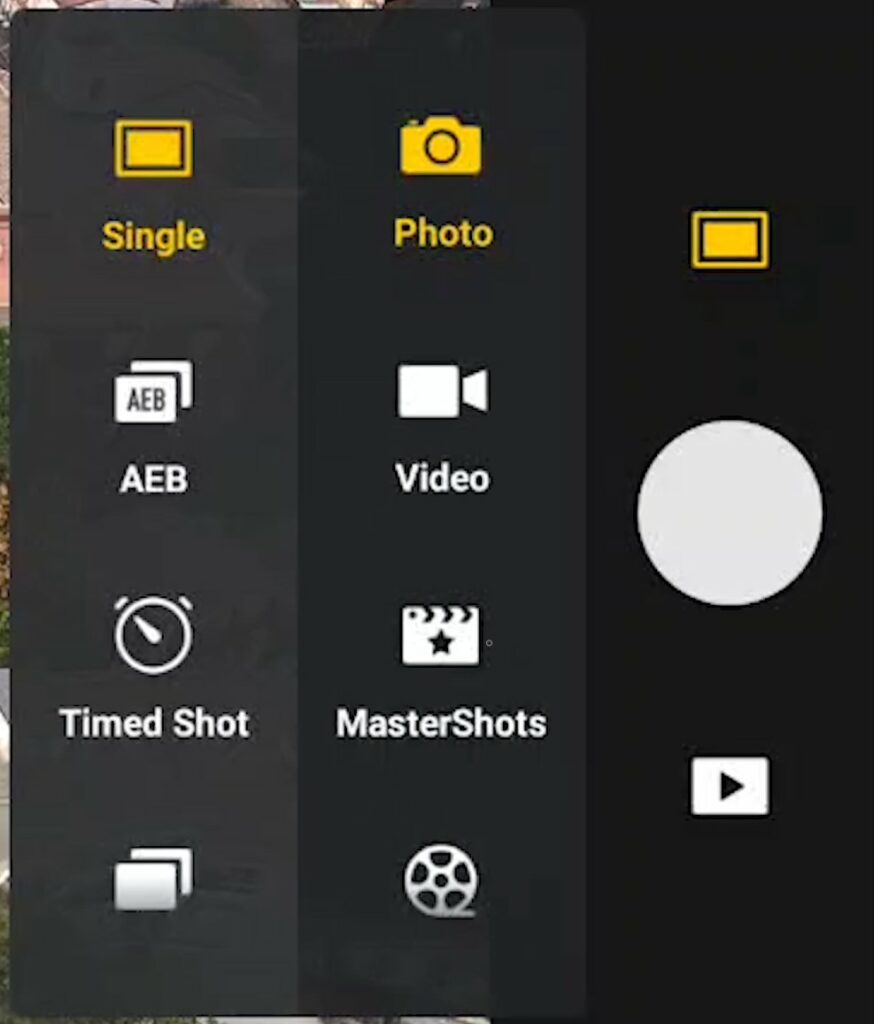
We find Masterhot in the right part of the photo/video menu, this mode can only be used when the drone is flying
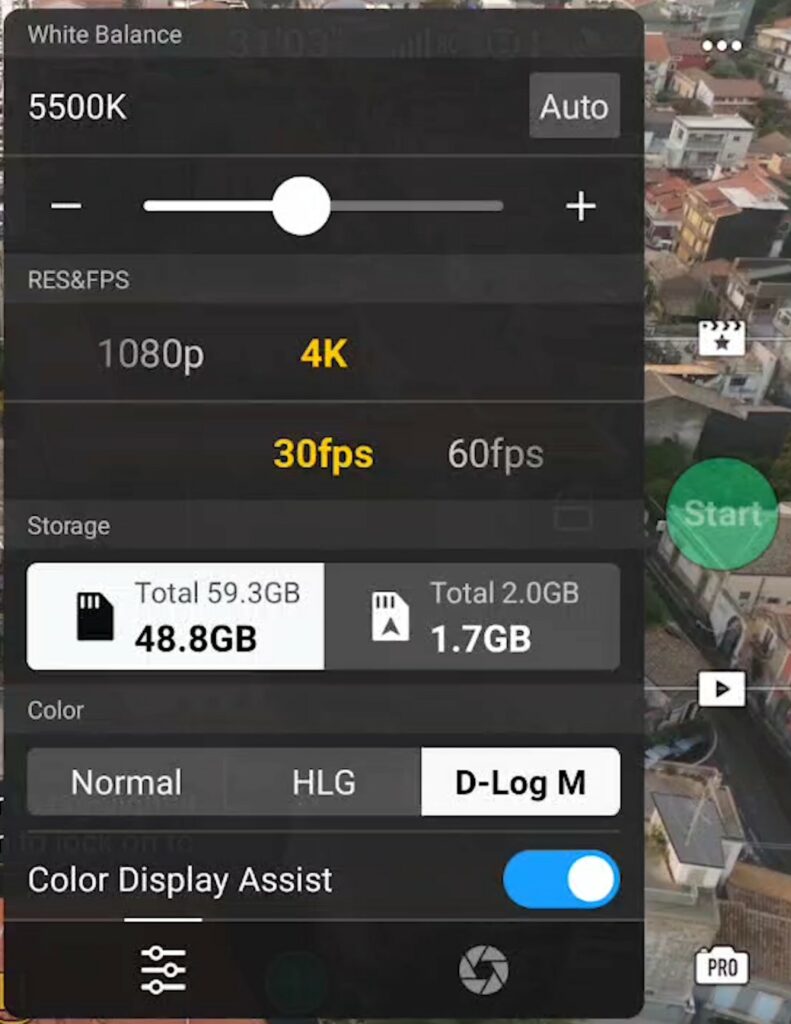
Both Auto and Manual Exposure are available

For Resolution, there is a choice between 4k and 1080p with Frame Rates of 30 and 60 fps, so it is possible to apply some slow motion, while in the Mini 3 Pro, only 30 fps is available
The 4k resolution applies only to the footage recorded during the Mastershot, while for the auto-generated short movies, the resolution is 1080p

All three Color Profiles of the Mini 4 Pro can be used, including Normal and the two 10-bit profiles, D-Log M and HLG. This is a major upgrade compared to the Mini 3 Pro, as it makes it easier to integrate the footage the the color scheme of a specific project
It is also possible to use MasterShots in vertical format, which is excellent news for users active on social media platforms
A target has to be selected by drawing a box around it. If a person is in the frame, it will be automatically recognized as a target and can be selected by simply tapping on the plus sign
In the middle of the screen, a small window shows the estimated flight time, which varies according to the situation, generally between 2 and 3 minutes
By opening the small window, we access 3 parameters: Width, Length, and Height, each of them can be set to Small, Medium, or Large to control the distance traveled during the shot
During the different moves the aircraft rises considerably in altitude, so it is suggested to start from a relatively low altitude, otherwise, the maximum height will be reached and the Mastershot will be aborted, even if the value Small is chosen for Height
For safety reasons, it is better to start at a higher altitude than all surrounding obstacles, even though the Mini 4 Pro has an omnidirectional obstacle avoidance system
Moves Performed During a Mastershot
After hitting the shutter, the aircraft will perform a series of moves according to the distance from the target and its nature
There are three different sets of moves:
- Proximity when the target is relatively close
- Landscape for a target further away
- Portrait when the target is a person
In Proximity mode the aircraft circles for a few seconds to compute its position, then it performs a Dronie going backward while raising, a Circle to the left far from the target, a Pitch Up Fly forward starting the move with the camera facing the ground and gradually tilting it up to reveal the target, a Circle to the right from a closer distance using the digital zoom, another Circle to the left from a medium distance, a Rocket, raising in altitude while keeping the camera on the target, a Camera Down Fly Forward until the target is below the aircraft, a camera down +Circle while slightly ascending for the famous screwdriver effect, a Camera Straight +Descend facing the opposite direction and a Camera Down + Descend
The camera stops recording and the aircraft goes back to the initial position
During the Mastershot the map on the lower left of the screen shows the itinerary in green and the position of the drone with a blue triangle, handy for spotting obstacles on the way
The moves in Portrait mode are very similar to the ones in Proximity, while Landscape mode introduces some moves with the drone rolling while turning like in FPV mode
How to Expose
During each MasterShot the aircraft and the gimbal perform all sorts of movements with the camera alternating top-down views to others facing forward including the sky
This leads to important shifts in luminosity. For good results, it is crucial to expose correctly
Beginners will start by using Auto Exposure, but in this mode, the software will compensate for the difference in luminosity, thus creating noticeable shifts in the brightness of the footage, a clear sign of an amateur job
I suggest always using Manual Exposure to control the luminosity and then adjusting the shadows while editing
But in many cases, the differences in luminosity will still be too strong when moving into shots including the sky, so I suggest carefully planning the shots
Better results are obtained by shooting around before sunrise, right after sunset, or with the sun covered by clouds, as the differences in luminosity will be reduced and the shadows much softer
This is the reason why it is often said that the middle of a sunny day is the time when videographers sleep
For the same reason, it is generally preferable to have the sun behind the camera
With the Masterhot properly exposed, it is then possible to cut out a few interesting clips when exploring an unknown location in just a few minutes
Auto-Generated Short Movies
Mastershots can be occasionally useful to advanced users, however, the main purpose is for beginners to produce some exciting short movies with music and text easily. Let’s see how they work
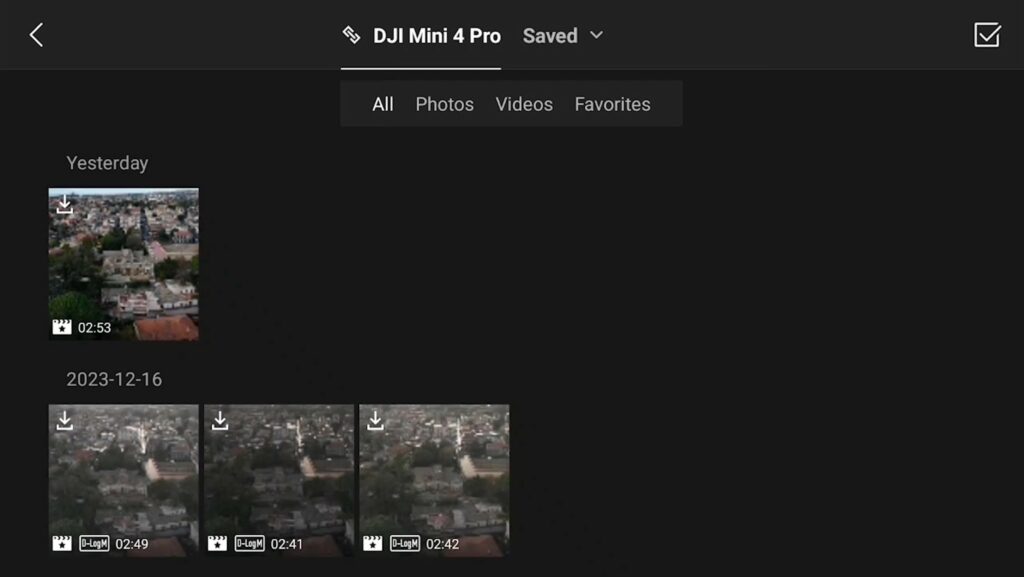
After turning on the controller and the drone, click on the icon with the small triangle below the shutter to access the Album containing the file on the memory disk and the internal memory of the drone
The files shot in color modes other than Normal show the name of the profile, D Log M, or HLG. I find this very useful

The files for Mastershots have an icon with a small star in the middle. By clicking on one of them we get a full-screen view
By clicking on Create Mastershot we access the different templates, divided into five groups for different moods:
- Original
- Epic
- Cheerful
- Smooth
- Pop

Each of them contains several templates for short movies of about 30 to 40 seconds putting together short clips taken from the Mastershot with music
Some templates contain text that cannot be modified
The resulting movie will be at a resolution of 1080p
When using a controller connected to a remote device, like the RC N2, the operation is straightforward, while with the RC 2 controller with the built-in screen, there is a minor inconvenience, as the files must be transferred using Quick Transfer to a smartphone or tablet with DJI Fly app installed to apply the templates and generate the short movie
If You Prefer To Watch As a Video
