
The Air 3 and Mini 4 Pro were released in the summer of 2023
Several functionalities have been added or improved via firmware updates, so it is the right time for an updated overview of all the features of the two models, aimed not only at beginners but also at users who want to know more about some specific topics
You can check the prices of the different configurations for the Mini 4 Pro and for the Air 3. It is an affiliate link, so in case of purchase I receive a small commission
If you prefer to watch this as a video, you will find my YouTube version at the end
Differences Between the two Models
The Mini 4 Pro and Air 3 have the same camera, sensor, and processor. All the settings, features, and intelligent modes are identical
Most of the content applies to both models, so I have chosen to make one single video for the two of them
There are two main differences between the two models
Dual Lens
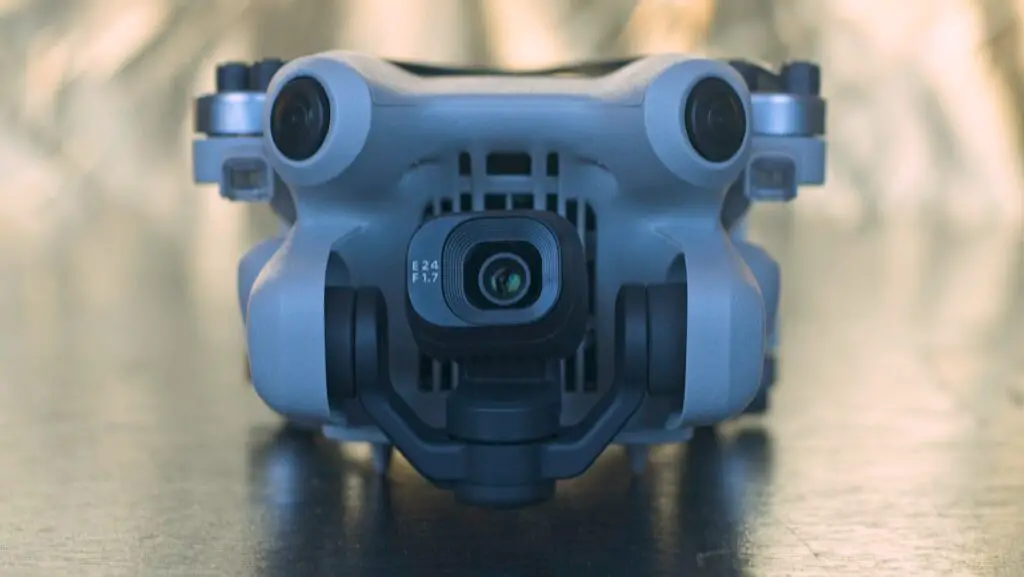
The Air 3 has a dual-lens system. The wide-angle lens is the same 1/1.3” as the Mini 4 Pro
This model is equipped with a second lens, a medium telephoto one with the same sensor size and resolution as the wide-angle one but with a field of view equivalent to 70mm
This is a very appealing feature of the Air 3, to get a closer view of targets we could not otherwise reach, and for spectacular parallax effects. More details in my article about the telephoto lens of the Air 3
Weight
The Mini 4 Pro is just below the important weight threshold of 250 grams, therefore under more relaxed regulation in most countries
This model has many functionalities, so every gram had to be shaved off to remain under the weight threshold
The Air 3 weighs 720 grams and offers the same functionalities, plus the dual lens system
It is built without weight constraints, so it feels much more powerful and can operate in stronger winds. It is very solidly built and can better stand some light crashes
Overview of the drones
A major update compared to the Mini 3 Pro and the Air 2S is the presence of an omnidirectional obstacle avoidance system. This feature was previously reserved for the flagship model of the line
Like the Mini 3 Pro, the two new models have pairs of sensors at the front, toward the back, and at the bottom, in the same position as the previous model
But the front and the back ones have wide-angle vision oriented upwards and to the side for detecting obstacles to the sides and above for 360-degree detection
This is a crucial safety feature. I will analyze the behavior when encountering obstacles later on in this video
In the Mini 4 Pro, the camera can rotate 90 degrees for vertical videos and photos, a handy feature for users active on social media platforms
The Air 3 has an announced battery life of 46 minutes, an excellent performance, versus 34 minutes for the Mini 4 Pro. An intelligent flight battery can be purchased to get the same performance as the one of the Air 3, but it is not available in Europe
For both models, it is possible to purchase a fly more combo with two extra batteries, extra propellers, a shoulder bag, and a battery charging hub for three batteries
You can check the prices of the different configurations for the Mini 4 Pro and for the Air 3. It is an affiliate link, so in case of purchase I receive a small commission
Controllers
For the Air 3 and the Mini 3 Pro DJI has released a brand new pair of remote controllers, the RC 2 and RC N2. The previous controllers, RC and RC N1, are not compatible with these models
The weak point of the Mini 3 Pro is signal transmission. It is the only model of DJI prosumer line without a pair of feet at the end of the wings. This is where the antennas are generally placed, in a vertical position
In the 3 Pro, the antennas are inside the wing, in a horizontal position, and this is one of the culprits of the poor signal. With the Air 3 and Mini 4 Pro, DJI has resumed the pair of feet to house the antennas
The new controllers integrate two built-in and two external antennas.
This doubles the number of transmitter and receiver antennas compared to the previous generation DJI RC, enhancing signal strength
The RC 2 is the most popular of the two controllers and is the one I suggest. It has a built-in screen and does not need a remote device
There is no need to carry cables and connect a mobile device. Just turn on the controller and the drone and we are ready for action. Here you find my in-depth analysis of the RC 2 controller
A cheaper alternative is the RC-N2 controller. It doesn’t have a built-in screen, so a smartphone or a tablet is needed
DJI Fly app
Before You Fly Screen
When turning on only the controller, this screen appears
Clicking on the Before You Fly area at the top, we can check the local maps for no-fly areas and authorization zones
Further down there is an icon for Quick Transfer, to transfer files from the aircraft to a smartphone or tablet
Through the next icon, Service, we access several after-sale services offered by DJI, including the coverage for DJI Care
We can tap on the Album icon on the lower left to access all photos and videos in the aircraft’s internal storage and the memory disk
The next icon is for DJI’s social media SkyPixel
The icon Profile, contains the Flight data center with the log of all the flights made with the drone
On the top right-hand corner, an icon to access some tutorials made by DJI
Left of the Screen
After turning on the drone, this other screen appears and we can press the icon GoFly. We are now on the main page of DJI Fly app, the software interface for all the current models of the DJI Prosumer line
To the left, in the middle, is a button for taking off. By simply tapping on it we access the auto take-off button. If we press and hold the circle Take Off, the drone will hover at a height of about one meter or three feet
The icon above is to access Waypoints, a powerful functionality previously reserved for the flagship model of the DJI prosumer line. It is now available on the Mini 4 Pro and Air 3
Waypoints create missions made by two or more points. For each point, the position of the drone, its elevation, and the camera orientation are stored in memory. The software will handle the smooth transition within points
Each mission is stored in memory and can be retrieved to perform the same flight in different light conditions or times of the day. You can watch my in-depth article about Waypoints here
Top of the Screen
On the top left, an icon shows the current Speed Mode:
- Cine
- Normal
- Sport
They are selected using the switch in the middle of the controller
To the right, a display shows technical warnings about the aircraft, the signal transmission, or restricted zones. By clicking on it we get some extra details, we can also modify the Return To Home Altitude, the Maximum Altitude and Distance, and the Storage Location
The next icon to the right shows the percentage of battery left and the estimated remaining flight time. By clicking on the circle icon we get a detailed view of the time left until Return to Home, a forced landing, and battery depletion
The next icon shows the Signal Strength. White bars indicate an excellent signal, yellow bars show that the signal has dropped, and red bars poor signal, generally just before disconnection
The following icon is white when the obstacle avoidance sensors are active, it turns to red when they are not active, for example when flying in Sport mode
The next icon indicates the number of satellites connected. Before taking off, it is suggested to wait until at least a dozen satellites are connected, so that the Home Point is updated in a position close to the operator, which helps to keep track of the aircraft’s position
Right of the Screen
In the right part of the screen, we find the Photo/Video menu with five options:
- Photo
- Video
- Mastershot
- Quickshots
- Hyperlapse
- Panorama
Photo
If we select Photo, a vertical menu to the left shows the photo modes available:
- Single
- AEB
- Burst
- Timed shots
For more info refer to my article about photography with the Mini 4 Pro or to the one about the Air 3
Video
When choosing Video, the menu to the left shows three options: Normal is used on most occasions
The next one is Night. This mode automatically applies noise reduction and sharpening to the footage
The last option is Slow motion. In this mode, we can take footage at 100 fps in 4k resolution for ultra-slow motion four times slower than real time if encoding at 24 fps. At a resolution of 1080p eight times slow motion is available at 200 fps. This is a major improvement compared to the Mini 3 Pro
With this method the footage is immediately slowed down it doesn’t have to be interpreted by a video editor. This makes it ideal for clips to be used immediately
The big round shutter on the right is red when video mode is selected, and white for Photo mode
The area to the left of the shutter is different in the two models
Mini 4 Pro
In the Mini 4 Pro, the top button rotates the camera from the traditional horizontal position to the vertical one, a crucial feature for users active on social media platforms
The icon below is for the Digital Zoom. By tapping on it we cycle to two times and then three times zoom. By holding and dragging we can apply progressive zoom, although a smoother way is using the right wheel of the remote control
Being a digital zoom there is a loss of resolution, just like zooming on the image while editing
Air 3
In the Air 3, the button to the left labeled 1 selects the wide-angle lens, the one below the telephoto one
With the telephoto lens, we get a three times optical zoom without resolution loss and this is a major feature of the Air 3, a deal maker for many users
In video mode, it is possible to apply a digital zoom up to a whopping 9 times; there is a loss of resolution, but this feature is useful for inspection
With the Air 3, the gimbal cannot rotate for vertical video and photos, but it is possible to get a vertical cropped 2.7k image, as we will see later
The icon at the bottom toggles between Auto and manual focus. The vast majority of the time we use autofocus, manual focus is used only for targets very close to the camera, which is rare with drones. In this case, hold and drag to set the focus
The play button below the shutter shows photos and videos on the aircraft memory disk or internal storage
Bottom of the Screen
Exposure, Resolution and Frame Rate
On the bottom right, a button toggles between Auto and Manual exposure
In Auto mode, the software will choose the correct exposure for a scene, the only way we can interact is by modifying the EV value to make the image brighter or darker. I prefer to set the EV to minus .3 or .7 to avoid overexposure
We enter manual exposure mode via the icon Auto on the right which turns into Pro
By tapping on the area just to the left we can set independently the ISO and Shutter Speed values. The MM value shown below cannot be modified, it displays the luminosity resulting from the values chosen above, compared to the optimal exposure computed by the software
The next area to the left is for resolution and the frame rate. With the Mini 4 Pro, the resolutions available are 4k and 1080p, I recommend using 4k for future-proofing your footage
At 4k we can choose different frame rate frequencies, the most widely used for encoding are 24 or 30 fps. Higher frame rates like 48, 50, and 60 fps are to apply slow motion. More details in my article about slow motion with the Mini 4 Pro
In the resolution panel of the Air 3, there is also a choice of 2.7k and 1080p at a ratio of 9:16 to get an image cropped to a vertical orientation, ready to post on social media
White Balance and Color Profiles
On the bottom left of the resolution window, an icon switches to a different one. The new window is context-sensitive, it behaves according to the selected mode, Video, or Photo
At the top we can set the White Balance, I suggest always using Manual mode to avoid unwanted shifts of color. For daylight conditions, I use a value of around 5500 Kelvins
Further down, in video mode, we can choose one of the three color modes of the Mini 4 Pro and Air 3
The 8-bit Normal mode need very little editing and it is used by beginners and users who need to post their images on social media. Two 10-bit color modes are also available, D Log-M and HLG, this is another improvement compared to the Mini 3 Pro. More details in my in-depth article about Color modes in the Mini 4 Pro and Air 3
If Photo mode is selected, instead of the color mode, we can choose the photo format between JPEG, RAW, or JPEG plus RAW, and the size of the image. I suggest using 4:3 to use the full height of the sensor
Moving to the left we find an indicator of the aircraft distance from the home point, the horizontal speed is shown above, and further to the left the aircraft elevation and the vertical speed
Map, Radar, Vision Assist
The icon on the bottom left corner opens a map of the area showing the position of the drone, the home point, and the controller
By tapping on the bottom right corner it turns into a radar view showing the aircraft’s position relative to the home point, the controller and the North
By tapping again we access an interesting new safety feature, Vision Assist. It shows a black-and-white view of the direction the drone is traveling, regardless of the camera orientation
More details about the Map, Radar, and Vision Assist
Settings – Safety
By clicking on the three dots in the top right corner, we enter the general Settings divided into five tabs:
- Safety
- Control
- Camera
- Transmission
- About
Obstacle Detection
In the Safety tab, we start by specifying the behavior of the aircraft when detecting obstacles
With Bypass the aircraft will try to find the quickest way around obstacles, if Brake is selected it will stop just before them. Off disables the obstacle sensors
The obstacle avoidance system is a crucial safety feature and I suggest turning it on whenever possible
The option Display Radar Map shows an orange or red line when an obstacle is detected in front, behind, or below the aircraft, together with the distance of the obstacle from the drone
Return To Home
In the Mini 4 Pro and Air 3, Return To Home has been redesigned with several improvements
If we chose Optimal in Advanced RTH the aircraft will find the shortest path back to the home point using the obstacle avoidance system, thus saving time and batteries
If the option Preset is selected the aircraft will rise to the Auto RTH Altitude specified just below before starting the Return To Home
There are several other improvements to the Return To Home, including different visual aids that can be selected via the option AR Settings. Here is my article about Return To Home
The next option is Update Home Point. This is the p oint from where the distances are computed and also where the drone will return. It is, therefore, useful to update it if the position of the operator changes during the flight, for example when driving, hiking, cycling, or on a boat
Other Safety Features
In Flight protection, we can set the Maximum Flight Altitude and the Maximum Distance from the operator
For the Mini 4 Pro the Maximum Altitude is by default limited to 120 meters in the EU. In most countries, the aircraft should be kept within Visual Line of Sight, somewhere between 300 to 400 meters
Then we have access to the calibration for the compass and the IMU. They are to be performed only when asked by the app, or in case of unusual behavior by the drone. After clicking on Calibrate, some easy-to-follow instructions will be shown on the screen
Further down there is Find My drone. The position of the drone and the remote controller will be displayed on a map and it is also possible to have the drone flashing and beeping if it still has some battery left. I have done a specific article about how to avoid losing a drone and find it if lost
In Advanced Safety Settings we can choose the aircraft behavior in case of signal loss. There are 3 options:
- Return To Home
- Descend
- Hover
I avoid setting it to Descend, as the drone could land in water, bushes, or someone’s property
RTH is fine on most occasions but can be dangerous if we have obstacles above, for example, when flying below a canopy of trees
Hover is another good option option: the drone will remain in the same spot and we can decide what to do according to each situation
Settings – Control
In the control tab, we can display the Units in meters, kilometers, or imperial
The Subject Scanning option is to be used when tracking. When turned on, the camera recognizes people, bicycles, and cars as possible targets and puts a plus sign over them for a quicker selection. This is particularly useful for a target in motion
Smart Shot Settings consists of a series of parameters to optimize the new 360 Active Track intelligent flight mode. This popular feature has been greatly improved in the Mini 4 Pro and Air 3
Gain and Expo Settings contains several options to control the camera movement. The values can be set independently for each speed mode: Cine, Normal, and Sport
Max Horizontal, Ascend, and Descend Speed are self-explanatory
Max Angular Velocity is the speed of the camera rotation when panning using the left stick of the remote control, I suggest setting it to a low value for more control
Yaw Smoothness controls the behavior when releasing the stick after panning: with the minimum value the rotation will stop abruptly, I prefer a value just above the midpoint for a smoother move
Brake Sensitivity controls the distance traveled after releasing the right stick
Moving further down we can control the vertical movement of the gimbal: Max Control Speed determines how fast the gimbal will tilt up or down. I like to set a low value for precise moves. Tilt Smoothness controls how quickly the gimbal will stop after a move. I prefer a value slightly above the midpoint
The gimbal is by default set to Follow Mode, in which case the aircraft maintains the horizon line while flying. We can choose the FPV mode to have the drone behave like a small plane, leaning to a side while it changes direction
The gimbal calibration has to be performed in case of unusual behavior. Simply place the drone on a level base and click the Auto button
In Button Customisation, we can assign specific tasks to each of the two buttons on the back of the remote controller, to the two dials on top of the controller, and even to the combination of the two buttons with the right dial. I would leave the configuration to the default one to start with.
Settings – Camera
The Camera tab is context sensitive, it shows different choices according to the mode we are in, Video or Photo
Video Mode
In video mode, we can select the Coding Format:
- H 265 is the most recent one, it is more efficient as it produces smaller files, but is heavier on computer resources
- H 264 has been around for a long time and is still a suitable alternative
The Histogram is the only tool I use for exposing. It can be positioned anywhere on the screen. To get the correct exposure I make sure that there is some space between the last bar to the right and the right edge of the histogram to avoid burning the highlights, which cannot be recovered in post-processing
Overexposure Warning is an alternative way to check exposure, showing striped bars in the overexposed areas. I never use it as I find it distracting
Gridlines overlays visual aids on the screen to help composition. I like to have the rule of thirds on, the one in the middle
Then we can set the White Balance to Auto or Manual
In Storage, we can choose between an SD card or the internal memory. A good quality memory card of at least 64GB is strongly recommended (affiliate link)
The internal storage is only 2GB for the Mini 4 Pro and a more generous 8GB for the Air 3, it is to be used as a last resort, in case we forget to bring the card
The Style functionality presents two sliders for Sharpness and Noise Reduction
Photo Mode
In Photo mode, the first three options relate to still images, while the rest of the menu is the same as in video
The images can be saved in JPEG, RAW, or in both formats
In Aspect Ratio we can select 4:3 for an image using the entire sensor, or 16:9 for an image cropped to the horizontal video format. I suggest using 4:3 and then cropping the image if necessary
Then we can choose the photo resolution between 12 MP and 48 MP. More info about the 48 MP photo mode here
Beginners should not worry about the Transmission tab
In the tab About we can check if we have the latest version of the firmware