Mastershots in the DJI Mini 3 Pro consists of a series of automated moves used to quickly produce several interesting clips, particularly useful when scouting a new location. They can also generate an automated short movie with music that can be customized in many ways
DJI Mini 3 Pro is the first lightweight drone of DJI line to feature Mastershots
This functionality is part of a series of intelligent flight modes added to the Mini 3 Pro together with Focus Track, Hyperlapse, and Quick Shots
Other related articles about the Mini 3 Pro you may find interesting:
You can check the prices for the different configurations of the Mini 3 Pro through the button below (commission earned)
If you prefer to watch this as a video, you will find my YouTube version at the end of this article
Settings

The Master shot item in the Video Photo menu can only be accessed when the drone is flying
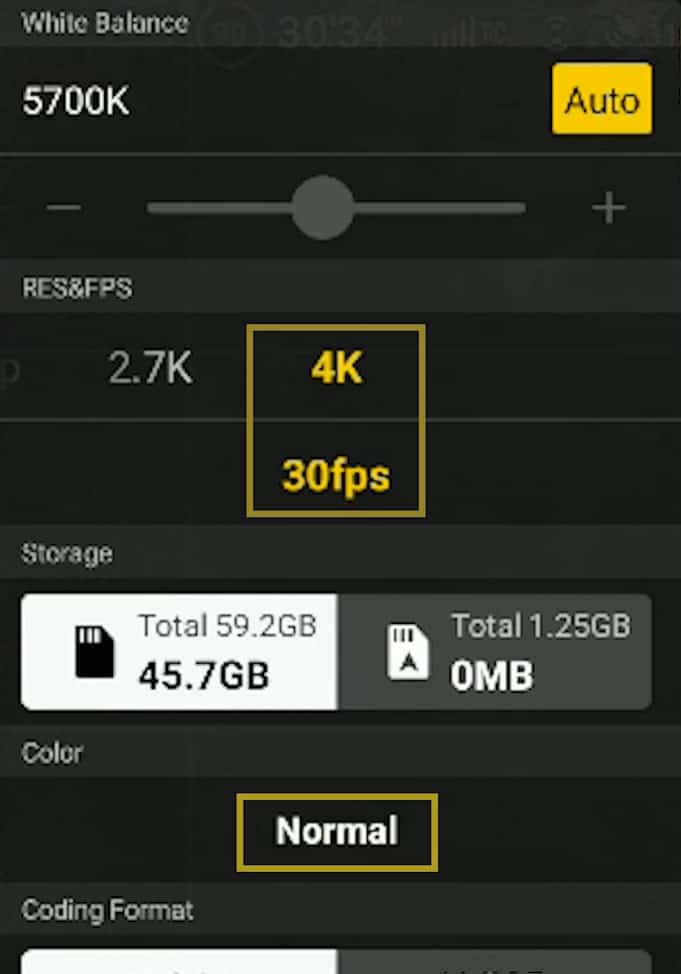
We can expose in Auto or Manual mode. We can also select the Resolution up to 4K at 30fps, but we can only shoot in Normal mode, as DCinelike at the moment is not available for Mastershots
A target has to be selected by drawing a box around it. If a person is in the frame, it will be automatically recognized as a target that we can select by simply tapping on the plus sign above
In the lower middle part of the screen, there is a box showing the estimated flight time, which varies according to the situation, generally between 2 and 3 minutes

If we open the box, we access 3 parameters: Width, Length, and Height, we can set each of them to Small, Medium, or Large
The moves performed by the aircraft during Master Shots are automated
Some involve orbiting movements; in this case, some attention is needed, as the Mini 3 Pro is not supplied with lateral obstacle sensors
For more details please check my article about the obstacle avoidance system of the Mini 3 Pro
In this article, I describe the most common mistakes to avoid with the Mini 3 and Mini 3 Pro
Sequence of Moves
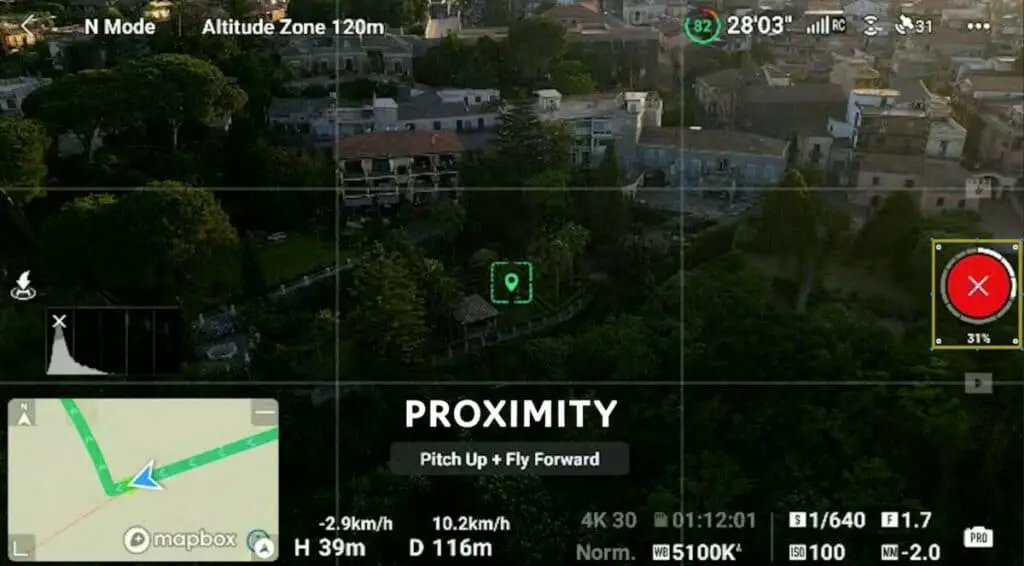
According to the subject and the distance the software will choose a different sequence of moves, named Portrait, Proximity, or Landscape
If the target is a person, the mode applied will be Portrait, for any other target the software will choose Proximity for closer targets and Landscape for targets further away
Moves in Portrait Mode
- Zoom-in zoom-out for a sort of vertigo effect
- Circle from medium-range
- Circle from a shorter distance
- Dronie
- Circle from far away
- Pitch up with the camera pointing down flying toward the target
- Rocket
- Circle with the camera pointing down
- Descent with the camera facing forward
- Descend with the camera pointing down
Moves in Proximity Mode
- Dronie
- Circle from far away
- Pitch up and fly forward while tilting up the gimbal
- Circle from a closer range zooming in
- Circle from medium-range
- Rocket
- Camera down flying forward toward the target
- Screwdriver, circling in a top-down view
- Descends with the camera pointing forward, a descent with camera top down. At the end of the Master Shot, the aircraft returns to the original location
Moves in Landscape Mode
- Dronie
- Circle from far away
- Pitch-up fly forward
- Roll while flying forward
- Closer circle zooming in
- Zoom out
- Circle from a medium distance
- Rocket
- Circle with camera forward
- Descent with camera forward
In this mode the drone never gets very close to the target, it is aimed to give an overview of the surroundings
Choosing the Scene
For safety reasons it is better to choose an area without major obstacles or slopes, as the aircraft will perform a lot of different moves at different heights
There are no real lateral moves, the most dangerous, as the Mini 3 doesn’t have lateral sensors
A lot of circling is involved, the sensors should be able to detect obstacles, but it is borderline, so some caution is needed
In case of danger, it is possible to exit Mastershot mode by tapping on the red shutter icon with an X above, or by tapping on the RTH button, or moving the control stick of the remote controller
How to Expose
Some planning is needed to get the correct exposure as the drone moves in all directions and the camera shifts several times from top down to straight ahead and this involves huge changes of luminosity in most light conditions
Auto Exposure
One possibility is to use Auto exposure; in this case, the software will modify the exposure parameters while the luminosity varies
There are two issues with Auto Exposure:
- The software tends to overexpose
- When the luminosity varies we notice a progressive shift of luminosity in the footage
It is fine for beginners to start with auto exposure, but I recommend getting used as soon as possible to manual exposure
Manual Exposure
Even when using manual exposure there will be issues due to the extreme difference in luminosity: clips with the camera facing forward will often be overexposed, while the ones with the camera looking down will be exposed correcly
To reduce the overexposure of the brightest parts it is better to choose the value Small for the parameters Width and Length, this way the sky will appear less frequently in the frame
For best results, it is better to shoot Master shots at sunrise or sunset, with the sun covered by clouds, or with the sun behind the aircraft, in order to reduce the dynamic range
More info about Exposure settings with the Mini 3 Pro in this article
Auto-Generated Short Movies
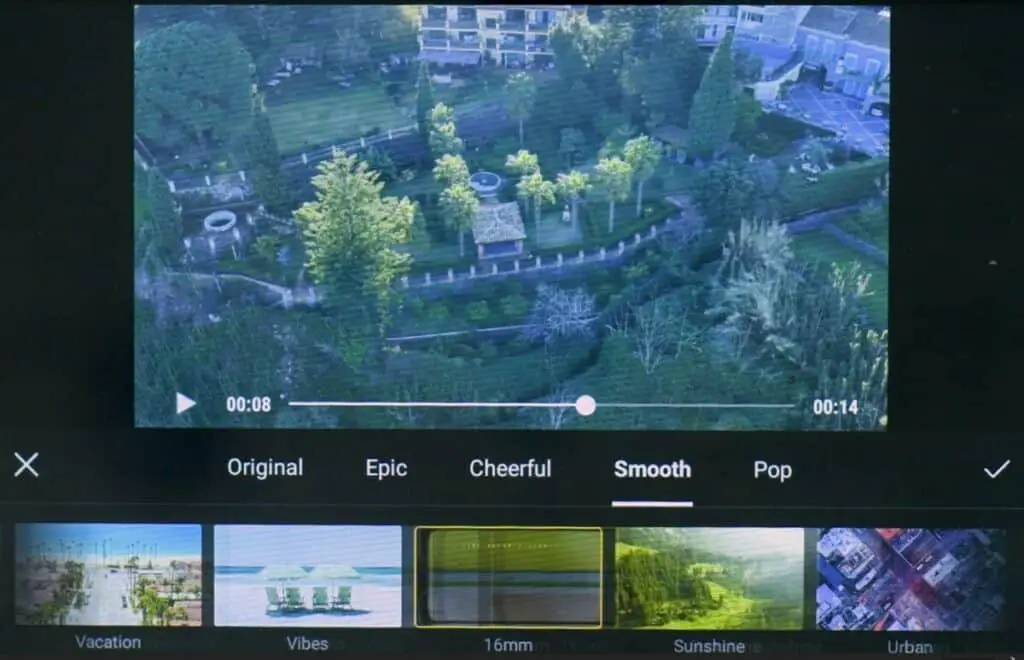
On DJI Fly app it is possible to generate short movies with music, with a choice of several different templates
Once we have downloaded the files to the album of DJI Fly app, the Mastershot files appear with a star on the left of the icon
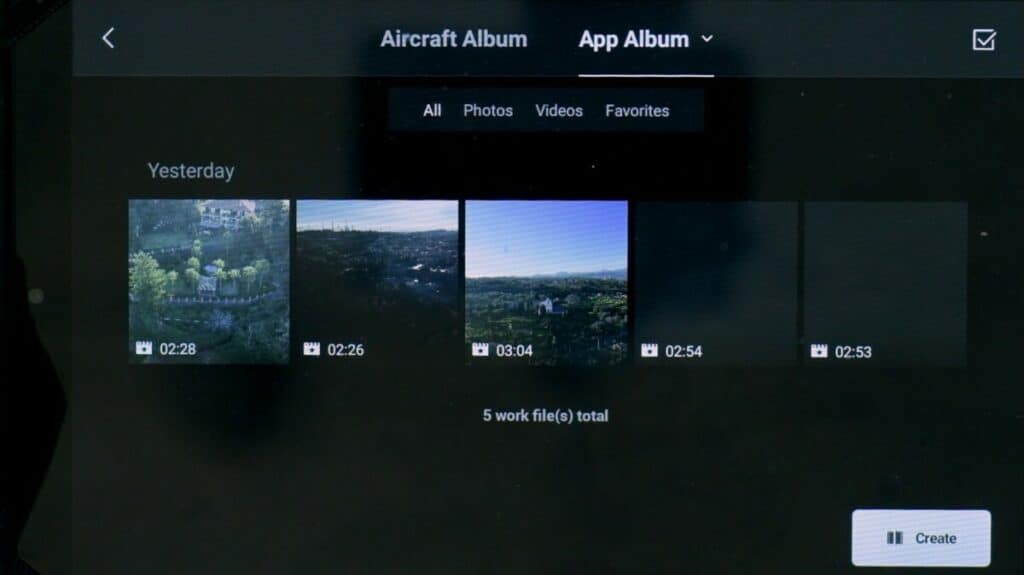
We can visualize the full-length clip, which is between 2 and 3 minutes long, or choose one of the many templates supplied, containing music
Each template will select a portion of the full clip of variable length, sometimes adding titles. When we find one that we like, we can save it for uploading to social media, or store it on a computer