With the DJI Mini 3 Pro, Quickshots mode performs a series of automated moves around a target. It can be useful to reveal the landscape around an exciting landmark, to quickly gather some cinematic footage of an unknown location, or for real estate videography
Most users think of Quick Shots as a way to do elaborate selfies with friends, maybe on vacation, but this mode can also be useful for videographers in certain situations
Some related articles you may find interesting
- Beginner guide to the Mini 3 and 3 Pro
- Video Settings of the Mini 3 Pro
- Common mistakes to avoid with the Mini 3 and Mini 3 Pro
- Mini 3 Pro video quality
- Mini 3 Pro Mastershots
If you prefer to watch this as a video, you will find my YouTube version at the end of this article
Settings
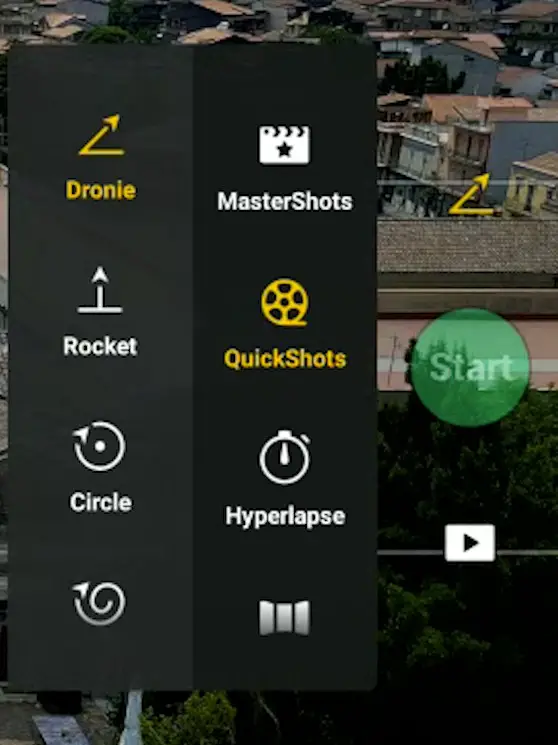
We access Quickshots on the Photo/video menu above the shutter. In the vertical menu to the left, the following modes are listed for the Mini 3 Pro
- Dronie
- Rocket
- Circle
- Helix
- Boomerang
- Asteroid
The recent, more affordable Mini 3 has the first five modes, Asteroid is omitted

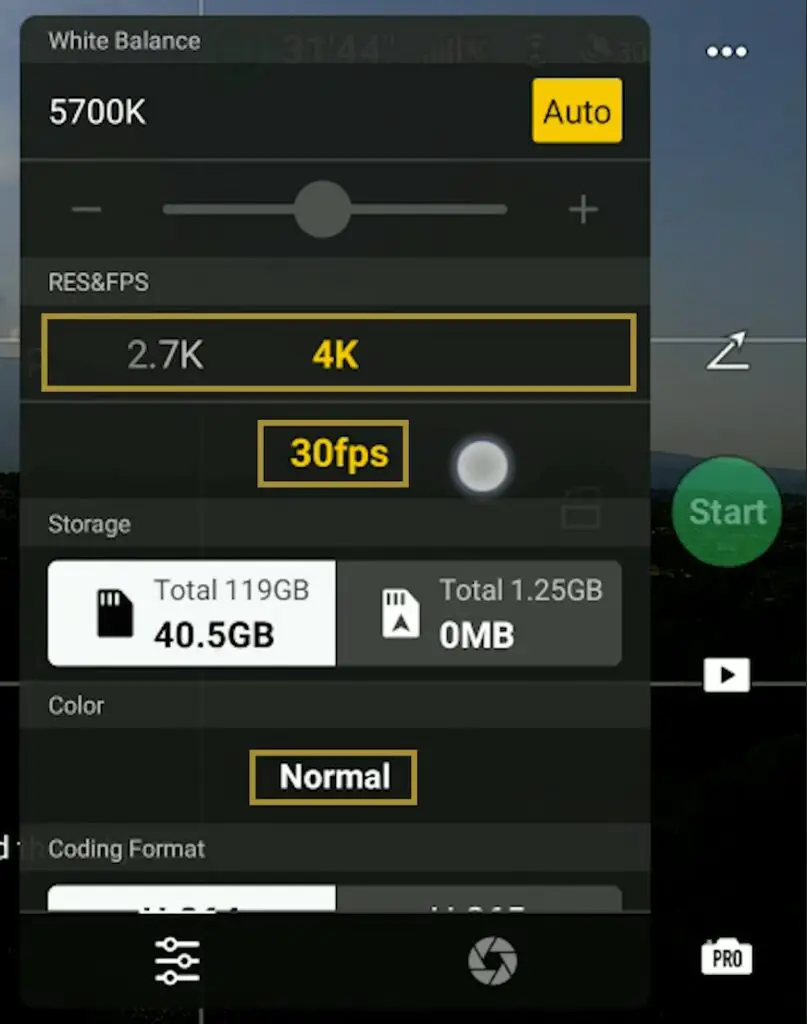
It is possible to use auto or manual exposure
The resolution can be set to 4k, 2.7k, and 1080p. The only frequency available is 30fps

There is no choice for color mode, Normal is the only one available
There are some limitations in terms of videography, but it is still possible to use it for some interesting footage
The moves performed by the aircraft during the Quick Shots are automated. Some of them involve orbiting movements, some attention is needed, as the Mini 3 Pro is not supplied with lateral obstacle sensors
For more details please check my article about the obstacle avoidance system of the Mini 3 Pro
After having chosen a specific mode, we must select a target by drawing a box around it
If people or vehicles are on the frame, a plus sign will be overlaid and we can select them as targets by simply tapping on the plus sign
Most of the modes are quite slow, it would be useful to have more control over the speed
During the different Quickshots, the sticks of the remote controller cannot be used, if we touch them the quick shot will be aborted
After completion of each move, the aircraft returns to the initial position, which is in most cases useful
It is possible to shoot Quickshots in vertical format. This is great news for users active on social media platforms. Vertical shooting is one of the main selling points of the Mini 3
Several of the quick shot modes can perform some basic tracking of the target
Quickshots are an interesting alternative to Mastershots and the three intelligent flight modes of Focus track:
Quickshot Modes
1 – Dronie
The aircraft moves away from the subject while ascending maintaining the target in the same position in the frame
It is a perfect move for the ending of a movie, as it reveals the surrounding
It is possible to select the value for the distance traveled from 30 to 200 meters from the starting point
It is suggested to choose a very low value when filming people and a much higher one when we want to show the surroundings of a landmark
2 – Rocket
The drone will ascend and advance while keeping the camera on the target, the movement ends on top of the target with the camera pointing down for a bird’s eye view
It reproduces the classic cinema movement known as the crane
In the settings, the altitude can be selected, from 30 meters to 80
It is possible to invert the move in post-processing for the reverse crane, which reveals the background
It is an advantageous move for real estate, not easy to perform manually
3 – Circle
Circle is a very simplified version of the intelligent flight mode Point of Interest
The aircraft will rotate around the target at a constant distance and height from the target
We can only set the speed and the direction using the yellow arrow
I don’t find this mode very useful as with Point of Interest it is possible to perform the same move in a more dynamic way using the two sticks of the remote controller to get closer or further away from the target and to modify the altitude
4 – Helix
Helix is a spectacular way to reveal the surroundings of a scene
The drone orbits around the target while rising in altitude
It is possible to set the direction of flight and the maximum Radius from 30 to 120 meters
When using the higher values and starting from a relatively high elevation an error message may appear on the screen if the drone reaches the maximum allowed altitude during the move
Some care is needed while exposing, as the light condition can vary during the movement, due to the change in elevation
5 – Boomerang
Boomerang is completely automated, there is no control over the movement
The drone flies away from the target while rising in altitude and then comes back on the other side of the target descending to the same altitude as it was at the beginning of the movement
It draws a half ellipse around the target. It is not an easy move to perform manually and it is an excellent one for real estate to showcase a property
6 – Asteroid
Asteroid is available only at a resolution of 1080p
It is good fun to show it to friends who have not seen a tiny planet before, but frankly, it is not that useful in videography
For this kind of shot, much better results are obtained by using a dedicated 360 degrees camera
Some creative examples of the use of Quickshots are in my article 9 drone moves for stunning cinematic video
