
For users who rely on computer editing, the best way to store their videos and photos made with the DJI Mini 4 Pro and Air 3 is to use a mini SD card and then transfer the content to a PC. An alternative is to transfer the files directly from the drone to a smartphone using Quick Transfer
I will show several ways to transfer photos and footage taken with the DJI Mini 4 Pro or Air 3, according to the device, a computer, a smartphone, or a tablet. I will also cover how to store screen recordings and screenshots
I will use a Mini 4 Pro, but the procedure is the same with the Air 3
Other related articles you might find interesting:
- RC2 remote controller
- Mini 4 Pro camera settings for photo
- Mini 4 Pro camera settings for video
- Mini 4 Pro calibrations
- Mini 4 Pro exposure settings
- Mini 4 Pro transmission range
- MIni 4 Pro return to home
- Mini 4 Pro obstacle avoidance
From SD Card to PC
The most effective way to store footage and photos made with a Mini 4 Pro is to use a Mini SD card inserted into the aircraft
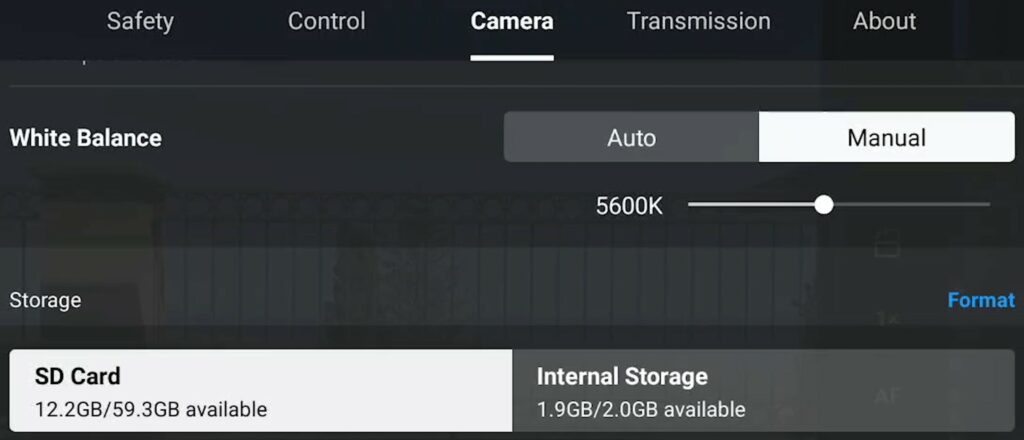
In the tab Camera of Settings in DJI Fly app, it is possible to switch between the SD card and the internal memory. The available space is displayed
Even though larger cards are available, in my opinion, a 128GB micro SD card is more than enough as it can store about three hours of 4k footage
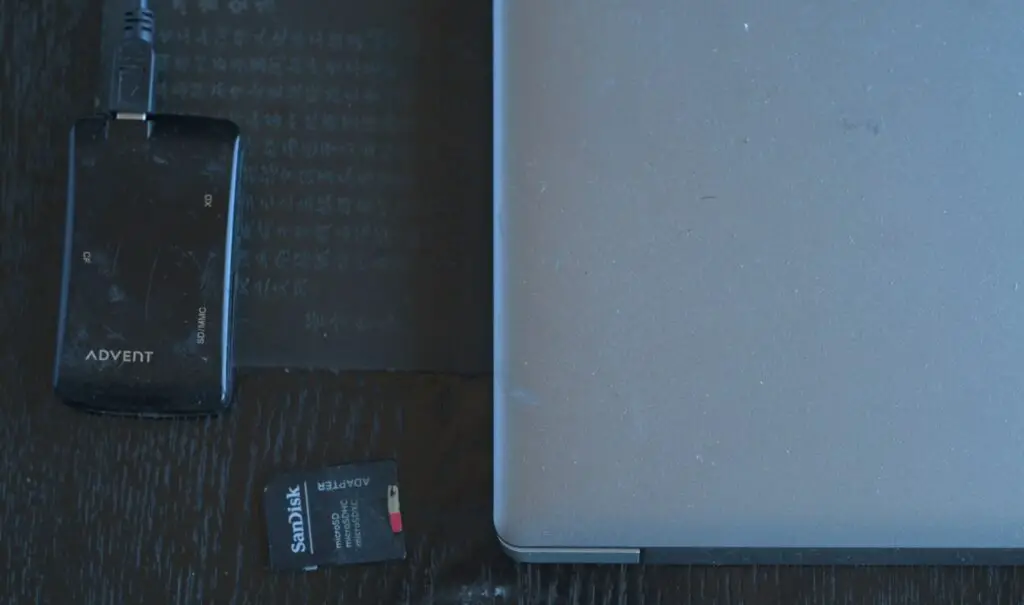
To transfer the files from a micro SD card to a computer you need an adapter from micro SD to SD and a card reader that attaches to the computer via USB
They are very affordable and you will find links to the ones I use in the description of this video. Some laptop computers have an SD card slot, in which case the card reader is not needed
When the card is connected to a Windows PC, an SD card folder will be visible. Open it in a new window, it contains a file named DCIM with another one named DJI_001 containing the footage and photos
We can then copy the files to the desired storage location
The procedure is very similar for IOS devices although the names of the files might be slightly different
From Internal Memory to PC
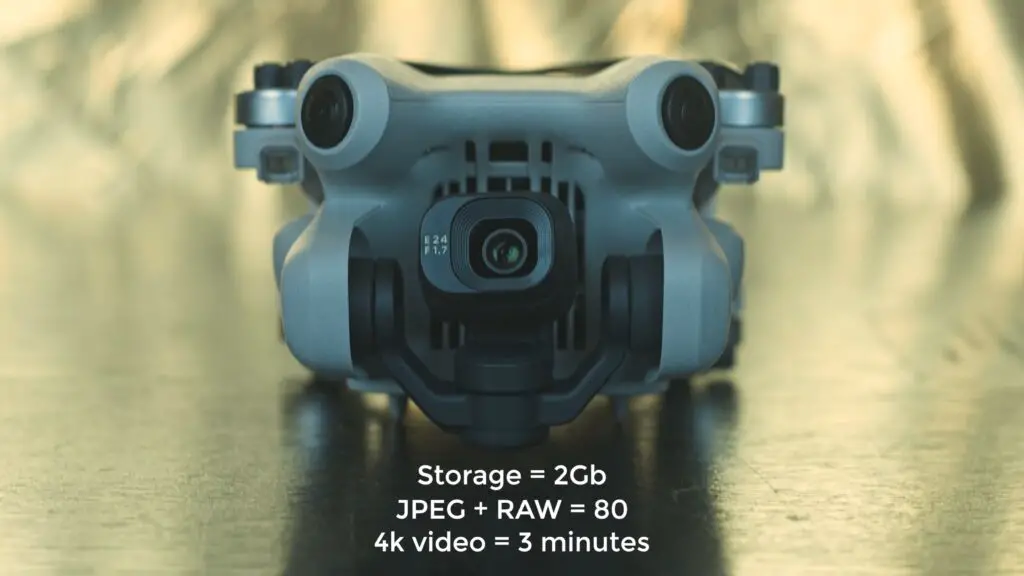
The Mini 4 Pro has an internal storage of 2Gb, almost double the 1.25Gb of the Mini 3 Pro. It can store more or less 80 RAW+JPeg images and about three minutes of 4k footage
This is not much, but it comes in handy when we forget to bring an SD card, or when the internal memory is full
To transfer the content of the internal memory to a computer, the remote controller is not needed
Make sure there is no memory card in the aircraft and connect the drone to a USB slot in the computer using the USB-C cable supplied
A folder named Internal Storage will appear, it contains two folders, by opening the folder DCIM we access another one named DJI_001 with the content of the internal memory of the drone
We can now copy the desired files to a folder on the PC
If a laptop is available at the filming location, we can quickly transfer the files to the hard drive, format the internal storage, and shoot some more footage and photos
On most occasions on location a computer will not be available, but we can transfer the files to a smartphone, as we will see later
Quick Transfer to a Smartphone
To transfer photos and video from the drone to a smartphone, or a tablet, it is possible to use Quick Transfer mode, considerably faster than the simple download
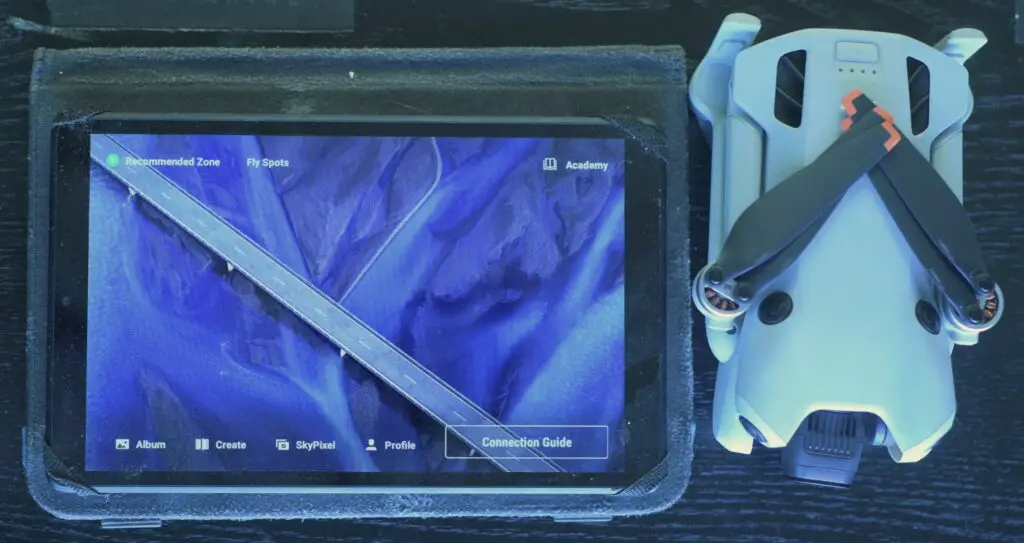
For users with the RC2 controller, the controller itself is not needed, but DJI Fly app must be installed on the remote device. I will be using a tablet, but the procedure is the same with a smartphone
The Bluetooth and Wifi functions must be enabled on the smartphone or tablet. On Android devices, access permissions for the app must also be enabled
Launch DJI Fly app and then switch on the drone. When connecting the mobile device to the aircraft for the first time, press and hold the power button for two seconds to confirm
A message will ask to Switch to QuickTranfer Mode
After hitting Switch, the device tries to establish a connection with the aircraft, and then a message asks to join the WiFi network of the drone
After hitting Join, the tablet connects with the drone. The battery level of the aircraft is shown together with an icon “View Album”, by tapping on it the photos and videos contained in the SD card of the drone will be displayed with a thumbnail for each icon
If no memory card is inserted into the aircraft, the content of the internal memory will be shown
On the top there is a menu to select all thumbnails, only the ones for video, only the ones for photos, or only the favorites
An item can be selected for download by a long press. If we press the icon on the top right, batch select mode is activated, we can then select several items by tapping on the empty square on the top right of each thumbnail
Finally, we hit the download button on the bottom right. The download’s progress is shown at the top left of this screen
Using QuickTransfer the download is fast, up to about 25MB per second, which means that the 2 GB of internal storage of the Mini 4 Pro can be downloaded in approximately one minute and a half
To exit Quick Transfer mode, tap the lightning icon on the upper right part of the screen
Screen Recordings
When using the RC 2 controller, it is possible to record the screen’s content during the flight
This is useful not only when making YouTube tutorials, but also for checking the settings and the flying modes used for each clip or photo. It can also help locate the drone in case of an accident
If you want to know how to take screen recordings and screenshots, please refer to my video about the RC 2 controller
Unlike the previous RC model, the RC 2 always stores screen recordings and screenshots in the 32 Gb internal memory, even when a memory disk is inserted
The procedure for transferring screen recordings to the memory disk is quite cumbersome
I prefer using the controller’s internal memory by connecting it to my computer with the USB-C cable
The same procedure can be used to transfer to a smartphone
The content of the internal memory of the controller will appear as an icon named DJI RC2, click on it to access the available space on the internal memory
Click the icon and then the folder Movies to access all the screen recordings. I prefer to set the view to Details to visualize the size and date of each file
I can then copy the relevant files to the chosen destination