The Mini 3 Pro is an excellent tool for hyperlapses, with good photo quality and long battery life. Thanks to the wide aperture of the lens, at f 1.7, the performance at night is astonishing. The special battery with over 40 minutes of life adds extra flexibility for length and interval between shots
With the point of view up in the sky and the ability to perform smooth moves, drones are ideal for hyperlapses
If you are interested in this technique, I suggest watching the following articles:
- Hyperlapse with the Mini 3 Pro
- Camera settings for photography with the Mini 3 Pro
- Timelapse vs Hyperlapse tutorial which applies not only to drones but also to ground-based cameras
- Step-by-step tutorial for beginners on how to shoot a drone time lapse
- Step-by-step guide on drone hyperlapses
- Best drone for time lapse and hyperlapse
- Photography with the Mini 3 Pro
If you prefer to watch it as a video, you will find my YouTube version at the end of this article
How to Find the Best Scene
Hyperlapses need movement in the Scene
For hyperlapses we need movement and at night the most common recognizable elements in motion are cars. It also helps to have a good amount of City lights to liven things up
I found this small village at the foothills of Mount Etna. It is not too crowded and there is one of the very few unbuilt areas where I can fly my drone while being still close to the village
Light is Important in Hyperlapses
To render Mount Etna in the best way, some good light and the best cloud conditions are needed, therefore I need timing and a bit of luck
Then I check the little village. I start with the camera pointing down towards the main square of the village where a street party is taking place
I make a diagonal move keeping the square in the middle of the frame
This would probably work better as a time-lapse with a static point of view, as there is already plenty of movement
Adding Movement with the drone
Then I try a sort of long crane shot in line with the main street of the village, going backward while descending. There is a good deal of movement going on, with cars and plenty of people because of the street party
The distance traveled is a bit too long, a shorter and slower move would be more interesting. Not bad, it could be a starting point to link to the view of Mount Etna
Set-Up
Setting the Points
I decided to start with a top-down view of the village over the main street from a high altitude and move to the left while descending and rotating the camera to frame Mount Etna
I will be using the Waypoint mode with just two points for a smoother result
So I fly to the first point, tap on the first icon to the left of the small window to store it in memory, then fly to the second point and do the same

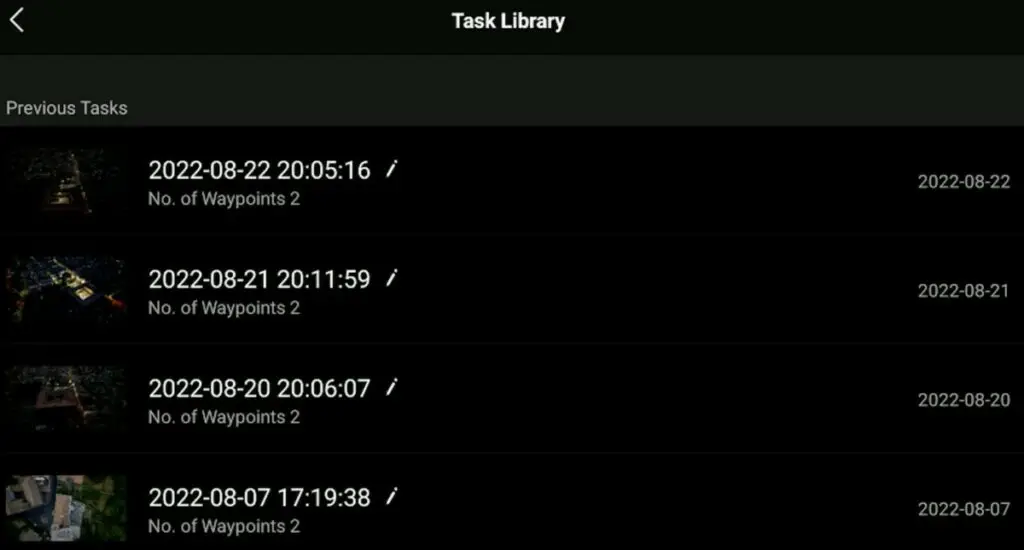
In Waypoint mode it is possible to store each mission in memory. I will be able to perform the exact same mission at different times and with different settings to get the best result. This also saves battery time, as no time is wasted on the set-up
I have done a specific article about the excellent Waypoints Hyperlapse mode with the Mini 3 Pro
Interval and Number of Photos
I will use an interval of one shot every 3 seconds which gives good results when the movement is generated mostly by cars or people walking
I want to get a 12-second clip that requires 300 shots. At the chosen frequency it will take 15 minutes for the 300 shots and this is well within the capabilities of the battery life of the Mini 3

It is possible to acquire a special battery with a life of well over 40 minutes. This battery makes the Mini 3 Pro a hyper-lapse champion, but sadly it is not available here in old Europe
Exposure
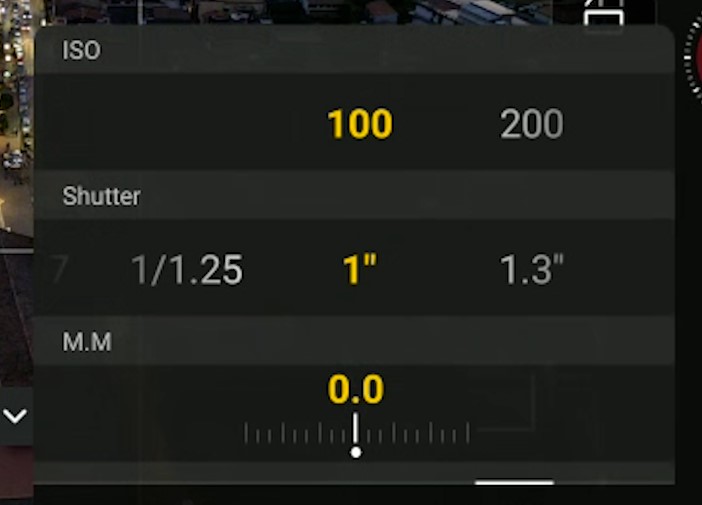
I will try to keep the ISO at the base value of 100, although I could raise it to 200 if needed for an extra stop of light
For the shutter speed, I will aim for 1 second for optimal motion blur, but I can go to 1.5 seconds for more light, or up to ⅓ to reduce the light if needed

I might be using a very light ND filter, either ND 4 or ND 8, or no filter at all, according to the time of the shooting and the light conditions. More details in my article about ND Filters for the Mini 3 Pro
Sunrises in Sicily are much faster than in North Europe, New England, or Canada
During the 15 minutes of shooting the light shifts a lot, so I will have to anticipate what the light conditions will be like at the end of the hyperlapse and plan the exposure accordingly
I will not go too deep into hyperlapse settings, as I have covered the topic of exposure and motion blur in time lapses and hyperlapses here
Action!
Take One
Ready to go. I don’t have to worry about setting up the shot, as I will be using the same Waypoint saved mission all the time. But it is crucial to choose the perfect time for the best light

The light conditions are excellent with great visibility and just a few nice clouds adding depth to the view of Mount Etna
Sunset is at 19:43 and I will try to get to the end of the 15-minute shooting with just the last bit of twilight
So I start the hyperlapse at 20:03. I am not using an ND filter, base ISO value of 100, and a shutter speed of 1/3 of a second
As usual, I set a frequency of 1 shot every 3 seconds and a length of the clip of 12 seconds
The result is quite good: the sky is correctly exposed and Mount Etna looks good framed by a couple of clouds
The motion blur in the car movement at the beginning is acceptable, but could be better to use a longer Shutter Speed value
More details about Motion blur, the crucial element of time lapses, in my dedicated article
Take Two
So I bring the drone home, change the battery, set the SS at 1”, and start a new one at 20:23. It is maybe a bit too late, let’s see if I can catch the last bit of light on Mount Etna
I like this one: the motion blur on the cars is perfect and Mount Etna looks nice with the last glimpse of light
There is just a touch of noise around Mount Etna after raising the shadows, but it is a level that can very easily be removed using Neat Video, my favorite video denoiser
More details about Neat Video in my specific article
The beauty of this method is that once we have dialed in the correct exposure values and starting time relative to sunset, we can keep doing it until we find the perfect conditions
And with Mount Etna, every time is a different story
Sunrise
A last example, this time for early birds. Same scene, and the same settings, but this time I am going for a sunset rather than a sunrise. Basically, a sunset upside down
From the previous tests, I know that the settings are the right ones and I can use the saved waypoint mission, the only thing to guess is the best starting time
And on the first try, it works very well. And Mount Etna decides to cooperate with its own little show
Not bad!
