
In the Mini 3 Pro Waypoint hyperlapses mode works by creating several points forming a mission. For each point, the position of the drone and the orientation of the camera are stored. The program controls the smooth transition from one point to the next. Each mission can be stored in memory
There is often some confusion about the term Waypoints (or Waypoint)
The Mavic 3 and Air 3 have a very popular feature for video named Waypoints. More details in my specific article about Waypoints with the Mavic 3
I will not analyze in-depth the general settings for hyperlapses with the Mini 3 Pro, as I have made a specific post about them
To know more about this technique, I suggest watching my in-depth article Timelapse vs Hyperlapse tutorial which applies not only to drones but also to ground-based cameras and contains some very interesting examples
Other related articles:
- Night hyperlapse with the Mini 3 Pro
- how to shoot a drone time lapse
- Step by step guide on drone hyperlapses
- Best drone for timelapse and hyperlapse
- Photo quality of the Mini 3 Pro
- Mini 3 Pro: camera settings for photography
- Do you need ND filters?
If you prefer to watch it as a video, you will find my YouTube version at the end of this article
How to Set up Waypoints with the Mini 3 Pro
Setting the Points
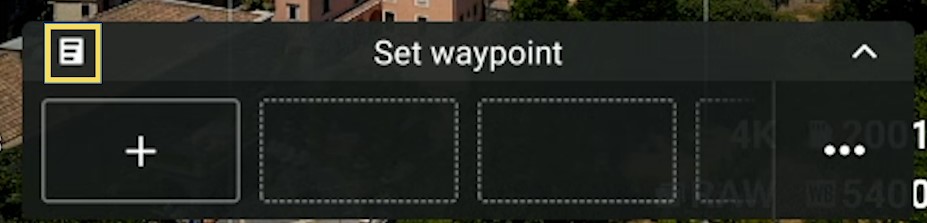
After entering Hyperlapse mode in the Photo/video menu above the shutter, we are presented with the four modes available, Waypoints is the one at the bottom

With the Mini 3 Pro, in Waypoints mode the first point is set up by flying to where the hyperlapse will start and framing the shot
On the window Set Waypoint, tapping on the first icon to the left stores in memory the position, altitude, and direction of the camera. The same operation is repeated for all other points
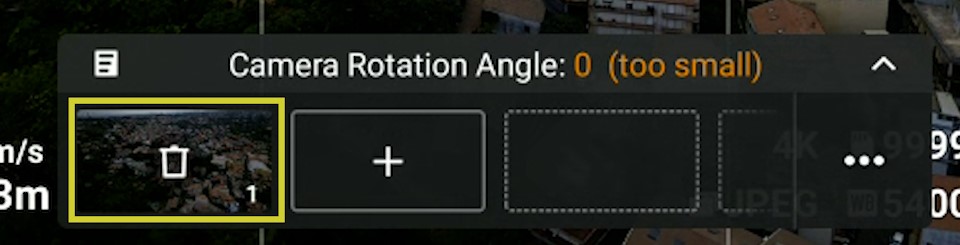
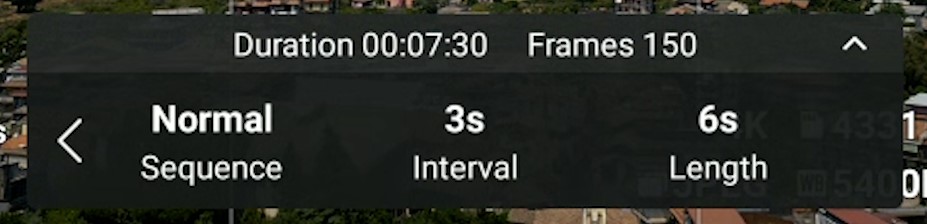
After entering the points, tap on the three dots to the right to enter the other options. To the left, there is a button Normal Sequence
The drone will start the hyperlapse from the first point. Tapping on it toggles to Reverse, in which case the hyperlapse will start from the last point, which might save battery time
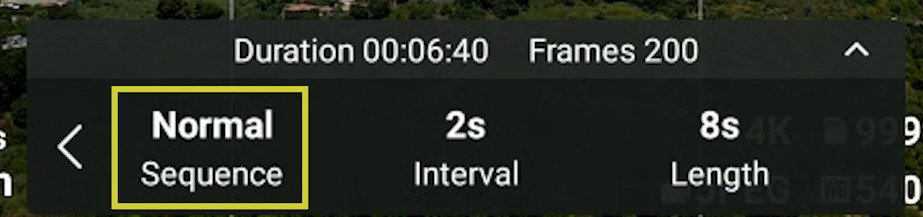
Interval and Lenght
Choose Interval to specify the frequency of shots. One shot every three seconds is fine for an HL where the movement comes mainly from cars or people
The next choice is the length of the resulting short movie. In most cases, I prefer to choose 12 seconds, which results in about 300 photos, since I encode at 24 frames per second
Shooting 300 photos at an interval of one second would take 5 minutes (300 seconds divided by 60), since we have an interval of 3 seconds, the shooting time will be 15 minutes
The Mini 3 Pro has a good battery life of about 30 minutes and can easily handle it, but we should not waste too much time setting it up and return home as fast as possible once the HL is done
There is the possibility to purchase a special battery with a flying time of over 40 minutes. It makes the Mini 3 Pro a perfect tool for HL, but sadly this battery is not available at the moment in Europe.
How Many Points
In this case, I have set the first point looking down at this little village from a high altitude, for the second and final point I moved to the left of the village, slightly closer to it at a lower altitude and I moved the camera to frame Mount Etna
In most cases, for a Waypoints hyperlapse the best results are obtained by setting only two or three points. Using more than three points might introduce abrupt changes in direction
Let’s see what happens with more than two points. In this case, I start from the same position as before, but this time I set a second point more or less in the middle of the sequence, I descend, move to the left, and keep the camera pointing to the center of the village
Then I set the last point by moving to the left and pointing the camera toward Mount Etna
The movement of the camera is too wide and this makes for a very abrupt result. It is preferable to use subtle changes in the direction of the camera
In this other case I am using again three points, but taking care to avoid abrupt moves. I am sliding to the left maintaining the camera on Mount Etna in the same position on the frame
I am starting at 60 meters of altitude, raising to 100 at the second point, and then down again to 40 meters
Since in this scene the movement comes mostly from the clouds, this variation of altitude works in my opinion quite well: it is relatively smooth and adds interest to the clip
In the final example, I used 4 points to get a sort of ellipse movement around this monastery. The changes of direction are relatively smooth and it works quite well
How to Save Missions
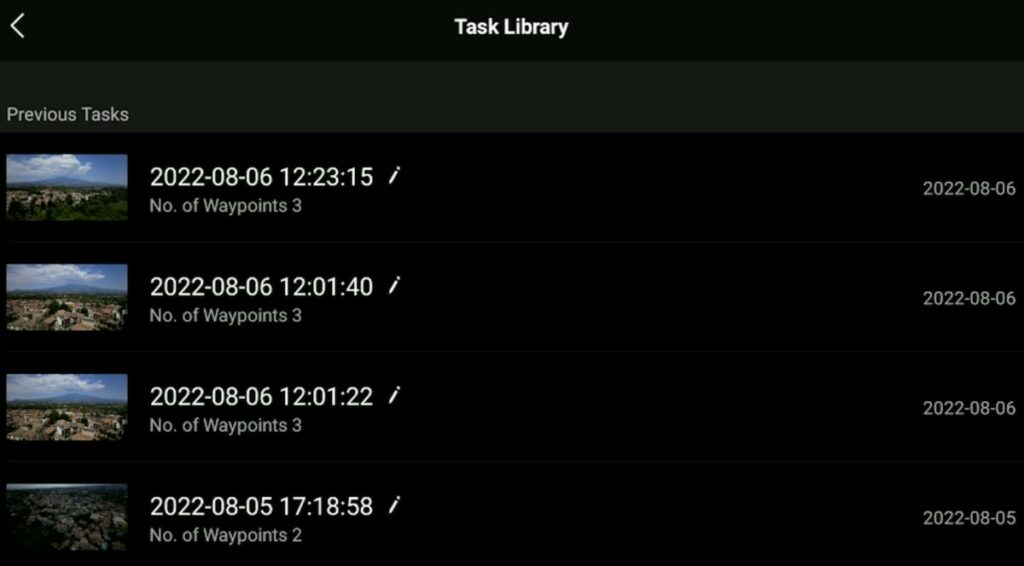
Every Waypoints hyperlapse mission is automatically saved in memory and this is an extremely useful feature
Tapping on the tiny icon at the top left corner of the Save Waypoint window opens the list of missions. The last one will be at the top of the list. A mission can be renamed or deleted
There are countless applications of this feature, especially for surveys or mapping
But even in videography, it is possible to shoot the same location at different times of the day, or in different seasons, a bit like Monet’s cathedrals
Longer Interval Between Photos
Let’s go back to a previous hyperlapse of Mount Etna shown in the video above. The movement is mostly in the clouds and I had chosen an interval of 3 seconds, which is good for cars or people walking
But in the case of clouds, we often get better results with an interval of 4 or 5 seconds
Let’s try with one shot every four seconds. All I have to do is go to the hyperlapse/Waypoints menu, click on the icon on the top left of the window, select our previous hyperlapse, choose a frequency of a shot every 4 seconds, and simply press on the shutter
The result is a bit more interesting with the clouds moving slightly faster
RAW or JPEG
After completing a Hyperlapse a short movie is automatically generated by the app
In the past, I never took seriously the auto-generated movie, but in recent models, it has improved and in the Mini 3 Pro the quality is not bad and can be used for posting on social media, especially for hyperlapses taken in vertical format
Much better results are obtained by saving the individual photos as RAW or JPEG, color grading them, and then putting them together into an Hyperlapse
In the past, I would dismiss the JPEG files and concentrate only on the RAW ones for much better final quality. But the JPEG files in the Mini 3 are good and they can be used for less demanding post-processing
For editing and color grading all the images I have used the excellent Luminar Neo, the tool I use for editing and managing all my photos
Click on the button below for info about the price and a 10% discount coupon code entering “vicvideopic”
How to Control the Speed
In Waypoint mode with the Mini 3 Pro there is no option to control the speed of the drone during the hyperlapse
The speed of the flight depends on the number of shots taken, the frequency of shots, and the distance traveled during the mission
Let me explain with some examples. I set the first point with the drone pointing down on a road in a village and then move backward raising the camera to frame Mount Etna in the distance
I set the second point at a distance of about 45 meters. Then I set an interval of 3 seconds and I try to set the length of the video at 12 seconds, as usual
But I can’t select a length over 6 seconds, as the drone cannot go at a speed slow enough to take 300 shots in the specified distance
After hitting the shutter, the app takes indeed 150 shots, half of the 300 that I wanted
I noticed that the speed during the mission was about 0.1 meters per second, and that makes sense because 150 photos at a frequency of one shot every 3 seconds equal 450 seconds, which at a speed of 0.1 meters per second, corresponds to 45 meters
Therefore to be able to shoot 300 photos I need to travel 90 meters. This time I set the second point at a distance of 90 seconds and I do get a hyper-lapse with 300 photos
But what happens if the distance traveled is longer? This time I set the distance to 180 meters, double the previous one. This time the drone moves much faster, at 0.2 meters per second, double the previous one
How to Control Motion Blur
Motion blur is the most important factor for good-quality hyperlapses
The secret is to use the correct relation between shutter speed and frequency of shots
When using drones there are some limitations compared to traditional cameras. To keep things simple it is better to always use a shutter speed of 1 second
More details about Motion blur, the crucial element of time lapses, in my dedicated article
To use such a slow shutter speed it is extremely important to use an appropriate set of ND filters. You will find here all you need to know about ND filters for the Mini 3 Pro