
Mastershots produces a series of automated moves useful not only for vacation movies but also to quickly create a series of exciting clips of an unknown place, for scouting purposes or real estate footage. With the DJI Air 3, the 70mm telephoto lens opens new options for Master shots
Other related articles about the DJI Air 3:
- Air 3 video review
- Air 3 vs Mini 3 Pro video quality
- Air 3 Pro vs Mini 3 Pro photo quality
- Air 3, camera settings for photography
- Air 3, panorama mode
- Air 3 photography review
- Air 3: Telephoto lens
If you prefer to watch this as a video, you will find my YouTube version at the end of this article
Settings
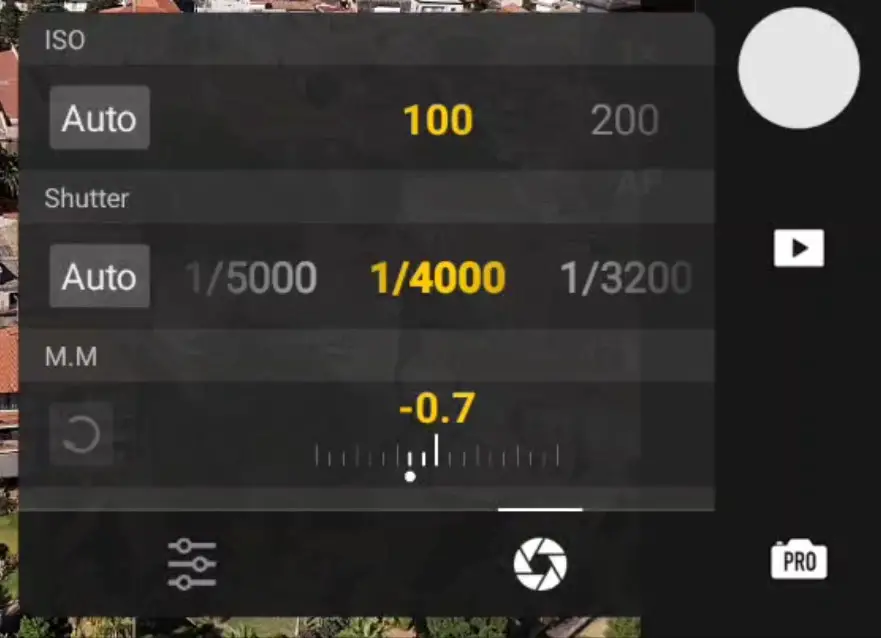
After selecting Mastershots in the photo video menu above the shutter, we can choose the exposure and resolution modes
Exposure
I always use manual exposure, although in Master Shots the aircraft will perform a series of moves in different directions with different vertical orientations of the camera and noticeable shifts of luminosity within the scene, so using Auto exposure can simplify the process
In previous models, Auto exposure would create noticeable delayed brightness adjustments in the clips with abrupt changes in luminosity
But in the Air 3, the processing of Auto exposure has been dramatically improved, to the point that it can now be used with pleasant results
It is still preferable to avoid shooting Mastershots in the middle of a sunny day, much better results are obtained by shooting near sunset or sunrise or with the sun covered by clouds
Resolution and Frame Rate
We can then choose the resolution of the footage, the two most suitable choices are 4k in traditional landscape orientation or 2.7k in vertical format, which is not obtained by rotating the camera, as is the case for the Mini 3 Pro, but rather by cropping it

In both cases, the frame rates available are 30 or 60 frames per second
Shooting
Then we select a target by drawing a rectangle around by swiping a finger on the screen. If a person is on the scene, a plus sign will appear on it and can be selected as a target by simply tapping on the sign
As soon as the target has been chosen, the obstacle avoidance system turns automatically on, even if it was set to off
Since the Air 3 has omnidirectional sensors, the process of shooting a Master Shot is safe in most cases, but since the aircraft will move in all directions and at different elevations, I suggest starting in an open area without obstacles until you get used to all the different moves

A small window with the estimated flight time for the master shot appears on the screen. By tapping on the downward arrow to the right the window opens to set three values for the width, length, and height of the movements with a choice of small, medium, and large
During the process, the aircraft will modify the altitude, so a message might appear on the screen warning that the maximum altitude will be reached
In this case, it is possible to lower the altitude, if the surrounding obstacle allows it, but in general, it is better to choose the setting Small for the height
We can now hit the green shutter to start the Mastershot
The aircraft will rotate in both directions to compute its position and then will start recording
The shutter turns red with the percentage of the process shown below. At any time it is possible to hit the red shutter to stop the Mastershot, in case of danger
The map on the bottom left of the screen shows in green the itinerary with the position of the drone
Moves
During the master shot several moves are performed according to three different modes:
- Landscape
- Proximity
- Portrait
These modes are automatically chosen according to the distance or the nature of the target
For targets beyond a certain distance Landscape is chosen, when the target is closer Proximity will be used, while if the subject is a person, Portrait will be used
In Landscape mode, the moves are:
- Dronie, with the aircraft flying backward and rising in altitude while keeping the target in the same position in the frame
- Circle to the left from far away, with no digital zoom applied
- Pitch-up fly forward, starting with the camera pointing down with the aircraft advancing towards the target while the camera is progressively tilting up
- Roll and Fly Forward, with the gimbal in FPV mode and the camera tilting sideways while turning like on a real plane
- Close-up circle using digital zoom, followed by a zoom-out with the drone hovering
- Medium circle with a digital zoom of 1.5x
- Rocket, with the drone advancing towards the target while rising in altitude
- Then the drone turns 180° and the camera points in the direction opposite to the target while advancing and descending
- Finally a panning to the right to return to the position facing the target
In Proximity mode, the first part of the Mastershot is the same, but toward the end, there are some interesting moves with the drone over the target and the camera pointing down descending, and rotating
The target is maintained in the correct position for every move, this was not the case with the first firmware version of the Mini 3 Pro where the target tended to shift away from the target
The quality of the footage is good, in true 4k, but in the parts including deep digital zoom, there is an evident loss of resolution when encoding in 4k
This is not an issue when posting on social media at lower resolutions while users who need 4k footage can select specific clips from the whole video
Masterhots with the Telephoto Lens of the Air 3
The star of the show with the Air 3 is the dual lens system, and the 70mm moderate telephoto lens is compatible with this functionality
As usual, the telephoto lens gives a different perspective with some fascinating parallax effects between elements in the foreground and the background
This is the way I use Master shots, to extract some interesting short clips from the two or three minutes of footage generated
Automated Short Movies
It is possible to use templates to have some automated 20 to 30-second short movies with music and graphics
At the moment, it is not possible to access the templates from the RC controller with a built-in screen, but the files can be transferred from the drone to a smartphone or tablet, and a template can be chosen using DJI Fly App
It is a bit cumbersome and I trust DJI to fix the issue very soon