
Time lapse is a fascinating technique between photography and videography. They work particularly well with drones and I have done countless videos about them
The difference compared to hyperlapses is that in the case of time lapses the point of view is static, in other words the drone hovers in the same position during the shooting process
I will show how to make a time lapse with a drone from start to finish, in the easiest possible way, so that a beginner can easily follow. I will cover the choice of the scene, the suggested light conditions, how to expose and all the different settings
I will be using the excellent DJI Mini 3 Pro, but most of the settings apply to the other models of the current DJI prosumer line
I have made a specific step-by-step article on How to shoot Hyperlapses with a drone
If you prefer to watch this as a video, you will find my YouTube version at the end of this article
Choice of the Scene
Movement
Time lapses need motion, therefore the scene must contain a good amount of movement coming from cars, people walking, boats, or other vehicles. In other cases, the movement may be due to natural events, like clouds or transitions from day to night
This is the scene I have chosen: a small village in the foothill of mount Etna, with the volcano behind. More details about Time lapses and hyperlapses with drones for beginners can be found in this article
For the first time lapse I focus on the center of the small village to keep things easy. The camera will point down keeping the sky out of the frame so that the differences in luminosity will be very low making it easier to find the correct exposure
Time of the Day
Then we need to choose the best time of the day. It is a very quiet village and we need some motion, so I will focus on the busiest parts of the day which should be around 8 to 9 o’clock in the morning or 6 to 7 in the evening
These are also good times for light conditions with limited dynamic range and soft shadows. I carefully avoid shooting in the middle of a sunny day, as the shadows are way too harsh, and the results are always disappointing
Another perfect time for a time lapse is right after sunset when the street lights are turned on while there is still some natural light
Camera Orientation
The position of the sun in the scene must also be considered. At around 8 o clock in the morning, the sun will be behind the camera, which makes things easier
For beginners, it is better to avoid shooting time lapses with drones in the direction of the sun, as it is a very advanced technique and requires some serious post-processing
Settings
Length
The first decision to make is the length of the time-lapse which depends on the battery life. The regular battery of the Mini 3 Pro has a life of around 30 minutes
Considering the time needed for the setup and for a safe return home, it is better to plan a maximum shooting time of about 22 minutes. I like to plan most drone time lapses at a length of thirteen seconds, which requires a bit more than 300 photos when using a 24 fps timeline
| 13 seconds x | 24 fps = | 312 photos |
Interval Between Photos
The second parameter to select is the interval between each photo. With drones in most cases, we choose 3 or 4 seconds

With an interval of 3 shots, the shooting time for the time-lapse will be about 16 minutes, which is perfectly safe, with an interval of 4, it will take about 22 minutes, which is still fine, but there will be no time to waste for a safe return to home
I choose a length of 13 seconds and an interval of 3 seconds. I have covered in depth all the settings needed for time lapses and hyperlapses in this article, please refer to it for more details
Exposure Values
For time lapses and hyperlapses it is crucial to always use manual exposure, as we want to have total control of the Shutter speed value
With drones the ideal shutter speed value in low wind is 1”, to get the correct amount of motion blur. Motion blur is the single most important factor to consider when shooting time lapses and hyperlapses, more details are in my dedicated article
The same concept of motion blur also applies to Long-exposure photography with a drone or with a regular camera, you can watch my dedicated article for more details and for creative photography ideas
The Mini 3 Pro, like the Air 2s, the Mini 4 Pro and the Air 3, has a fixed aperture, so the only other parameter to set for exposure is the ISO. The only model of the DJI prosumer line with a variable aperture is the Mavic 3
Regarding ISO, ideally, we want to set it to the minimum value, 100, but if needed we can go up to ISO 400 without a noticeable loss in image quality
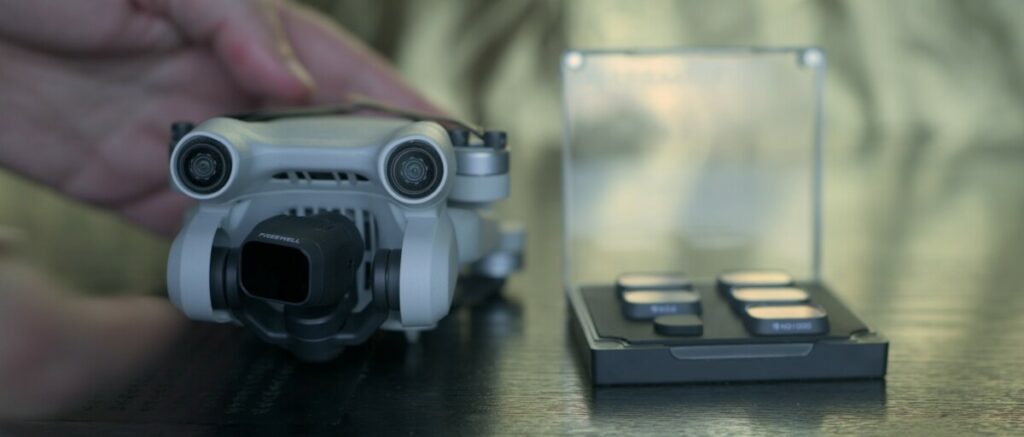
ND Filters are Needed for Time Lapses
To be able to set these precise values in different light conditions, ND filters are absolutely needed when shooting time lapses. More details on why ND filters are needed in my article
When shooting time lapses with the mini 3 during the day, strong values of ND filters are needed, due to the very wide aperture of this drone, at f1.7, capable of gathering plenty of light
When shooting right after sunrise, before sunset, or with the sun covered by clouds, the filter value needed will be ND64, ND128, or ND 256, some trial and error is involved
These are the ND filters I suggest for the different DJI models:
- Mini 4 Pro: set of ND filters for video. For hyperlapses I suggest adding a stronger ND 1000 filter
- Air 3
Top-Down Time Lapse
I am ready for action as planned at 8 o clock in the morning, about an hour after sunrise. The sun is shining and I immediately notice that the light is already too strong, especially for this scene
The village has very narrow streets and a strong light produces very harsh shadows, something I really dislike. I have the feeling that it would be much better to start an hour earlier or to retry with the sun covered by clouds
Exposure Values
I put on my strongest ND filter, a mighty ND 1000, and start to expose
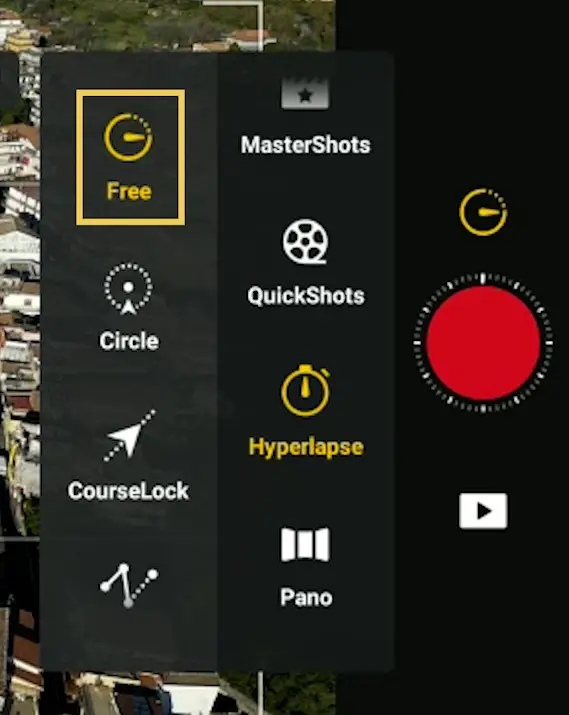
The exposure settings are relative to each photo or video mode, so we must enter hyperlapse mode before exposing. I choose hyperlapse and the first mode at the top, Free, the one suitable for static time lapses
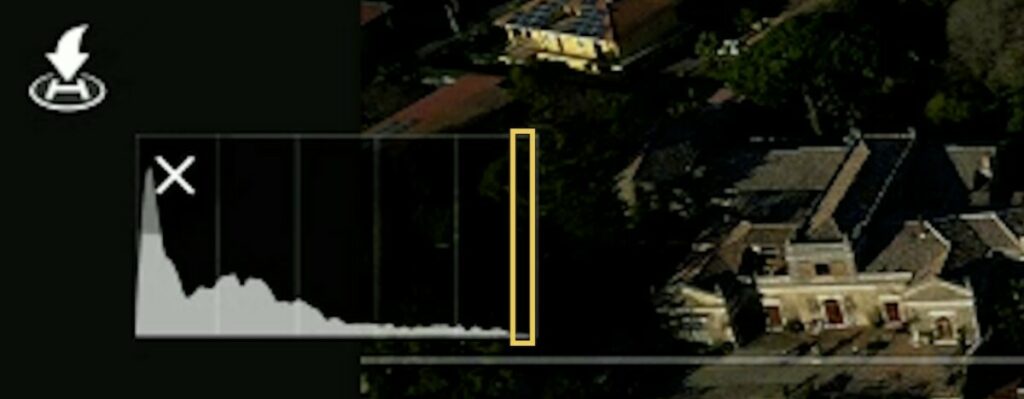
To expose I always check carefully the histogram. To avoid burning the highlights I like to leave a little room between the last bar on the right and the right edge. I also check the MM value at the bottom, I prefer it to be slightly in negative territory
I keep the ISO to the lowest value, 100, and then I go to set the very important shutter speed value
In this case I cannot dial in my ideal shutter speed of 1” which produces a nice motion blur. I have to settle for a faster shutter speed of 1/4“. The scene will be ever so slightly overexposed, and I will lose a bit of motion blur, but it is the best compromise under these conditions
It would have been better to use a stronger ND filter, an ND 2000 but I don’t have one available. Even better would be to start an hour earlier, or right after sunrise, for a softer light
More details can be found in my article Camera settings for photography
Other Settings
I then set the other parameters. For this scene where the main movement will come from cars, I can set the interval to 3 seconds. At this interval a time lapse of 13 seconds will take about 16 minutes which leaves me a good amount of battery life for a safe return home
Then I set the length at the desired value of 13 seconds. The last value is max speed, but since the drone will hover in a static position, I can disregard it
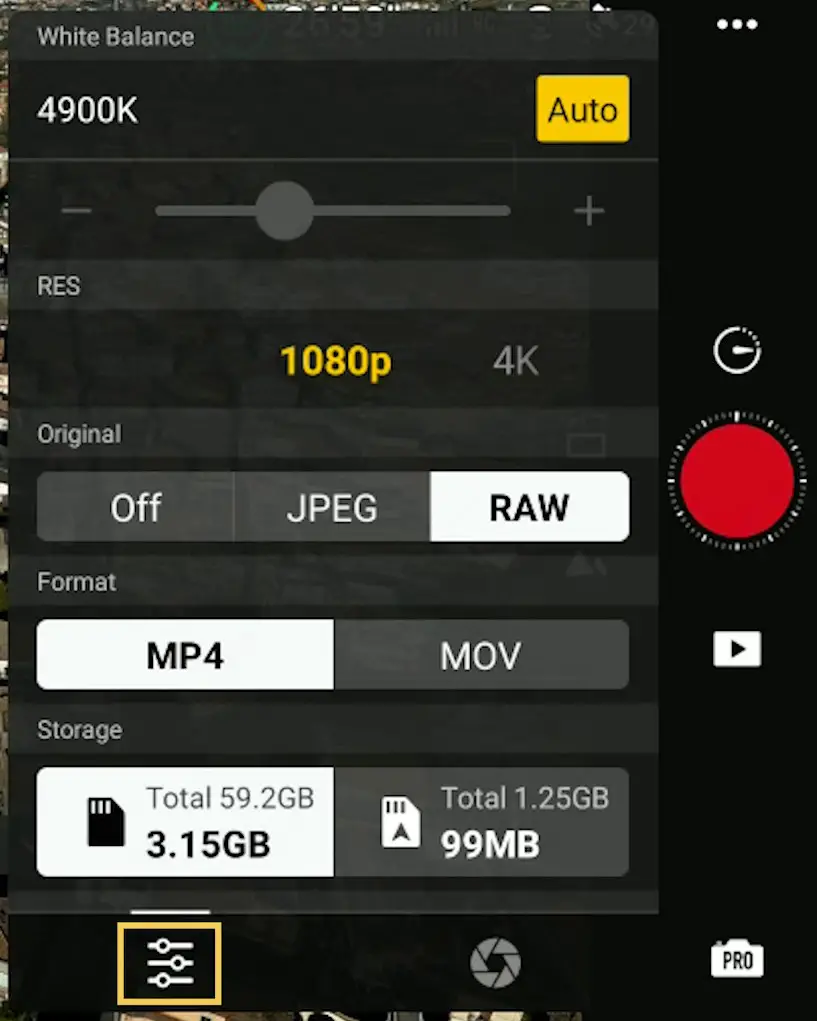
By tapping on the small icon on the bottom left of the exposure window, I enter other values. I generally set the white balance value at about 5500 Kelvin, but the Mini 3 has a tendency towards a warmish tone, so I prefer a lower value at around 5000k
Then there is a choice for the resolution of the auto-generated time lapse between 1080p and 4k. I always choose 4k and I suggest doing so, but in this first example, I try 1080p, just to see the result
In the next field, there is the option to save each individual photo as JPEG or RAW. I always save each image in RAW that I process using the excellent editing program Luminar NEO and finally import them as a JPEG sequence into my video editor. This workflow is much more powerful and yields far better results, but I will analyze it in a different article, as it is a more advanced topic
Auto-Generated Time Lapse
The auto-generated short movies have improved a lot in recent DJI models and can be used by beginners to quickly post their masterpieces on social media
This is the result of the auto-generated short movie. Stabilization is already applied, but some drifting remains. Things get better after stabilizing on Premiere Pro
I am not particularly happy with the result: the shadows are too harsh due to the strong light, and the motion blur is not the best, as I could not use the ideal shutter speed. Also, I was hoping for a bit more car and people action
But this is normal in time lapses: after choosing the scene, the first take is useful mainly for exploring purposes. It helps to choose the ideal conditions for the best results. I am sure that better results would be obtained starting an hour earlier, and probably even better right after sunset
Time Lapse Including the Sky
Since I am here, I decide to turn the camera toward Mont Etna for a different scene. This time the movement will come mostly from the clouds
There is hardly any wind and the clouds look perfectly still, so I increase the interval between photos to 4 seconds to speed up the movement. The downside is that the time-lapse will be slightly shorter
With the longer interval between shots the movement in the cloud is quite interesting, although the shadows are again a bit too harsh due to the strong light
Time Lapse at Sunset
At sunset I go back to the previous location, I put on a ND 16 filter, and this time I manage to dial in a shutter speed very close to 1”. The rest of the settings are the same as the ones of the first time lapse
The flow of the car is now much smoother with a correct amount of motion blur. The shadows are also much softer
I was expecting more electric lights to turn on for a more interesting effect, but here at the moment, they are trying to save as much as possible on the bills
In a transition from day to night much better results are obtained by post-processing the individual RAW files for more control of the white balance and the shift in luminosity