
With the point of view up in the sky and the ability to move smoothly in all directions above obstacles, a drone offers many creative options for video
One of the most surprising creative move achievable with a drone is the Vertigo Effect, also known as Dolly Zoom. I will show how to do it with the DJI Mini 4 Pro. I will analyze two techniques, one can be performed with any drone, the other requires the use of Waypoint mode, which available in this model
You can check the prices for the different configurations of the Mini 4 Pro through this link (commission earned)
Other related articles you may find interesting:
- 9 drone moves for creative footage
- Mini 4 Pro: Camera settings for video
- Mini 4 Pro Waypoints mode
- Mini 4 Pro Video quality
- Mini 4 Pro vs Mini 3 Pro for video
If you prefer to watch this as a video, you will find my YouTube version at the end of this article
What is the Vertigo Effect?
The vertigo effect, also known as dolly zoom, was introduced in the movie Vertigo by Alfred Hitchcock in the 50’s
It consists of two opposite movements: one going forward and the other in the opposite direction. The target gives the impression of remaining still, while all other elements seem to be in motion
This is the opposite of what we see in real life and surprises the viewer, a bit like when coming out of the pub after too many drinks
Choosing the scene
An interesting and well-defined target is crucial, as it will be the focal point of the action. It is preferable to have elements on several layers in the background and possibly others in the foreground
The distance from the target plays a big part in the intensity of the effect. The closer the aircraft is to the target, the more evident it will be
The same goes for the speed of the movement. Here you can see the same scene taken at different speeds: 2, 5, and 7.5 meters per second
In my opinion, the first option is too slow and the effect fails to impress. I prefer the results obtained at 5 and 7-5 meters per second
At a higher speed, the resulting clip will be shorter, so it can be a good idea to increase the distance between the two points
The Movement
The main movement is performed by the drone advancing toward the target, or moving away from it
Both directions work fine, but it is easier to start close to the target, carefully frame the scene, and then move backward
The opposite movement can be obtained in two ways
- Using the digital zoom in the drone
- With a video editor
Loss of Resolution
In both cases, there will be a loss of resolution due to zooming, so some loss of quality is expected, since the Mini 4 Pro has a maximum video resolution of 4k
It will still be acceptable for social media, or when the project is encoded in 2.7k or 1080p
The only model of the current DJI prosumer line with a video resolution higher than 5k is the Mavic 3. With this model, it is possible to apply a considerable amount of zoom without loss of resolution when encoding in 4k
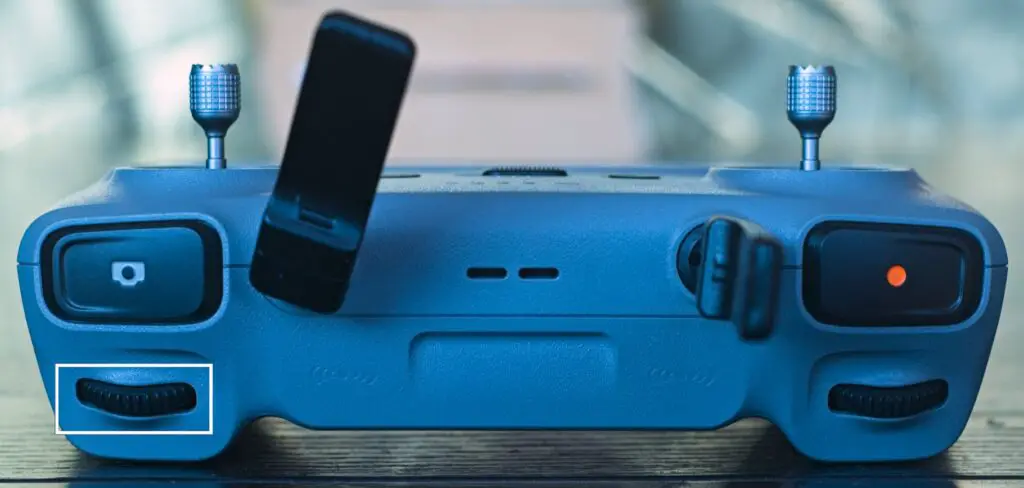
With the Mini 4 Pro, it is possible to use the wheel of the remote controller to apply a smooth progressive zoom, however, with this method it is difficult to synchronize the zoom with the movement of the aircraft
Using a Video Editor
Better results are obtained using a video editor, as we can easily modify the parameter to get the desired outcome
Here I am using Premiere Pro, but the process is very similar with most other video editors, as I am only adding keyframes
This clip starts with the aircraft close to the target moving progressively further away. We go to the first frame and add four guides to frame the target. If needed we can slightly zoom in or out to optimize the framing
We click on the stopwatches for position and zoom to set keyframes and store the values for that point
Then we move to the last point. We zoom in to reposition the monastery to fill the gridline. Two more keyframes are automatically added for the same values
This is the result: the monastery maintains the same size and appears to be sitting still, while the background gives the impression of movement, disorienting the viewer
For an extra element of surprise we can add some rotation with the video editor
We go back to the first frame, add a positive value for rotation of +4 degrees, and add a keyframe. Then we move to the last frame, and enter a value of minus 5 degrees, and set another keyframe
The result is even more intriguing with a touch of FPV feel
Using Waypoints
Waypoint mode for video was traditionally reserved for the flagship model of the DJI line. It is now also available on the Mini 4 Pro and Air 3
For an in-depth analysis of Waypoint mode with the Mini 4 Pro, please check my specific article
It is possible to create a mission made by two points to automate the two opposite movements within the camera. This is particularly interesting for users who cannot access a video editor

We start by adding a gridline to keep track of the target’s position, we select the one in the middle in the Camera tab of the Settings
We activate Waypoint mode by tapping the icon on the left of the screen
We move closer to the target, and frame the target for the beginning of the move. We open the window in the lower part of the screen and hit the plus sign to set the first point
We now move backward for at least 100 meters to where we want the second and final point
Using the wheel of the remote controller we zoom in until the target fits on the gridline. We hit the plus sign again to set the second point. We can then select the speed of the move
Another advantage of Waypoints is that each mission is stored in memory, which is useful for performing the same vertigo effect at different speeds or in different light conditions
Let’s watch the result of this other Dolly Zoom at different speeds. Once again we notice that the the effect works much better with the aircraft flying quite fast, at least 5 meters per second
I suggest experimenting with different speeds to optimized the effect