The hyperlapse function has been available in DJI prosumer line since the Mavic 2 series, but like most new functionalities, it needed several improvements. In particular, the minimum speed of the drone was way too high
The most important mode, Waypoints, needed a very long distance of travel to get a 10-second hyperlapse, with the risk of finding the aircraft in a different country
To know more about this technique, I suggest watching my in-depth article Timelapse vs Hyperlapse tutorial which applies not only to drones but also to ground-based cameras and contains some very interesting examples
I have done a Step by step tutorial for beginners on how to shoot a drone time lapse, and another Step by step guide on drone hyperlapses, I suggest them as a starting point for beginners
If You Prefer To Watch This As a Video
Advantages of the Mavic 3 for hyperlapses
The quality of photos and hyperlapses with the Mavic 3 is similar to the one of the Air 2S, it is mostly a matter of personal preference
The Mavic 3 has two major practical advantages for shooting hyperlapses compared to previous models
- It has manual control of the aperture, which makes it much easier to expose, although ND filters are still needed for the correct amount of motion blur.
- It also has a much longer battery life for more flexibility. With previous models, I could not get an hyperlapse of 12 seconds, which is often my favorite length, and I could not use a frequency of shots higher than one photo every 3 seconds because of the shorter battery life
Mavic 3 Hyperlapse Settings
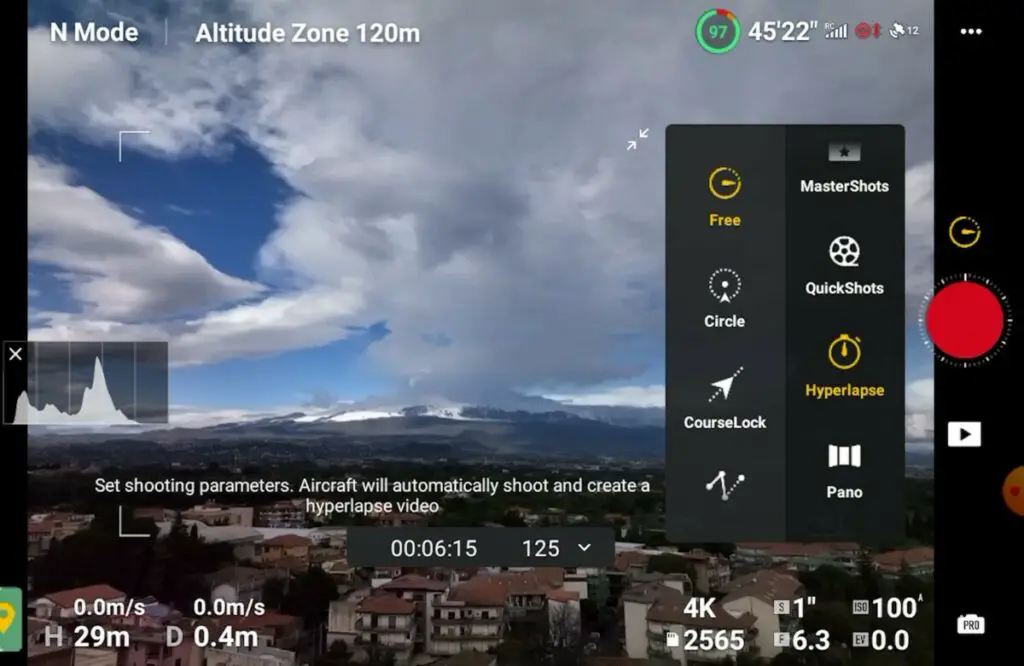
When selecting Hyperlapse from the photo menu, we have a choice of the same four different modes: Free, Circle, Course Lock, and Waypoints

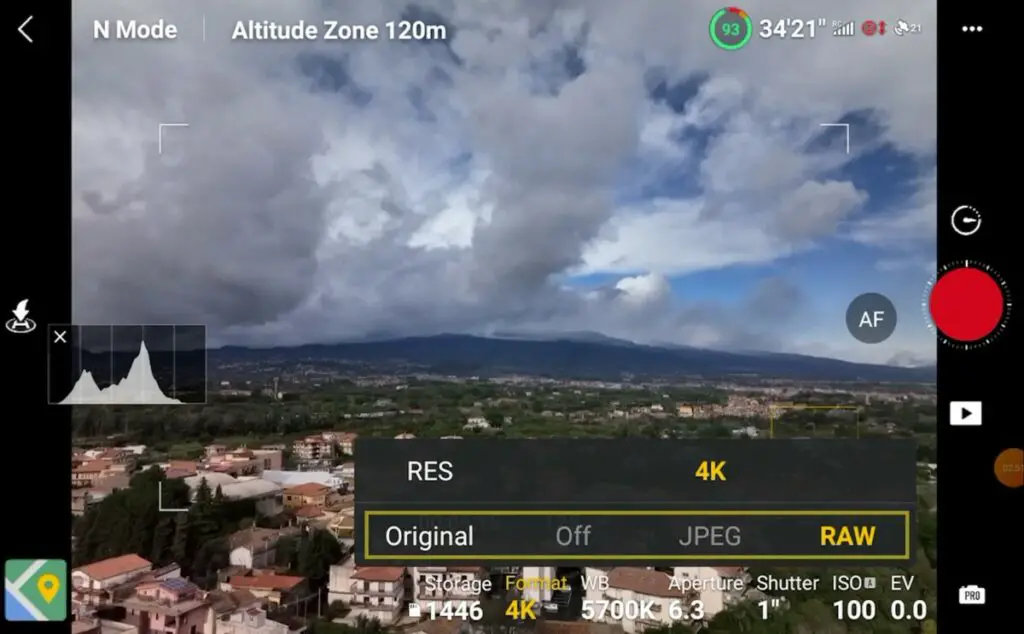
The settings for hyperlapse with the Mavic 3 in the first three modes are similar. After having chosen the mode, in the bottom right of the screen it is possible to save the individual shots either in RAW or JPEG format. The resolution of the autogenerated movie is always 4k
For editing and color grading all the images I have used the excellent Luminar Neo, the tool I use for editing and managing all my photos. Click on the link for an in-depth analysis of this program

In the window at the bottom in the middle, there is a choice for the interval between shots. With the improved battery life, it is possible to make hyperlapses of 12 seconds using any frequency from 2 to 5 seconds. I prefer to use 3 seconds in hyperlapses with people, cars, boats, and so on, while I tend to use 4 or 5 seconds when the movement comes mostly from clouds

The minimum interval of 2 seconds is not available with the slow shutter speed needed for the correct amount of motion blur, as the camera needs a bit more than a second to buffer the shot. Therefore in most cases, the frequency of shot will be at least 3 seconds
More details about the correct shutter speed to use for hyperlapses and why ND filters are needed in my specific article
More details about Motion blur, the crucial element of time lapses, in my dedicated article
The following selection is the length of the resulting hyperlapse. In most cases, I use 12 seconds, because it makes it easy to know how long the shooting time will be. It will take 10 minutes with an interval of 2 seconds, 15 minutes with an interval of 3 seconds, and so on
| Interval | Shooting time |
| 2 seconds | 10 minutes |
| 3 seconds | 15 minutes |
| 4 seconds | 20 minutes |
| 5 seconds | 25 minutes |
The next choice is the speed of the drone movement during the hyperlapse. The minimum speed is now 0.1 meters per second which is very slow and enables hyperlapses with a subtle movement, very useful in certain situations
After hitting the red shutter button, the camera starts taking photos at the specified interval. During the hyperlapse it is possible to hit the button to the right to increase the number of shots taken to extend the duration of the resulting movie by 1 second

How many photos to take for a hyperlapse?
The choice of the number of photos to take for a hyperlapse depends on the interval between shots and the desired length of the resulting short movie. Due to the limited battery life, it is critical to consider the shooting time needed
| Number of Photos | Length of Hyperlapse | Shooting Time at interval 3 | Shooting Time at interval 4 |
| 50 | 1.6 seconds | 2 minutes 30 seconds | 3 minutes 20 seconds |
| 100 | 3.3 seconds | 5 minutes | 6 minutes 40 seconds |
| 150 | 5 seconds | 7 minutes 30 seconds | 10 minutes |
| 200 | 6.6 seconds | 10 | 13 minutes 20 seconds |
| 250 | 8.3 seconds | 12 minutes 30 seconds | 16 minutes 40 seconds |
| 300 | 10 seconds | 15 minutes | 20 minutes |
| 350 | 11.6 seconds | 17 minutes 30 seconds | 23 minutes 20 seconds |
| 400 | 13.3 seconds | 20 | 26 minutes 40 seconds |
More details in my article Drone time lapse and hyperlapse for beginners
How to Use Hyperlapse Modes with the Mavic 3
Free Mode for Hyperlapse with the Mavic 3
This mode is the only one allowing the use of the two sticks of the remote controller to move the aircraft freely during the hyper-lapse. It was useful in previous models, but now Waypoints mode is much more efficient for these kinds of moves
The mode Free is now to be used only for time lapses, hyperlapses with a static point of view, in other words with the drone hovering. Once selected the frequency of shots and the length of the resulting movie, hitting the shutter will start the hyperlapse. The process will stop after the required number of photos
When hovering a drone tends to move slightly, while when traveling forward or sideways the momentum will severely reduce the drifting. Shooting static time-lapses is a good way to test the stability of the drone while hovering
In medium winds, the drone is quite stable while hovering, and the results are good after stabilizing
Circle Mode for Hyperlapse with the Mavic 3
Orbiting around a target is an interesting move, especially when the scene presents elements in different planes at different distances, thus creating a parallax effect
In Circle mode, after having set the frequency of shots, the length of the movie and the speed, a target must be chosen by drawing a box around it. After selecting the direction, clockwise or counterclockwise, it is time to hit the shutter
With the Air 2S it was possible to use the two sticks of the remote controller to get closer or further away from the subject, or to ascend or descend while the drone rotates around the target. The sticks are not effective anymore during a circle hyperlapse, but this is not an issue, as these sorts of moves can be performed in a more efficient way using Waypoints mode
Course lock Mode for Hyperlapse with the Mavic 3
Course Lock is another useful mode. Position the aircraft towards the intended direction of flight before hitting the button Locked Direction, then select a target by drawing a box around it and the camera will follow it regardless of the direction of flight. The position of the camera is disconnected from the direction of the flight
As for Circle mode, the two sticks of the remote controller cannot be used. But to do the same route with a change of elevation or direction, the mode Waypoints it is more efficient
How to use Waypoints Hyperlapse in the Mavic 3 and 3 Classic
This is by far the most useful, versatile, and spectacular mode. It deserves its own paragraph. In most cases, the smoothest results are obtained by setting only two or three points
To set a point, fly to the desired location, position the camera, and tap on the first frame to the left. The position of the drone, the altitude, and the angle of the camera will be stored in memory. After setting the different points, a window will appear to select the interval between shots and the length of the movie

There is a Normal Sequence icon to the left, if it is left as it is, the drone will fly to the first point to start the HL. By tapping on it, it will change to Inverted, and the Hyperlapse will start from the last point, thus saving batteries

It is not always possible to choose the length of the movie. The maximum length available is based on the distance traveled during the mission. For a 12 seconds HL with an interval of two seconds, the drone has to travel at least 60 meters (0.1 m/s * 300 shots * 2 seconds). If the distance traveled is shorter the resulting movie will also be shorter, if the distance traveled is longer, the speed of the aircraft will increase
During the mission, the software will handle the smooth transition between each point

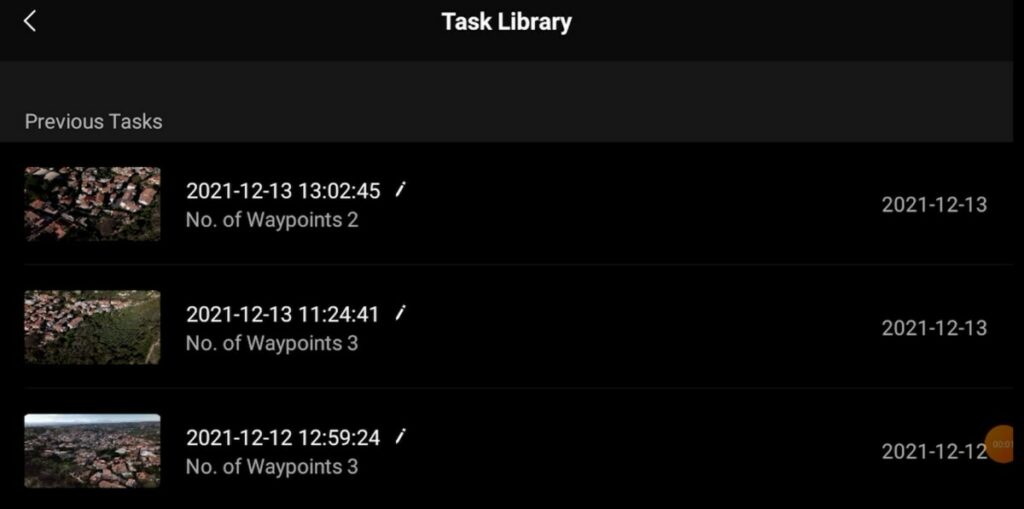
It is possible to retrieve a mission in order to use it again. Each mission is automatically saved by default. To retrieve it, tap on the tiny icon at the top left of the window. A list of the different Waypoint missions made will appear, with the last one at the top
More details in my specific article Waypoint Hyperlapse

Auto-Generated files
After taking all the photos needed, the drone will be busy for a few seconds auto-generating the file of the short movie. We can see the progression in percentage below the shutter
In the memory disk, the file will be stored in the subfolder 100 Media, while the files of each individual photo will be in the file Hyperlapse
The quality of the auto-generated file has improved a lot in recent models of the DJI line. This is good news for users who want to quickly share a hyperlapse on social media. The images are very well stabilized and the colors are nice. It is even possible to apply a decent amount of color grading
