The DJI Mavic 3 can take panorama photos in four different modes: Vertical, Wide-Angle, 180°, and Vertical. A JPEG panorama of good quality is automatically generated. It is possible to save each photo as RAW or JPEG to stitch them into a panorama using third-party editing programs for best results
After a series of updates, DJI has finally released the panorama mode on the Mavic 3, while in the Mavic 3 Classic and Mavic 3 Pro, it has been available since the first version
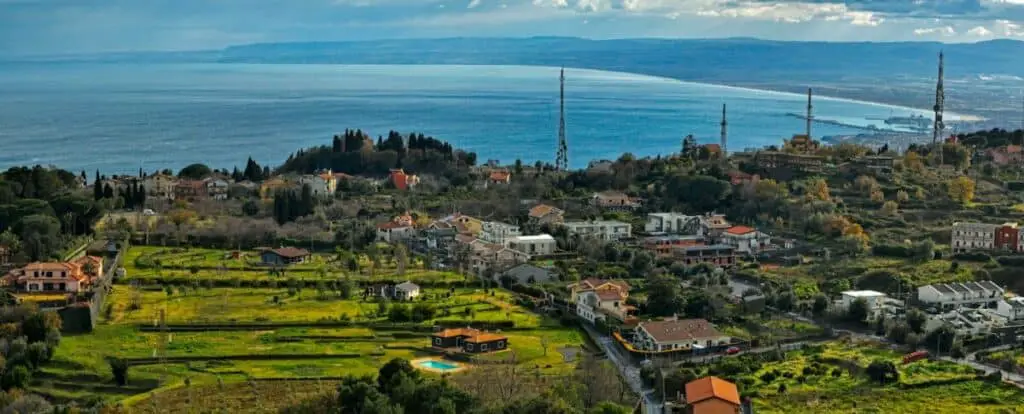
A drone is an ideal tool for panorama photography
Having the point of view up in the sky opens the doors to 360° images without any obstacles giving a different perspective of reality
Other related articles you might find interesting:
If you prefer to watch it as a video, you will find my YouTube version at the end
Mistakes to Avoid
Some issues are specific to panorama and have to be considered when planning the shots
The stitching software needs several reference points to do the job properly, therefore it is better to avoid scenes with a big portion taken by uniform elements like water or the sky
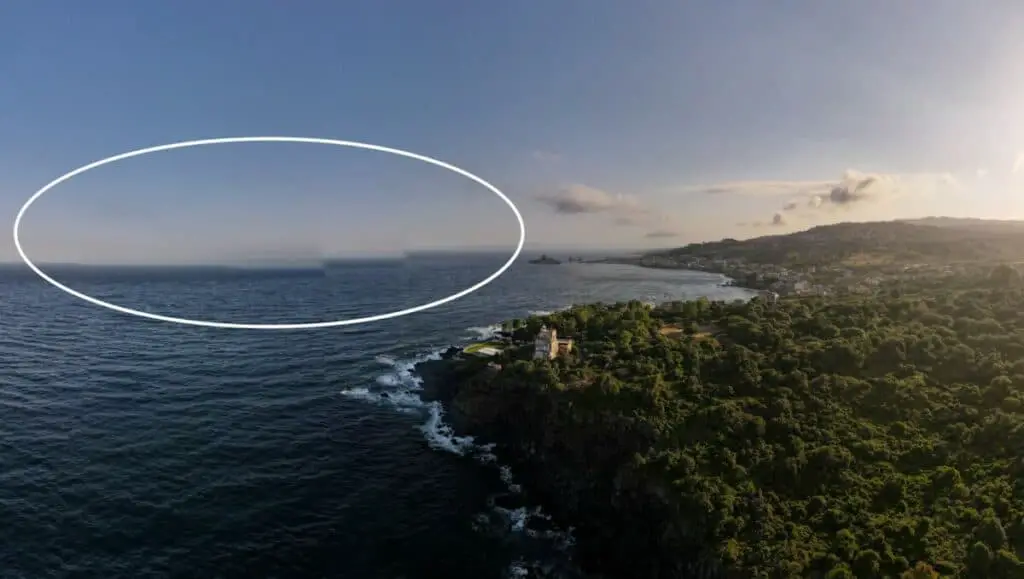
In this Panorama with a big portion taken by the sea and the sky, the software failed to stitch the image properly
One thing to consider with a sphere panorama, and to a lesser degree with a 180-degree one, is that the full sun will always be in the frame, as well as elements on the ground
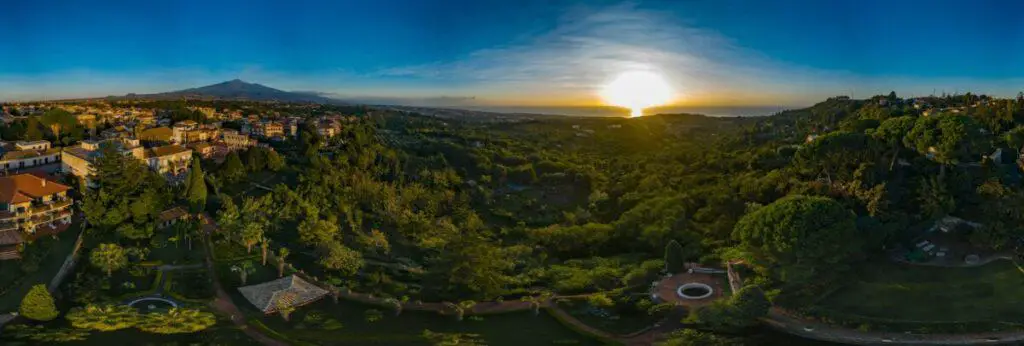
Therefore the scene will have a huge dynamic range and it will be very hard or impossible to expose it correctly
I strongly suggest avoiding shooting Sphere Panorama with the full sun
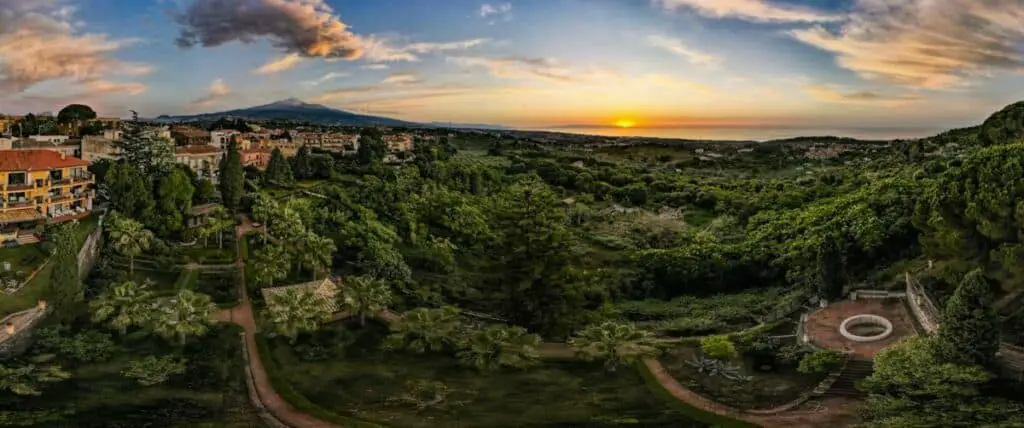
It is much better to choose a day when the sun is covered by clouds or to shoot just after sunset or before sunrise
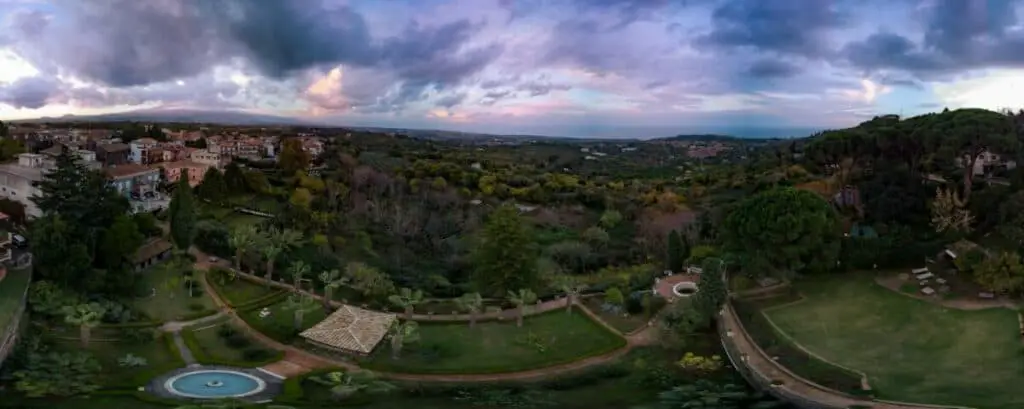
It is important to shoot for the highlights making sure that the area around the sun is not overexposed, as nothing can be done to fix burnt highlights
The Shadows will be very dark but in most cases, it will be possible to recover them
Another thing to avoid is the use of polarising filters, as they react differently according to the angle of light, therefore the sun will be uneven in the photos composing the panorama and severe banding can be caused
Settings
We access Panorama mode via the video photo button above the shutter, in the right part of the menu through the icon at the bottom
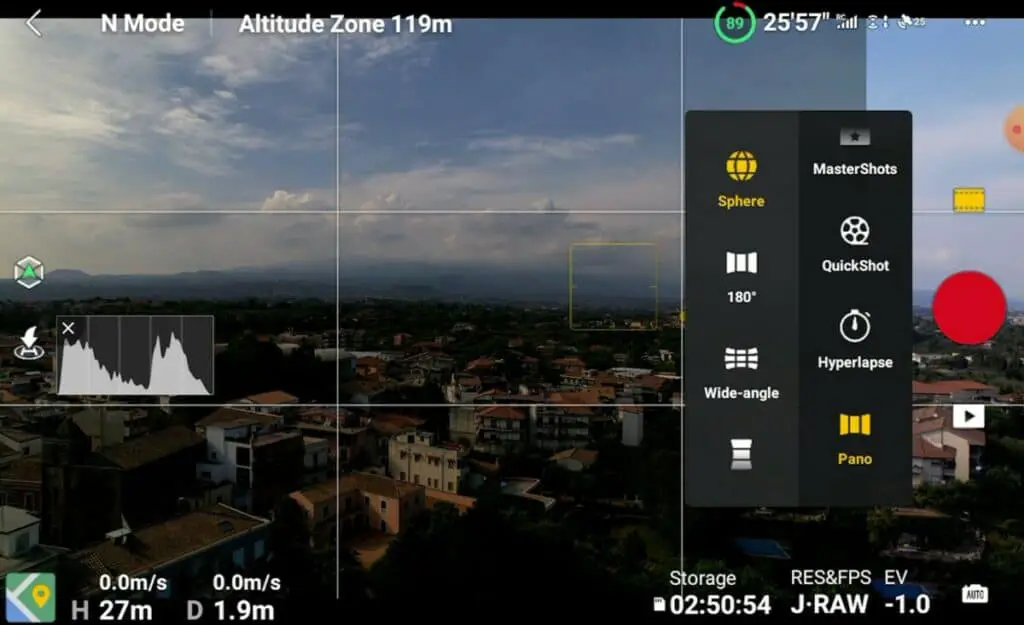
The menu to the left will display four icons for the different pano modes:
- Spere
- 180°
- Wide-Angle
- Vertical
The Panorama function is available only when the drone is flying
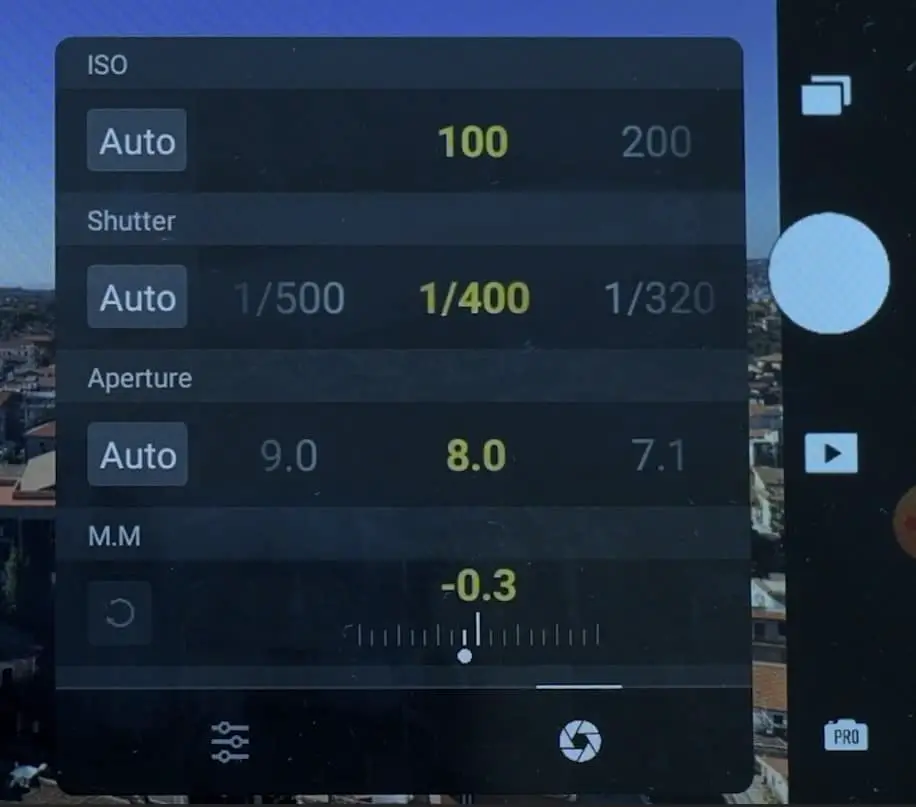
It is possible to choose the format for the individual photos either in RAW or JPEG
DJI fly will automatically stitch a panorama as shown by the line on top labeled Output. In this case, there is no choice for the file format, only JPEG is available
The original photos can then be processed and stitched using other programs
For editing and color grading all the images I have used the excellent Luminar Neo, the tool I use for editing and managing all my photos
You will find info about Luminar Neo together with a coupon for a 10% discount by entering the code “vicvideopic” using the button below

The next step is to select the Exposure mode
The icon on the bottom right toggles between auto and manual, labeled Pro
In manual mode, we can modify the values for ISO and Shutter Speed
While taking the photos the drone will rotate and tilt to optimize the amount of overlap between the photos
While shooting, under the shutter icon a numeric indicator will show the progression of the process in percentage
The Different Panorama Modes
- In Sphere mode, the drone will shoot 26 photos in rapid succession, almost a 360 view over 3 rows
- 180-degree mode shoots 21 photos
- In Wide-angle mode, 9 photos are taken, 3 rows and 3 columns
- Vertical mode consists of three photos
Autogenerated JPEG file
Immediately after shooting the panorama, DJI Fly app stitches the images into a JPEG file
This will be available on the app for posting immediately on social media
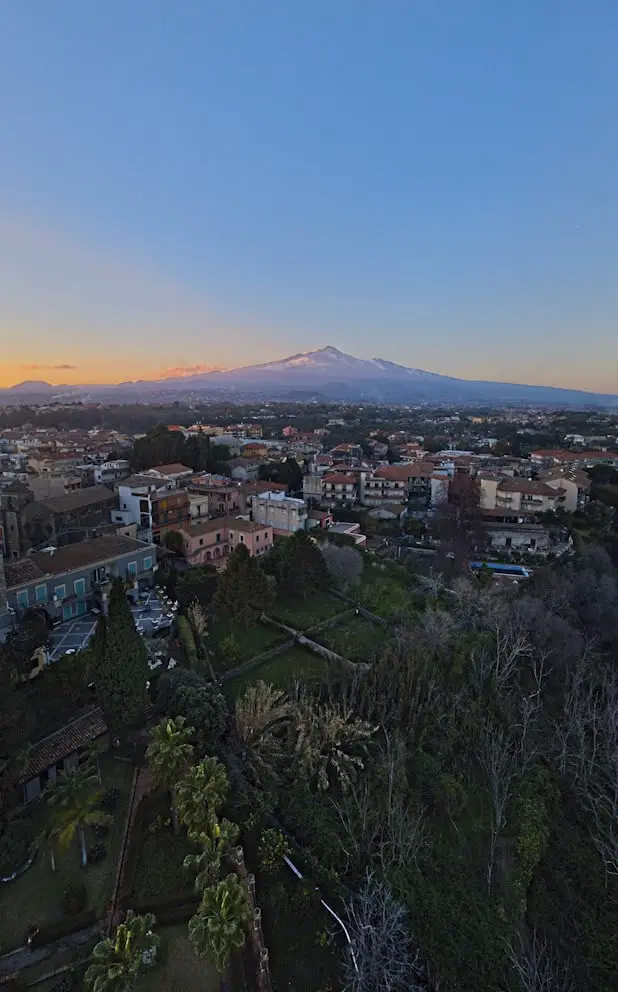
The Vertical mode is a single RAW of three photos, suitable for tall subjects, like buildings or mountains
Compared to previous models of the DJI line, these files contain plenty of info in the shadows and respond very well to post-processing
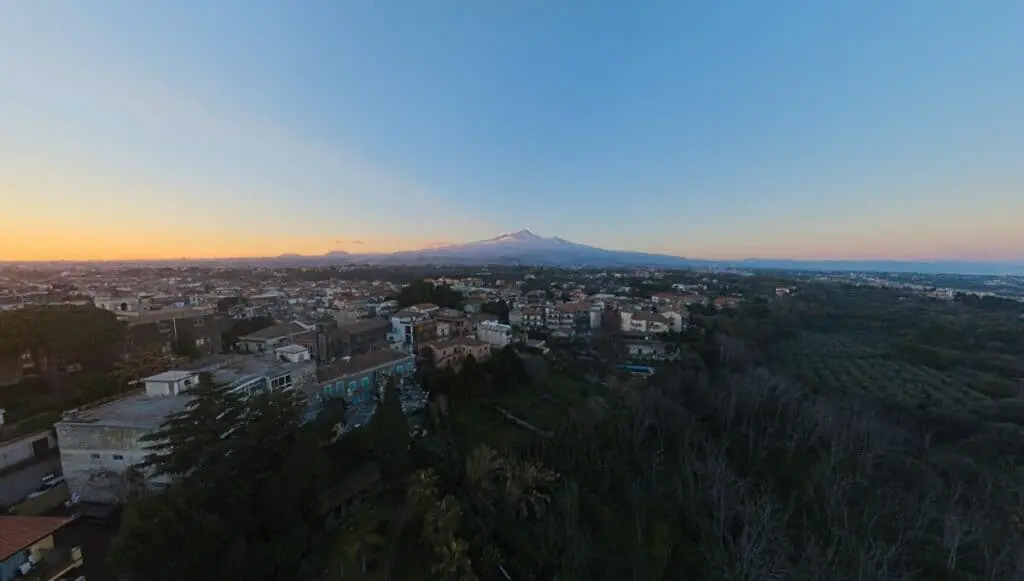
The Wide-Angle mode consists of 3 vertical rows of 3 images each
One of the big advantages of panorama photos is the very large resolution, the detail is excellent even at extreme zoom levels which makes them particularly suitable for very large prints
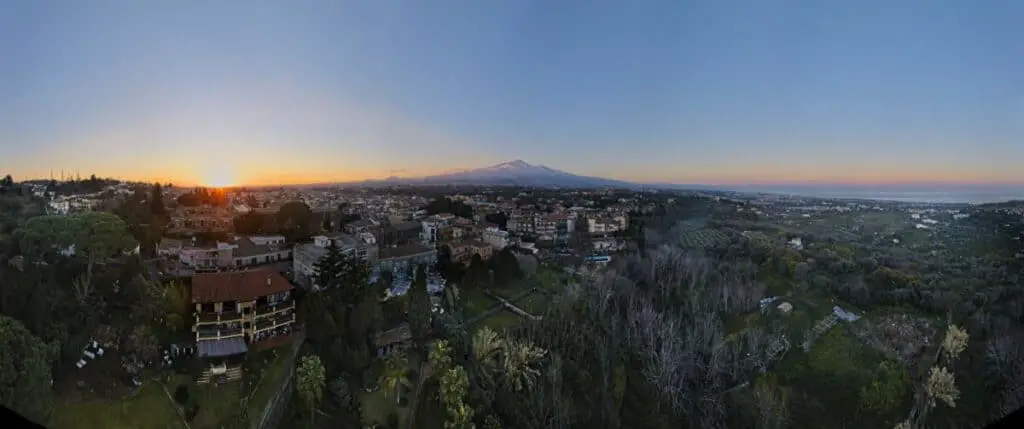
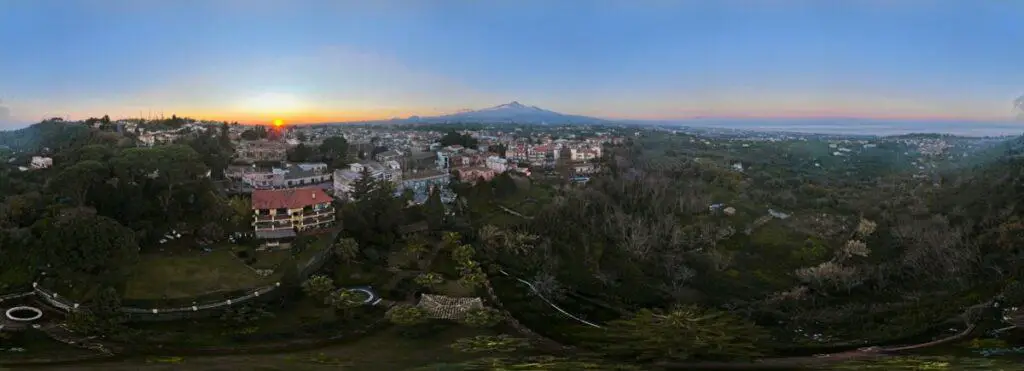
The 180° mode is made by 3 rows of 7 photos
To accommodate such a wide view on a two-dimensional image, there will be some distortion, although less than in previous models
The distortion is not necessarily a bad thing as it creates a slightly unexpected and surreal look leaving room for creativity
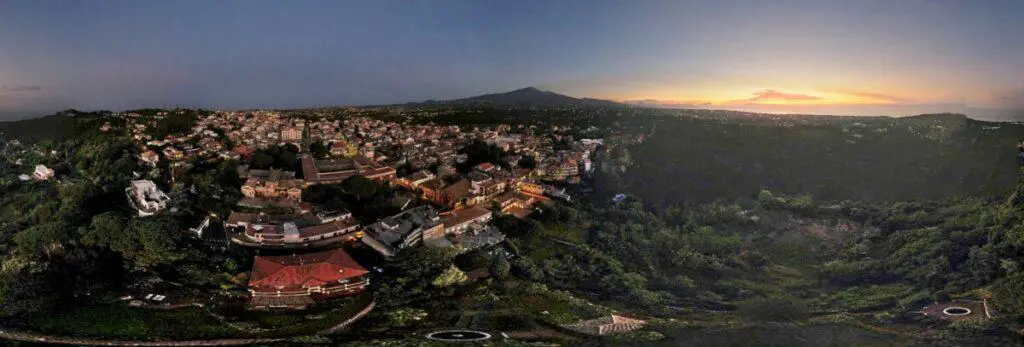
The mode Sphere attempts a 360° view of a scene in a two-dimensional space, thus creating more distortion
The raw at the top is not made by the original photos, as the camera cannot reach so high, but it is an attempt to recreate part of the sky. It is possible to get rid of it in post-processing
Sphere mode is meant mainly as an interactive image for social media, or as a tiny planet, but the two-dimensional distorted projection gives at times creative and oniric results
What is the best program to stitch a Panorama?
The quality of the autogenerated JPEG file is surprisingly good, but for best results, the way to go is to save each photo as a RAW file and then stitch them together using a third-party program
The resolution is sensational at any zoom level
Several RAW processing programs like Lightroom and Luminar Neo can assemble panorama from individual photos
To edit all the images and stitch them into a panorama I have used Luminar Neo.
Here you find my article about this excellent program
You will find the different pricing options for Luminar Neo together with a coupon for a 10% discount by entering the code “vicvideopic” using the button below
Panorama with the Telephoto Lens
The quality of images of the telephoto lens of the Mavic 3 has been improved by firmware updates
Now the files can be saved in Raw format and manual exposure is available, two major improvements
With the telephoto lens, it is possible to make panorama photos by taking the shots manually making sure to have enough overlap between two shots
The result is quite good, with a very interesting parallax effect, due to the long lens
More detail about the Telephoto lens of the Mavic 3 in my specific article