
Does Mavic 3 have Mastershots?
Master shots were introduced by DJI with the Air 2S and are available in the Mavic 3 and in the Mini 3 Pro. At first, I did not take this function seriously, but when I tested it, I realized that it can be very useful to easily get some interesting footage of an unknown location and for scouting purposes
Mastershots is a sequence of several automated moves. Many users associate them with QuickShots, which are individual moves. Here is my detailed article about Quickshots with the Mavic 3
If You Prefer To Watch This As a Video
How to Use Mastershots in the Mavic 3
Master Shots Settings
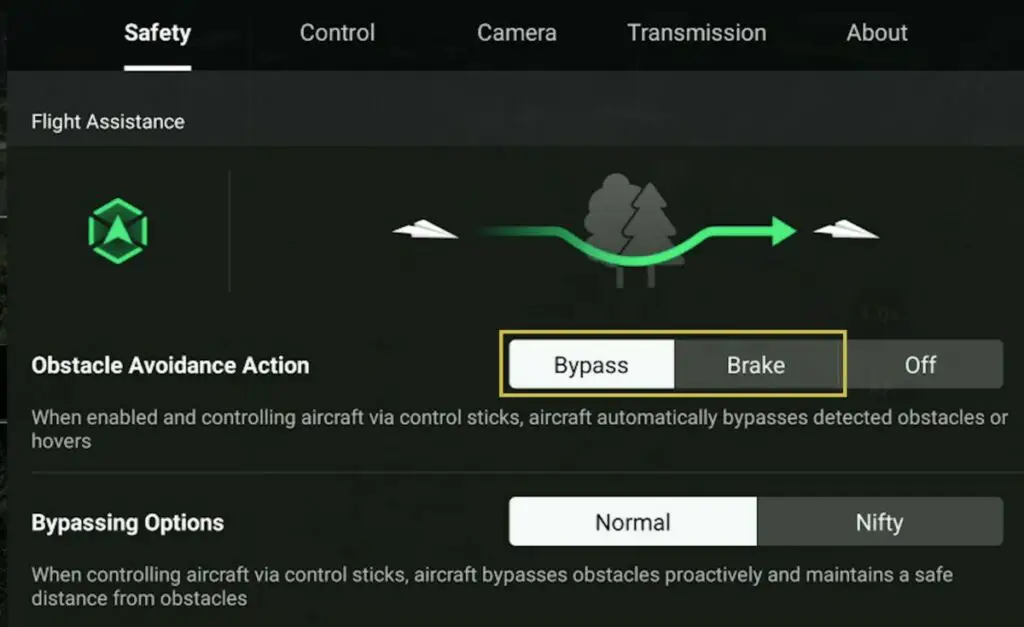
In Mastershots mode there is no control over the movement of the aircraft, therefore before starting it is suggested to double-check in the Safety tab of the settings that the Obstacle Avoidance Action is set to either Bypass or Stop to avoid possible collisions
In the photo video menu, we choose Mastershots and then select a target by drawing a box around it. A box appears in the lower part of the screen indicating the estimated shooting time
By opening the menu we can modify the values for Width, Length, and Height by choosing Small, Medium, or Large for each of them. In this case, I have chosen Large for the three options and the estimated flight time increases to 3 minutes
In the first release of Mastershots, the only color mode available was Normal, but after a recent firmware update, the 10-bit modes D LOG and HLG are now also available. The resolution of the auto-generated short movie can be set at a resolution of either 4k or 1080 at 30 or 60 fps
During the automated moves, the aircraft will rise considerably in altitude and a message may appear warning that the flight will reach the maximum altitude, especially when choosing the value Large for Height. When it happens it is suggested to lower the initial altitude or go to the safety tab and increase the maximum altitude
How to Expose
During the Mastershot, the camera of the aircraft modifies the orientation several times switching from top-down shots to others facing forward and therefore including the sky. The luminosity varies a lot, so exposing requires attention
In the latest version of MasterShots, Auto and Manual exposure are available. In Auto exposure, the only possible adjustment is the overall luminosity, through the EV value. It is preferable to lower this value, maybe by a full stop, as there is a tendency to overexpose
The issue with Auto Exposure is that sudden changes in brightness will result in noticeable shifts in light in the footage, giving an unprofessional appearance. More advanced users prefer to use manual exposure, making sure that the brightest part ore not burnt. The elements in the ground will be darker, but it will be possible to make adjustments while editing
To help expose, on many occasions it might be preferable to use the value Small for Width, Length, and Height, to focus mainly on the elements on the ground, and reduce the changes in luminosity
The Individual Moves
After hitting the shutter, for a few seconds, the drone will make some calculations about the distance from the target and then starts the series of automated moves, the name of each move is shown on the screen.
Around the shutter, a white ring shows the progression of the moves in percentage, each segment of the ring indicating one of the ten moves of the Master Shot. On the lower left, the map will show the path of all the different moves:
- Dronie, moving away from the target while raising in altitude
- Circle from far away
- Pitch up + Fly forward: the camera faces down while advancing and gradually tilting the gimbal up for a revealing shot of the target
- Circle from a closer distance with some zooming in
- Circle from an intermediate distance
- Rocket, rising in altitude while maintaining the target in the same position in the frame
- Camera Down + Fly Forward, with the camera slowly tilting up to frame the target
- Camera Down + Circle while ascending
- Camera Stright + Descend
- Camera down + Descend with the camera pointed down toward the target
Footage Taken during a Mastershot
The entire footage shot for each Master Shot is saved on the memory card. It can be split into smaller clips for each move and color-graded. It can be useful for scouting an unknown location. It can also be very useful for real estate, music clips, and so on. If the main purpose is to access the entire footage it is strongly suggested to choose 4k resolution for higher quality compared to 1080p
I have tried different values for the options Width, Length, and Height. For the first one, I have set the value for all three parameters to Medium. The drone flies far away from the target, the sky enters the frame and there is a strong change in luminosity
The second time I set all parameters to Small and this time the aircraft remains closer to the target, focusing mainly on the element on the ground for better control of the exposure
Auto-Generated Short Movies
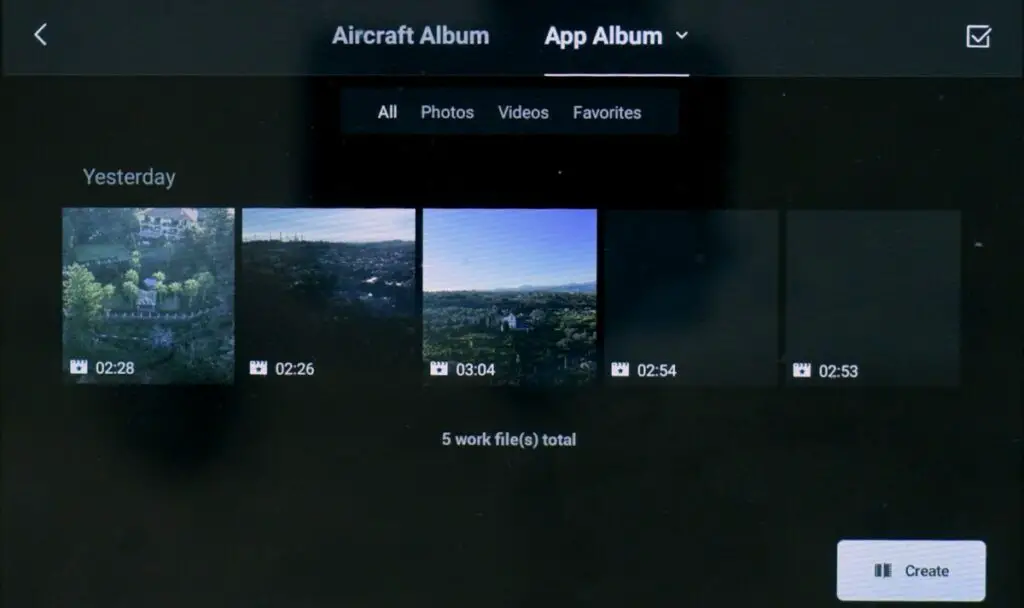
On DJI FLY app it is possible to generate short movies with music with a choice of several different templates. After downloading the files to the Album of DJI Fly app the Master shot files appear with a star icon on the left
It is possible to visualize the full-length clip, which in this case is about 2 and a half minutes, or choose one of the many templates supplied, containing music. Each template will select a portion of the full clip. As an example this one will produce a short movie of only 15 seconds, others contain titles, while others are a bit longer
After applying the template, the file can be saved for uploading to social media or stored on a computer.
Downloading and processing 4k master shots is quite resource-intensive. If your mobile device should struggle and you are not interested in the entire footage taken during the master shot, it may be better to choose the lower 1080p resolution