Up next in 10

Mini 3 Pro DJI Fly app
Show More Show Less View Video Transcript
0:00
The first time you use a Mini 3 you will need an internet connection to update the firmware
0:05
and activate the aircraft. Let's now have an in-depth look at the software interface
0:11
allowing it a sort of control of your drone. DJI Fly Up
0:17
When turning on the controller after a few seconds we are presented with this screen
0:22
After turning on the drone this other screen appears. We are now on the main page of DJI Fly Up
0:28
First of all, let's have a look at all the icons. To the left in the middle there is a button for taking off
0:36
By simply tapping on it we access the auto take off button
0:40
If we press for a few seconds on the circle take off, the drone will take off and over
0:45
at the height of a bit more than one meter. On the top left there is an arrow icon that will take us back to the previous screen
0:55
Here we can tap on the album icon on the lower left to access all our photo and video containing
1:02
the storage of the drone, or on the memory disk. The next icon is for DJI social media Skypixel
1:11
Then we have an icon for our profile, containing the flight data center with a log of all the
1:16
flights made with the drone. On the top right hand corner there is an icon to access some tutorials made by DJI
1:24
Let's go back to the main page by pressing on Go Fly
1:28
On the top left we have an indicator showing in which of the three flying modes we are
1:33
Cine, Normal or Sport. They are chosen using the switch in the middle of the controller, as we saw before
1:41
Then we have a display showing the altitude zone, or some warnings if we cannot take off
1:47
for technical reasons, or because we are in a restricted zone, or if we don't have enough
1:52
GPS signal By clicking on it we get some extra detail Moving to the right we have icons to show the percentage of battery left and the estimated remaining flight time
2:07
By clicking on the circle icon we get a detailed view of the time left until return to home
2:13
and to a forced landing. The next icon shows the strength of the signal between the drone and the remote controller
2:21
White bars indicates excellent signal. yellow bars when the signal has dropped somehow
2:31
while red bars are for very poor signal, generally just because disconnection
2:38
The following icon indicates that the obstacle avoidance sensors are active when it is white
2:44
but it turns to red when they are switched off, for example when flying in sport mode
2:50
The next icon indicates the number of satellite connected, as well as the strength of the GPS signal
2:57
Moving downwards, in the right part of the screen we have an icon for choosing the video or photo mode
3:06
At the top we have photo, and to the left and vertical menu shows the different photo modes available
3:13
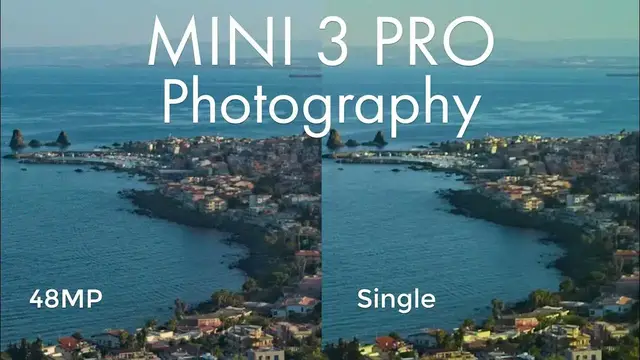
single, 48 megapixel, automatic exposure bracketing, bursts and timed shoots. Please refer to my video about photography with the Mini 3 for more info
3:26
by clicking on the link on the screen. The next choice is video with two possibilities
3:33
Normal is the one we use practically all the time. The one below is slow motion which operates at a very low resolution of 1080p
3:44
Further down to the right we have several automated shooting modes, master shots, quick
3:49
shots, hyperlapse and panorama. Please check the playlist at the end of this video for my in tutorials of these modes Some of them are already there I will add the remaining ones very soon In the middle on the right hand side we have a big round shutter
4:08
which is red when we shoot video and white when we are in photo mode
4:13
By tapping on it we take a photo or start recording a video, according to the mode we are in
4:20
To the left the top button toggles the camera from the traditional horizontal position
4:24
position to the new vertical one to shoot vertical video and photos
4:31
The button below is for zooming from the normal ratio to 2 times when we are in 4K resolution
4:38
Keep in mind that the zoom is digital. In other words, there is a loss of resolution when zooming in
4:44
It can be used without any harm when delivering video at an ATP, but if the final output is
4:50
there will be a severe loss of resolution. By holding a finger on the icon and dragging, we can progressively zoom from 1 to 2 times
5:01
although the best method for smoother result is to use the wheel in the new controller
5:06
for users who own this version. In 1080p resolution, it is possible to zoom up to 4 times
5:13
but the resolution will get extremely poor, poor so this function is to be used for exploration only
5:22
The play button underneath shows all the photos and video contained on the memory disk or
5:28
on the internal storage of the drone. On the bottom right of the screen there is a button to toggle between auto and manual exposure
5:37
I strongly recommend shooting in manual mode, at least for video, for several reasons
5:43
In auto mode the software will choose the correct exposure for a scene
5:47
The only way we can interact is by modifying the EV value to make the image brighter or darker
5:53
Keep in mind that the auto exposure has a tendency to overexpose big time in my opinion With the next button to the left we can choose the resolution and the frame rate These days we use mostly 4k but 2 and 1080p are also available At 4k we can choose frame rates of 24
6:15
25, 30, 48, 50 and 60 frames per seconds. In frame rates up to 30 frames per seconds a sort
6:24
of HQ mode is applied. The next button to the left, Storage
6:30
indicates how much recording time we have left in the memory card according to the mode we are in
6:37
In Pro mode we can access all different settings from a single window and this is an excellent feature
6:43
of DJI Fly App. Very handy. We simply click on the setting area and we are presented
6:49
with this window where we can modify independently the ISO and the shutter speed. By clicking on the icon on the bottom left of this window we can
6:58
modify all other video parameters. White balance, resolution and frame rate, storage location from
7:05
the SD card to the internal memory, codec and video format. I will cover these subjects more
7:12
in depth in the next chapter. Moving towards the left we find an indicator of the distance of the
7:18
drone from the home point and above is an indicator of the horizontal speed
7:23
Further to the left the elevation of the drone as well as the vertical speed
7:30
On the bottom left corner we can tap on this icon to access a radar view with the position of the
7:35
drone relative to the home point and to the north. By tapping on the bottom right of the icon we
7:42
we access a map of the area, again with the position of the drone, the home point and the controller
7:49
By tapping on it we get a full screen display of the map and we can visualize the itinerary travelled by the drone
7:57
and the direction the camera is aiming to. Tap on the bottom left corner to go back to the original icon
#Consumer Electronics
#Virtual Reality Devices