Up next in 10

DJI Mini 5 Pro Waypoint - Creating a Mission
Show More Show Less View Video Transcript
0:00
We access waypoint mode by the icon on
0:02
the left of the screen just above the
0:04
one for takeoff.
0:08
For videography, it is preferable to
0:10
have only a few points, generally no
0:12
more than four.
0:15
For simple moves, two points are
0:17
sometimes all that is needed.
0:24
I want to show this village on the
0:25
foothills of Mount Atn easily and then
0:29
descend and move to the left while the
0:31
camera rotates to the right and tilts up
0:33
to reveal Mount Atna.
0:38
The first step is setting the exposure.
0:41
Since the shots will alternate between
0:43
the ground and the sky, it is best to
0:45
use manual exposure to prevent sudden
0:48
changes in brightness.
0:53
I fly to the right of the village at
0:54
medium altitude. Frame the central
0:57
square and press the C1 button on the
0:59
controller to set the first point or the
1:02
Fn button if using the RCN3 controller.
1:08
I then fly to the left, rise to the
1:10
maximum altitude, advance and tilt down
1:13
the gimbal for a top- down view of the
1:15
center of the village.
1:18
An alternative way to add the point is
1:20
to open the small windows on the lower
1:23
part of the screen and tap on the plus
1:25
sign next to the previous point.
1:29
Then I fly backwards and to the left
1:32
while lowering the altitude,
1:34
rotate the camera and adjust the gimbal
1:37
orientation to frame mount at
1:40
the third and final point. Here we can
1:44
adjust the mission global settings by
1:46
tapping on next to the right of the
1:48
window. I increase the global speed to
1:50
around 9 m/s.
1:53
We can specify the action to take at the
1:55
end of the flight and in case of signal
1:57
loss. In this case, I have them on
2:00
return to home. On another occasion, if
2:02
obstacles are present on the scene, it
2:04
is better to set them to hover. Finally,
2:07
we choose the start point. I choose to
2:10
start at the first point, while on other
2:12
occasions it might be preferable to
2:14
start from the last point to save
2:16
battery time.
2:18
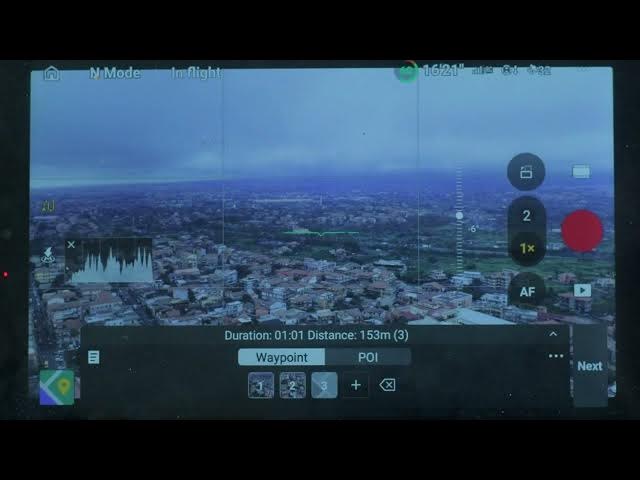
I tap the arrow on the left to return to
2:20
the main window. The top of the window
2:23
shows the resulting duration in seconds,
2:25
the distance between the first and the
2:27
last point, and the number of points.
2:31
We can now save and name the mission
2:34
through the small icon on the left.
2:37
I tap next on the right of the window
2:39
and then go.
2:42
The aircraft move to the first point and
2:45
start the mission.
2:47
As you can see, the movement is
2:48
perfectly smooth and the transition
2:50
between point flawless.
2:53
Many users tend to use too many points
2:55
thus creating abrs
3:00
only a few points. As you can see, light
3:04
conditions are horrible and we can
3:06
hardly see Mount Edna. But it is not a
3:08
concern as the mission is saved in
3:10
memory and we can perform it in better
3:12
light conditions.