Up next in 10

DJI Mini 5 Pro Video Settings - Control
Show More Show Less View Video Transcript
0:01
In gain and expose settings, we can
0:03
control the movement of the aircraft and
0:05
the camera. We can set the values
0:07
independently for each of the three
0:09
speed modes, sena, normal, and sport.
0:14
Max horizontal, ascend, and descend
0:17
speed are self-explanatory.
0:20
Max angular velocity is the speed of the
0:22
camera's rotation when panning using the
0:25
left stick of the remote control.
0:27
I suggest setting it to a low value.
0:31
Your smoothness controls the behavior
0:33
when releasing the stick after panning.
0:36
I prefer a value just above the midpoint
0:39
for a smoother release. Brake
0:42
sensitivity control the distance
0:44
traveled after releasing the right
0:46
stick. Further down, we can control the
0:48
gimbal movement. Max control speeds
0:52
determines how fast the gimbal will tilt
0:54
up or down. I like to set a low value
0:57
for precise moves.
1:00
Tilt smoothness controls how quickly the
1:03
gimbals come to a halt after I move. I
1:06
prefer a value slightly above the
1:08
midpoint.
1:10
In Expo, there are three sliders to
1:13
adjust the sensitivity of the control
1:15
sticks. I like to set them at very low
1:18
values for a smoother response.
1:22
The last two sliders of Gyn Expo
1:24
settings control the behavior of a new
1:26
feature, the gimbal roll.
1:30
Max roll speed affects the rotation
1:33
speed when using the gimbal dial. Roll
1:36
smoothness should be set at a high value
1:38
for a smoother rotation.
1:42
Further down in the control menu, we
1:43
access the bottom customization window
1:46
to assign specific actions through the
1:48
two buttons at the back of the
1:49
controller, to the scroll wheel, or to a
1:52
combination of wheel and button.
1:56
I like to set the C1 button to recenter
2:00
tilt down gimbal
2:03
and the C2 to cruise control.
2:06
In cruise control, we can start the
2:08
movement. In this case, advancing
2:10
diagonally. When we tap the bottom, the
2:13
aircraft will continue to fly in the
2:15
same direction at the same speed. And we
2:18
can concentrate on adding other
2:20
movements like ascending and descending
2:24
and tilting or rotating the gimbal. The
2:27
scroll wheel can be used to tilt the
2:28
gimbal up and down.
2:32
While the combination of the button and
2:35
wheel can control the gimbal rotation.
2:47
In the camera tab of settings, the menu
2:49
is contest sensitive. Since we have
2:52
selected video in the video photo menu,
2:54
all the items in the camera tab will
2:56
relate to filming.
3:00
The histogram is the only tool I use for
3:02
exposure. Therefore, I have it on all
3:05
the time. I always leave some space
3:08
between the last bar to the right and
3:09
the right edge of the histogram to
3:11
prevent burning the highlights.
3:15
If the bars are bunched up against the
3:17
left edge and there is plenty of space
3:19
to the right, the image is underexposed
3:22
and we should increase the luminosity.
3:24
However, there is more tolerance for
3:27
underexposed shadows as they can be
3:29
recovered while editing while
3:31
overexposing highlight should be avoided
3:34
at all costs.
3:37
If bar touch both the left and right
3:40
edge, we are in a high dynamic range
3:42
situation.
3:47
Further down, we can overlay grid lines.
3:50
I find it useful to add the one in the
3:52
middle to apply the rule of thirds.
3:55
When filming with drones, we often have
3:58
the horizon line in the frame. Rather
4:00
than having it in the middle, it is more
4:02
interesting to divide the scene into
4:04
thirds and have it either on the upper
4:07
or the lower third.
4:10
On other occasions, especially for top-
4:12
down shots, we might want a symmetric
4:14
framing, in which case the same overlay
4:17
helps position this object.
4:21
The option style presents two sliders to
4:23
adjust sharpness and noise. I set them
4:26
to minus one or minus two as I find the
4:29
standard setting to oversharpen the
4:31
image and apply too much noise
4:33
reduction.
4:38
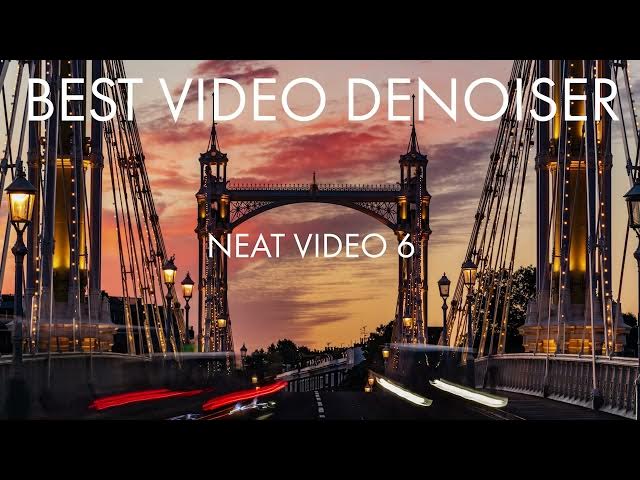
To reduce noise, I use the excellent
4:40
noiser nit video when needed. You will
4:43
find info about it in the description
4:45
below. You can watch my video about me
4:47
video by clicking on the link above.
4:57
The window for exposure is at the bottom
4:59
right of the screen. The icon to the
5:02
right toggles between auto and manual
5:05
labeled pro. The aperture is fixed so we
5:08
have only two values to set when
5:10
exposing ISO and shutter speed.
5:14
In auto mode, the only control on
5:16
exposure is through the overall exposure
5:19
value, EV, the first icon to the right.
5:22
I find that this model tends to
5:24
overexpose, so I prefer to lower the EV
5:27
value by about 0.3 or 0.7.
5:32
With all other drones or camera, I avoid
5:35
filming with auto exposure as the
5:37
software compensate for the difference
5:39
in luminosity with a small lag.
5:42
A clear indicator of amateur footage.
5:46
But with the Mini 5 Pro, it can be worth
5:48
using it in a specific situation as we
5:51
will see later.
5:53
In manual exposure mode, we can set the
5:55
ISO value and shutter speed
5:57
independently for more control.
6:00
The mm value at the bottom cannot be
6:02
modified. It displays the luminosity
6:05
resulting from the values chosen above
6:07
compared to the optimal exposure
6:09
computed by the software.
6:12
With an X icon, we can set resolution
6:15
and frame rate. There are two resolution
6:18
option 4K and 1080p. 4K is nowadays the
6:22
standard and one I suggest using
6:24
although 1080p can still be used for
6:27
social media if file size is an issue.
6:32
Below the resolution there are option
6:34
for different frame rates. The most
6:36
widely used are 24 and 30. It is
6:40
recommended to use a consistent frame
6:42
rate across all clips in the same
6:44
project. Higher frame rates like 48 and
6:48
60 frame pers can be used to apply some
6:51
slow motion while editing.
6:56
In videography, the 180° rule is widely
6:59
applied. The idea is to set the shutter
7:02
speed at a value double the frame rate
7:04
to achieve the correct amount of motion
7:06
blur. With a frame rate of 24 frame per
7:09
second, the ideal shutter speed is 150th
7:12
of a second. at 30 frame per second,
7:16
160th of a second and so on. This rule
7:20
is particularly important when flying
7:21
close to the ground or when the scene
7:24
contains moving element.
7:27
However, when flying at a high altitude,
7:30
there is more tolerance. Although very
7:32
high shutter speed values should always
7:34
be avoided.
7:37
To control the shutter speed in low
7:39
light condition, a set of ND filter is
7:41
needed. I use the Freewell All Day
7:44
six-pack with values from ND16 to
7:48
ND1000,
7:50
suitable for all light conditions, not
7:52
only for video, but also for hyperlapses
7:55
and long exposure photography.
7:57
You will find a link with prices and
8:00
info in the description of this video.
8:02
It is an affiliate link, so in case of
8:04
purchase, I receive a small commission,
8:07
which helps the channel.
8:12
As I said earlier, there is a situation
8:14
when auto exposure can be a good choice.
8:17
The specs of the Mini 5 Pro claim a
8:19
whopping 14 stops of dynamic range using
8:23
the dual ISO Fusion.
8:27
This technique can only be applied when
8:29
filming in auto exposure.
8:33
Another possibility is to use manual
8:35
exposure, setting the ISO value to auto.
8:39
I do find that in high dynamic range
8:41
situation, it is worth using this
8:43
technique for improved results.
8:52
In the same window, we can click on the
8:54
icon on the bottom left to access other
8:57
video settings. At the top, we select
8:59
the white balance value expressed in
9:02
Kelvin. Auto white balance should be
9:04
avoided as it leads to unwanted color
9:06
shift when the luminosity changes.
9:10
A quick way to find the correct value is
9:12
to tap the auto button on the left to
9:14
get the app's suggested value. Then tap
9:17
it again to switch back to manual mode
9:19
and adjust it to your test if needed.
9:23
Below the resolution frame rate areas,
9:25
we can select one of the three color
9:27
profiles, normal, hrg, or the log M.
9:33
Normal mode is the most widely used. It
9:35
is a pre-processed profile and can be
9:38
used just out of the camera. Although a
9:40
touch of extra contrast and saturation
9:42
is often beneficial.
9:45
Normal has constantly improved over the
9:47
years. It is now a true 10 bit mode
9:50
capable of displaying over 1 million
9:53
colors with excellent quality in most
9:55
like conditions. It is an excellent
9:58
choice for users who don't relies on
10:00
computer proprocessing or when editing
10:02
is not an option.
10:05
The log M is a flat profile widely used
10:08
by professionals for two reasons.
10:12
It performs better in a dynamic range
10:14
situations
10:16
and it responds extremely well to
10:18
postprocessing to adapt a clip to the
10:20
color scheme of a specific project.
10:32
We access video mode via the icon above
10:35
the shutter. A menu on the left offers a
10:38
slow motion option.
10:41
It is meant for extreme slow motion at a
10:44
frame rate of 120 fps. Very interesting
10:48
for scene with moving elements.
10:53
With this mode, there is no need to slow
10:55
down the footage while editing as the
10:57
slow motion is automatically applied.
11:02
To the left of the shutter, an icon
11:04
toggles between horizontal and vertical
11:06
camera orientation to take footage in
11:09
portrait mode.
11:11
To the left of the shutter, we find
11:13
another important new feature of the
11:15
Mini 5 Pro, the metal mode.
11:19
By tapping on the icon 2, we get a two
11:21
times zoom with image quality close to a
11:24
true 48 optical lens. It works by
11:27
cropping the central part of the image,
11:30
taking advantage of the higher
11:31
resolution of the 1 in sensor.
11:35
I find this feature extremely useful for
11:37
filming subject that we cannot reach or
11:40
increasing the parallax effect in scene
11:43
with elements on different layers.
11:47
By sliding on the icon we get variable
11:50
zoom levels up to three times, but in
11:53
this case there is a noticeable loss of
11:55
resolution.
11:58
Click on this link to watch my video
12:00
about photography with the Mini5 Pro.
12:03
And don't forget to hit the like button
12:04
if you find this video interesting.
12:07
Thank you.