Up next in 10

DJI Mini 5 Pro Point of Interest - Settings
Show More Show Less View Video Transcript
0:00
Point of interest is part of a suite of
0:02
three intelligent modes grouped under
0:04
the name focus track. Unlike quickshot,
0:08
master shot and hyperlapse, these modes
0:11
don't appear in the photo video menu.
0:14
To access them with a static target,
0:16
such as a building or run mark, simply
0:19
draw a box around them. A small window
0:22
in the lower part of the screen present
0:24
a choice among the three modes at the
0:26
track, spotlight, and point of interest.
0:31
These modes are only available when the
0:33
drone is flying.
0:36
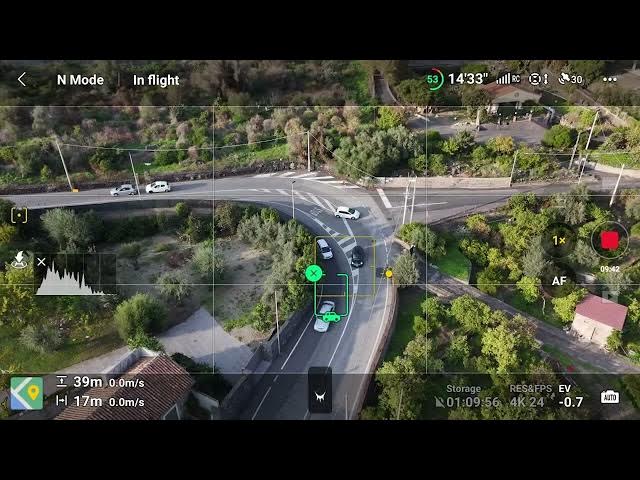
After selecting point of interest, a
0:38
double yellow arrow appears to select
0:41
the direction and the and the speed of
0:43
flight.
0:45
It is possible to modify the speed
0:47
during the shot, which is handy.
0:52
I would prefer a higher maximum speed.
0:56
However, it is possible to increase it
0:58
while editing if the scene doesn't
1:00
contain moving elements.
1:04
Once a target is selected, the camera
1:06
locks on the target defined by green
1:08
brackets.
1:10
The focus track icon on the left part of
1:12
the screen turns to yellow, indicating
1:14
that we are in one of the three focus
1:16
track modes.
1:20
If needed, we can switch to a different
1:22
mode with the same target selected via a
1:24
small window.
1:28
In previous DJI lightweight models like
1:30
the Mini 5 Pro and the Flip to select
1:32
targets like people or vehicle, we had
1:35
to activate subject scanning in the
1:37
control tabs setting.
1:41
The procedure has been simplified in the
1:43
Mini 5 Pro.
1:45
When the active track icon is active,
1:48
the app recognizes people and vehicles
1:50
and displays a plus sign over them.
1:53
Simply tap on the plus icon to select
1:55
one of them as a target.
2:00
To exit point of interest, tap the focus
2:02
track icon on the left, which will
2:05
change from yellow to white to indicate
2:06
that you are back in normal video mode.
2:11
An alternative way is to tap on the
2:13
green X near the target.
2:17
Point of interest can be applied to
2:19
vertical footage taken in portrait mode
2:21
which is handy for users involved in
2:23
social media.
2:28
Most of the video settings are
2:30
available.
2:32
We can use manual or auto exposure and
2:34
white balance. The resolution can be set
2:37
to 1080p or 4K with frame rates up to 60
2:41
frames per second.
2:46
It is also possible to use it with the
2:48
video slow motion mode and the frame
2:51
rate of 120 frame per second for extreme
2:55
slow motion.
2:58
The three color profiles are available
3:00
normal, dlog m and hlg
3:06
with the mini pro. Point of interest can
3:08
be used with a 48 mm metal mode to apply
3:12
a two times zoom with a quality close to
3:15
a true optical lens
3:18
achieving an astonishing parallax
3:20
effect.
3:24
Surprisingly, the continuous gimbal
3:26
rotation is not available in this mode.
3:30
However, similar result can be achieved
3:33
by performing a circular move in
3:35
spotlight mode, which does support the
3:38
gimbal rotation.
3:42
Before starting a move, be aware of
3:43
nearby obstacles and turn on the
3:45
obstacle avoidance system in the safety
3:47
tab of the setting, selecting break or
3:50
bypass.