Up next in 10

Hyperlapses n Waypoint mode: https://youtu.be/1MhVu-R0yP4
My video about Neat Video: https://youtu.be/C4LPhBV53yw
The DJI Mini 3 Pro is an excellent tool for hyperlapse, with good photo quality and relatively long battery life. Shooting time lapse with a drone like the Mavic mini3 is not easy, but it is huge fun.
In this video I will show how to make the most of night hyper lapse and timelapse in Waypoint mode, choosing the most exciting scene and optimizing the settings and the light conditions
DJI MINI 3 PRO: https://amzn.to/3BOYE4B
RC Controller for Mini 3 and Mavic 3: https://amzn.to/3SaHwel
ND Filters for the Mini 3 Pro: https://amzn.to/3P8z9P1
Lanyard neck strap for DJI RC controller: https://amzn.to/3CHdY27
Anti-glare screen protector: https://amzn.to/3EQy9xw
SanDisk Memory Card: https://amzn.to/3QtXW12
As an Amazon Associate, I earn from qualifying purchases.
Luminar Neo, my photo editing and video organizing software: https://skylum.evyy.net/c/3885118/1142920/3255
DISCOUNT COUPON for 10% off the price: VicVideoPic
My video about Luminar Neo: https://youtu.be/FgvL58P0zz4
Neat Video, best denoiser for video: https://www.neatvideo.com/?linkID=p7938
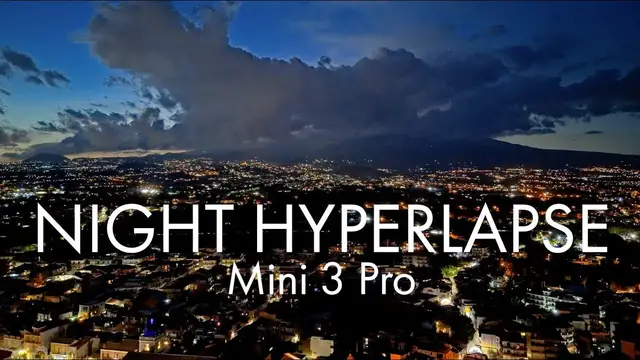
Show More Show Less View Video Transcript
0:00
The Mini 3 is an excellent tool for hyperlapses with good photo quality and relatively long battery life
0:07
Shooting hyperlapses with a drone is not easy, but it is huge fun
0:13
In this video I will show how to make the most on-night hyperlapses, how to choose the most exciting scene, and how to optimize the setting and the light conditions
0:23
It is the month of August in Sicily and it is incredibly crowded everywhere
0:34
Apparently everyone goes on holiday exactly at this time of the year
0:39
It's very hard to find places where it's possible to fly a drone
0:42
There's just too many people around. I have found this small village at the foothills of Mt
0:47
It is not too crowded and there is a very rare unbuilt area where I can fly my drone
0:54
while being still close to the village. For hyperlapses we need movement and at night the most common recognizable elements in motion
1:02
are cars. It also helps to have a good amount of city lights
1:08
Well this village is certainly not New York or London but this is what I have available
1:13
at the moment so let's try to make the most of it. To get the most out of the scene, let's check the individual parts to see if we can find enough movement or other interesting effect so that we can tie the most interesting part into our hyperlapse
1:35
I start by taking a few quick hyperlapses of the different parts of the scene
1:40
without caring too much about exposure and post-processing, just for inspection, to choose the most suitable areas for our masterpiece
1:50
First of all, let's see what happens approaching Mount Etna. It is not bad, there are plenty of distant lights from villages further away
1:58
a few streaks of cars from highways, and of course the backdrop of Mount Etna can be quite spectacular
2:05
It will not be easy to render Mount Aetna properly as we need some good light and hope for the best cloud conditions
2:13
Therefore we need the best timing and a bit of luck. Let's see what we can make out of the little village
2:20
I start with the camera pointing down to the main square of the village where a street party with a rock concert is taking place
2:27
I make a diagonal move keeping the square in the middle of the frame. this one would probably work better as a time lapse with a static point of view as there is
2:37
already plenty of movement going on but this fellow doesn't have a cooling fan and to avoid
2:44
overheating he relies on the air generating by the movement it is not suggested to keep it over
2:51
in for 15 minutes especially in this hot weather but we can probably find something more interesting Then I try a sort of long range shot in line with the main street of the village going backward while descending
3:06
There is a good deal of movement going on, with cars and plenty of people because of the street party
3:11
The distance travel is too long, a shorter and slower move will be more interesting
3:17
Not bad, it could be a starting point to link to the view on Mount Etna
3:24
I decided to start with a top-down view of the village over the main street from a high
3:32
altitude and move to the left while descending and rotating the camera to frame Mt. Etna
3:38
I will be using the waypoint mode with just two points for a smoother result
3:44
So I fly to the first point, tap on the first icon to the left of the small windows to store
3:50
it in memory. Then fly to the second point and do the same
3:57
A great feature of the mode waypoints is that it stores each mission in memory. I will be
4:02
able to perform the exact same mission at different times and with different settings
4:07
to get the best result. This will also save a good deal of precious battery time, as no
4:13
time will be needed for the setup. I will use a frequency of one shot every three seconds
4:20
which gives good results when the movement is generated mostly by cars or people walking
4:27
I want to get a 12-second clip that requires 300 shots. At the shutter frequency, it will take 15 minutes
4:35
for the 300 shots, and this is well within the capabilities of the battery life of the Mini 3
4:43
For the Mini 3, it is possible to acquire a special battery
4:46
that lasts for well over 40 minutes. This battery makes the Mini 3 a hyperlapsed champion, and I was very much looking forward
4:56
to purchase one, but sadly is not available here in old Europe
5:01
Well, we can't always get what we want. Regarding exposure, I will try to keep the ISO at the base value of 100, although I could
5:10
raise it to 200 if needed, for an extra stop of light
5:14
For the shutter speed I will aim for 1 second for optimal motion blur, but I can go up to
5:20
1 third of a second to reduce the light if needed. I might be using a very light ND filter, either ND4 or ND8 for 1 or 2 stops, or no filter
5:32
at all, according to the time of the shooting and the light conditions
5:38
Another big challenge is due to the fact that sunsets and sunrises here are much faster
5:43
than in Northern Europe, New England or Canada. During the 15 minutes of shooting the lights shift a lot, so I will have to anticipate what
5:52
the light condition will be like at the end of the hyperlapse and plan the exposure accordingly I will not go deep on why I choosing these settings as I have very thoroughly covered
6:04
the topic of exposure and motion blur in time lapses and hyperlapses in this video linked
6:09
on the top of the screen. I will also link my video about hyperlapses in waypoint mode with the mini tree at the
6:17
end of this one. So we are ready to go. I don't have to worry about setting up the shot, as I will be using
6:28
the same waypoint save mission all the time, but it is crucial to choose the perfect time
6:33
for the best light. The light conditions are excellent, with great visibility and just a few nice clouds adding
6:41
depth to the view on Mt. Etna. Sunset is at 7.43 and I will try to get to the end of the 15 minute shooting, with just
6:49
the last bit of twilight. So I start the hyperlapse at 812
6:54
I'm using an ND4, the lightest ND filter, for just one stop, bass ISO at 100 and a shutter
7:02
speed of half second. As usual I set a frequency of one shot every 3 seconds and the length of the clip at 12 seconds
7:11
The hyperlapse starts and I can see on the screen on the controller that it's going to be a great one
7:16
The sky is well controlled with the highlights correctly supposed. The elements on the ground are dark, but I should be able to recover part of the shadows in post-processing
7:28
But after it is shot... Drama. The shooting is interrupted, probably because of signal issues
7:40
What to do? If I come home and change the battery, it will probably be too late
7:46
and I will lose the light at the end of the shooting. I still have decent battery left, so I decided to keep the bird flying and start the new hyperlapse
7:55
One thing to notice is that with the Mini 3, the LED light doesn't interfere at all with the hyperlapse
8:02
as it was the case with other models. Nice work, DJI! I just slightly lower the shutter speed to 1 second and hit go
8:14
But I have to stop midway through because I'm running short of battery time
8:19
it would have been a very good one even though on the darkish side
8:25
unlucky well win some lose some but at least now i have good reference points for the best timing
8:32
according to the light so back to the drawing board the next day i decided to have a go a little
8:39
earlier at 8.03 to get just a bit of extra light i take out the handy filter and have to set the
8:46
shutter speed at one third of a second to avoid overexposing The result is quite good the sky is correctly exposed and Mount Etna looks good framed by a couple of clouds the motion blur in the car movement at the beginning is okay
9:06
but could be better using a longer shutter speed so I bring the bear home change the battery set the shutter speed at one second and start a new one
9:19
at 823. It is maybe a bit late, let's see if I can catch the last bit of light on Mount
9:26
Etna. I do like this one, the motion blur on the car is perfect and Mount Etna looks
9:32
nice with a last glimpse of light. There is just a touch of noise around Mount Etna after
9:41
rising the shadows, but it is a level that can very easily be removed using Neat Video
9:48
You will find info about this excellent denoiser in the description below
9:53
Click on the link above if you're interested on my tutorial about Neat Video
9:58
By now I gathered enough information about the best time to start and the corresponding
10:03
exposure settings. So the next day I felt very confident and chose a starting time in between the previous
10:09
two at 8.10. The settings are the same, no ND filter, ISO 100, shutter speed 1 second
10:18
The result in terms of exposure and motion blur is excellent. The sky is perfectly exposed
10:25
This timeout Etna is covered by heavy clouds, maybe not exactly what I was looking for
10:32
although the cloud looks actually very nice with the reflection of the dying sun
10:39
But the beauty of this method is that once we have dialed in the correct exposure value
10:45
and starting time relative to sunset, we can keep doing it until we find the perfect conditions
10:53
And with Mt. Etna every time is a different story. Let me know your thoughts and which one you prefer in the comment below
11:00
I really encourage you to use this method, it is great fun and the result can be astonishing
11:07
Just the last example, this time for early birds. Same scene, same setting, but this time I'm going for a sunrise rather than a sunset
11:17
Basically a sunset upside down. Since I know I have the right settings and I can use the saved waypoint mission, the
11:24
only thing to guess is the correct starting time. And at the first try it actually works very well
11:39
And what's more, Mount Etna decided to cooperate with his own little show
11:45
Not bad
#Consumer Electronics
#Drones & RC Aircraft
#Virtual Tours