The Air 2S is able to shoot 4k footage at a frame rate of up to 60fps and 1080p at 120fps. Higher frame rates are used to achieve good quality slow motion
In certain situations, slow motion can make drone footage more interesting. So, let’s see how to make the most of the higher frame per rate of the Air 2S to achieve high-quality slow motion
Why Slow Motion in Drone Footage?
When shooting landscape footage from far away, which is often the case with drones, slow motion is not really needed, especially if there are no moving elements in the scene. But when the scene contains subjects in motion, slowing down the action often adds interest. Getting closer to the action, slow motion becomes even more important to convey a different mood
Let me show you a few examples of slow motion applied to footage. Before someone calls the drone police, please note that some of the footage shown here was obviously shot on a ground-based camera, not with a drone
How to Use Higher Frame Rates
A question often asked is: can I not simply slow down the footage in post-processing and forget about this confusing thing of frame rate?
It is always possible to accelerate footage without loss of quality while editing, but the same is not true when slowing it down, as we can see from these examples of slow-down made from a higher frame rate interpreted in the frame rate of the timeline...
…versus footage shot at the same frame rate of the timeline and simply slowed down in post-processing. Let me explain why
The most used frame rates are 24, 25 or 30 frames per second. I use 24 (which is actually 23.997), but I will refer to it here as 24
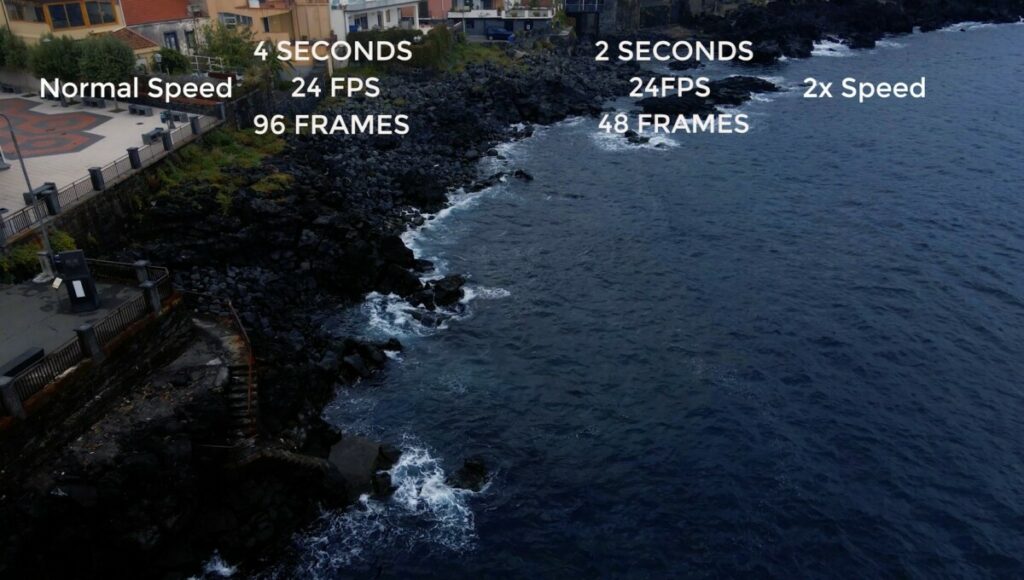
A very simple example: we have 4 seconds of footage shot at 24 frames per second, So a total of 24 by 4 which is 96 Frames. If we want to double the speed we need 2 seconds of footage still at 24 frames per second, so 48 frames. We have plenty of frames available, all the software has to do is drop half of the frames and keep the 48 needed, so it can maintain basically the same quality
If we want to speed it up by four times we only need one second of footage. And again there are plenty of frames just dropped 3 out of 4
But if we want to slow down our 4 seconds clip to half speed, the software has to fill 8 seconds and needs 192 frames. But there are only 96 frames, so the program has to somehow create new frames and this is where the quality declines, whatever method we use
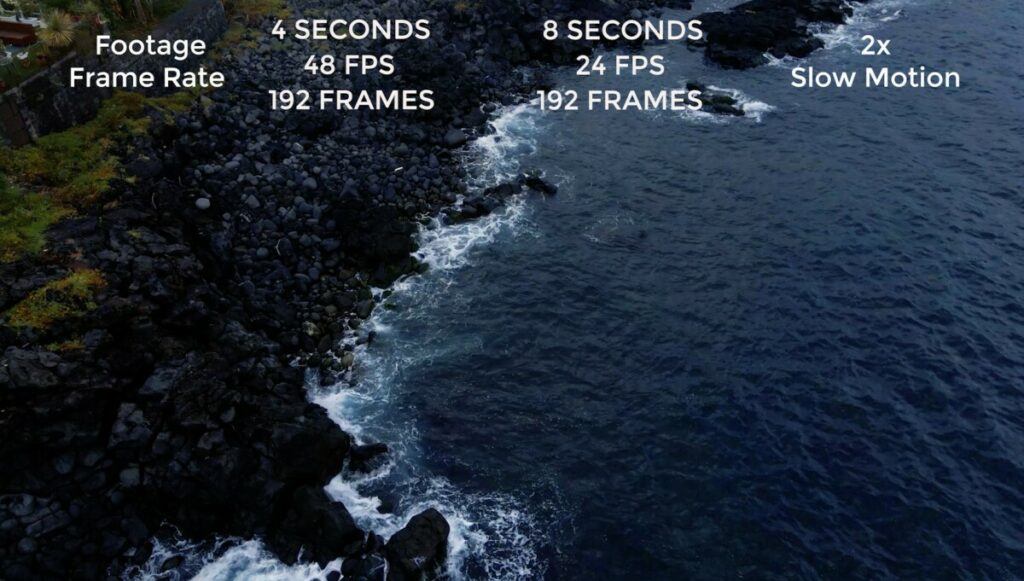
The best way to slow down a clip is to start with a higher amount of frames. In our example, if we start with a 4 seconds clip shot at 48 frames per second which is double 24, we have a total of 192 frames. If we slow down the speed by half, we end up again with an 8 seconds clip. Since our project is at 24 fps, we need 24 x 8 seconds, which equals 192, we have exactly the frames we need
The best results are obtained when using a frame rate that is exactly a multiple of the one used in the timeline so that all the frames are used. But other frame rates are sometimes used, for example, it is possible to shoot at 30 fps and encode at 24, in order to get a very subtle 20% effect which can be quite cinematic at times. But the software has to drop one frame out of each five. This can cause small artifacts, but the result is good enough for most non-professional projects. We can also use 60 fps for a 60% slow-down effect, in this case, some frames will again be dropped
| Frame Rate | Speed | Frame Dropped |
| 30 | 80% | Yes |
| 48 | 50% | No |
| 60 | 40% | Yes |
| 120 | 20% | No |
DJI Air 2S Frame Rates
At 4k resolution the Air 2S can shoot footage at the following frame rates: 24, 25, 30, 48, 50, and 60. The same resolutions are available at 2.7k and at 1080p. If we choose the option slow motion on the video menu we can get a frame rate of 120fps at 1080p for super slow-mo. The 120fps is automatically slowed down and doesn’t need to be converted in the frame rate of the timeline, as we will see later
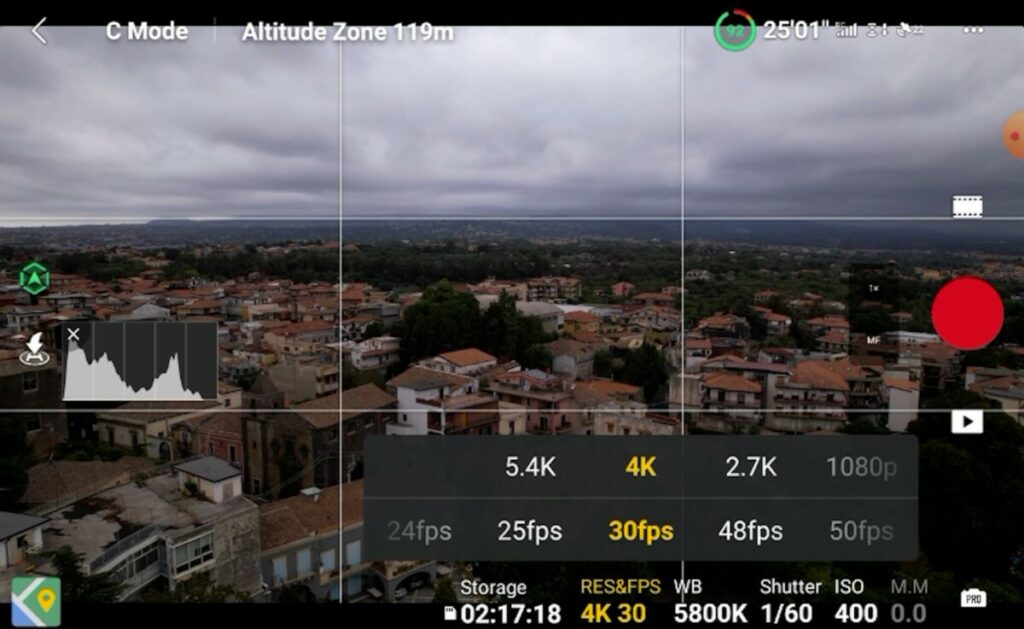
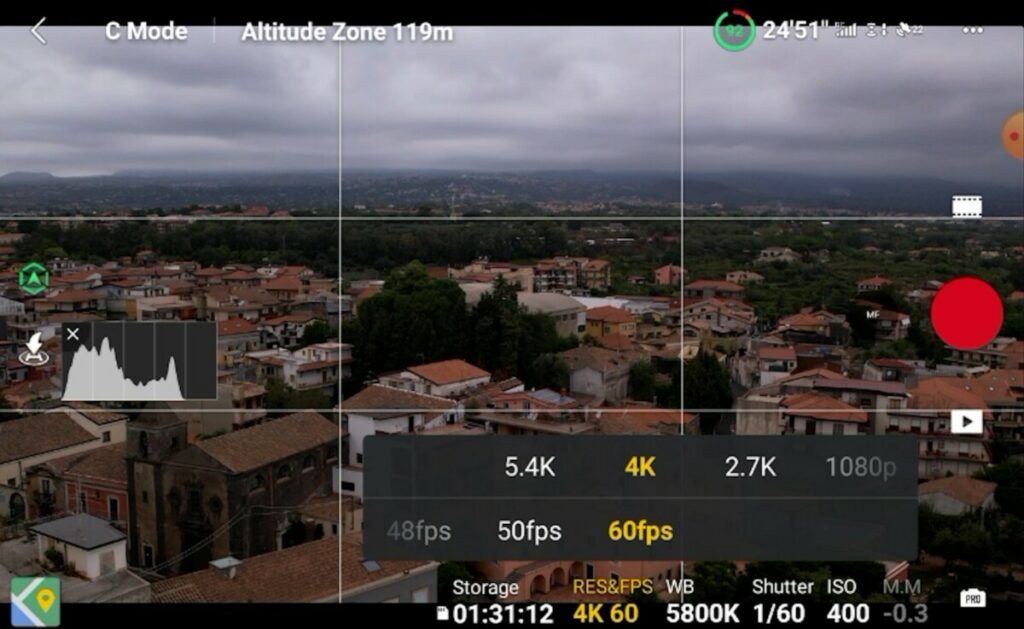
Notice how with frame rates above 30 fps we get a very noticeable crop in the resulting footage. Some users have complained about it, but I see it as a positive: when using higher frame rates I generally want to be close to the action, so this crop factor is in most cases very useful to get even closer
Sadly there are a couple of limitations in the use of frame rates above 30 fps. When shooting for slow motion, in many cases we want to track a subject, but the intelligent flight modes are only available up to 30 fps, including Action Track and Spotlight, the two most useful ones for tracking
The Air 2S has excellent zoom capabilities but at 4k resolution and frame rates higher than 30fps the zoom function is not available. I hope that both limitations will be solved by upcoming firmware upgrades
Editing Slow-Motion Footage
The process to get slow motion from a higher frame rate is quite simple and it is similar in most video editors. Here I will be showing how it works in Adobe Premiere Pro, one of the most widely used. I will show two different methods to make sure that the editor you use contains at least one of them
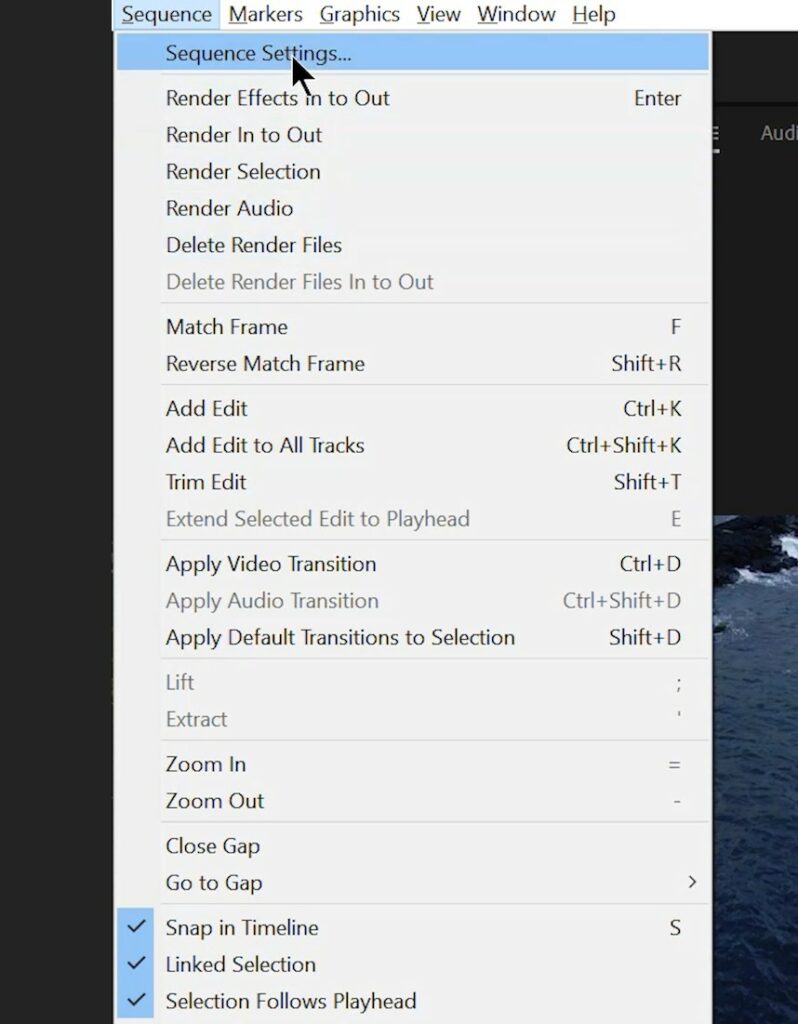
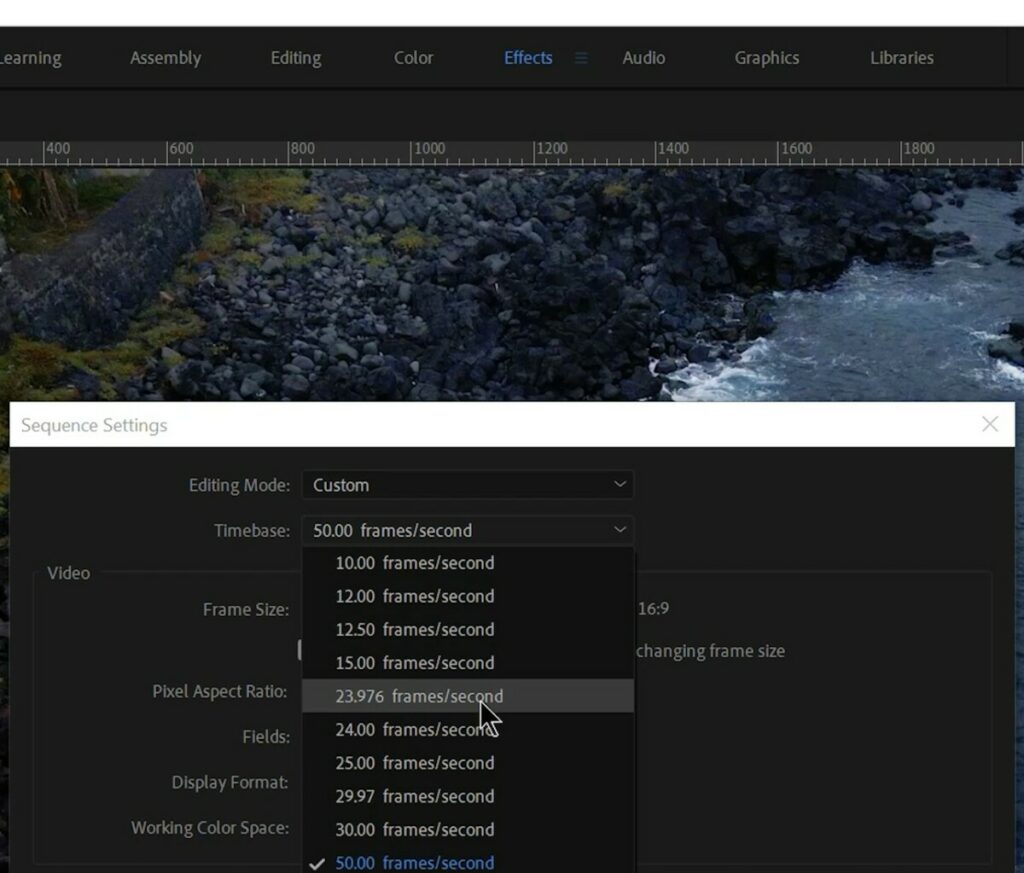
After dropping the first clip in the timeline, the frame rate of the project is set by going to Sequence, Sequence Settings, and at the top, we choose the Timebase at 23.976. If we drop a clip shot at 48 fps, double the frame rate of the project, it is still playing at normal speed, we need to slow it down to half speed and there are two ways to do it
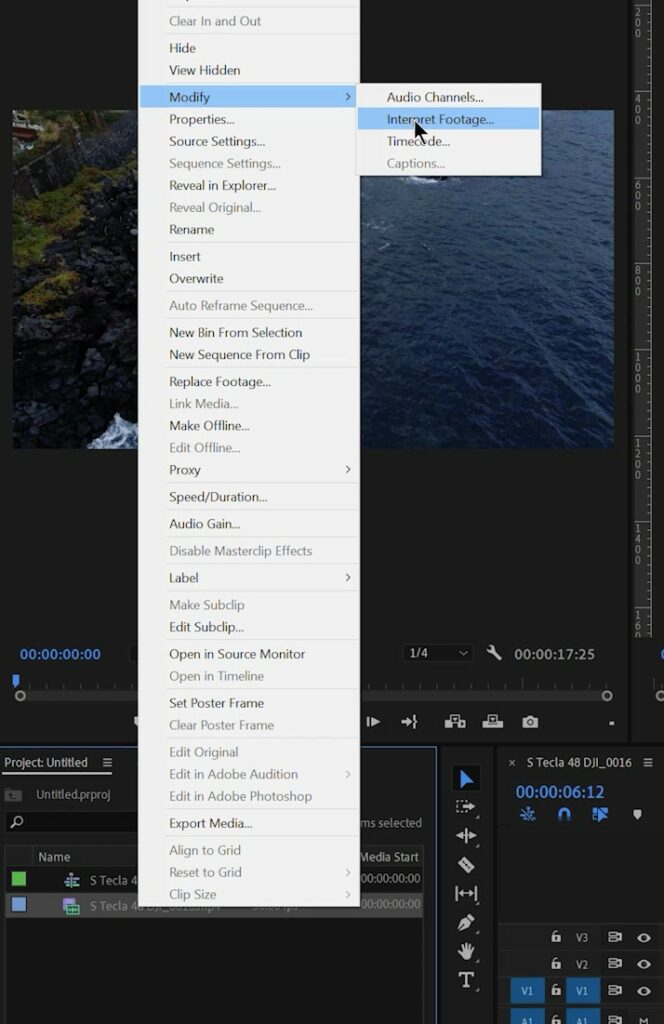
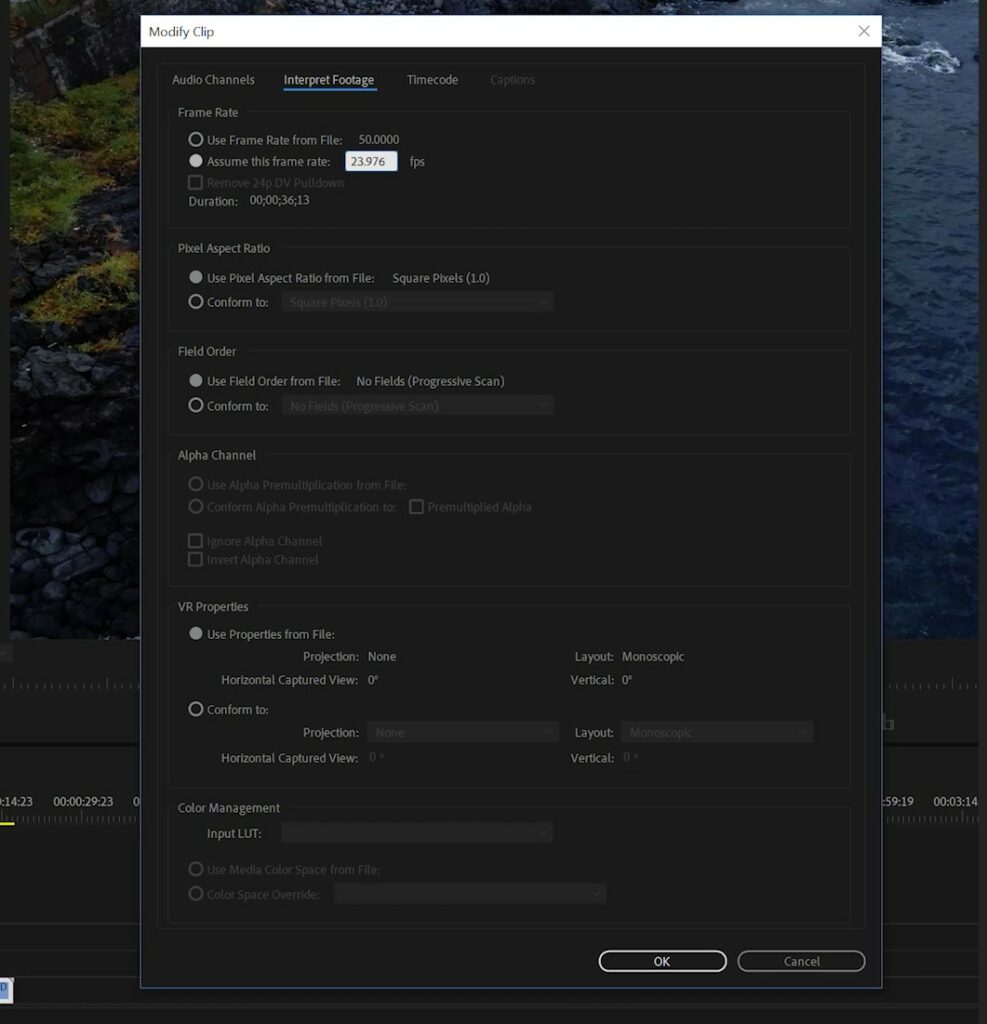
The more flexible one is to go to the icon of the clip on the window at the left, right-click on it and choose Modify and then Interpret Footage. Then in Frame Rate, we select Assume This Frame Rate and enter 23.976. The clip now plays at half speed as 48 frames are played at 24 fps speed, which is exactly half
The original frame rate of the file is kept in memory and can always be retrieved if needed, this can be useful when working on a project with plenty of files with different frame rates. It is also possible to batch modify several clips by selecting them, right-clicking, and choosing Assume This Frame Rate
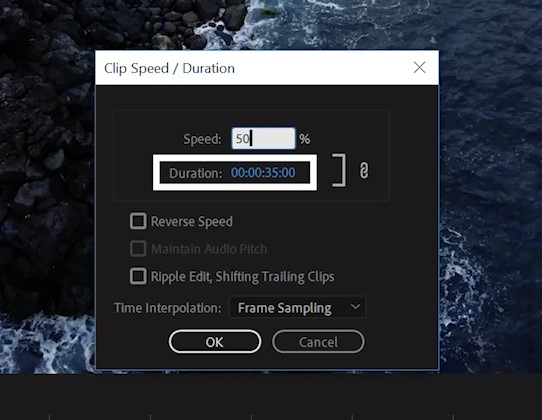
Another method that can be used is simply right-clicking on a clip in the timeline and choosing speed duration. We are presented with this window where we can enter the desired speed. In this case, we have a 48 fps clip and we want to slow it down to half speed, so we enter 50%, the duration of the speed displayed just below will double
When using this second method we must enter the correct percentage of speed reduction according to the frame rate at which the file was shot. Assuming, as usual, a timeline of 24 fps, if the footage was shot at 30 fps we must enter 80%, for a file shot at 48 fps enter 50%, for one shot at 60 fps, enter 40%. Note that when we shoot in slow motion mode, therefore at 120 fps at a resolution of 1080p, the file is automatically interpreted and we don’t need to reduce the speed
Related Articles
